
Creating a well tested application pays off by having a lot less to debug in the future, together with the peace of mind that you can refactor your application as much as you want and nothing is going to break because the tests would alert you quickly if that happened. Automating your deployment will also pay off, not only because it will save you a ton of clicks (or commands) but because it will prevent errors and your builds will be predictable. If they fail, it will be because they have a legitimate reason to fail, not because you forgot to type a command somewhere.
I have created a very trivial application to showcase this. It's a web server where you can go to an url that includes the title of a movie, and the browser will display a basic page showing the poster for it. There is no storage. Everything is achieved via the API of OMDB, so if you want to fully recreate the exercise, you will need your own API key, which you can request here: http://omdbapi.com/

I am going to highlight only some important parts of the code, but you can find the full source in my repo: https://github.com/rubenwap/movie-poster-server
Also, you can try a live version here:
http://movieposters.herokuapp.com/movie/apocalypto
Structure of the project
We start initializing the project with
go mod init your_github_project_url
such as
go mod init github.com/rubenwap/omdb-client
That way, as you add more dependencies, the mod file will keep track of them and be useful for tasks such as re downloading them.
The main files you are going to need to create are:
omdb.go: Your main logic will live here
omdb_test.go: Your tests will live here
cases_test.go: Auxiliary data used by your tests will live here. We could include that data in omdb_test.go but the file would look too polluted and confusing, so let's have this one separated.
A "testing first" approach
Ok, so you have made your planning and you know what do you want to achieve. You know that you need this function and that other function. In my case, I wanted to build:
A function to build a full url for the API call using the parameters that the user indicates (for instance, the movie title)
A function to perform the actual API call, so you request the URL that you built in the previous step and you get a JSON with the response
A function that takes the JSON and transforms it into a struct, so we can manipulate it in Go. Therefore, the goal is to have a function where the input is the JSON object and the output is the struct.
A function that runs all the previous functions and displays the movie poster (taken from the struct) into a webpage
The
mainfunction would only basically launch the web server
I am going to create tests for the first three functions.
To do that, my cases_test.go will include slices of structs for each function with the contents:
- What is the description of the test
- What is the input that we pass to the function
- What is the output that we should expect
For example
var testCasesBuildParams = []struct {
    description string
    input       string
    expected    string
}{
    {
        description: "It should build correctly URL with unique word titles",
        input:       "bambi",
        expected:    "http://www.omdbapi.com?apikey="+ os.Getenv("OMDB_KEY") +"&plot=full&t=bambi",
    },
    {
        description: "It should build correctly URL with multi word titles",
        input:       "the dark knight",
        expected:    "http://www.omdbapi.com?apikey="+ os.Getenv("OMDB_KEY") +"&plot=full&t=the+dark+knight",
    },
}
Look at the full file here:
https://github.com/rubenwap/movie-poster-server/blob/develop/cases_test.go
After I have defined the cases, I will create a test function (that by the way, will fail, because there is no real function in my omdb.go code yet).
Building the full URL for the API call
So I head into omdb_test.go and do:
const (
    URL = "http://www.omdbapi.com"
)

func TestBuildURLwithParams(t *testing.T) {
    for _, c := range testCasesBuildParams {
        got := buildURLwithParams(c.input, URL)
        if got != c.expected {
            t.Fatalf("FAIL: %q, want %q, got %q", c.input, c.expected, got)
        }
        t.Logf("PASS: %q", c.description)
    }
}
If you analyze this test, you will realize that you can reuse this same function with minimal changes for most of the stuff you want to test, since it's just comparing what you are getting upon running something, against what you expect to get.
More about Golang testing here: https://golang.org/pkg/testing/
If you use VSCode with the Go extension, you get handy buttons in the top of each test to click and run them. If you prefer to launch them via terminal, type:
go test -v
where the v parameter means that you want your output to be verbose, which I find is quite useful.
Since we don't have function yet to use with this test, let's write it. In our omdb.go file this would look like:
// buildURLwithParams builds the URL parameters
func buildURLwithParams(name string, url string) string {
    req, err := http.NewRequest("GET", url, nil)

    if err != nil {
        log.Fatalf("fetch: %v", err)
    }

    q := req.URL.Query()
    q.Add("apikey", os.Getenv("OMDB_KEY"))
    q.Add("t", name)
    q.Add("plot", "full")
    req.URL.RawQuery = q.Encode()

    return req.URL.String()
}
Note that the API key is an environment variable. We will take care of setting that up in your Heroku deployment and Github Actions a little later. In the meantime, for your local development you can set them up in macOS terminal like this:
export OMDB_KEY=123
or if you use Windows, you can open PowerShell and do this (correct me if I am wrong, since I don't have a Windows computer to test!)
$env:OMDB_KEY = '123'
So if we run our test at the moment, it should pass.
Use mocking to test the API call function
The test number 3 (compare that the JSON from the response equals to the struct that we expect to produce in the transformation) also follows this scheme of "compare this value against this other value", so you can check the full source in the repo, but I want to stop for a moment with the test number two, since it includes an interesting technique you will need to know: Mocking a response
So what is mocking? Imagine that you need to test a function that does something against a third party service, in this case the OMDB API. Will you need to call the remote API every single time you need to run the test? Not a good option, not only because it will slow you down quite a bit, but also because in some cases if you are contacting a rate limited API, it might mean a big hit on your rates. Also, it's totally unnecessary. Is also not your job to test whether their API works. The only thing you need to know is how will your function behave once it receives the content, so you only care about the content.
In order to achieve that, you will use a mocking library, which will simulate a fake response upon calling an URL. For example, you can configure it so every time your test does a request against the url [mytestingurl.com](http://mytestingurl.com) it receives the response [{"test":"cool"}]
So look at the code for the mocking test:
func TestGetMovieResponse(t *testing.T) {
    httpmock.Activate()
    for _, c := range testCasesGetMovieResponse {
        httpmock.RegisterResponder("GET", c.input,
            httpmock.NewStringResponder(200, c.expected))
        got := getMovieResponse(c.input)
        if string(got) != c.expected {
            t.Fatalf("FAIL: %q, want %q, got %q", c.input, c.expected, got)
        }
        t.Logf("PASS: %q", c.description)
    }
}
We are setting up an httpmock (using the github.com/jarcoal/httpmock library, although you have many other options) and we are registering that whenever we do a GET request against a certain url (in this case the url is defined in the c.input variable) then we should receive a response (which is the c.expected variable). To make it clearer, look at those values:
var testCasesGetMovieResponse = []struct {
    description string
    input       string
    expected    string
}{
    {
        description: "It should return a correct json response from the server",
        input:       "http://www.omdbapi.com?apikey="+ os.Getenv("OMDB_KEY") +"&plot=full&t=bambi",
        expected:    `{"Title":"Bambi","Year":"1942","Rated":"G","Released":"21 Aug 1942","Runtime":"70 min","Genre":"Animation, Drama, Family","Director":"James Algar, Samuel Armstrong, David Hand, Graham Heid, Bill Roberts, Paul Satterfield, Norman Wright, Arthur Davis, Clyde Geronimi","Writer":"Felix Salten (from the story by), Perce Pearce (story direction), Larry Morey (story adaptation), Vernon Stallings (story development), Mel Shaw (story development), Carl Fallberg (story development), Chuck Couch (story development), Ralph Wright (story development)","Actors":"Hardie Albright, Stan Alexander, Bobette Audrey, Peter Behn","Plot":"The animated story of Bambi, a young deer hailed as the 'Prince of the Forest' at his birth. As Bambi grows, he makes friends with the other animals of the forest, learns the skills needed to survive, and even finds love. One day, however, the hunters come, and Bambi must learn to be as brave as his father if he is to lead the other deer to safety.","Language":"English","Country":"USA","Awards":"Nominated for 3 Oscars. Another 6 wins & 3 nominations.","Poster":"https://m.media-amazon.com/images/M/MV5BMTY1NzM4NDg5MV5BMl5BanBnXkFtZTgwMjI1MTkzMjE@._V1_SX300.jpg","Ratings":[{"Source":"Internet Movie Database","Value":"7.3/10"},{"Source":"Rotten Tomatoes","Value":"90%"},{"Source":"Metacritic","Value":"91/100"}],"Metascore":"91","imdbRating":"7.3","imdbVotes":"125,824","imdbID":"tt0034492","Type":"movie","DVD":"01 Mar 2005","BoxOffice":"N/A","Production":"RKO Radio Pictures","Website":"N/A","Response":"True"}`,
    },
}
So, the mock is set up so whenever in the test we contact the URL in input, we shall receive the response in expected.
Put the movie contents into a struct
We now have the function to build the URL, the function to make the API call and there is yet a last function, which transforms the JSON into a struct. In order to achieve that, we should have already defined a struct with the correct fields that describe a movie. This is the function. It uses json.Unmarshal taking as an input both your JSON, and the new variable with Movietype that you have created to hold the final value:
func unmarshalMovieIntoStruct(movie []byte) Movie {
    var m Movie
    if err := json.Unmarshal(movie, &m); err != nil {
        log.Fatalf("JSON unmarshaling failed: %s", err)
    }
    return m
}
Please look at the definition of the struct here:
https://github.com/rubenwap/movie-poster-server/blob/develop/omdb.go
All the previous three functions are launched via an auxiliary function which does four things:
- Builds the URL for the API call based on the movie titled passed via the browser
- Does the call and retrieve the JSON result
- Puts the JSON into a struct
- Takes the title, year and poster fields from the struct and write it into an HTML response:
func handlePoster(w http.ResponseWriter, r *http.Request) {
    title := strings.TrimPrefix(r.URL.Path, "/movie/")
    movieResponse := getMovieResponse(buildURLwithParams(title, os.Getenv("OMDB_URL")))
    movie := unmarshalMovieIntoStruct(movieResponse)
    fmt.Fprintf(w, fmt.Sprintf("<h1>%s (%s)</h1>", movie.Title, movie.Year))
    fmt.Fprintf(w, fmt.Sprintf("<img src=\"%s\"/>", movie.Poster))
}
The HTML writing via Fprintf could be improved via using something cleaner such as templates, but in order to build this quick proof of concept, this will do.
All of the above is ran in the Go's main function via the httppackage:
func main() {
    log.Println(fmt.Sprintf("Server running in port %s...", os.Getenv("PORT")))
    http.HandleFunc("/movie/", handlePoster)
    http.ListenAndServe(fmt.Sprintf(":%s", os.Getenv("PORT")), nil)
}
Docker that!
If we dockerize our application, we will ensure that it can be painlessly deployed anywhere with ease. If you really really trust the process, you wouldn't even need to build the image yourself (since Heroku will take care of that) But if you want to give it a try:
FROM golang:latest
# Set the Current Working Directory inside the container
WORKDIR /app/
# We set an environment variable with the port because that is how is called from within the app
ENV PORT 8080
# We make sure the port is accessible
EXPOSE 8080
# Copy the contents to the image
COPY . .
# Getting the dependencies
RUN go mod download
# Building the app
RUN go build -o omdb .
# Running it
CMD ["./omdb"]
Like I said, you could cross your fingers and let Heroku do the build, but if you want to test it locally:
docker build -t movieposter:0.1 .
docker run -it -p -e OMDB_URL=http://www.omdbapi.com OMDB_KEY=1234 8080:8080 movieposter:0.1
GitHub Actions
You could deploy your application right now as is, we could go to Heroku and say, "Put this online!", but there is an extra step we can still do which will give us an extra quality reassurance.
Later when we have Heroku set up we will be able to do new builds and releases of our app simply by committing our code to the Git branch. What if we mess up? Imagine that we inadvertently make a breaking change. Wouldn't it be a pity to have done a "testing first" approach to don't take advantage of it now that we can?
That's what we are going to do. We are going to set up a GitHub Action with the basic steps for a Golang workflow, and that action will run the tests in our code. Then we will configure Heroku so it will only deploy our app if the testing has gone well.
You can create a new workflow in the "Actions" tab of your repo. This will create a new file go.ymlwhich will live in your repo, so if you are creating this file via the GitHub interface, then don't forget to do a git pullfrom your local repo, since what you are actually doing in the interface is committing a new file.
Let's look at that file:
name: Go

on:
  push:
    branches: [ master, develop ]
  pull_request:
    branches: [ master, develop ]

jobs:

  build:
    name: Build
    runs-on: ubuntu-latest
    steps:

    - name: Set up Go 1.x
      uses: actions/setup-go@v2
      with:
        go-version: ^1.13
      id: go

    - name: Check out code into the Go module directory
      uses: actions/checkout@v2

    - name: Get dependencies
      run: go mod download

    - name: Test
      env: # Or as an environment variable
        OMDB_URL: ${{ secrets.OMDB_URL }}
        OMDB_KEY: ${{ secrets.OMDB_KEY }}
      run: go test -v .

    - name: Build
      run: go build -v .
If you look at the original file created by GitHub, you will realize that I have modified very little. You need to change the branches value depending on your needs, since this is telling us in which branches this action should trigger. Then I have also added two environment variables that are needed for the tests to run. I have added them both as secrets, even though the URL one is not really secret (but the KEY one definitely is!)
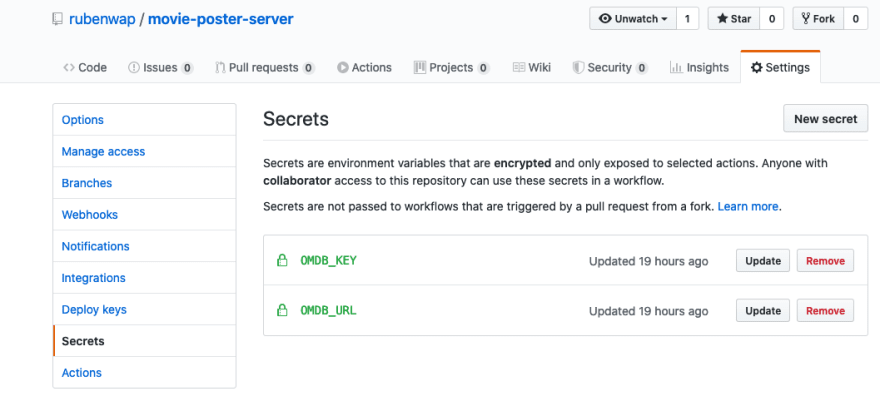
You add the secrets in the GitHub repo page, in the "settings" page for your repo, there is a "secrets" option in the menu.
Heroku deployment, finally
So now we will deploy this. Open a Heroku account if you don't have one, since it's a really cool way to get your small side projects online without a lot of hassle and on a low budget (free, in fact). If you get a lot of usage and you need to upgrade to a paid option, there are many different options which can be discussed in another moment.
Create a new app: https://dashboard.heroku.com/new-app?org=personal-apps
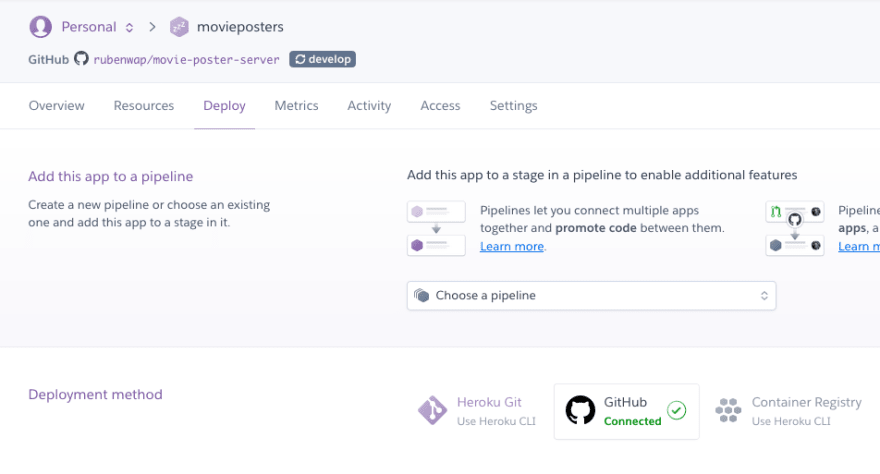
You have several options to pick the origin for the deployments. In my case, I have chosen to link my GitHub account and select the appropriate repo in the "deploy" screen
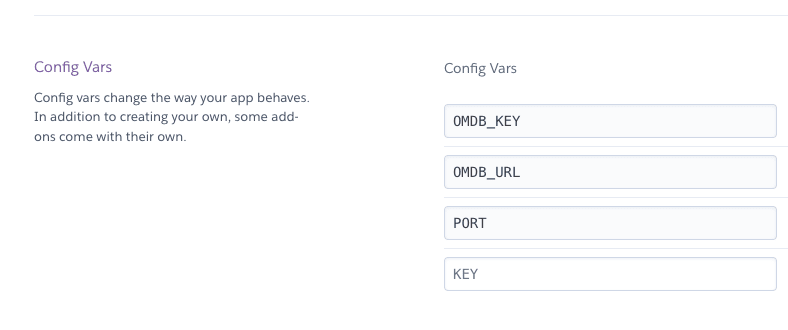
- It's very important that you don't forget to set your environment variables in the "settings screen", in our case remember it was the
OMDB_URLandOMDB_KEY
Having done this, your next commit probably won't create a working deployment yet. We need two tiny files in the repo that are required by the Heroku process. The Procfileand the heroku.ymlfiles:
Procfile (https://devcenter.heroku.com/articles/procfile):
web: ./omdb
heroku.yml (https://devcenter.heroku.com/articles/build-docker-images-heroku-yml):
build:
  docker:
    web: Dockerfile
TADA!
That was the last step, so now, hopefully if you commit those two files to the repo, it will pass the GitHub Actions step (all tests will be ok) and then it will trigger a build in Heroku.
If it doesn't work, look at the common causes:
- Is your GitHub actions step passing? Perhaps you have a failing test in your code
- Can you build your Dockerfile manually? Perhaps there is an issue with it
- Can you run and execute the local Docker container correctly? Does it work as expected?
If all those three steps are affirmative, the Heroku deployment should also be fine, but don't forget to look at the Heroku logs in order to double check there is no issue in that side! Most common issues are timeouts or applications crashing, but they are almost never because of Heroku, but more often than not, because of an issue of the three common causes that you should test first.
I hope this was a useful guide. My goal is not so much that you build the very same exact thing I built, but that my steps can help you to understand what are the steps that you need in your own project. Please leave a comment if you have any doubt!

Top comments (0)