
Introduction
Labeling a Cloud Resource in key:value format is known as Tagging. Labels should contain meaningful information. For e.g. To mark the EC2 instance as a production environment you can tag it with the label env:prod.
Types of Tagging
I. Automated Tagging
Automated Tagging is a method of adding machine-generated Tag to Cloud Resource at the time of provisioning. You can use Automated Tagging in case of provisioning a Cloud Resource through an automation tool like Terraform.
Examples:
-
user:sagar: A user who provisioned the Cloud Resource. -
timestamp:06/01/22 04:11:05: Time of provisioning. -
id:12456: Unique identifier of the Cloud Resource. -
group:finance: A group that owns the Cloud Resource.
II. Manual Tagging
Manual Tagging is a method of adding Tag manually to Cloud Resource at the time of provisioning. You can use Manual Tagging in case of provisioning a Cloud Resource through UI.
Examples:
-
purpose:poc: The purpose behind provisioning a Cloud Resource. -
env:prod: Name of the environment where the Cloud Resource is provisioned. -
cleanup:yes: Delete a Cloud Resource after certain days.
Tagging Best Practices
- Use a small case.
- Don't use any special character especially
@. - Use underscore
_instead of space.
Why Tag a Cloud Resource?
- To group Cloud Resources. For e.g. If an application has multiple Cloud Resources then you can tag them with the label
app:myapp. - To delete Cloud Resources after certain days. For e.g. You can implement a policy that Cloud Resources will be automatically deleted after 7 days If they are tagged with a
cleanup:yeslabel. - For audit purposes. For e.g. You can generate a User per Cloud Resource report i.e How many Cloud Resources are owned by a particular User? By looking at the
owner:sagarTag.
Demo
Let us understand Automated & Manual Tagging through the following examples:
Add timestamp tag to EC2 instance through Terraform
In this example, you will learn How to add the timestamp tag to the EC2 instance through Terraform at the time of provisioning. Check out documentation to configure AWS connection before proceeding with the below steps.
I. Create a file called main.tf and add the below content to it
data "aws_ami" "ubuntu" {
  most_recent = true

  filter {
    name   = "name"
    values = ["ubuntu/images/hvm-ssd/ubuntu-focal-20.04-amd64-server-*"]
  }

  filter {
    name   = "virtualization-type"
    values = ["hvm"]
  }

  owners = ["099720109477"] # Canonical
}

resource "aws_instance" "web" {
  ami           = data.aws_ami.ubuntu.id
  instance_type = "m1.small"

  tags = {
    Name = "automatedtaggedvm"
    timestamp = "${timestamp()}"
  }
}
II. Run terraform init command
III. Run terraform plan command
IV. Run terraform apply command
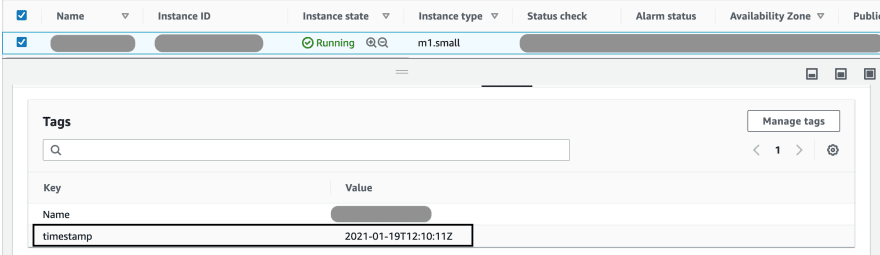
V. Verify EC2 instance provisioned with timestamp Tag
Add env tag to EC2 instance through AWS Console
In this example, you will learn How to add the env tag to the EC2 instance through AWS Console at the time of provisioning.
I. Login to AWS Console
II. Launch EC2 instance and add env Tag as follows:

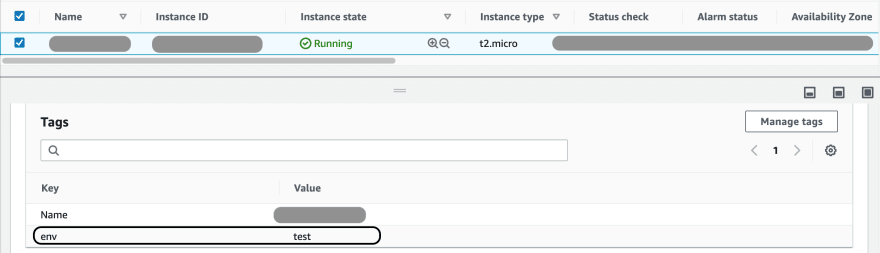
III. Verify EC2 instance provisioned with env Tag
Glossary
Cloud Resource
A resource deployed in Cloud. For e.g. EC2 instance, SNS service, Managed Kubernetes Service, etc.
Provision
A process of deploying or creating Cloud Resources in Cloud. For e.g. Launching EC2 instance in AWS.

Top comments (0)