
We all love Airtable for various reasons and use cases. In these times of COVID, we have seen many websites built using Airtable to solve different issues. Popular ones include candor.co, etc..
Airtable has a killer feature "share view", where you can share the view of your table and embed it on your website using a simple iframe. I have also used the same feature for building the first version of Startups vs COVID - a live repository of funds, support & resources for startups tackling COVID-19.
A simple HTML website with the Airtable iframes which looked like this:

But here are some of the drawbacks of this version:
- No way to share/highlight individual records
- Lack of SEO
- Unable to track analytics of each record
- Unable to share individual records on social
To solve this problem, a second version of the platform was built using Gatsby and Airtable without any iframes.
And here is the second/current version:

Why Gatsby?
Love for React
Previously built Leapcode using React and nextjs and my personal website using Gatsby.
Automatic static pages generator
Blazing fast website
Faster deployment using Netlify
PWA and faster page load
Plugin library
How to build the website using GatsbyJs & Airtable?
In this article, we'll focus only on connecting airtable & displaying data on your gatsby web page. We are not going deeper into the design of the website here.
First, install GatsbyJS and start a project. Here is how you can do it. You can also use one of the starter packs to get started.
Gatsby has several plugins that will help you integrate with different apps. Here we are going to take advantage of the gatsby-source-airtable plugin; it sources data into the website from the Airtable base. It is a prewritten module that uses airtable API to convert to Gatsby GraphQL.
Once your Gatsby website & the Airtable base is ready, install the gatsby-source-airtable plugin in your folder.
# using npm
npm install --save gatsby-source-airtable

# using yarn
yarn add gatsby-source-airtable
Get Started
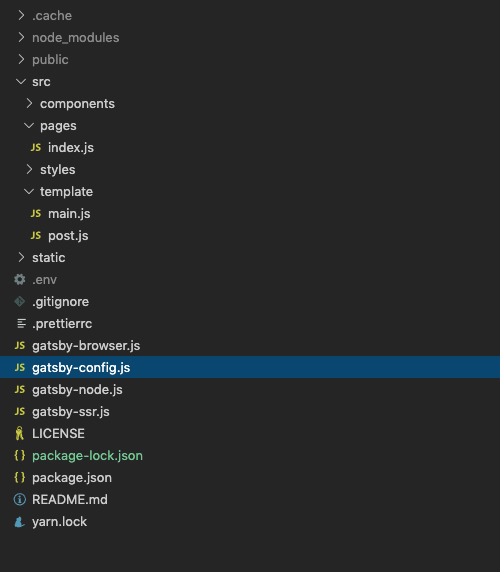
Here is how the folder will look once you finish building:
Integrating Airtable to your code
Once you have installed gatsby-source-airtable plugin, configure your Airtable tables in the gatsby-config.js file as shown below:
{
    resolve: "gatsby-source-airtable",
      options: {
        apiKey: process.env.AIRTABLE_API_KEY,
        tables: [
          {
            baseId: "YOUR_AIRTABLE_BASE_ID",
            tableName: "YOUR_TABLE_NAME",
          },
                ]
            }
}
- Airtable API key - This can be found in the Airtable on Help→API Documentation. You should inject your API key using an environment variable instead of using it directly in the file.
- The base ID of your base can be found in the API Documentation.
In this article, we are using only one table. You can add as many tables you want and should specify that inside the tables in gatsby-config.js
Getting data from Airtable to our Gatsby Project
Gatsby uses GraphQL to send data to different pages. The plugin gatsby-source-airtable will convert Airtable's REST APIs to GraphQL schemas.
Let's start by checking if you are getting data from the Airtable API using the GraphQL interface Gatsby has.
Start your gatsby server:
gatsby develop
Go to your: http://localhost:5000/_graphql
Now, let's run a simple query to check the data from the Airtable. gatsby-source-airtable provides a query called allAirtable, which will fetch all the data.
query {
    allAirtable {
        edges {
            node {
                column_name_1
                column_name_2
            }
        }
    }
}
At this point, we have got the airtable connected, and the data should be coming to the GraphQL. Next step is to bring this data to our homepage which is pages/index.js
import React from "react"
import { graphql } from "gatsby"

export default ({data}) => {

    const allAirtableData = data.allAirtable.nodes;
    return (
        <div>
            {
                allAirtableData.map((node) => (
                    <div>
                        <img src={node.data.column_name_1} />
                        <h1>{node.data.column_name_2}</h1>
                        <a href={`/${node.recordId}`}>Click Here</a>
                    </div>
                ))
            }
        </div>
    )
}

export const query = graphql`
    query {
        allAirtable {
            node {
           recordId
            data {
                    column_name_1
                    column_name_2
            }
            }
        }
    }
`
That was simple! We mapped the list from the allAirtable query to the data variable in the react component. Then we iterated the list using map() and listed all the data from the airtable base.
Creating standalone pages for each record
To improve the SEO, creating pages for each row felt like a good idea, but we didn't want to create it manually for every single row; instead, we wanted to automatically generate these pages when the Airtable updates. The best way to do this is to run the whole project on a backend server and route using the server-side rendering. But Gatsby offers an inbuilt function to create pages with gatsby builds. That was a big time saver for us. We didn't have to maintain a backend server to run our website.
Before we begin, let's start by creating a standard template for that page.
Create a new folder "template" and create a file called post.js inside that.
import React from 'react'
import { graphql } from 'gatsby'

export default ({ data }) => {

    return (
    <div>
        <h1>{data.airtable.column_name_1}</h1>
        <img src={data.airtable.column_name_2} />
    </div>
    )
}

export const query = graphql`
query GetRecord($recordId: String!){
    airtable(recordId: { eq: $recordId}) {
        id
        table
        recordId
        data {
            column_name_1
            column_name_2
        }
    }
}`
On a quick look, the GraphQL query became a bit complex, but it's relatively easy. There is a new variable $recordId, which is basically the id of each row/record in the airtable; the value of recordId would be passed from a script (we will be doing it in the next step) and would be used to fetch the corresponding record from the airtable.
Introducing the createPage function
createPage() is an inbuilt function in gatsby to create pages on the build programmatically. Now, all we have to do is, get all the records from the airtable, iterate through each record, and create pages for each one.
To begin, we need to create a new file, gatsby-node.js, on the root folder with the following content.
const path = require(`path`);
exports.createPages = ({ graphql, actions }) => {

  const { createPage } = actions
  return new Promise(async resolve => {

    const result = await graphql(`
        {
        allAirtable {
          edges {
            node {
              table
              recordId
              data {
                column_name_1
                column_name_1
              }
            }
          }
        }
      }
    `)
    // For each path, create page and choose a template.
    // values in context Object are available in that page's query
    result.data.allAirtable.edges.forEach(({ node }) => {
      createPage({
        path: `/${node.recordId}`,
        component: path.resolve(`./src/template/post.js`),
        context: {
            recordId: node.recordId,
        },
      })
    });
    resolve()
  })
}
Step by step process of what is happening in this page
- Run a graphQL query with
allAirtable. This will fetch every row from the airtable base and store it in a constant calledresult. - Iterate through each array inside
result.data.allAirtable.edges, which is basically each record in the airtable base -
createPage()will now generate pages with path/:recordId - It will use the component as the template for each page. Here we specified it as
post.js, which we created before this. -
contextwill send therecordIdto the template which we used in the graphQL query inpost.js
Voila! Let's do a gatsby deploy again to see individual records in a new page. You can type the URL with any recordId → eg: localhost:5000/rec2312321413
Congrats! Now you have all the data that you need from the Airtable base in your frontend. There is a lot more you can do with this, such as working with multiple tables, webhooks for Airtable, components for your frontend, PWA, etc. Stay tuned for the next article to know more about how to implement these.
Thank you so much for reading. Leave a comment if you have any questions or suggestions!

Top comments (1)
I think if you do this you lost some of the spreadsheet features like sorting or filtering right? Otherwise it is a cool idea.
How do you enable spreadsheet-like features using gatsby and airtable as a database?