
This article was originally posted on my personal blog
You can check out part 1 here.
In the previous article, we learned how to create a simple Twitter bot with Node.js that fetches data from the Today In History API and tweets it in our account.
In this article, we will go over how to deploy the bot to a server and run the bot at a specific time in a day.
I have also created a new account for the History Bot rather than use my personal twitter account. You can check it out in live action @HistoryBot7
For the full code of this tutorial, you can check out the GitHub repository. If you haven't checked out part 1 then I suggest you go over it a little.
Deploying The Bot
I will be deploying the bot that we created last time to alwaysdata. It's free and provides a lot of options that we need like scheduled tasks. However, you're free to deploy the bot to whatever server you want.
After creating an account if you don't have one, go to Accounts in the sidebar in the "Customer Area" section. You'll find a list of accounts if you have any or you can create a new one. These accounts are basically apps in your own main account. If you don't have any, click on "Add account"

You will then need to enter account name which we will call "history-bot". alwaysdata will also use this account name for the subdomain you will get for free. Then in the Product dropdown choose Free Public Cloud. Check the checkboxes at the bottom and once you're done click "Submit"

Once you click submit a new account will be created where you can add the bot to. Make sure that the account you created is selected in the sidebar menu in the dropdown field. If not, change to the account you created.

Now go to Sites under Web in the sidebar, and you will find a newly created site. Click edit to configure the site.

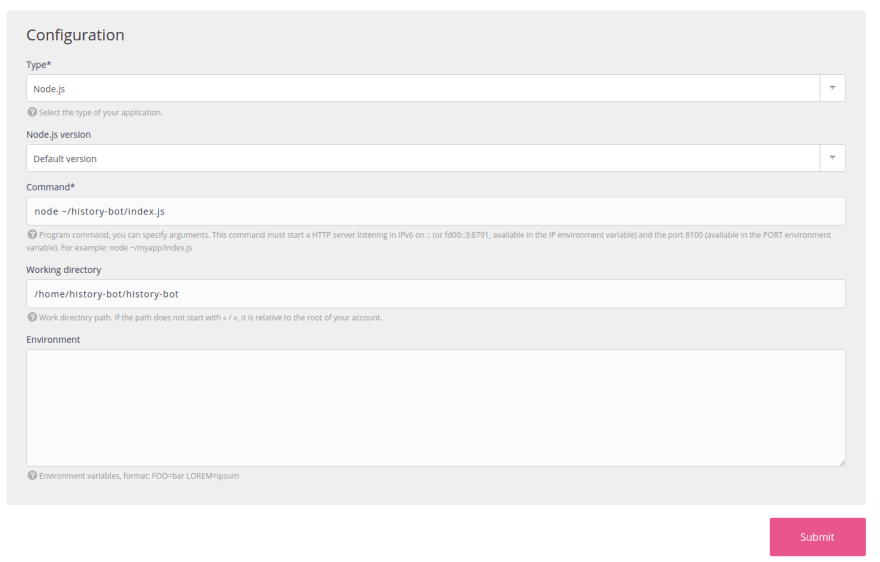
You can change the Name of the site and add any domain names if you own any. Then, go to the Configuration section and change the Type to "Node.js". In the Command field, enter node ~/history-bot/index.js but make sure to replace history-bot with the name of the app you created. In the working directory enter /home/history-bot/history-bot the reason behind this is that I'm going to clone the history-bot repository into the history-bot app, so feel free to rename them based on what you have. The first one is the name of the app you created and the second one is the name of the repository.
Once you are done click Submit. Then in the sites listing, click on Restart to restart our site with the new configuration.

After restarting the site, we need to deploy the bot we created to it. To do this, we will need access to it with SSH. In the sidebar, go to SSH under Remote Access. Then, click on Edit and in the edit screen check the "Enable Password login" checkbox.
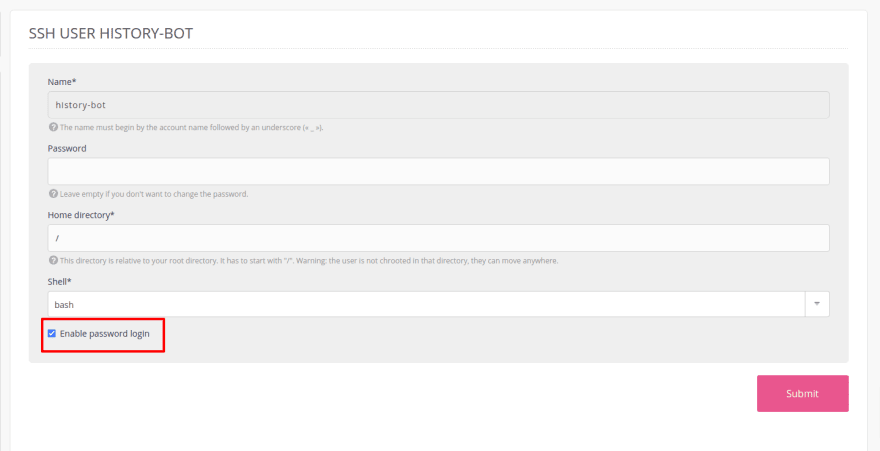
If you don't enter a password in the Password field, you will use your alwaysdata account password for SSH. To use a different password, enter it in the Password field.
Once you're done click Submit.
There are two ways to access your site with SSH. One is through a web interface alwaysdata have that you can see in the main page on the "SSH" section

When you click on it it will ask you for you SSH name and password and if you enter them correctly, you can use the web terminal.
Another way to do this is by accessing from your terminal using ssh command:
ssh user@host
Where user can be found under Name in the table and host can be found in the yellow alert above the table. You will then be prompted to enter your password and when you do, you will be logged in.
Once you're in, enter the following command to clone your repository:
git clone https://github.com/shahednasser/history-bot.git
If you don't have a repository for your bot, you should create one.
Then, go to the directory of the cloned repository:
cd history-bot
and run:
npm install
Now, we will need to create a new .env file with our keys, so copy .env.sample:
cp .env.sample .env
and edit the new .env file:
nano .env
You will need to enter the keys you have, so make sure they're already saved and ready for use.
Once you're done, save the file.
To make sure that the bot is running correctly, run the following:
node index.js
And if everything is working correctly, a new tweet should be sent to the account the keys belong to:

If any error occurs, make sure that the keys entered are correct. For more help, you can check part 1 to make sure everything is configured correctly.
Scheduling Tweets
So, this is great but a bot should run on its own, not be activated manually. So, we will need to schedule for the bot to run every day.
Go back to alwaysdata and click on Scheduled Tasks under "Advanced". Then click on "Add a scheduled task"

In the first section, choose "Execute the command" as type of task, and in Value type node ~/history-bot/index.js
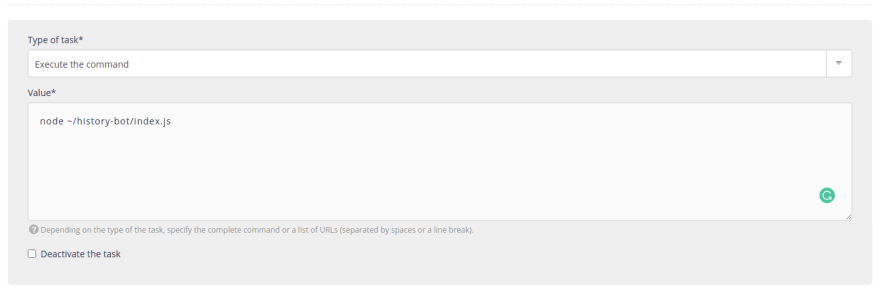
In the Environment section, choose the SSH user you are using, and enter the Working directory we entered before.
Then in the Frequency section, choose Everyday and enter the time you want it to run at. Keep in mind that this time is relative to the timezone of the app you created, which by default is in Paris. To figure out what time it is in the app's timezone, run the following in the SSH terminal:
date "+%H:%M:%S %d/%m/%y"
I suggest for testing it now, set the time a few minutes after when you are going through this tutorial so that you can check that it works
Once you're done click Submit, and go back to the Sites section under Web and restart your app.
It should be noted that due to the simplicity we used to create the bot, we're always sending the first event we are receiving from the API. So, if you ran the bot before creating this task and a tweet went out, the scheduled task will run but will receive an error from Twitter that the "Status is a duplicate". To avoid this, make sure to remove the tweet you put out when testing the bot earlier.
Now, you have to wait until it's the time you chose for the bot to run at. Once it's time, give it a few seconds and check your account. If you find a new tweet then the bot is working!
If not, you can check the logs by going to ~/admin/logs/jobs/2021 in your app and check the logs there. Make sure that everything is configured correctly.
Now, everyday at the time you sent, a Today in History tweet will go out to the account you specified!

Conclusion
In the next tutorial, we'll go over how to retweet specific hashtags made by other users!

Oldest comments (1)
good one!