
final result

Hi everyone, I hope you all are safe and doing fine!
Here i have created the stack and tab navigation using react navigation version 5.
If you're already familiar with JavaScript, React and React Native, then you'll be able to get moving with React Navigation quickly!
Explanation
First create the project using command
expo init navigations
then install the packages that needed for the navigations
yarn add @react-navigation/native
let's also install and configure dependencies used by most navigators, then we can move forward with starting to write some code.
The libraries we will install now are react-native-gesture-handler, react-native-reanimated, react-native-screens and react-native-safe-area-context and @react-native-community/masked-view.
expo install react-native-gesture-handler react-native-reanimated react-native-screens react-native-safe-area-context @react-native-community/masked-view
after installing dependencies the package.json file should look like this except versions because Over time, that is likely to get updated
{
  "main": "node_modules/expo/AppEntry.js",
  "scripts": {
    "start": "expo start",
    "android": "expo start --android",
    "ios": "expo start --ios",
    "web": "expo start --web",
    "eject": "expo eject"
  },
  "dependencies": {
    "@expo/vector-icons": "^10.2.1",
    "@react-native-community/masked-view": "^0.1.10",
    "@react-navigation/bottom-tabs": "^5.8.0",
    "@react-navigation/native": "^5.7.3",
    "@react-navigation/stack": "^5.9.0",
    "expo": "~38.0.8",
    "expo-status-bar": "^1.0.2",
    "react": "~16.11.0",
    "react-dom": "~16.11.0",
    "react-native": "https://github.com/expo/react-native/archive/sdk-38.0.2.tar.gz",
    "react-native-gesture-handler": "^1.7.0",
    "react-native-reanimated": "^1.13.0",
    "react-native-safe-area-context": "^3.1.7",
    "react-native-screens": "^2.10.1",
    "react-native-web": "~0.11.7"
  },
  "devDependencies": {
    "@babel/core": "^7.8.6",
    "babel-preset-expo": "~8.1.0"
  },
  "private": true
}
The folder structure for project is shown in img
Now it's time to code
Step 1:
Create the folder name called screens which include the 3 files stack1.js,Stack2.js and Settings.js
screens/Stack1.js
import React from 'react'
import { View, Text, StyleSheet, Button } from 'react-native'

export default function Stack1(props) {
    return (
        <View style={styles.container}>
            <Text>Stack Screen 1</Text>
         </View>
    )
}

const styles = StyleSheet.create({
    container: {
      flex: 1,
      backgroundColor: '#fff',
      alignItems: 'center',
      justifyContent: 'center',
    },
  });
screens/Stack2.js
import React from 'react'
import { View, Text, StyleSheet } from 'react-native'

export default function Stack2() {
    return (
        <View style={styles.container}>
            <Text>Stack2</Text>
        </View>
    )
}

const styles = StyleSheet.create({
    container: {
      flex: 1,
      backgroundColor: '#fff',
      alignItems: 'center',
      justifyContent: 'center',
    },
  });
Settings.js
import React from 'react'
import { View, Text, StyleSheet } from 'react-native'

export default function Settings() {
    return (
        <View style={styles.container}>
            <Text>Settings</Text>
        </View>
    )
}

const styles = StyleSheet.create({
    container: {
      flex: 1,
      backgroundColor: '#fff',
      alignItems: 'center',
      justifyContent: 'center',
    },
  });
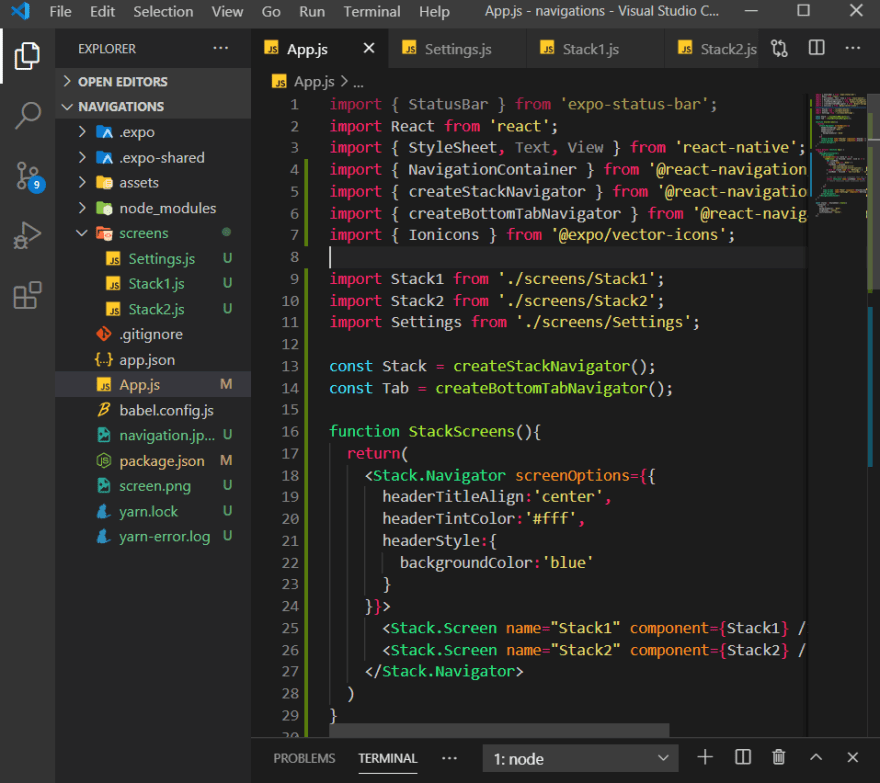
Step 2:
Now create first stack navigator using package name @react-navigation/stack in App.js
import { StatusBar } from 'expo-status-bar';
import React from 'react';
import { StyleSheet, Text, View } from 'react-native';
import { NavigationContainer } from '@react-navigation/native';
import { createStackNavigator } from '@react-navigation/stack';
import Stack1 from './screens/Stack1';
import Stack2 from './screens/Stack2';

const Stack = createStackNavigator();

function StackScreens(){
  return(
    <Stack.Navigator screenOptions={{
      headerTitleAlign:'center',
      headerTintColor:'#fff',
      headerStyle:{
        backgroundColor:'blue'
      }
    }}>
      <Stack.Screen name="Stack1" component={Stack1} />
      <Stack.Screen name="Stack2" component={Stack2} />
    </Stack.Navigator>
  )
}

export default function App() {
  return (
    <NavigationContainer>
        <StackScreens />
    </NavigationContainer>
  );
}

const styles = StyleSheet.create({
  container: {
    flex: 1,
    backgroundColor: '#fff',
    alignItems: 'center',
    justifyContent: 'center',
  },
});
createStackNavigator is a function that returns an object containing 2 properties: Screen and Navigator.Using them we created two screens name Stack1 and Stack2.
NavigationContainer is a component which manages our navigation tree and contains the navigation state. This component must wrap all navigators structure.
Output of above code
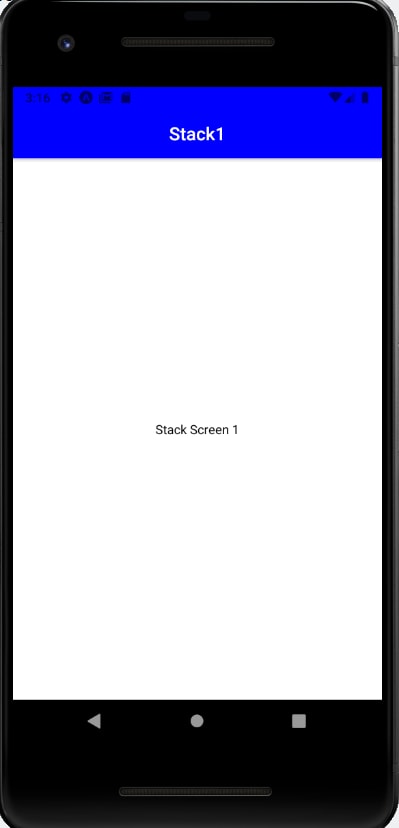
Now add the some line of code in Stack1.js to go to Stack2 screen.
screens/stack1.js
.....
  return (
        <view style={styles.container}>
            <Text>Stack Screen 1</Text>
            <Button title="Go to Stack Screen 2" onPress={() => props.navigation.navigate('Stack2')} />
        </View>
    )
.......
By adding button you can move to screen called Stack2.js
so, Stack Navigation has completed.Now create the Tab Navigation.
Step 3:
To create Tab navigations require the package name called @react-navigation/bottom-tabs.
And do the changes in App.js
App.js
import { StatusBar } from 'expo-status-bar';
import React from 'react';
import { StyleSheet, Text, View } from 'react-native';
import { NavigationContainer } from '@react-navigation/native';
import { createStackNavigator } from '@react-navigation/stack';
import { createBottomTabNavigator } from '@react-navigation/bottom-tabs';
import { Ionicons } from '@expo/vector-icons';

import Stack1 from './screens/Stack1';
import Stack2 from './screens/Stack2';
import Settings from './screens/Settings';

const Stack = createStackNavigator();
const Tab = createBottomTabNavigator();

function StackScreens(){
  return(
    <Stack.Navigator screenOptions={{
      headerTitleAlign:'center',
      headerTintColor:'#fff',
      headerStyle:{
        backgroundColor:'blue'
      }
    }}>
      <Stack.Screen name="Stack1" component={Stack1} />
      <Stack.Screen name="Stack2" component={Stack2} />
    </Stack.Navigator>
  )
}

export default function App() {
  return (
    <NavigationContainer>
      <Tab.Navigator
        screenOptions={({ route }) => ({
          tabBarIcon: ({ focused, color, size }) => {
            let iconName;
            if (route.name === 'Home') {
              iconName = focused
                ? 'ios-information-circle'
                : 'ios-information-circle-outline';
            } else if (route.name === 'Settings') {
              iconName = focused ? 'ios-list-box' : 'ios-list';
            }

            // You can return any component that you like here!
            return <Ionicons name={iconName} size={32} color={color} />;
            // return <Ionicons name= size={32} color= />

          },
        })}
      >
        <Tab.Screen  name="Home" component={StackScreens} />
        <Tab.Screen  name="Settings" component={Settings} />
      </Tab.Navigator>
    </NavigationContainer>
  );
}

const styles = StyleSheet.create({
  container: {
    flex: 1,
    backgroundColor: '#fff',
    alignItems: 'center',
    justifyContent: 'center',
  },
});
In the above code, The use of tab navigation is much more similar to stack navigation.just we have used the screen options and used different components.
Now our Navigations are ready
GitHub
you can find code on github
Do ⭐ the repository

Top comments (5)
This works great! Awesome!
Thank you for taking your time to write the article :)
Maybe I missed something, but nesting the navigators like this will not make them share history.
So having a back button can mess things up. Also, the header is not visible when clicking on screens in the tab navigator?
Thanks for reading!
So, we can pass value from stack1 screen to stack2 screen by making little bit changes in a code.
this is simple example for navigations. if we want a common header then we can create a Header file and import that file wherever we want.
Keep Working!!🙌💥
thank you
What about stack navigations on screens that are not the home screen. Example: Tab screen: home/scr1/scr2/scr3 and I'm trying for stack navs on scr1 and 2...
Thanks