
Create a Docker container that runs your machine learning models as a web application
This article will explain the advantages of Streamlit and how to build a Streamlit application with Docker.
Why Streamlit?
You've explored your data and developed a machine learning model. It's now time to release it to the world so that others can see what you've built.
Now what?
Deploying machine learning models is not trivial.
You've most likely set up your developer machine with conda, installed Python and the necessary libraries for data science (NumPy, pandas, scikit-learn, JupyterLab).
That setup works fine for data exploration and development. But how would you deploy a JupyterLab notebook that contains your machine learning model?
The answer is: you don't.
You will need to configure a new architecture that you can run in production, for example, a web application with REST API.

image from Christopher Samiullah: four potential ML system architecture approaches
Streamlit Is An Alternative to Classic Machine Learning Deployment
Streamlit is a new tool which allows you to run interactive Python machine learning scripts with a beautiful UI.
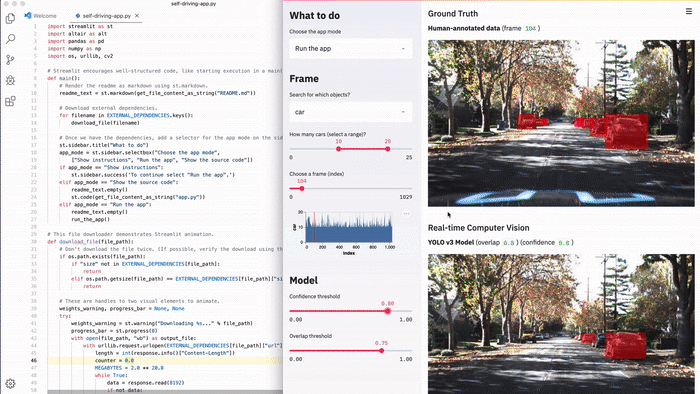
video from Streamlit.io: build a semantic search engine with 23 functions
Streamlit's interface resembles the familiar Python notebooks which you will know as a data-scientist. But a Streamlit application offers a modern UI, widgets with interaction and an inbuilt web-server.
You can use your favorite text editor to edit your code, and Streamlit will update the code for you.
Installation is easy if you use the typical Python installers like pip or conda.
But what if you want to create a stand-alone application with Docker and docker-compose?
How To Build a Streamlit Docker Container
Prerequisites:
Create a new project folder with a folder structure like this (or similar):
.
├── data
├── docker-compose.yml
├── Dockerfile
├── images
│   ├── logo.png
│   └── screenshot.png
├── LICENSE
├── project
│   └── app.py
├── README.md
└── requirements.txt
The data folder will hold all the raw data, for example, .csv files. The project folder will contain the Streamlit program.
Installation Of Python Libraries
Create the requirements.txt file:
scikit-learn==0.22.2.post1
streamlit==0.56.0
Docker and docker-compose
Create a new file called Dockerfile with the following content:
###############
# BUILD IMAGE #
###############
FROM python:3.8.2-slim-buster AS build

# virtualenv
ENV VIRTUAL_ENV=/opt/venv
RUN python3 -m venv $VIRTUAL_ENV
ENV PATH="$VIRTUAL_ENV/bin:$PATH"

# add and install requirements
RUN pip install --upgrade pip
COPY ./requirements.txt .
RUN pip install -r requirements.txt

#################
# RUNTIME IMAGE #
#################
FROM python:3.8.2-slim-buster AS runtime

# setup user and group ids
ARG USER_ID=1000
ENV USER_ID $USER_ID
ARG GROUP_ID=1000
ENV GROUP_ID $GROUP_ID

# add non-root user and give permissions to workdir
RUN groupadd --gid $GROUP_ID user && \
          adduser user --ingroup user --gecos '' --disabled-password --uid $USER_ID && \
          mkdir -p /usr/src/app && \
          chown -R user:user /usr/src/app

# copy from build image
COPY --chown=user:user --from=build /opt/venv /opt/venv

# set working directory
WORKDIR /usr/src/app

# switch to non-root user
USER user

# disables lag in stdout/stderr output
ENV PYTHONUNBUFFERED 1
ENV PYTHONDONTWRITEBYTECODE 1
# Path
ENV PATH="/opt/venv/bin:$PATH"

# Run streamlit
CMD streamlit run project/app.py
The Docker configuration uses a multi-stage build. In the first stage we install all necessary Python packages inside a virtual environment.
In the build stage you can also install Debian packages like gcc which you don't want to bring into the runtime Docker image.
For example, before you install packages with pip, you could add the following lines:
# install dependencies
RUN apt-get update && \
    apt-get install -y --no-install-recommends gcc
For now, that's not required, so let's continue with the runtime image.
We make sure that we create a non-root user with the correct user permissions. Then we can copy the Python libraries from the build image into the runtime image.
The last line shows the command that runs Streamlit.
Don't forget to add a .dockerignore file. For example:
# .dockerignore
.venv
.env*
We can add a docker-compose.yml configuration for convenience:
version: '2.4'

services:
  streamlit:
    build:
      dockerfile: ./Dockerfile
      context: ./
    ports:
      - '8501:8501'
    volumes:
      - './data:/usr/src/app/data:delegated'
      - './project:/usr/src/app/project:delegated'
    environment:
      - USER_ID=1000
      - GROUP_ID=1000
The setup also mounts the local folders from your computer to the Docker container. Now you can develop your app while using Docker and save changes.
The matching docker commands are:
# build Docker image in current directory
docker build -t 'latest' .
# Run docker image with port 8501 and volumes
docker run -it --rm --port '8501:8501' -v '$(pwd)/data:/usr/scr/app/data:delegated' -v '$(pwd)/project:/usr/scr/app/project:delegated' latest
Create Streamlit Program
Inside the project folder, add a new file (app.py):
# simple_streamlit_app.py
"""
A simple streamlit app
"""

import numpy as np
import pandas as pd
import streamlit as st

st.title("Simple Streamlit App")

st.write("Here's our first attempt at using data to create a table:")
st.write(
    pd.DataFrame({"first column": [1, 2, 3, 4], "second column": [10, 20, 30, 40]})
)
Run the Application
You can now start the Docker container in the background with docker-compose.
Type into your terminal:
docker-compose up -d
Inside your browser, you should see the Streamlit app running on http://localhost:8501.
Now you can use your Python skills with the Streamlit framework to create data-rich applications.
Recap
You've learned:
- why you might want to use Streamlit for data science and machine learning with Python
- how to install Streamlit with Docker and run your first data science web app
Now what?
You can deploy the Docker container to Heroku, DigitalOcean, or another cloud provider.
I will write a blog post about deployment to Heroku in the future.
Further Reading
- Streamlit Official Website
- How to Build a Streamlit App in Python by Peter Kazarinoff
- How to Deploy Machine Learning Models by Christopher Samiullah
- Avoiding Permission Issues With Docker-Created Files by Vladislav Supalov
- Running Docker Containers as Current Host User by Juan Treminio

Top comments (0)