
Lots of developers prefer to build their Strapi application from a starter rather than building from scratch. With Strapi, you can create an application with your favorite tools and frameworks in a short time.
However, this can get better with Strapi starters. Strapi starters are frontend applications that consume Strapi API.
Strapi starters provide a stepping stone so that you don't create your Strapi application from scratch always. For instance, with a Strapi-Vue blog starter, you don't have to build a Strapi blog from scratch repeatedly whenever you want to create a blog for yourself or a client.
It is because the starter has the most functionalities for setting up a blog already incorporated into it.
This article will explore Strapi starters and build a Strapi Blog template with the Vue.js framework from start to finish.
You can find the GitHub repository of this tutorial here.
Why are Strapi Starters Necessary
Strapi starters are pre-made frontend applications that consume Strapi API. These pre-made frontend applications are reusable and created to suit a specific use case. For instance, a Strapi blog template won't be suitable for use as an eCommerce app.
To create a Strapi starter, you first need to create a Strapi template. A Strapi template consists of Strapi configurations, which allows you to build a custom Strapi app quickly. Strapi templates need not deal with environment-specific configurations. Instead, they should adapt Strapi to a use case of choice to avoid conflict with other CLI options.
Let's create a template for our Strapi-vue blog starter.
Prerequisites
To create a Strapi-Vue starter, you need the following prerequisites.
- Node.js 12.x - 14.x version installed in your working environment.
- Install Vue-CLI into your working environment by running the command below:
    npm install -g @vue/cli
    # OR
    yarn global add @vue/cli
Strapi Set Up
First, we'll be creating two folders named backend and frontend. The backend will hold our application's backend, while the frontend will hold our application's front end, the Vue application.
To create a Strapi template, you first need to create a Strapi project. Navigate to your directory's backend with the cd backend and run the command below to create a Strapi project for our template.
# Create Strapi Project from CLI
npx create-strapi-app strapiproject --quickstart
Now that we have created our Strapi project, the next step is to fill in the required information on the registration page. Then, let's customize it to match our suite case – which is a blog in our case.
First, we'll create a new collection type for our Blog by clicking on Create new collection type in Content-Type Builder from our navigation panel. Then, put in blog as the display name and click on the continue button.

Next, we'll create field types for our blog collection:
- Click on Add another field,
- The select text under Select a field for your collection type.
- Input Blog_title as name, choose short text as type and click on the finish process button.
Repeat the first and the second steps for the other two fields. For step 3, input Blog_description and Blog_content as name, choose long text as type, and click on the finish process button.

Since users will have different blog posts, you can skip creating blog content.
Next, change the user permissions in settings > users &permissions plugin > Roles > Public. Under BLOG in APPLICATION, click select all. These permissions will allow the user to perform a CRUD operation.

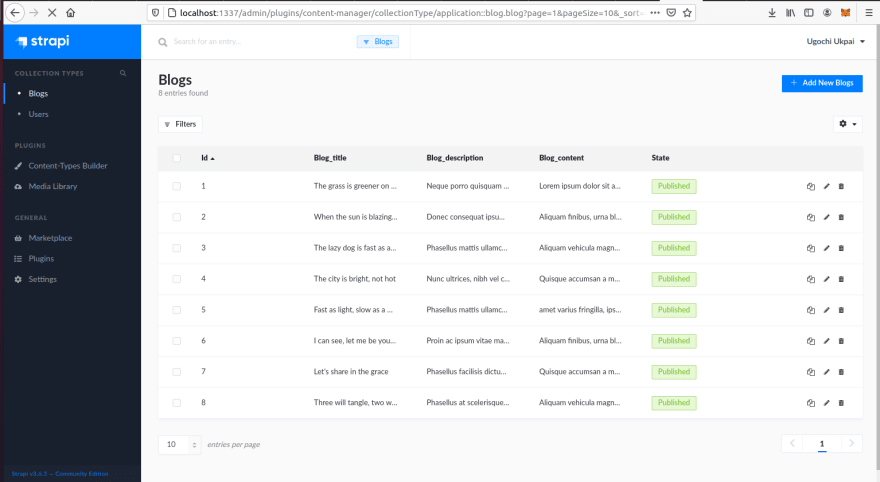
However, if you wish to inject pre-made blog posts into your template, you can add some blog content for your collection type. For instance, I have populated the fields in my blog collection, which looks like this now.
Creating Template From Strapi Setup
To generate a template from your **strapiproject** folder, run the command below in your terminal from your project folder.
npx strapi generate:template <templatename>
# or
yarn strapi generate:template <templatename>
Where <templatename> is the name of your template. For instance, I will use npx strapi generate:template blog since I want the name of my template to be blog.
Next, we'll be uploading our template to GitHub, i.e., our template <folder> and template.json file. If you don't know how to push a project to GitHub, I think this guide is an excellent fit for you. Make sure you push your template into the master branch of your repository.
Notice how the template.json file contains the data we've configured in our blog project. You can add more files to your template to customize it further. However, your template must contain a template.json or template.js file.
After generating the template, the next thing we'll be doing is to create a project with the template.
Run the command below to create a new Strapi project from the template we’ve created.
# Create Strapi Project with template
npx create-strapi-app myblog --template <template-github-name>
Where <template-github-name> is the URL to your Strapi template. In my case, it's https://github.com/hannydevelop/Strapi-template So the template the command will be:
npx create-strapi-app myblog --template https://github.com/hannydevelop/Strapi-template
This command will install all necessary dependencies required to create your Strapi project, choose Quickstart as installation type.
Once your project is ready, it'll direct you to the admin registration panel. Notice how we already have our blog data and configurations already set for our application, just like the template project.
Anyone who uses this template will get the configurations we have already set; they can also tweak it to suit their needs.
Now that we have our application's backend setup let's create our frontend and consume API from our backend.
Vue.js Set Up
Navigate to your application's frontend folder with cd frontend and run the command below to create a new Vue.js project.
# Create Vue.js project
vue create strapi-front
Because Vue 3 is still under preview, we'll go with the default version 2 of Vue.js because it supports bootstrap-vue and other styling frameworks. Once your application is ready, navigate it with cd strapi-front and run npm run serve in your CLI.
Let's configure our frontend application to match our needs.
First, discard the App.vue file and replace them with the code below since we don't need the vue logo and other extraneous codes.
     <template>
      <div id="app">
        <HelloWorld/>
      </div>
    </template>
    <script>
    import HelloWorld from './components/HelloWorld.vue'
    export default {
      name: 'App',
      components: {
        HelloWorld
      }
    }
    </script>
Next, we will put our blog's code in HelloWorld.vue file. So, replace the codes in HelloWorld.vue with the code below.
    <template>
      <div class="hello">
        <div id="layout" class="pure-g">
          <div class="sidebar pure-u-1 pure-u-md-1-4">
            <div class="header">
              <h1 class="brand-title">A Sample Blog</h1>
              <h2 class="brand-tagline">Creating a blog For Strapi Starter</h2>
              <nav class="nav">
                <ul class="nav-list">
                  <li class="nav-item">
                    A sample Strapi-Vue blog.
                  </li>
                </ul>
              </nav>
            </div>
          </div>
          <div class="content pure-u-1 pure-u-md-3-4">
            <div>
              <h1 class="content-subhead">Pinned Post</h1>
              <!-- Use v-for for post iteration -->
              <div v-for="blog in blogs" :key="blog.id" class="posts">
                <!-- A single blog post -->
                <section class="post">
                  <header class="post-header">
                    <!-- Bind blog title with interpolation -->
                    <h2 class="post-title">{{ blog.Blog_title }}</h2>
                    <p class="post-meta">
                      <!-- Bind blog description with interpolation -->
                      {{ blog.Blog_description }}
                      <!-- Create delete method for specific id with @click event-->
                      <button
                        @click="Delete(blog.id)"
                        class="post-category post-category-js"
                      >
                        Delete
              <!-- Create update method for specific id with @click event-->
              </button><button
                        @click="Update(blog.id)"
                        class="post-category post-category-design"
                        href="#"
                      >
                        Update
                      </button>
                    </p>
                  </header>
                  <div class="post-description">
                    <p>
                      <!-- Bind blog content with interpolation -->
                      {{ blog.Blog_content }}
                    </p>
                  </div>
                </section>
              </div>
            </div>
          </div>
        </div>
      </div>
    </template>
    <script>
    import axios from "axios";
    export default {
      name: "HelloWorld",
      data() {
        return {
          //initialize blogs as return data
          blogs: [],
        };
      },
    //create methods for all click events
      methods: {
        async Delete(id) {
          await axios
            .delete(`http://localhost:1337/blogs/${id}`, {}).then(
              (response) => {
                this.blogs = response.data;
              },
              (error) => {
                console.log(error);
              }
            );
        },
        Update(id) {
          axios
            .put(`http://localhost:1337/blogs/${id}`, {
              Blog_title: this.Blog_title,
              Blog_description: this.Blog_description,
              Blog_content: this.Blog_content,
            })
            .then(
              (response) => {
                this.blogs = response.data;
              },
              (error) => {
                console.log(error);
              }
            );
        },
      },
    //add get method to mounted lifecycle since we want it to take effect once page loads
      mounted() {
        axios.get("http://localhost:1337/blogs", {}).then(
          (response) => {
            this.blogs = response.data;
          },
          (error) => {
            console.log(error);
          }
        );
      },
    };
    </script>
    <!-- Add "scoped" attribute to limit CSS to this component only -->
    <style scoped>
    * {
      -webkit-box-sizing: border-box;
      -moz-box-sizing: border-box;
      box-sizing: border-box;
    }
    a {
      text-decoration: none;
      color: rgb(61, 146, 201);
    }
    a:hover,
    a:focus {
      text-decoration: underline;
    }
    h3 {
      font-weight: 100;
    }
    /* LAYOUT CSS */
    .pure-img-responsive {
      max-width: 100%;
      height: auto;
    }
    #layout {
      padding: 0;
    }
    .header {
      text-align: center;
      top: auto;
      margin: 3em auto;
    }
    .sidebar {
      background: rgb(61, 79, 93);
      color: #fff;
    }
    .brand-title,
    .brand-tagline {
      margin: 0;
    }
    .brand-title {
      text-transform: uppercase;
    }
    .brand-tagline {
      font-weight: 300;
      color: rgb(176, 202, 219);
    }
    .nav-list {
      margin: 0;
      padding: 0;
      list-style: none;
    }
    .nav-item {
      display: inline-block;
      *display: inline;
      zoom: 1;
    }
    .nav-item a {
      background: transparent;
      border: 2px solid rgb(176, 202, 219);
      color: #fff;
      margin-top: 1em;
      letter-spacing: 0.05em;
      text-transform: uppercase;
      font-size: 85%;
    }
    .nav-item a:hover,
    .nav-item a:focus {
      border: 2px solid rgb(61, 146, 201);
      text-decoration: none;
    }
    .content-subhead {
      text-transform: uppercase;
      color: #aaa;
      border-bottom: 1px solid #eee;
      padding: 0.4em 0;
      font-size: 80%;
      font-weight: 500;
      letter-spacing: 0.1em;
    }
    .content {
      padding: 2em 1em 0;
    }
    .post {
      padding-bottom: 2em;
    }
    .post-title {
      font-size: 2em;
      color: #222;
      margin-bottom: 0.2em;
    }
    .post-description {
      font-family: Georgia, "Cambria", serif;
      color: #444;
      line-height: 1.8em;
    }
    .post-meta {
      color: #999;
      font-size: 90%;
      margin: 0;
    }
    .post-category {
      margin: 0 0.1em;
      padding: 0.3em 1em;
      color: #fff;
      background: #999;
      font-size: 80%;
    }
    .post-category-design {
      background: #5aba59;
    }
    .post-category-pure {
      background: #4d85d1;
    }
    .post-category-yui {
      background: #8156a7;
    }
    .post-category-js {
      background: #df2d4f;
    }

    @media (min-width: 48em) {
      .content {
        padding: 2em 3em 0;
        margin-left: 25%;
      }
      .header {
        margin: 80% 2em 0;
        text-align: right;
      }
      .sidebar {
        position: fixed;
        top: 0;
        bottom: 0;
      }
    }
    </style>
What we have above is the code for our Vue.js blog. We have the template section <template></template> where we wrote our markup language, the script section <script></script> for JavaScript and style section <style></style> for our style which is in CSS.
Since we'll be dealing with dynamic data from our Strapi backend, we use the vue template syntax {{}} to bind the rendered DOM to vue instances data. We also used list rendering v-for to render data from our Strapi starter into Vue.js.
For the update button to function correctly, you need to place an input field to edit blog posts. You can also add a form field to collect inputs for new blog posts, i.e., post requests.
Next, import Axios by running the command below in your terminal.
# Install axios
npm install --save axios
We have created a simple blog that can fetch, post, delete, and update blog posts from our strapi backend. Unfortunately, if you run npm run serve, you'll get an error because http://localhost:1337/blogs can't be reached.
If you want to add more pages to your blog, for example an about me page, you’ll have to use Vue Router. Add router to your App.Vue file:
    <template>
      <div id="app">
        <!--Add router to App.vue--!>
        <router-view></router-view>
      </div>
    </template>

    <script>
    export default {
      name: 'app'
    }
    </script>

Next, add a router to your `main.js` file:


    import router from './router'
    ....

    new Vue({
      el: '#app',
      router,
      ....
    })
Create a router folder at the root of your application. In the router folder, create an index.js file. Then, put the contents below in your index.js file.
    import Vue from 'vue'
    import Router from 'vue-router'
    import name from '@/components/name'
    Vue.use(Router)
    ....

    export default new Router({
      mode: 'history',
      routes: [
        {
          path: '/path',
          name: 'name',
          component: Component
        },
      ]
    })
Creating Starter From Vue Setup and Template
Now that our Vue.js application is ready let's create a Strapi starter by referencing our template. First, create a temp/starter folder in the root of your Vue.js project's directory.
Next, create a starter.json file in the temp folder. Finally, reference your template by pasting the code below into your starter.json file.
    {
    "template": "https://github.com/hannydevelop/Strapi-template"
    }
Replace the template URL with the URL of your template, which you pushed to GitHub. Now, we'll move the files in our frontend directory into the starter folder (we'll be leaving the node_modules folder since we're moving our starter to GitHub).
At this point, we have our Strapi-Vue blog starter ready. The next step is to push this to GitHub to create a project from our starters.
Creating Project with Starter
First, we'll push the Strapi starter we just created to GitHub so that we can create a project with it. So, we'll be pushing the temp folder to GitHub just as we uploaded our template folder to GitHub. Next, run the command below to create a project with the starter you just created.
# Run the command below to create a Strapi starter with your template
npx create-strapi-starter vue-blog https://github.com/hannydevelop/Strapi-starter
Where https://github.com/hannydevelop/Strapi-starter is the URL to my GitHub repository that I have uploaded my starter, feel free to replace it with yours. Notice that the CLI is downloading your Strapi and Vue.js templates and that two folders for your application's frontend and backend are created.

With this, you now have a full-stack application with a Strapi backend and Vue.js frontend. With this setup, you can now start your application by running npm run develop instead of running your application's frontend and backend separately.
You can configure permissions in the template. For instance, you can replace the codes below with the content of the config/functions/bootstrap.js file of your template to enable user permissions so that users can perform CRUD operations. For example, the code below has been added to my template to bootstrap public roles and permissions.
    "use strict";
    /**
     * An asynchronous bootstrap function that runs before
     * your application gets started.
     *
     * This gives you an opportunity to set up your data model,
     * run jobs, or perform some special logic.
     *
     * The code below will enable user roles and permissions for Blog collection
     */
    const findPublicRole = async () => {
      const result = await strapi
        .query("role", "users-permissions")
        .findOne({ type: "public" });
      return result;
    };

    const setDefaultPermissions = async () => {
      const role = await findPublicRole();
      const permissions = await strapi
        .query("permission", "users-permissions")
        .find({ type: "application", role: role.id });
      await Promise.all(
        permissions.map(p =>
          strapi
            .query("permission", "users-permissions")
            .update({ id: p.id }, { enabled: true })
        )
      );
    };

    const isFirstRun = async () => {
      const pluginStore = strapi.store({
        environment: strapi.config.environment,
        type: "type",
        name: "setup"
      });
      const initHasRun = await pluginStore.get({ key: "initHasRun" });
      await pluginStore.set({ key: "initHasRun", value: true });
      return !initHasRun;
    };

    module.exports = async () => {
      const shouldSetDefaultPermissions = await isFirstRun();
      if (shouldSetDefaultPermissions) {
        await setDefaultPermissions();
      }
    };

Also, you can inject data into your template so that they appear in the starter. For example, If you want to inject pre-made data into your template, create a data/data.json file in the root of your template folder. Then, inject the data you just created in Strapi into it. For instance, this is the data I created earlier in my Strapi project.
    {
        "blogs": [
            {
                "id": 1,
                "Blog_title": "The grass is greener on the other side",
                "Blog_description": "Neque porro quisquam est qui dolorem ipsum quia dolor sit amet, consectetur, adipisci velit.",
                "Blog_content": "Lorem ipsum dolor sit amet, consectetur adipiscing elit. Nam volutpat massa placerat justo vulputate, ut consectetur elit sodales. Integer nec lacus diam. Integer mattis, risus ut lobortis mattis, felis risus placerat sapien, vel tristique velit odio et ante. Vivamus feugiat auctor tellus vitae porta. Proin feugiat neque id magna sagittis, et pellentesque massa tincidunt. Integer purus nisi, sagittis at nunc a, semper dictum quam. Nullam non tellus mauris. Proin ac ipsum vitae massa euismod congue. Cras sit amet purus nunc. Quisque in ornare orci. Nulla a nibh diam. Aliquam convallis iaculis ante non tristique. ",
                "published_at": "2021-06-19T12:30:45.801Z",
                "created_at": "2021-06-19T12:30:29.777Z",
                "updated_at": "2021-06-19T12:30:45.818Z"
            },
            {
                "id": 2,
                "Blog_title": "When the sun is blazing hot.",
                "Blog_description": "Donec consequat ipsum at turpis vehicula faucibus",
                "Blog_content": "Aliquam finibus, urna blandit congue faucibus, erat lacus posuere mi, eu consectetur lectus lectus quis quam. Aliquam efficitur, velit sit amet varius fringilla, ipsum elit egestas libero, nec sagittis ex purus nec ex. Donec consequat ipsum at turpis vehicula faucibus. Praesent erat ante, elementum in hendrerit vel, euismod aliquet metus. Nam malesuada nisl orci, at laoreet mauris sodales in. Morbi rhoncus metus eget turpis commodo, at blandit magna dapibus. Nunc ultrices, nibh vel convallis efficitur, nisi lorem porta diam, a vehicula metus nisl eu augue. Morbi suscipit dui enim, id elementum lectus vulputate molestie. Vivamus rhoncus vel enim vel finibus. Phasellus facilisis dictum iaculis. Vestibulum eget suscipit dui. Mauris id orci tellus. Nulla facilisi. Fusce aliquet at quam vel sollicitudin. Duis vel interdum eros. Pellentesque quam mauris, volutpat nec interdum ac, facilisis eget arcu. ",
                "published_at": "2021-06-19T12:32:55.694Z",
                "created_at": "2021-06-19T12:32:49.979Z",
                "updated_at": "2021-06-19T12:32:55.709Z"
            },
            {
                "id": 3,
                "Blog_title": "The lazy dog is fast as a cheeta",
                "Blog_description": "Phasellus mattis ullamcorper augue, a consectetur nibh laoreet in",
                "Blog_content": "Aliquam vehicula magna eu nisi lacinia aliquam. Nulla magna risus, dictum at aliquam pharetra, lobortis ac ex. Proin dictum ante felis, ut tristique tortor consequat quis. Quisque rhoncus dolor metus. Phasellus mattis ullamcorper augue, a consectetur nibh laoreet in. Ut consequat nisi in risus pulvinar cursus. Suspendisse id ligula consequat, lacinia tellus a, mattis mi. Praesent at justo id massa euismod rhoncus. Maecenas porttitor, justo id euismod ultrices, nulla orci ultrices ante, quis semper felis diam non purus. Sed gravida mattis dignissim. Interdum et malesuada fames ac ante ipsum primis in faucibus. In hac habitasse platea dictumst.",
                "published_at": "2021-06-19T12:35:20.888Z",
                "created_at": "2021-06-19T12:35:07.774Z",
                "updated_at": "2021-06-19T12:35:20.903Z"
            },
            {
                "id": 4,
                "Blog_title": "The city is bright, not hot",
                "Blog_description": "Nunc ultrices, nibh vel convallis efficitur, nisi lorem porta diam",
                "Blog_content": "Quisque accumsan a mauris at rutrum. Vivamus aliquet felis pharetra leo mattis, vel ornare elit pellentesque. Sed at massa orci. Nulla facilisi. Ut faucibus sed nisi eu commodo. Duis mattis erat nec purus facilisis, mollis convallis velit fringilla. Suspendisse ut sem malesuada, varius nulla id, hendrerit nisl. Ut sit amet pellentesque dolor. Donec dignissim gravida massa ac condimentum. Morbi luctus urna quis tincidunt varius. Phasellus at scelerisque leo. Donec a massa id justo ultrices aliquet. Vivamus pretium consectetur purus, egestas convallis dolor varius faucibus. Suspendisse aliquam a metus vel pulvinar. Integer porta odio vitae euismod interdum. Sed tristique nisl a nibh lobortis, eget consequat tellus feugiat. ",
                "published_at": "2021-06-19T12:36:46.842Z",
                "created_at": "2021-06-19T12:36:35.651Z",
                "updated_at": "2021-06-19T12:36:46.860Z"
            },
            {
                "id": 5,
                "Blog_title": "Fast as light, slow as a mole",
                "Blog_description": "Phasellus mattis ullamcorper augue, a consectetur nibh laoreet in",
                "Blog_content": "amet varius fringilla, ipsum elit egestas libero, nec sagittis ex purus nec ex. Donec consequat ipsum at turpis vehicula faucibus. Praesent erat ante, elementum in hendrerit vel, euismod aliquet metus. Nam malesuada nisl orci, at laoreet mauris sodales in. Morbi rhoncus metus eget turpis commodo, at blandit magna dapibus. Nunc ultrices, nibh vel convallis efficitur, nisi lorem porta diam, a vehicula metus nisl eu augue. Morbi suscipit dui enim, id elementum lectus vulputate molestie. Vivamus rhoncus vel enim vel finibus. Phasellus facilisis dictum iaculis. Vestibulum eget suscipit dui. Mauris id orci tellus. Nulla facilisi. Fusce aliquet at quam vel sollicitudin. Duis vel interdum eros. Pellentesque quam mauris, volutpat nec interdum ac, facilisis eget arcu. ",
                "published_at": "2021-06-19T12:39:08.696Z",
                "created_at": "2021-06-19T12:39:02.144Z",
                "updated_at": "2021-06-19T12:39:08.718Z"
            },
            {
                "id": 6,
                "Blog_title": "I can see, let me be your eyes",
                "Blog_description": "Proin ac ipsum vitae massa euismod congue. ",
                "Blog_content": "Aliquam finibus, urna blandit congue faucibus, erat lacus posuere mi, eu consectetur lectus lectus quis quam. Aliquam efficitur, velit sit amet varius fringilla, ipsum elit egestas libero, nec sagittis ex purus nec ex. Donec consequat ipsum at turpis vehicula faucibus. Praesent erat ante, elementum in hendrerit vel, euismod aliquet metus. Nam malesuada nisl orci, at laoreet mauris sodales in. Morbi rhoncus metus eget turpis commodo, at blandit magna dapibus. Nunc ultrices, nibh vel convallis efficitur, nisi lorem porta diam, a vehicula metus nisl eu augue. Morbi suscipit dui enim, id elementum lectus vulputate molestie. Vivamus rhoncus vel enim vel finibus. Phasellus facilisis dictum iaculis. Vestibulum eget suscipit dui. Mauris id orci tellus. Nulla facilisi. ",
                "published_at": "2021-06-19T12:40:13.070Z",
                "created_at": "2021-06-19T12:40:10.358Z",
                "updated_at": "2021-06-19T12:40:13.088Z"
            },
            {
                "id": 7,
                "Blog_title": "Let's share in the grace",
                "Blog_description": "Phasellus facilisis dictum iaculis.",
                "Blog_content": " Quisque accumsan a mauris at rutrum. Vivamus aliquet felis pharetra leo mattis, vel ornare elit pellentesque. Sed at massa orci. Nulla facilisi. Ut faucibus sed nisi eu commodo. Duis mattis erat nec purus facilisis, mollis convallis velit fringilla. Suspendisse ut sem malesuada, varius nulla id, hendrerit nisl. Ut sit amet pellentesque dolor. Donec dignissim gravida massa ac condimentum. Morbi luctus urna quis tincidunt varius. Phasellus at scelerisque leo. Donec a massa id justo ultrices aliquet. Vivamus pretium consectetur purus, egestas convallis dolor varius faucibus. Suspendisse aliquam a metus vel pulvinar. Integer porta odio vitae euismod interdum. Sed tristique nisl a nibh lobortis, eget consequat tellus feugiat. ",
                "published_at": "2021-06-19T12:42:08.390Z",
                "created_at": "2021-06-19T12:42:06.241Z",
                "updated_at": "2021-06-19T12:42:08.405Z"
            },
            {
                "id": 8,
                "Blog_title": "Three will tangle, two will fight",
                "Blog_description": "Phasellus at scelerisque leo. Donec a massa id justo ultrices aliquet",
                "Blog_content": "Aliquam vehicula magna eu nisi lacinia aliquam. Nulla magna risus, dictum at aliquam pharetra, lobortis ac ex. Proin dictum ante felis, ut tristique tortor consequat quis. Quisque rhoncus dolor metus. Phasellus mattis ullamcorper augue, a consectetur nibh laoreet in. Ut consequat nisi in risus pulvinar cursus. Suspendisse id ligula consequat, lacinia tellus a, mattis mi. Praesent at justo id massa euismod rhoncus. Maecenas porttitor, justo id euismod ultrices, nulla orci ultrices ante, quis semper felis diam non purus. Sed gravida mattis dignissim. Interdum et malesuada fames ac ante ipsum primis in faucibus. In hac habitasse platea dictumst. ",
                "published_at": "2021-06-19T12:43:10.043Z",
                "created_at": "2021-06-19T12:43:07.821Z",
                "updated_at": "2021-06-19T12:43:10.059Z"
            }
        ]
    }
Now, you can import the JSON file into your config/functions/bootstrap.js file.
    "use strict";
    const { blogs } = require("../../data/data.json");
    /**
     * An asynchronous bootstrap function that runs before
     * your application gets started.
     *
     * This gives you an opportunity to set up your data model,
     * run jobs, or perform some special logic.
     *
     * The code below will enable user roles and permissions for Blog collection
     */
    const findPublicRole = async () => {
      const result = await strapi
        .query("role", "users-permissions")
        .findOne({ type: "public" });
      return result;
    };
    const setDefaultPermissions = async () => {
      const role = await findPublicRole();
      const permissions = await strapi
        .query("permission", "users-permissions")
        .find({ type: "application", role: role.id });
      await Promise.all(
        permissions.map(p =>
          strapi
            .query("permission", "users-permissions")
            .update({ id: p.id }, { enabled: true })
        )
      );
    };
    const isFirstRun = async () => {
      const pluginStore = strapi.store({
        environment: strapi.config.environment,
        type: "type",
        name: "setup"
      });
      const initHasRun = await pluginStore.get({ key: "initHasRun" });
      await pluginStore.set({ key: "initHasRun", value: true });
      return !initHasRun;
    };
    const createEntry = async ({ model, entry, files }) => {
      try {
        const createdEntry = await strapi.query(model).create(entry);
        if (files) {
          await strapi.entityService.uploadFiles(createdEntry, files, {
            model,
          });
        }
      } catch (e) {
        console.log("model", entry, e);
      }
    }
    const importBlogs = async () => {
      return Promise.all(
        blogs.map((blog) => {
          return createEntry({ model: "blog", entry: blog });
        })
      );
    }
    async function importSeedData() {
      // Allow read of application content types
      await setDefaultPermissions();
      // Create all entries
      await importBlogs();
    }
    // Add importSeedData to isFirstRun so that data is imported once at first run.
    module.exports = async () => {
      const shouldSetDefaultPermissions = await isFirstRun();
      if (shouldSetDefaultPermissions) {
        await importSeedData();
      }
    };
Now, when you create a project with your template, you'll notice that the Blog's content type is loaded with pre-made data.

You can find the codes for this tutorial on GitHub. If you wish to generate a Strapi project from the template or starter, you're free to do so.
Conclusion
In this article, we have explored Strapi-Vue blog starter creation. We first talked about Strapi templates and how they aid in creating Strapi starters. Next, we created a template to fit our use case, deployed it to GitHub, and connected the template to our starter. You can check the Vue.js integration with Strapi for more information.
While starters are pre-made Strapi projects that provide a building block to create your Strapi project, templates are a kind of bridge between your application's backend and frontend. For instance, a Strapi template allows you to start your application's frontend and backend concurrently with one command.
This benefit is almost impossible if you create your application's frontend and backend separately. Also, developers can plug in your template to their frontend application as long as it meets the use case designed for the template.

Top comments (0)