
TL;DR: Discover .NET Aspire, a powerful stack simplifying cloud-native app development with standardized components, enhanced tooling, and seamless orchestration. Learn to deploy and manage apps effortlessly with Azure integration.
Today, we’ll explore .NET Aspire, an exciting new technology making waves in the .NET community. This article provides an easy-to-understand introduction to orchestration in .NET Aspire, focusing on its benefits and capabilities. Let’s discover how .NET Aspire contributes to advancements in our daily development.
What is .NET Aspire?
.NET Aspire is a powerful, cloud-native framework for building observable, production-ready distributed applications. It consists of the following three main capabilities:
- Orchestration: Simplifies configuration and interconnection of application components, reducing complexity and development time.
- Components: NuGet packages streamline integration with services like Redis and PostgreSQL, providing standardized configurations and automatic injection for efficient service communication.
- Tooling: Visual Studio and .NET CLI integrations with standardized project templates and pre-configured components like .AppHost and .ServiceDefaults streamline development and scaling.
Let’s dive deeper into what makes .NET Aspire unique and valuable.
Benefits of .NET Aspire
- Productivity: Automating various tasks related to configuring and managing cloud-native applications, .NET Aspire allows developers to focus on writing business logic and delivering features.
- Consistency: Standardized components and configurations ensure that applications are built using best practices, reducing the likelihood of errors and inconsistencies.
- Scalability: Designed to handle the complexities of distributed systems, .NET Aspire makes it easier to build apps that can scale to meet increasing demand.
- Observability: Comprehensive logging, telemetry, and health check features provide deep insights into the app’s behavior, making it easier to monitor and maintain.
Prerequisites
To get started with .NET Aspire, you need the following:
- .NET 8
- Visual Studio 2022 Preview
- .NET Aspire workload: Install it using the .NET CLI with the commands:
1. dotnet workload update aspire // Updates Aspire to the latest version.
2. dotnet workload install aspire // Installs Aspire.
3. dotnet workload list // Checks the version of .NET Aspire.
- Rancher Desktop / Docker Desktop
- Chocolatey: Install Chocolatey to deploy apps on Azure. Follow the instructions in the Chocolatey Windows Installation Guide.
- Azure connection setup : Set up your environment for connecting to Azure with these commands:
1. choco install azd
2. azd
3. azd auth login
.NET Aspire vs. .NET Aspire Starter application
When starting with .NET Aspire, you may notice two templates: the .NET Aspire Application and the .NET Aspire Starter Application. Here’s a comparison to help you understand their uses and differences:
.NET Aspire application
- Purpose: Provides a fully-featured setup with all essential components needed for building cloud-native apps.
- Components: Includes ApiService, AppHost, ServiceDefaults, and Web projects.
- Use Case: Ideal for developers looking to create a comprehensive, production-ready app with full orchestration and integration capabilities.
.NET Aspire Starter application
- Purpose: Offers a simplified setup for quickly getting started with .NET Aspire, focusing on the basics.
- Components: Typically includes fewer projects and configurations, providing a more lightweight and streamlined approach.
- Use case: Best suited for developers new to .NET Aspire who want to experiment and learn the fundamentals before moving on to a full-scale app.
Creating your first .NET Aspire Starter project
Follow these steps to build your first project with .NET Aspire:
Step 1: Setup the project
1.Open Visual Studio 2022 Preview.
2.Search for the .NET Aspire Starter Application template and select the one that fits your needs.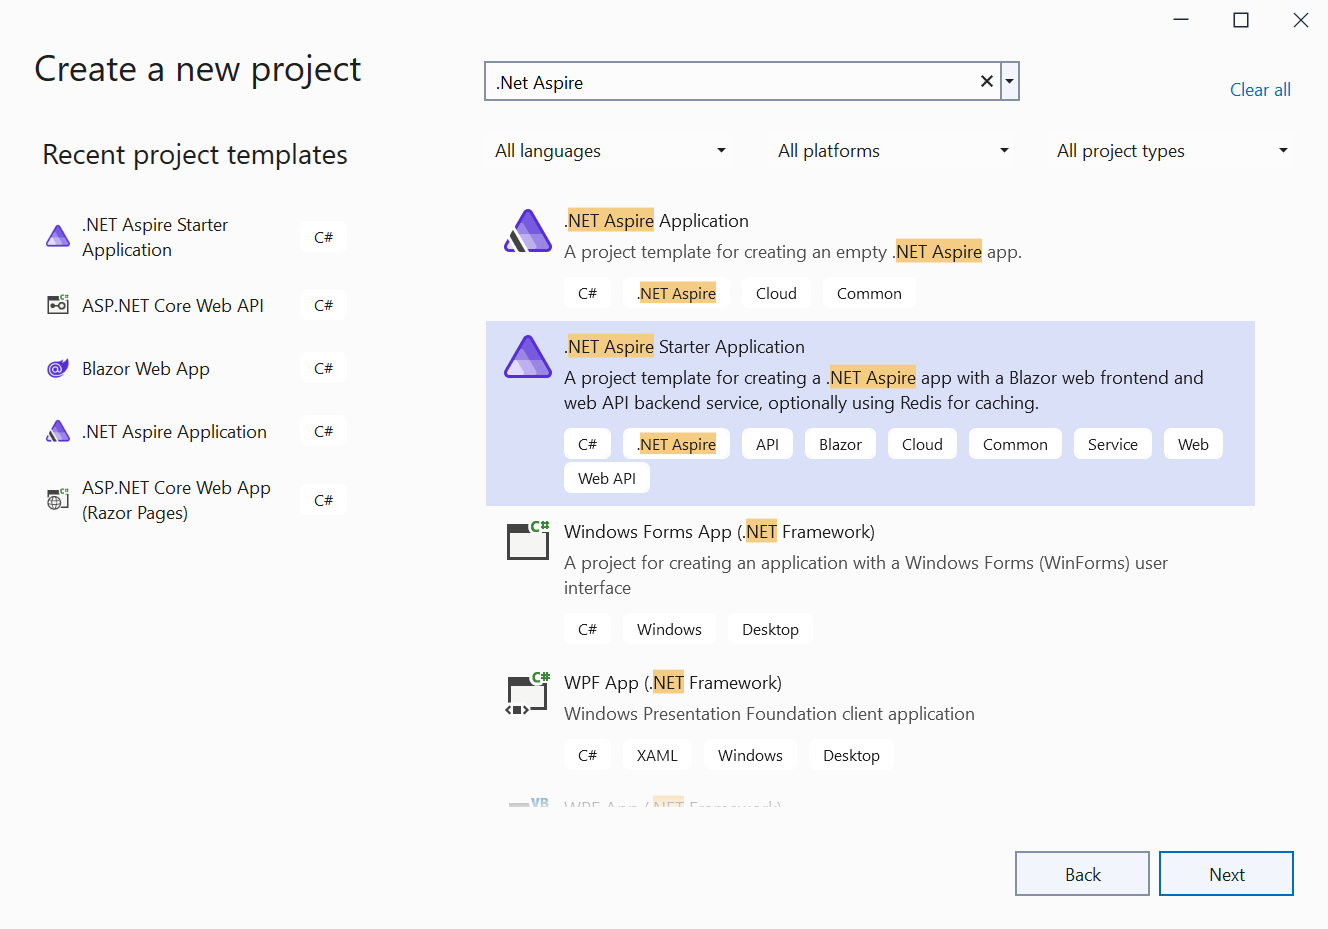
3.Provide the project Solution name and Location in the appropriate fields, then click Next.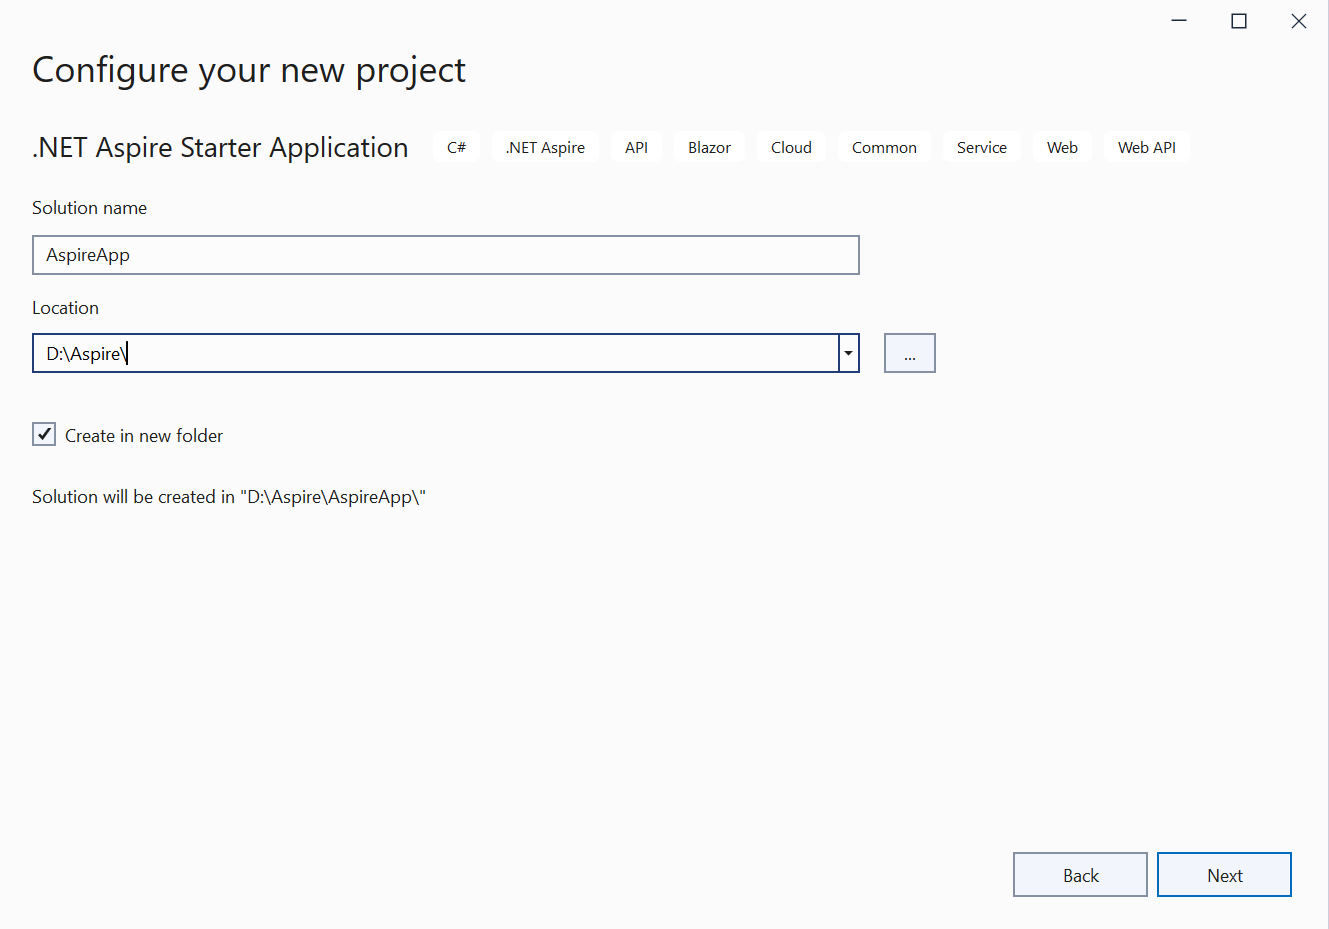
4.After that, continue with the default target framework to complete the project creation.
Step 2: Understand the project structure
After creating the project solution, you will see the following projects.
- ApiService : This component serves as the backend API provider, handling requests and responses between the front-end Web application and the database or other services. It manages data access and business logic, ensuring efficient communication and processing.
- AppHost : As the central orchestrator, AppHost coordinates the execution of all projects within the .NET Aspire app. It manages dependencies, sets up configuration settings, and ensures seamless integration between different components like ApiService and Web.
- ServiceDefaults : This component is crucial in managing and configuring dependencies across the app. It provides a standardized approach to configuring services, enabling easier scalability and maintenance of the app.
- Web : The Web component serves as the front-end interface, utilizing Blazor to interact with the ApiService. It handles user interactions, displays data fetched from the backend, and provides a responsive user interface for seamless user experience.
Refer to the following image.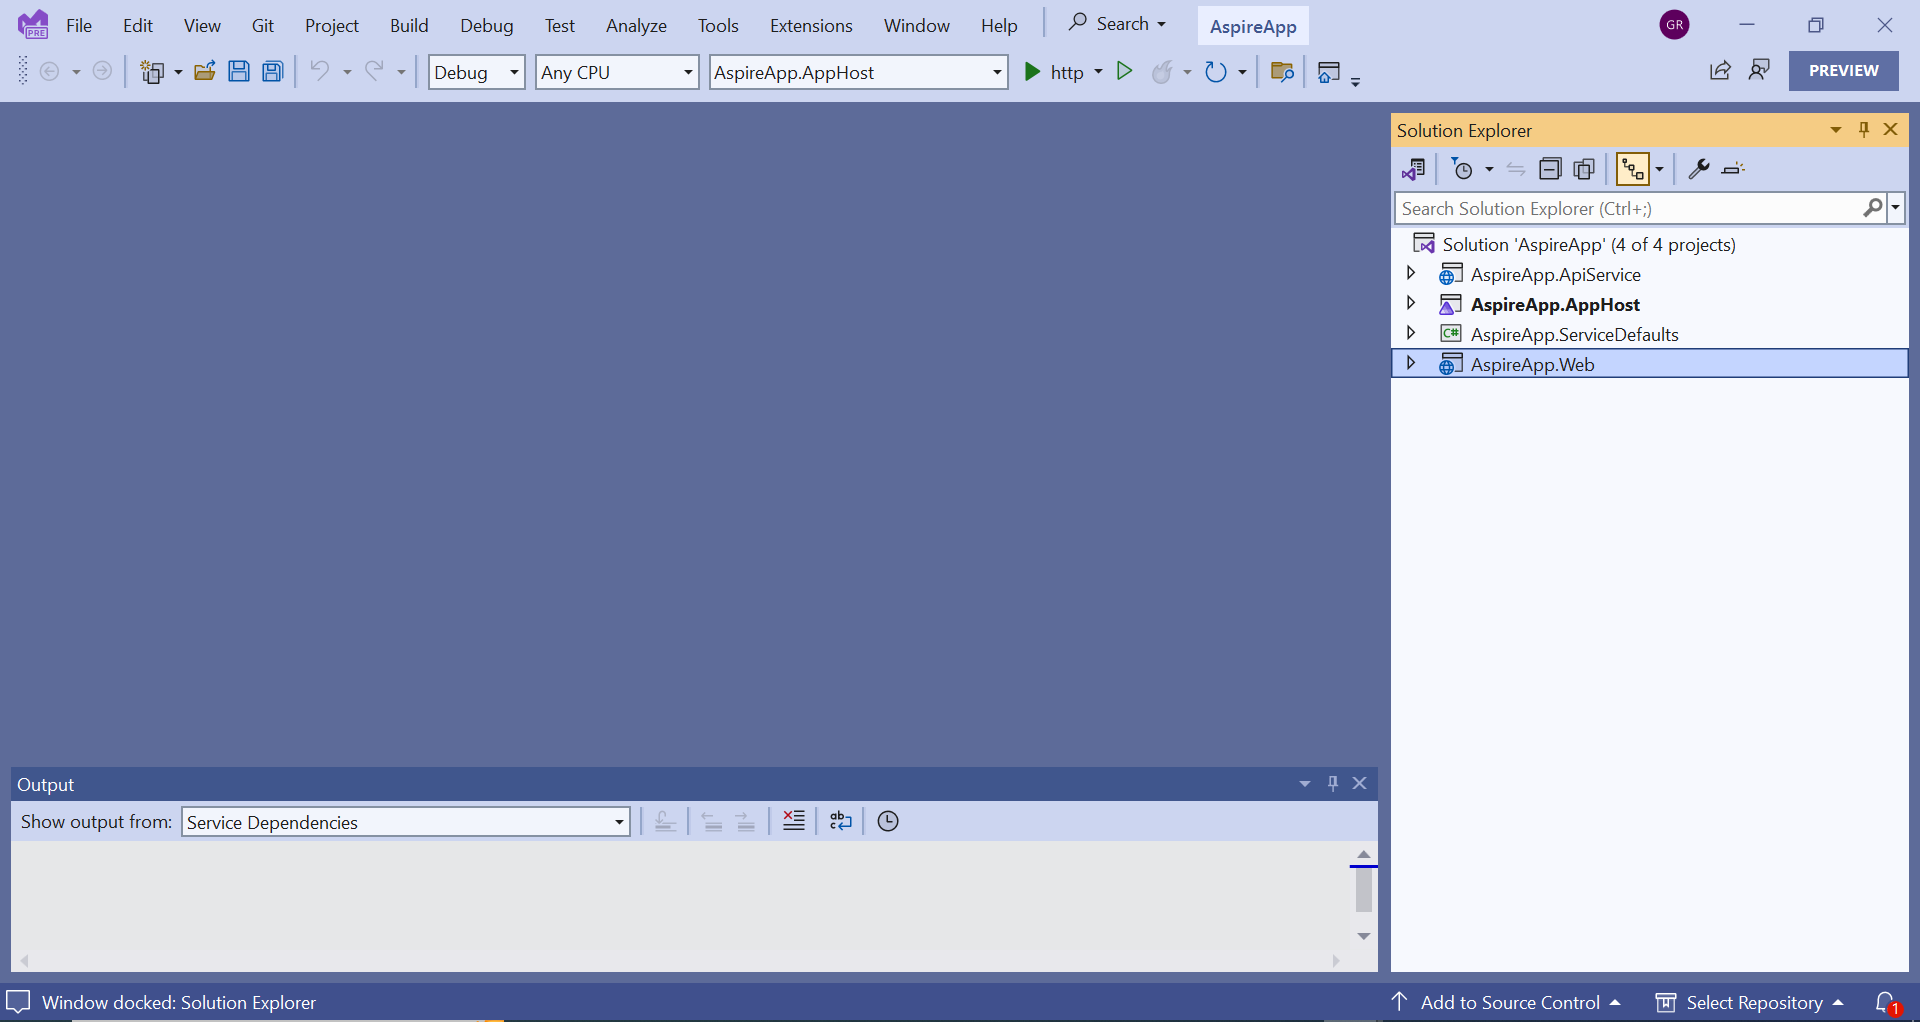
Step 3: Execute the project locally
1.Set the AppHost project as the startup project. This project will orchestrate the others.
2.Update the Program.cs file with the following code.
var builder = DistributedApplication.CreateBuilder(args);

var apiservice = builder.AddProject<Projects.AspireApp_ApiService>("apiservice");

builder.AddProject<Projects.AspireApp_Web>("webfrontend")
    .WithReference(apiservice);

builder.Build().Run();
This code references the web-frontend project with the API service project.
3.Press F5 to execute the project.
Step 4: Explore the .NET Aspire dashboard
Once the project starts, you will see the .NET Aspire Dashboard. Here, you can monitor various aspects of your app.
Refer to the following images. 
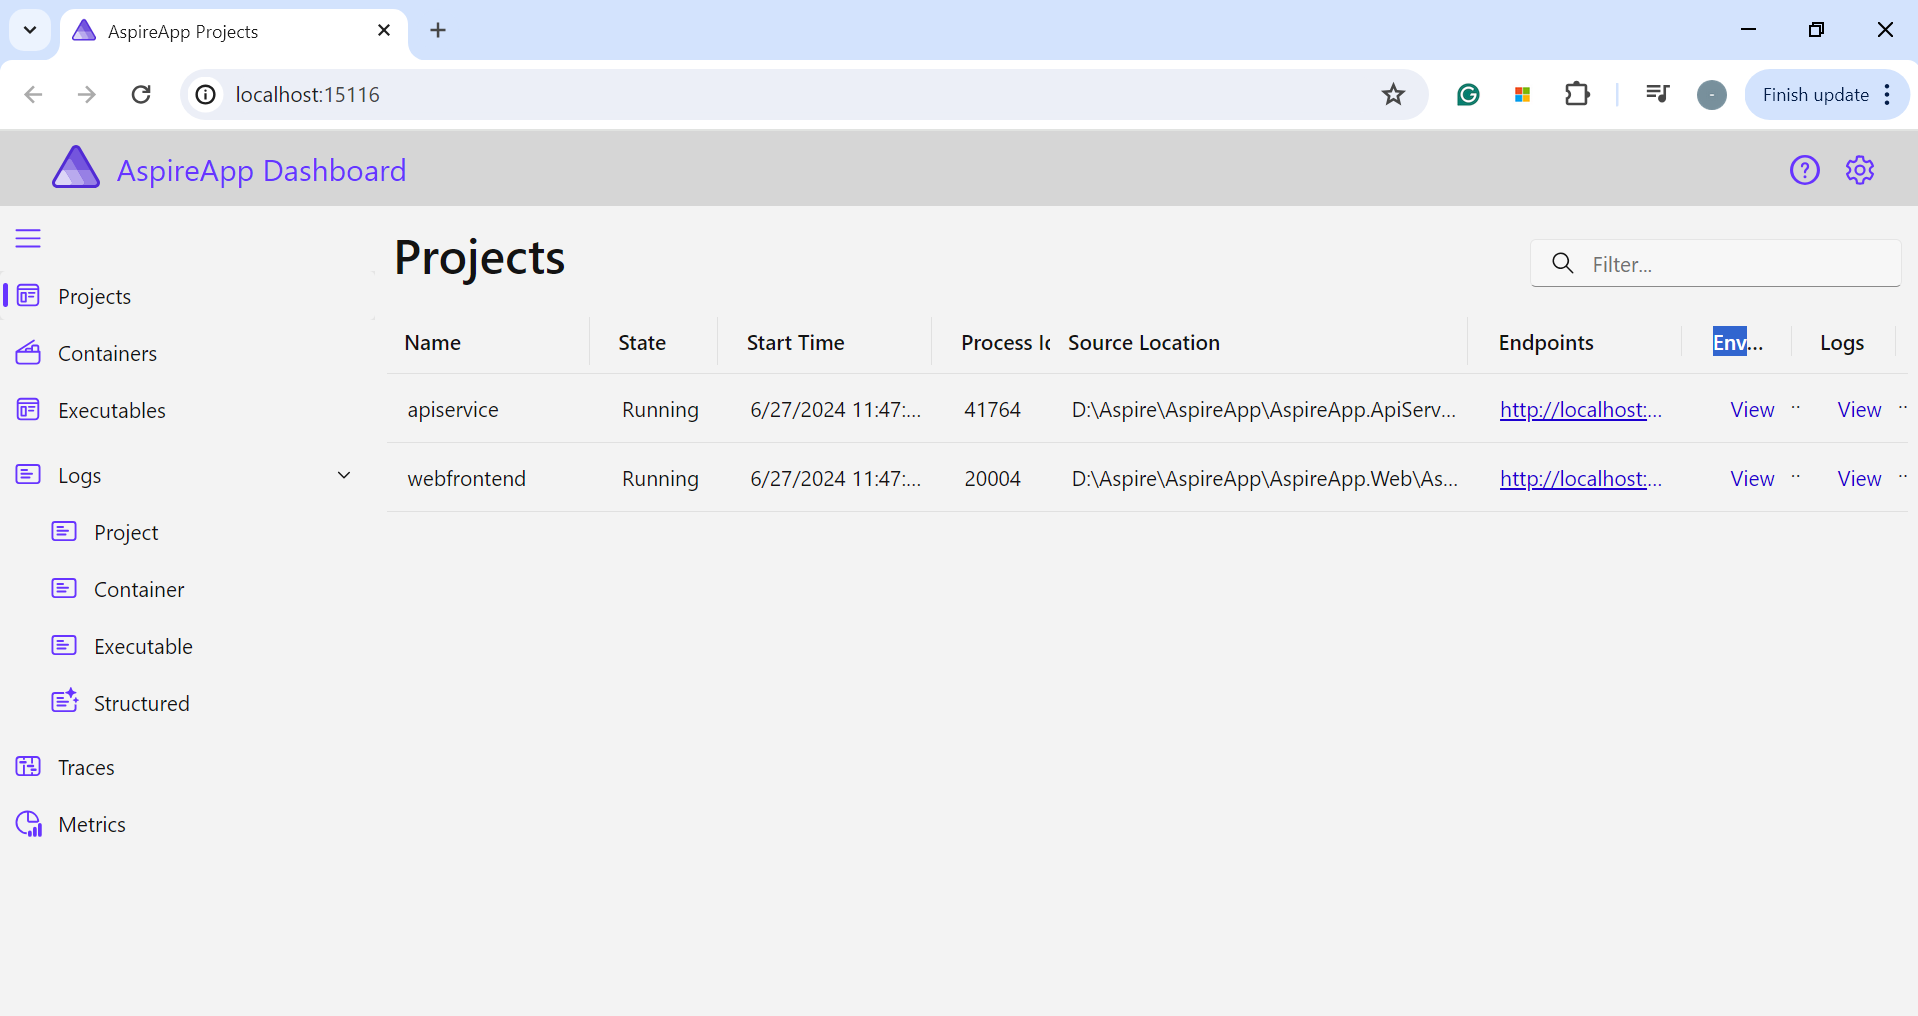
- Resources : This section provides essential information about each .NET project in your .NET Aspire setup, including app status, endpoint addresses, and loaded environment variables.
- Project : Lists each microservice as a Project within the dashboard.
- Container : Shows supporting services like Redis caches, represented as Containers.
- Executable : Displays other components that function as Executables.
- Console Logs : Shows text sent to standard output, used for events or status messages.
- Structured Logs : Presents logs in a table format, supporting basic filtering, search, and log level adjustments. You can expand log details by clicking the View button.
- Endpoints : Lists endpoints for microservices, allowing direct connection and testing in your browser.
- Traces : Tracks request paths throughout your app. For instance, view requests for /weather to see its journey through different parts of your app.
- Metrics : Displays exposed instruments and meters with their dimensions, optionally providing filters based on available dimensions.
Afterward, navigate from the home page to the weather page using the left-side navigation, where you’ll find detailed weather data.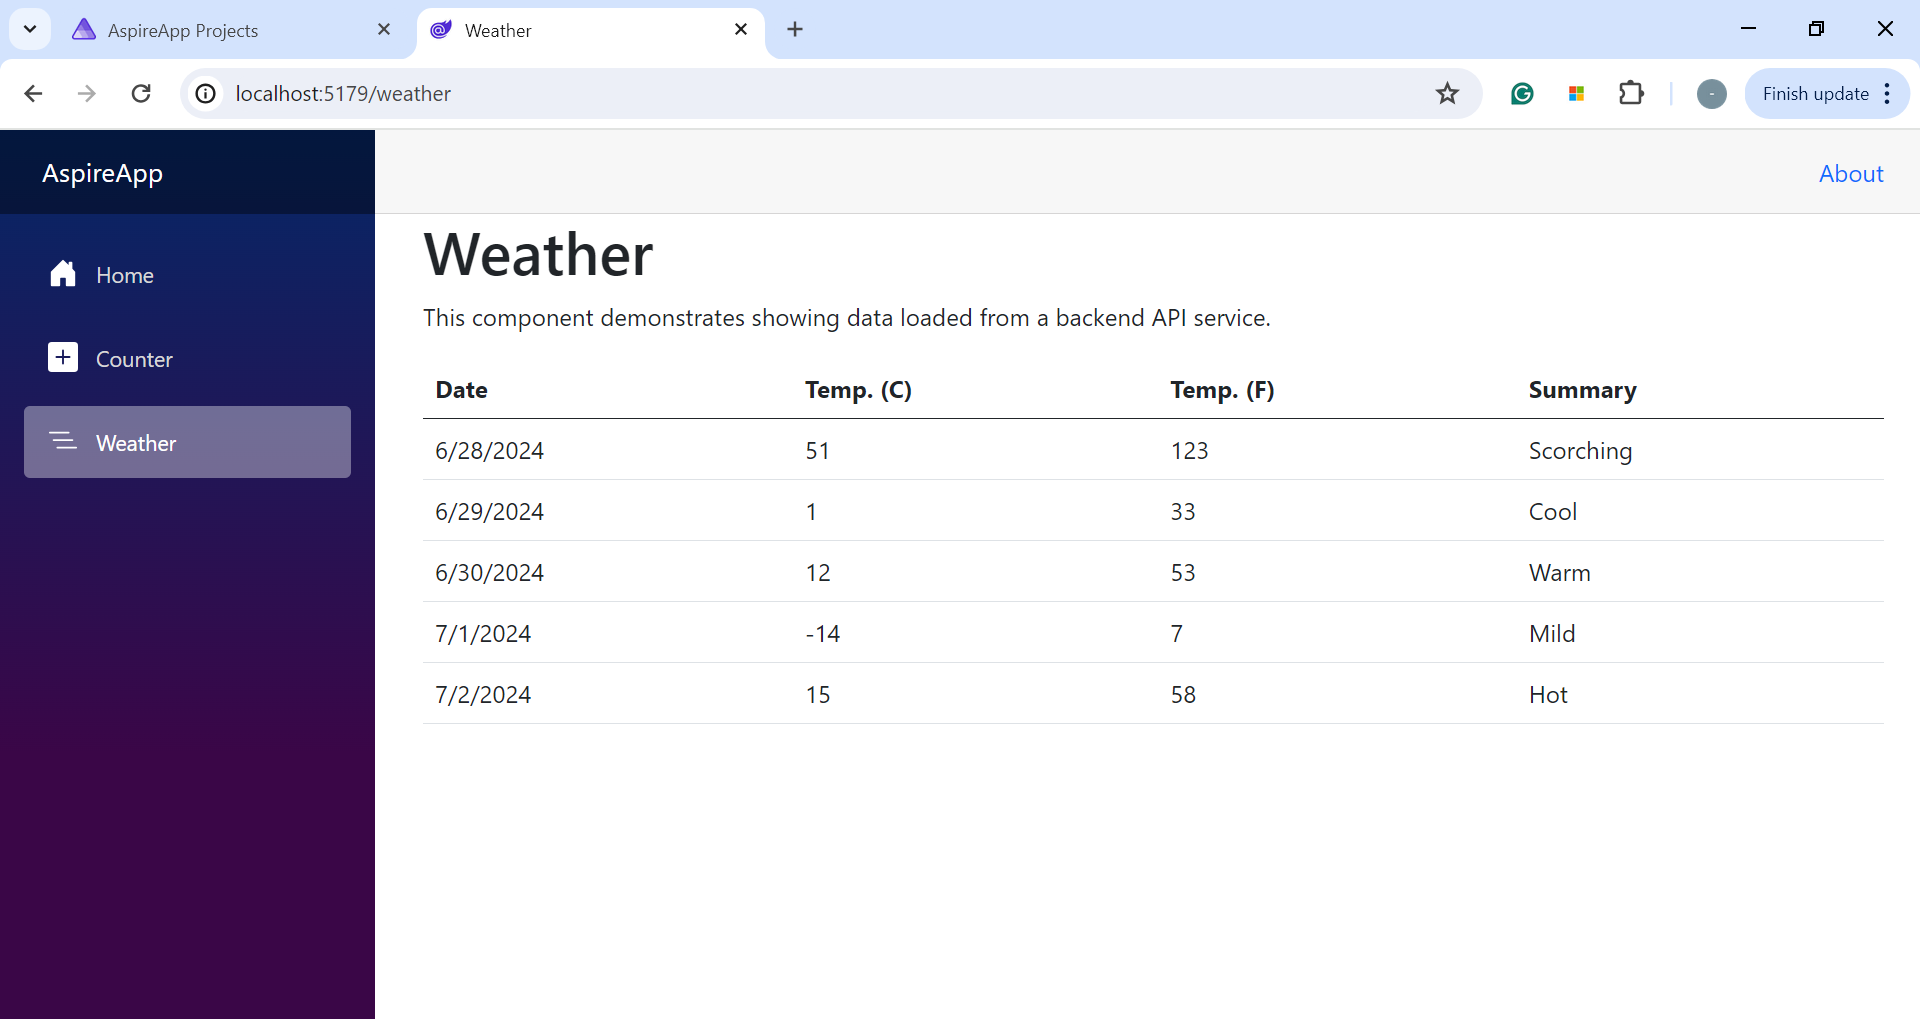
Create a .NET Aspire application
In Visual Studio 2022 Preview, create a new project using the .NET Aspire Application template. Select a solution name, location, and framework (choose .NET 8 Long-Term Support ).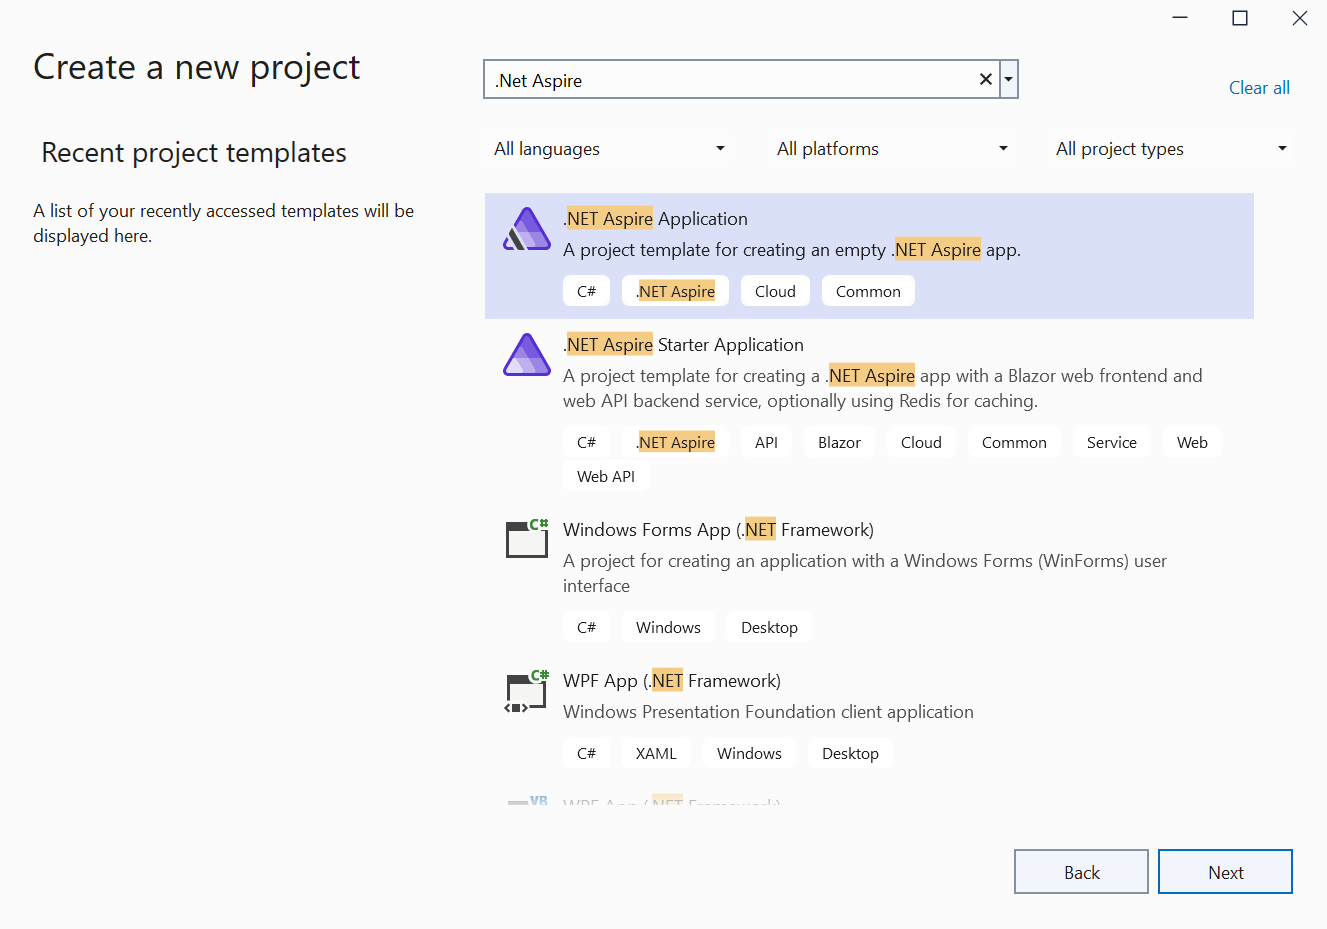
After that, continue with the default target framework to complete the project creation. This creates a basic .NET Aspire environment with essential projects, including an AppHost and ServiceDefaults.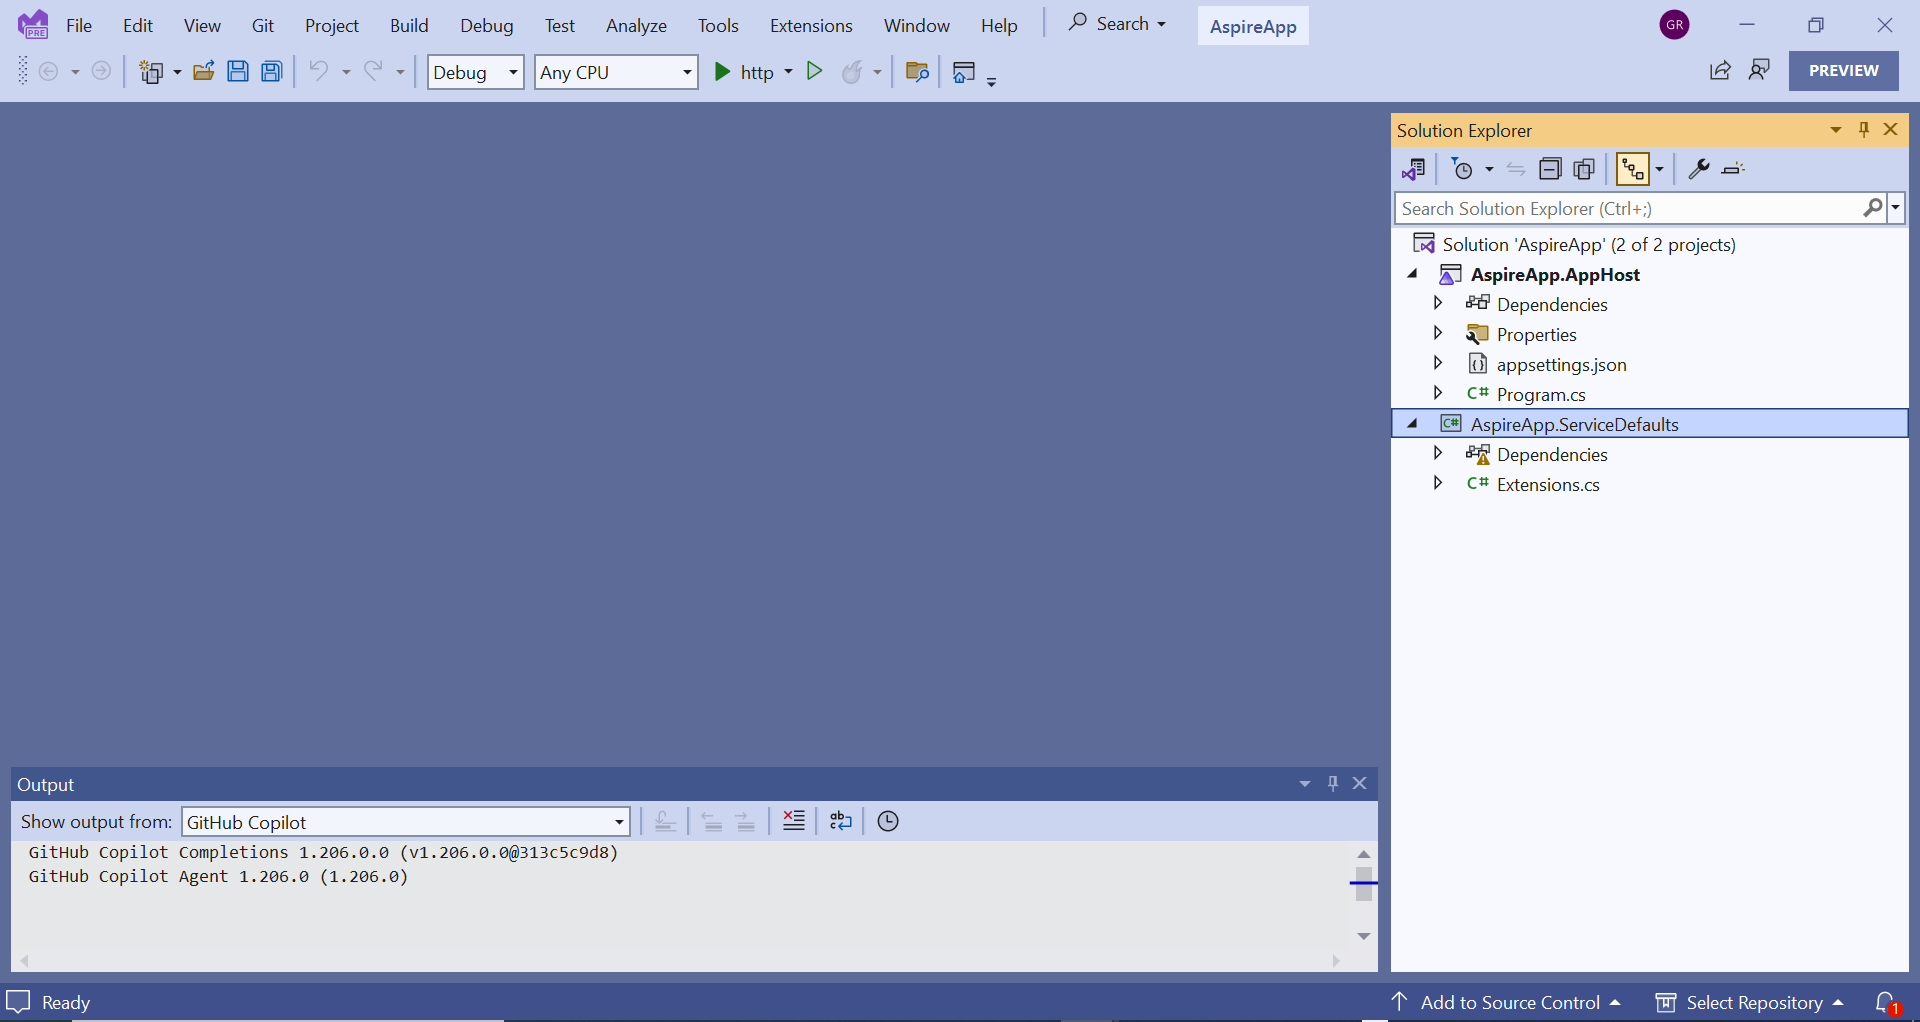
Create an ASP.NET Core Web API app as a back-end web service
1.Right-click the Solution project -> Add -> New Project in the Visual Studio menu bar.
2.Select the ASP.NET Core Web API application and click Next.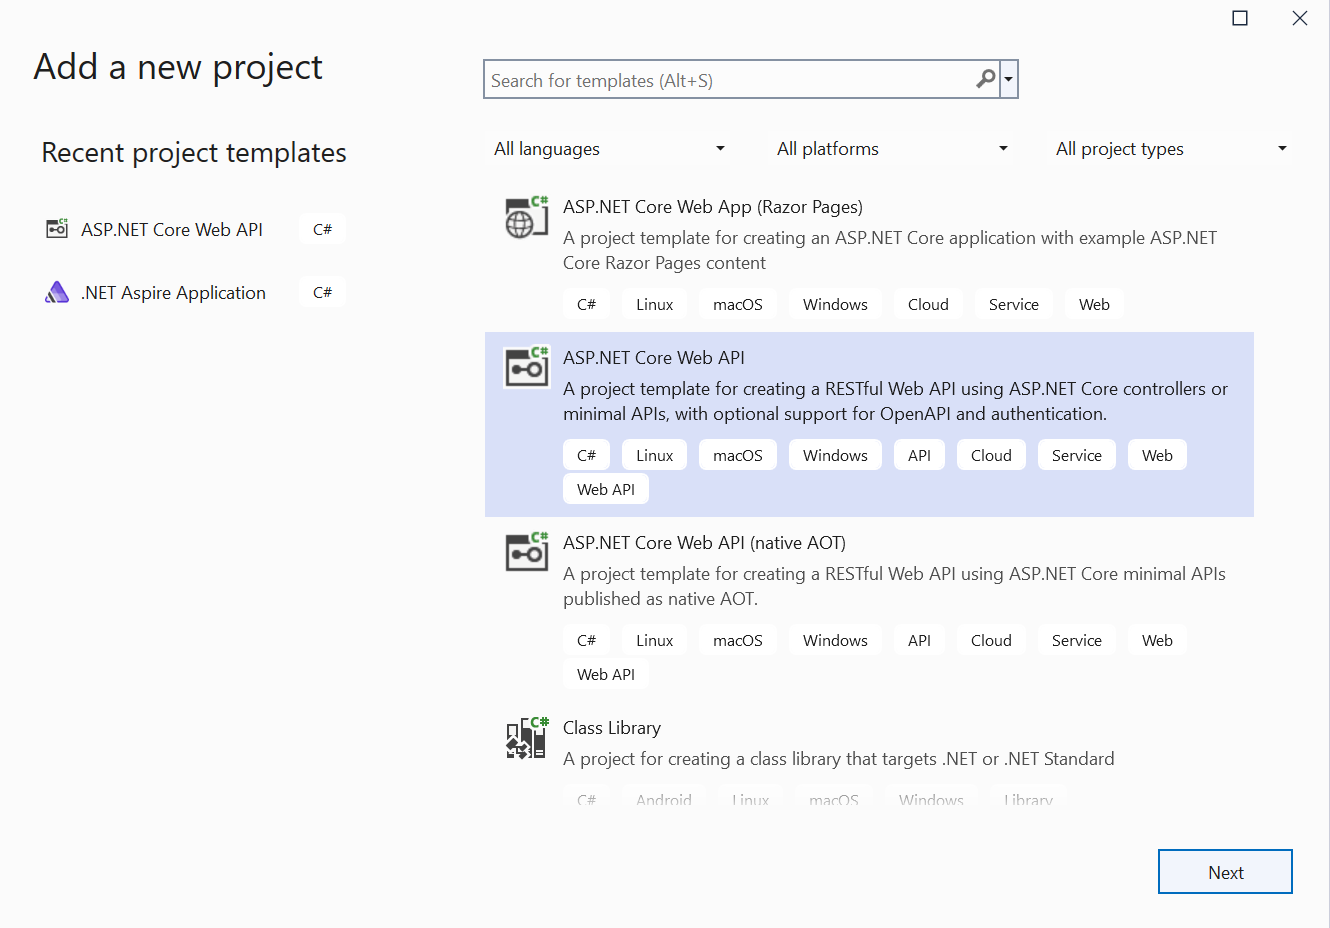
3.Then, continue with the default target framework to complete the project creation. This will set up a basic ASP.NET Core Web API project that can serve as your back-end web service.
4.Next, we plan to add new items to the to-do list and delete them once completed. We’ll add three operations: Get , Post , and Delete. Create a separate class named TodoController.cs in the Controllers folder and include the following code.
using Microsoft.AspNetCore.Mvc;
using System.Collections.Generic;

namespace AspireAppAPIService.Controllers
{
    [Route("api/[controller]")]
    [ApiController]
    public class TodoController : ControllerBase
    {
        private static readonly List<string> todos = new List<string>();

        // GET: api/todo
        [HttpGet]
        public ActionResult<IEnumerable<string>> Get()
        {
            return Ok(todos);
        }

        // POST: api/todo
        [HttpPost]
        public ActionResult Post([FromBody] string todo)
        {
            if (string.IsNullOrWhiteSpace(todo))
            {
                return BadRequest("Todo item cannot be empty");
            }

            todos.Add(todo);
            return Ok();
        }

        // DELETE: api/todo/{index}
        [HttpDelete("{index}")]
        public ActionResult Delete(int index)
        {
            if (index < 0 || index >= todos.Count)
            {
                return NotFound("Todo item not found");
            }

            todos.RemoveAt(index);
            return Ok();
        }
    }
}
Create a Blazor app as a front-end
To integrate a front-end into your .NET Aspire app, follow these steps:
1.Right-click on the Solution project -> Add -> New Project in the Visual Studio menu bar.
2.Select Blazor Web App and click Next.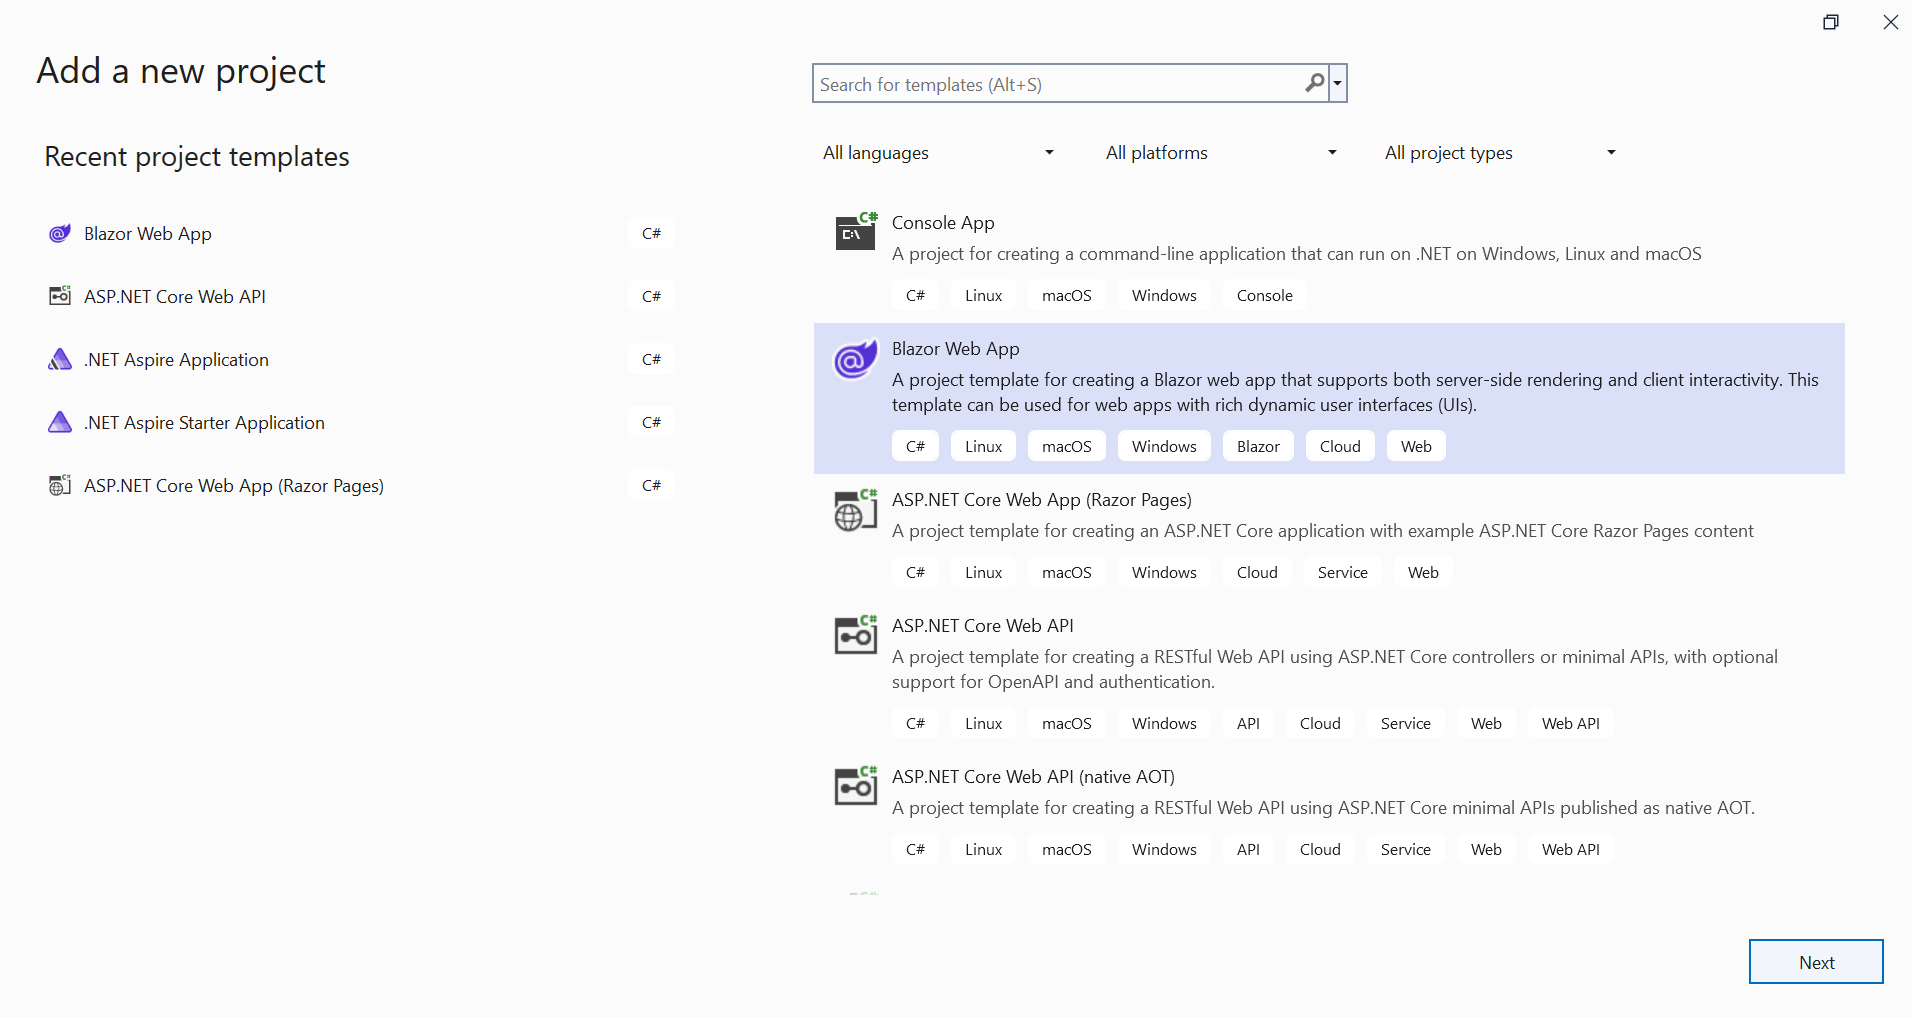
3.Continue with the default target framework to complete the project creation.
Implementing a to-do list feature
After setting up the Blazor project, implement a simple To-do list feature. Create a TodoService.cs class to interact with your Web API endpoints. This class manages tasks such as retrieving, adding, and deleting to-do items from the server.
Refer to the following code example.
using System.Net.Http;
using System.Net.Http.Json;
using System.Threading.Tasks;
using System.Collections.Generic;

public class TodoService
{
    private readonly HttpClient _httpClient;

    public TodoService(HttpClient httpClient)
    {
        _httpClient = httpClient;
    }

    public async Task<List<string>> GetTodosAsync()
    {
        return await _httpClient.GetFromJsonAsync<List<string>>("api/todo");
    }

    public async Task AddTodoAsync(string todo)
    {
        await _httpClient.PostAsJsonAsync("api/todo", todo);
    }

    public async Task DeleteTodoAsync(int index)
    {
        await _httpClient.DeleteAsync($"api/todo/{index}");
    }
}
Next, design the UI for your to-do list by creating a new Razor component named Todo.razor and adding the following code.
@page "/todo"
@inject TodoService TodoService

<h3>To-Do List</h3>

<div class="input-group mb-3">
    <input @bind="newTodo" class="form-control" placeholder="Enter new to-do item" />
    <button @onclick="AddTodo" class="btn btn-primary">Add</button>
</div>

<ul class="list-group">
    @foreach (var todo in todos)
    {
        <li class="list-group-item d-flex justify-content-between align-items-center">
            @todo
            <button @onclick="() => DeleteTodo(todo)" class="btn btn-danger btn-sm">Delete</button>
        </li>
    }
</ul>

@if (todos.Count == 0)
{
    <p>No to-do items yet.</p>
}

@code {
    private List<string> todos = new List<string>();
    private string newTodo;

    protected override async Task OnInitializedAsync()
    {
        await LoadTodos();
    }

    private async Task LoadTodos()
    {
        todos = await TodoService.GetTodosAsync();
    }

    private async Task AddTodo()
    {
        if (!string.IsNullOrWhiteSpace(newTodo))
        {
            await TodoService.AddTodoAsync(newTodo);
            await LoadTodos();
            newTodo = string.Empty;
        }
    }

    private async Task DeleteTodo(string todo)
    {
        var index = todos.IndexOf(todo);
        if (index != -1)
        {
            await TodoService.DeleteTodoAsync(index);
            await LoadTodos();
        }
    }
}
After creating Todo.razor , add it to the navigation menu ( NavMenu.razor ) under the Layout folder.
<div class="nav-item px-3">
 <NavLink class="nav-link" href="todo">
  <span class="bi bi-list-nested-nav-menu" aria-hidden="true"></span> To-Do List
 </NavLink>
</div>
Next, configure an HttpClient with a BaseAddress in the Program.cs file of your web app project to establish communication with the Web API.
builder.Services.AddHttpClient<TodoService>(client => client.BaseAddress = new("http://apiservice"));
Connecting ASP.NET web app and Web API project
To connect the ASP.NET web app with the Web API in your .NET Aspire solution, modify the Program.cs file in the AspireApp.AppHost project. Include both the Web API and Web application projects using the following code.
var builder = DistributedApplication.CreateBuilder(args);

var apiservice = builder.AddProject<Projects.AspireAppAPIService>("apiservice");
builder.AddProject<Projects.AspireWebApp>("webfrontend").WithReference(apiservice);

builder.Build().Run();
This setup allows the Web app to communicate with the Web API without requiring direct references between the projects. The .NET Aspire framework manages this communication pipeline.
Execute the project locally
Run the AppHost project as the startup project or press F5.
The Web application (front-end) and Web API (back-end) projects will appear on the Dashboard, as shown in the screenshot below. From this dashboard, you can monitor logs, metrics, and tracing and facilitate communication between the two apps without needing direct references or specific URLs.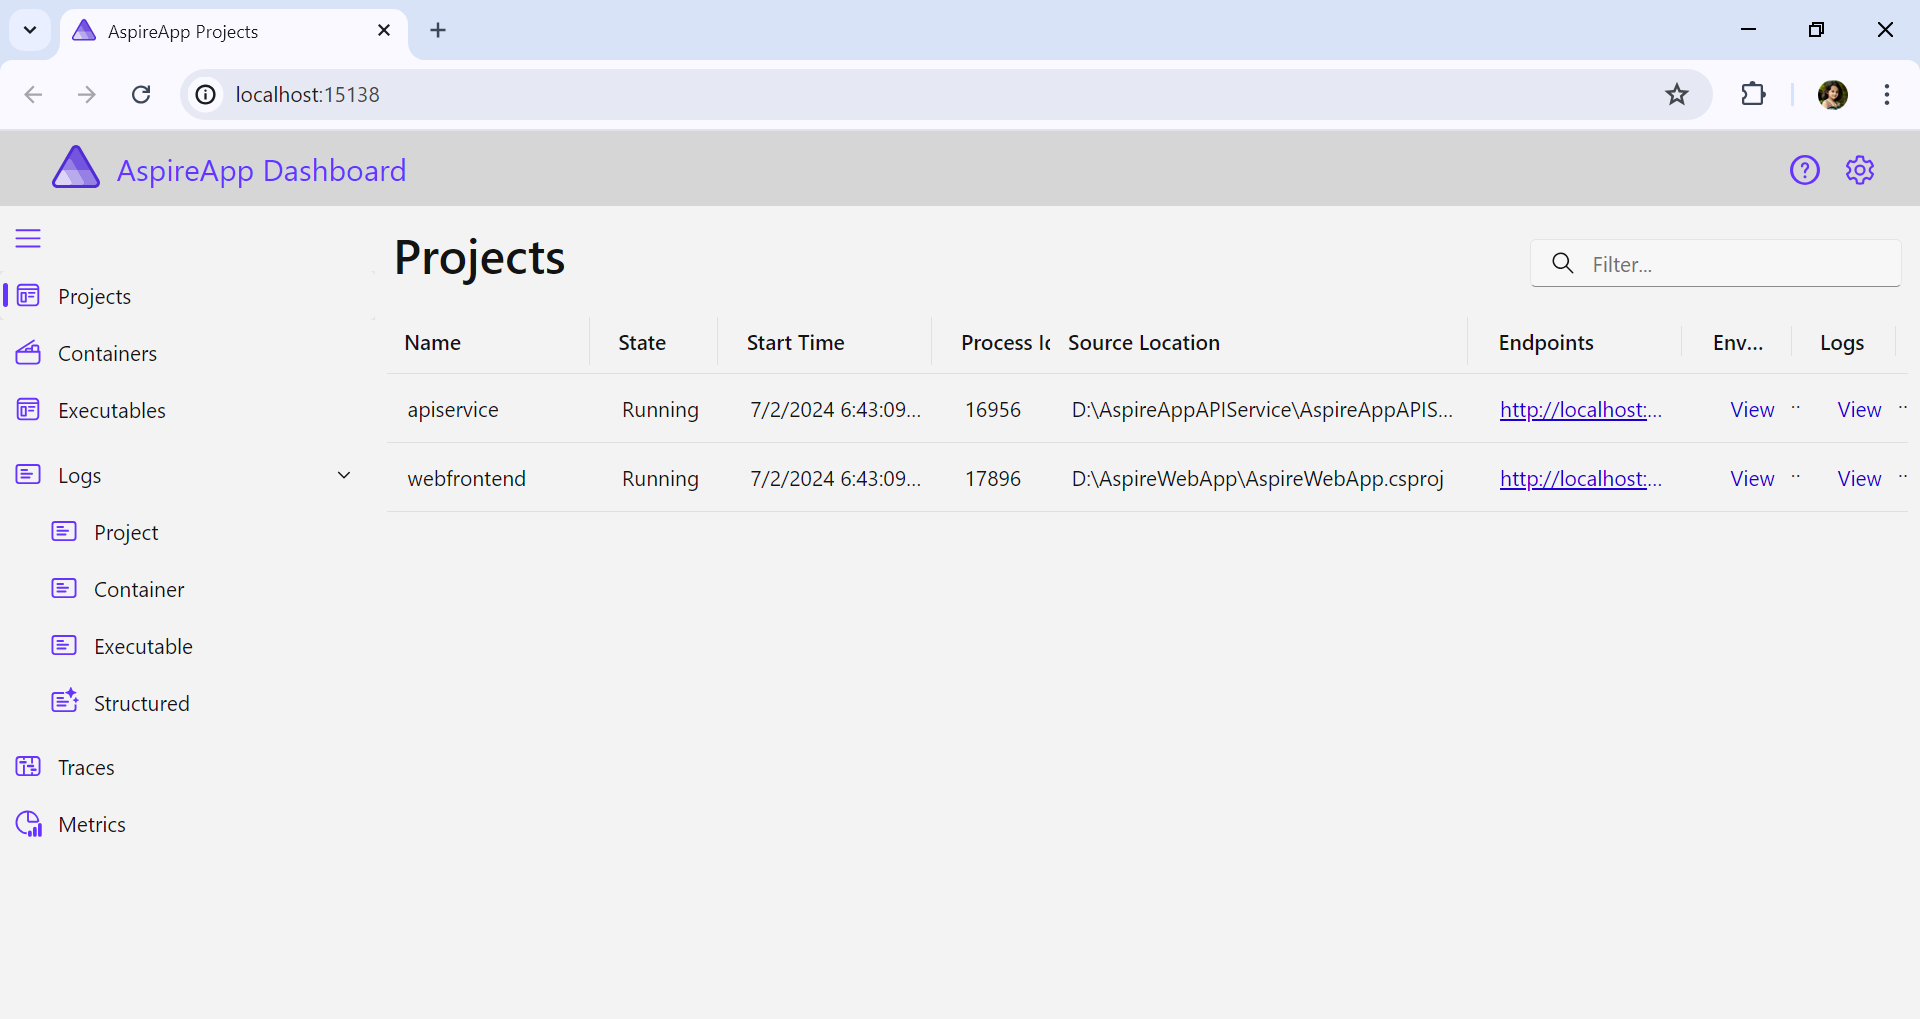
Back-end view 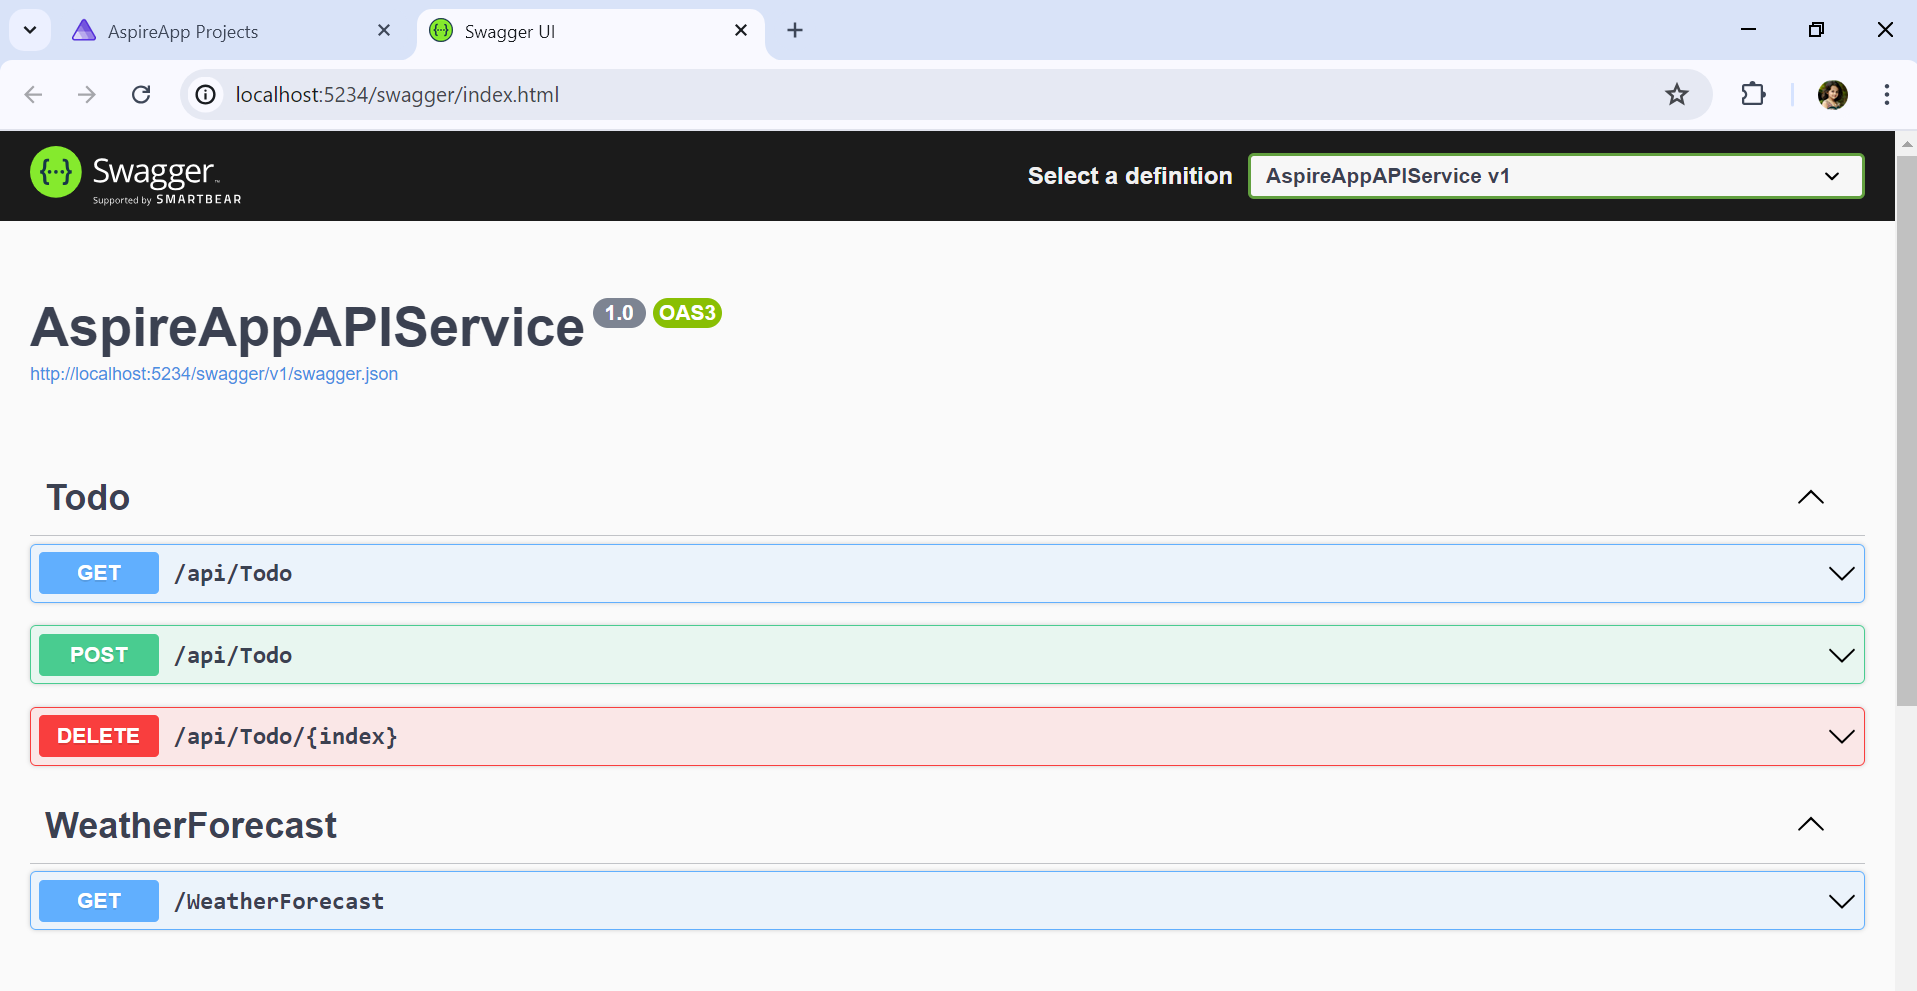
Front-end view 
Deploying the app in Azure
For deployment in Azure, follow these steps:
1.Open the AppHost project in PowerShell.
2.Initialize Azure using the azd init command and enter the environment name, e.g., AspireApp.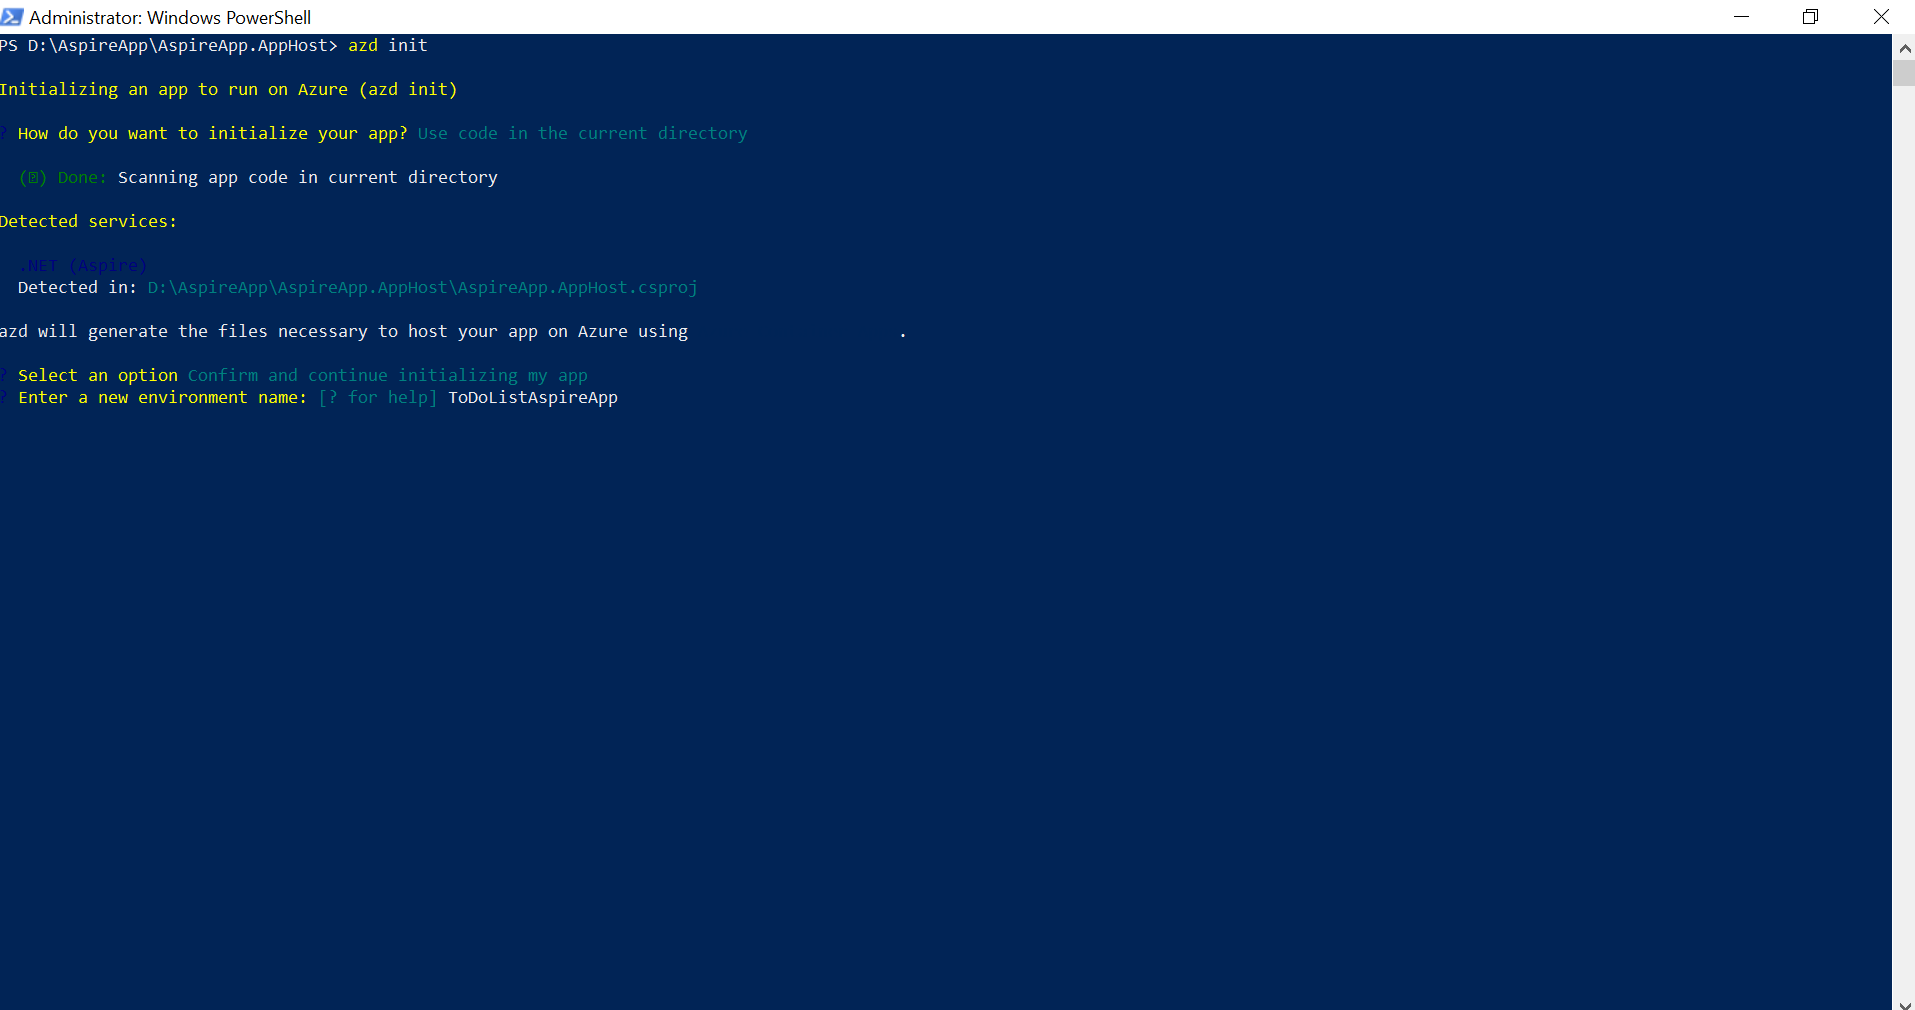
3.Execute the azd up command to deploy the app using the generated Azure.yaml and next-steps.md files. 
4.Once deployed, access the app via the provided endpoint link.
Conclusion
In this blog, we explored how .NET Aspire simplifies the development of cloud-native applications by providing essential components and tools. With its standardized configurations, enhanced tooling, and robust orchestration capabilities, .NET Aspire enhances productivity and reduces complexity for developers. By deploying our app to Azure, we demonstrated the seamless integration and management capabilities of .NET Aspire in modern cloud environments.
The latest version of Essential Studio—Syncfusion’s collection of eighteen-hundred-plus UI components and frameworks for mobile, web, and desktop development—is available for current customers from the License and Downloads page. If you are not a Syncfusion customer, you can start a 30-day free trial to try all the components.
If you have questions, contact us through our support forums, support portal, or feedback portal. We are always happy to assist you!

Top comments (0)