
Syncfusion XlsIO is a .NET Excel library which can create, read, and edit Excel files. It can easily convert a Excel file into PDF, HTML, images and more file formats. You can also use the Excel library in WinForms, WPF, UWP, ASP.NET (Web Forms, MVC, Core), Xamarin, Blazor, Flutter applications. In this blog, we are going to see how to create an Excel file, export data from a data table to a worksheet, and download the output Excel file in the Blazor platform.
Generate and download Excel files in Blazor
There are two types of applications in the Blazor platform, server-side and client-side. In this blog post, we will cover Excel file generation in both. We will:
- Create a server-side/client-side application.
- Install XlsIO NuGet package.
- Add necessary code.
- Run the application.
- Download the output Excel document.
*Note: * If you are new to using our Excel library, please follow the instructions in our Getting Started guide.
Server-side application
Create a server-side application
Open Visual Studio 2019 and choose Create a new project. A dialog will appear. Choose Blazor App from the list and click Next.
_ _Choose the Blazor Server App from the list and select the configure for HTTPS check box in the Advanced section. Then, click Create to create a new Blazor server-side application project.
Install the XlsIO NuGet package
Right- click on the project and select Manage NuGet Packages. Navigate to the Browse tab, and install the Syncfusion.XlsIO.Net.Core NuGet package as a reference in your Blazor application from NuGet.org. To learn more, refer to NuGet Package required documentation.

Add necessary code to server-side application
Step 1: Create a Razor file with the name Excel in the Pages folder and include the following namespaces.
@page "/Excel"
@using System.IO;
@using ServerSideApplication;
@inject ServerSideApplication.Data.ExcelService service
@inject Microsoft.JSInterop.IJSRuntime JS
Step 2: Add the following code to create a new button (Create Document) in your application.
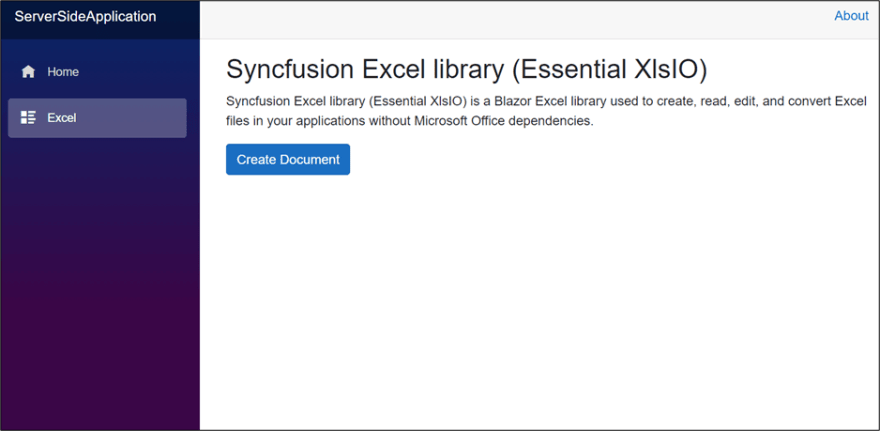
<h2>Syncfusion Excel library (Essential XlsIO)</h2>
<p>Syncfusion Excel library (Essential XlsIO) is a Blazor Excel library used to create, read, edit, and convert Excel files in your applications without Microsoft Office dependencies.</p>
<button class="btn btn-primary" @onclick="@CreateDocument">Create Document</button>
Step 3: Then, add the following code in the Excel.razor file to create and download the Excel file.
@code {
    MemoryStream excelStream;

    /// <summary>
    /// Create and download the Excel document.
    /// </summary>
    protected async void CreateDocument()
    {
        excelStream = service.CreateExcel();
        await JS.SaveAs("Sample.xlsx", excelStream.ToArray());
    }
}
Step 4: Now, create a new class file named ExcelService in the Data folder. Then, create a new method CreateExcel and include the following code to export data to Excel document in your Blazor server-side application.
*Note: * We can export data from the ADO.NET objects such as datatable, datacolumn, and dataview to Excel worksheets. The exporting can be done as column headers by recognizing column types or cell value types, like hyperlinks, and a large dataset, all in just a few seconds. You can find the various easy ways to export data to Excel in the blog, 6 easy ways to Export data to Excel in C#.
We are going to export data from a data table to Excel worksheets in Blazor platform using the Excel library’s ImportDataTable method.
using Syncfusion.XlsIO;
using System.IO;
using System.Data;

namespace ServerSideApplication.Data
{
    public class ExcelService
    {
        public MemoryStream CreateExcel()
        {
            //Create an instance of ExcelEngine.
            using (ExcelEngine excelEngine = new ExcelEngine())
            {
                IApplication application = excelEngine.Excel;
                application.DefaultVersion = ExcelVersion.Xlsx;

                //Create a workbook.
                IWorkbook workbook = application.Workbooks.Create(1);
                IWorksheet worksheet = workbook.Worksheets[0];

                //Initialize DataTable and data get from SampleDataTable method.
                DataTable table = SampleDataTable();

                //Export data from DataTable to Excel worksheet.
                worksheet.ImportDataTable(table, true, 1, 1);

                worksheet.UsedRange.AutofitColumns();

                //Save the document as a stream and return the stream.
                using (MemoryStream stream = new MemoryStream())
                {
                    //Save the created Excel document to MemoryStream.
                    workbook.SaveAs(stream);
                    return stream;
                }
            }
            return null;
        }

        private DataTable SampleDataTable()
        {
            DataTable reports = new DataTable();

            reports.Columns.Add("SalesPerson");
            reports.Columns.Add("Age", typeof(int));
            reports.Columns.Add("Salary", typeof(int));

            reports.Rows.Add("Andy Bernard", 21, 30000);
            reports.Rows.Add("Jim Halpert",25, 40000);
            reports.Rows.Add("Karen Fillippelli", 30, 50000);
            reports.Rows.Add("Phyllis Lapin", 34, 39000);
            reports.Rows.Add("Stanley Hudson", 45, 58000);

            return reports;
        }

    }
}
Next, add the below service code under ConfigureServices method in the Startup.cs file.
public void ConfigureServices(IServiceCollection services)
{
    services.AddRazorPages();
    services.AddServerSideBlazor();
    services.AddSingleton<WeatherForecastService>();
    services.AddSingleton<ExcelService>();
}
Step 5: Then, create a new class file in the project named FileUtils and add the following code to invoke the JavaScript action for downloading the file in a browser.
public static class FileUtils
{
    public static ValueTask<object> SaveAs(this IJSRuntime js, string filename, byte[] data)
        => js.InvokeAsync<object>(
            "saveAsFile",
            filename,
            Convert.ToBase64String(data));
}
Step 6: Add the saveAsFile JavaScript function in the _Host.cshtml file present under the Pages folder.
<script type="text/javascript">
    function saveAsFile(filename, bytesBase64) {

        if (navigator.msSaveBlob) {
            //Download document in Edge browser
            var data = window.atob(bytesBase64);
            var bytes = new Uint8Array(data.length);
            for (var i = 0; i < data.length; i++) {
                bytes[i] = data.charCodeAt(i);
            }
            var blob = new Blob([bytes.buffer], { type: "application/octet-stream" });
            navigator.msSaveBlob(blob, filename);
        }
        else {
            var link = document.createElement('a');
            link.download = filename;
            link.href = "data:application/octet-stream;base64," + bytesBase64;
            document.body.appendChild(link); // Needed for Firefox
            link.click();
            document.body.removeChild(link);
        }
    }
</script>
#4 Run the application
Add the Excel page in the navigation panel in NavMenu.razor file under the Shared folder and then run the application.
<li class="nav-item px-3">
  <NavLink class="nav-link" href="excel">
   <span class="oi oi-list-rich" aria-hidden="true"></span> Excel
  </NavLink>
</li>
#5 Download the output Excel document
Finally, navigate to the Excel page in your application and click on the Create Document button.
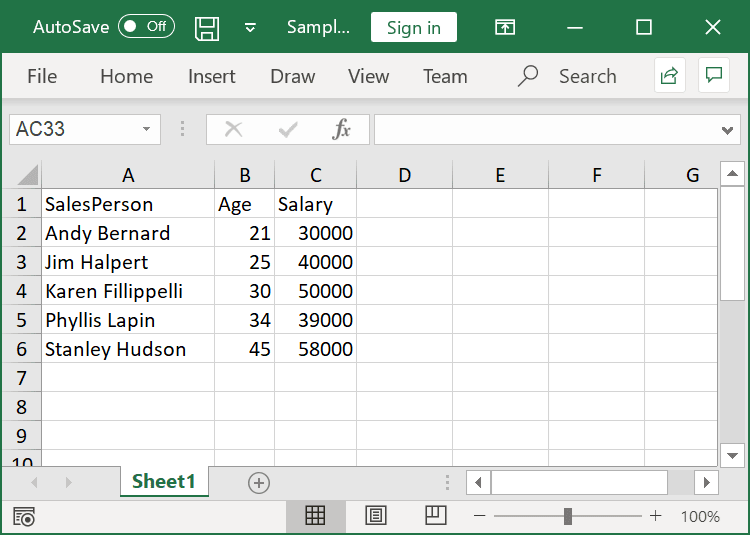
Then, we will get the output Excel file like in the following screenshot.
Client-side application
Create a client-side application
Create a new C# Blazor client-side application similar to the creation server-side application. Here, you have to choose the Blazor WebAssembly App option from the list like in the following screenshot.
 Install the XlsIO package
Install the Syncfusion.XlsIO.Net.Core NuGet package as a reference to your Blazor application from NuGet.org.
Add necessary code to the client-side application
Step 1: Create a Razor file with the name Excel in the Pages folder and include the following namespaces in it.
@page "/Excel"
@using Syncfusion.XlsIO;
@using Syncfusion.Drawing;
@using System.IO;
@inject Microsoft.JSInterop.IJSRuntime JS
@using System.Data;
Step 2: Then, add the following code to create a new button (Create Document) in your application.
<h2>Syncfusion Excel library (Essential XlsIO)</h2>
<p>Syncfusion Excel library (Essential XlsIO) is a Blazor Excel library used to create, read, edit, and convert Excel files in your applications without Microsoft Office dependencies.</p>
<button class="btn btn-primary" @onclick="@CreateDocument">Create Document</button>
Step 3: Add the following code in the Excel.razor file. In it, create a new method with the name CreateDocument to create, download and export data to the Excel document in the Blazor client-side application.
@code{
    /// <summary>
    /// Create an Excel document.
    /// </summary>
public async void CreateDocument()
{
    //Create an instance of ExcelEngine.
    using (ExcelEngine excelEngine = new ExcelEngine())
    {
        IApplication application = excelEngine.Excel;
        application.DefaultVersion = ExcelVersion.Xlsx;

        //Create a workbook.
        IWorkbook workbook = application.Workbooks.Create(1);
        IWorksheet worksheet = workbook.Worksheets[0];

        //Initialize DataTable and data get from SampleDataTable method.
        DataTable table = SampleDataTable();

        //Export data from DataTable to Excel worksheet.
        worksheet.ImportDataTable(table, true, 1, 1);

        worksheet.UsedRange.AutofitColumns();

        //Save the document as a stream and return the stream.
        using (MemoryStream stream = new MemoryStream())
        {
            //Save the created Excel document to MemoryStream
            workbook.SaveAs(stream);

            //Download the excel file.
            await JS.SaveAs("Sample.xlsx", stream.ToArray());
        }
    }
}
private DataTable SampleDataTable()
{
    DataTable reports = new DataTable();
    reports.Columns.Add("SalesPerson");
    reports.Columns.Add("Age", typeof(int));
    reports.Columns.Add("Salary", typeof(int));
    reports.Rows.Add("Andy Bernard", 21, 30000);
    reports.Rows.Add("Jim Halpert", 25, 40000);
    reports.Rows.Add("Karen Fillippelli", 30, 50000);
    reports.Rows.Add("Phyllis Lapin", 34, 39000);
    reports.Rows.Add("Stanley Hudson", 45, 58000);

    return reports;
}
}
Step 4: Now, create a new class file in the project, with the name FileUtils the same as in the server-side application.
Step 5: Then, add the saveAsFile JavaScript function in the _Host.cshtml file present in the Pages folder the same as for the server-side application.
Run the application
Now, add the Excel page in the navigation panel in the NavMenu.razor file under the Shared folder. Then, run the application the same as for the server-side application.
Download the output Excel document
Finally, navigate to the Excel page in your app and click Create Document.

Then, we will get the output Excel document like in the following screenshot.

Resources
For more information, refer to the example Export data to Excel in Blazor application.
Conclusion
As you can see, it’s easy to create an Excel file, export data from data table to a worksheet, and download the output file in the Blazor platform with the Syncfusion Excel library (XlsIO).
Use the library to generate Excel reports with high performance and to process large amounts of data. Take a moment to peruse our documentation, where you’ll find other options and features, all with accompanying code examples. Also, use this library to export Excel data to PDF, image, data table, CSV, TSV, HTML, collections of objects, ODS file formats, and more.
Are you already a Syncfusion user? You can download our products from the product setup. If you’re not yet a Syncfusion user, you can download a 30-day free trial.
If you have any questions, please let us know in the comments below. You can also contact us through our support forum or Direct-Trac or Feedback Portal. We are happy to assist you!

Top comments (0)