
Introduction
JAMstack is a modern web development architecture that focuses on speed, security, and scalability by pre-generating content, leveraging serverless functions, and maintaining a decoupled structure. Rather than relying on traditional back-end servers, JAMstack websites generate static HTML in advance and enhance interactivity through JavaScript and APIs. This approach leads to lightning-fast performance and improved security, as there's no direct connection to a back-end server.
A powerful framework for building JAMstack applications is Next.js, a React-based framework that supports Static Site Generation (SSG) and Incremental Static Regeneration (ISR) — both perfect for blogs. Next.js also offers built-in SEO optimizations, dynamic routing, and an intuitive developer experience.
For hosting and deployment, GitHub Pages is an excellent choice. This free hosting service from GitHub allows users to publish static websites straight from a repository. Supporting HTML, CSS, and JavaScript, it's ideal for personal portfolios, project documentation, static blogs, and simple web apps. With GitHub Actions, deployment can be automated by pushing code to a designated branch.
What You'll Learn in This Guide
This comprehensive guide will take you through the process of creating a fully functional JAMstack blog with Next.js and deploying it on GitHub Pages. By the end, you’ll have:
- Set up a Next.js project with all required dependencies
- Built a blogging system using MDX (Markdown + React components)
- Optimized your blog for performance, speed, and SEO
- Successfully deployed blog on GitHub Pages
Understanding JAMstack
JAMstack stands for JavaScript, APIs, and Markup. Unlike traditional websites that generate pages dynamically on the server at request time, JAMstack sites pre-render content as static files and use JavaScript and APIs to introduce dynamic features.
Why Choose JAMstack?
- Exceptional performance – Since content is pre-generated, pages load almost instantly, creating a seamless user experience.
- Enhanced security – Without a server or database, common threats like SQL injections, brute-force attacks, and plugin vulnerabilities are eliminated.
- Affordable hosting – GitHub Pages offers a free tier along with budget-friendly paid plans, making it a cost-effective option.
Why Next.js for Your Blog?
Next.js is an outstanding framework for modern blogging because it provides performance, flexibility, and an enjoyable development experience.
- Blazing-fast page loads – Thanks to SSG (Static Site Generation), your blog is pre-built for optimal speed.
- SEO-friendly – Fast and easy implementation of meta tags, structured data, and sitemap generation.
- MDX support – Write posts in Markdown while embedding interactive React components effortlessly.
Why Deploy on Github Pages?
- Zero-cost hosting for static sites
- Automatic deployments & Git integration
- DDoS protection and security advantages
Prerequisites Before Starting
- Node.js v18.18.0 or higher
- GitHub account
- Basic knowledge of React & Next.js
- Purchased Domain
Setting Up the Next.js Blog
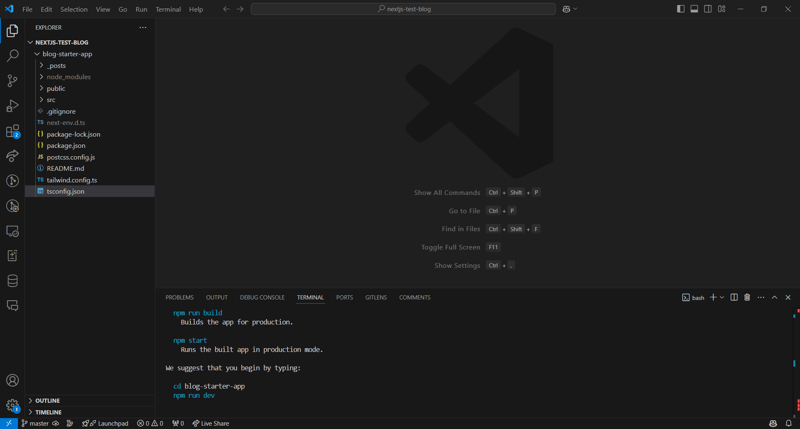
Step 1: Create a Next.js project with pre-built folder structure for a blog.
npx create-next-app --example blog-starter blog-starter-app
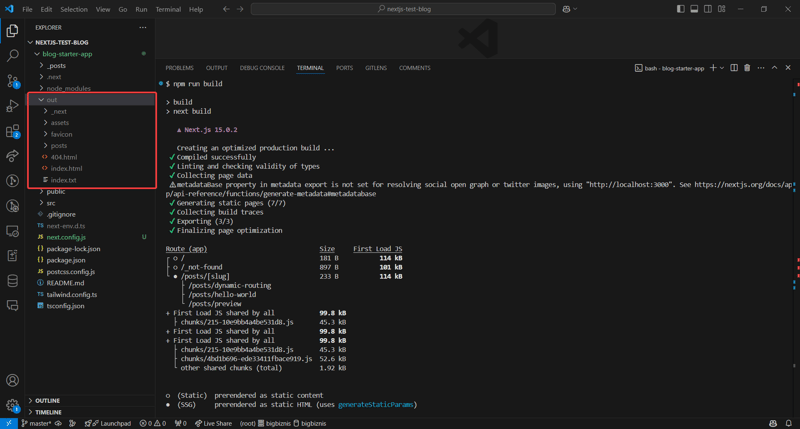
Step 2: Once the project is installed successfully you should see all of the newly created files and folders:
Step 3: Create a new file called next.config.js and put this content inside:
/**
 * @type {import('next').NextConfig}
 */
const nextConfig = {
  output: "export",
  images: {
    unoptimized: true
  },
  basePath: '/',
  assetPrefix: '/',
};

module.exports = nextConfig;
Step 4: Run the following commands:
cd blog-starter-app
npm run build
Once the build is completed, you should see the folder /out.
Now let's test that the build is working properly.
cd out
npx serve
Open http://localhost:3000 in your browser and verify that the blog is working.
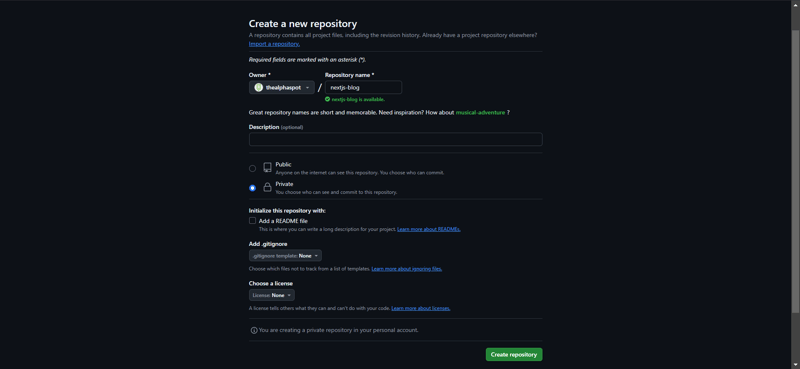
Step 5: Create a private Github repo.
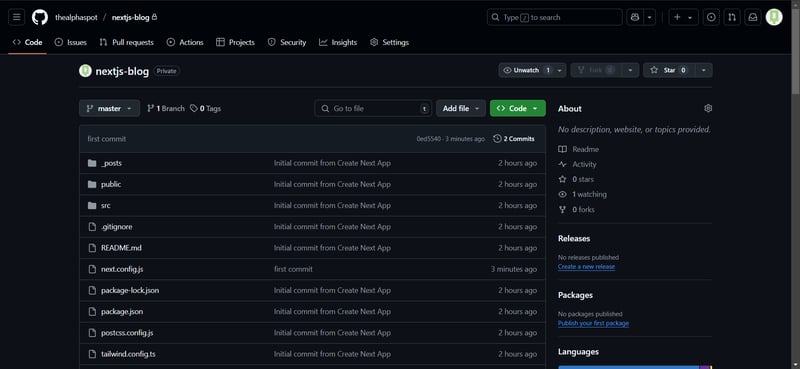
Follow the instructions on how to commit and push your code to the repo.
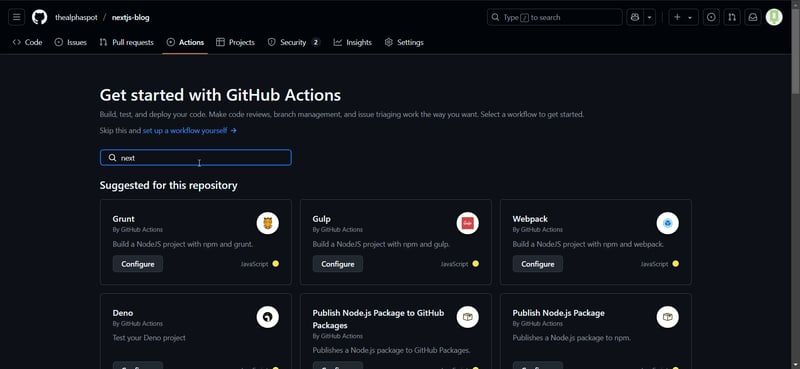
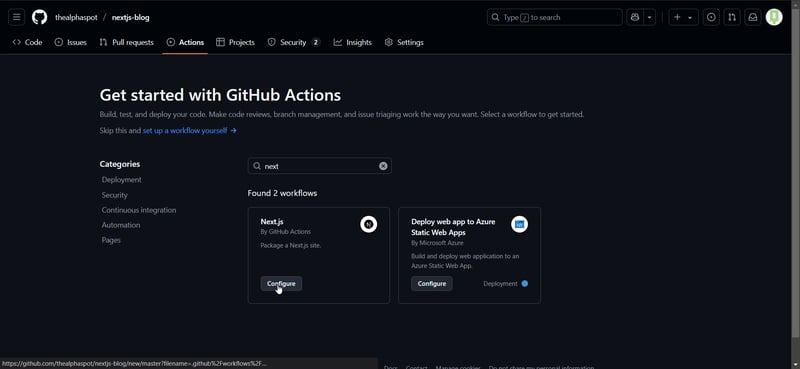
Step 6: Go to the Actions tab and search for next.
Step 7: Click on Configure.
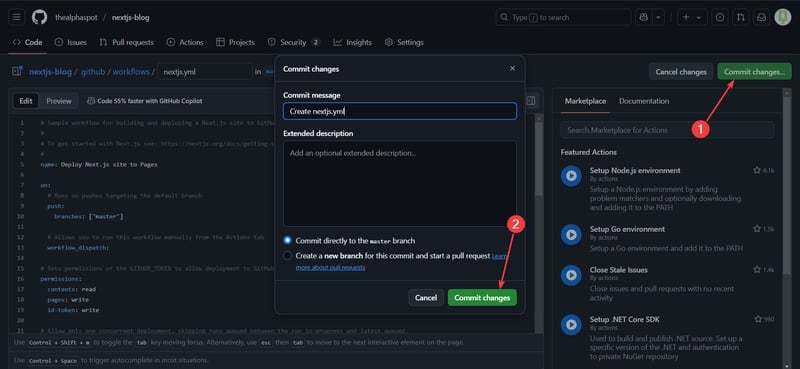
Step 8: Click on Commit changes, choose to commit to the main branch and click Commit changes again.
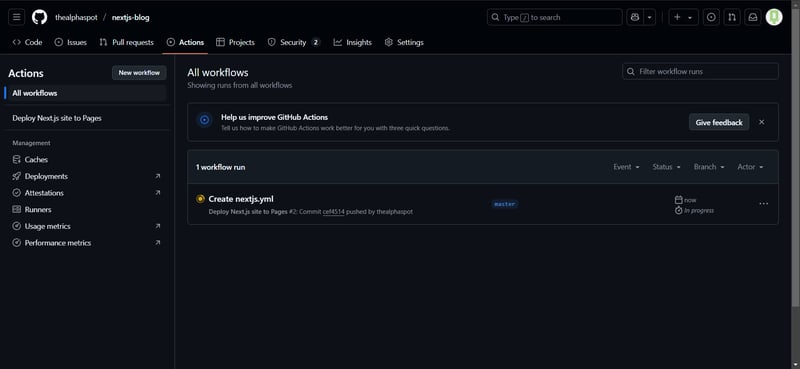
Step 9: Go to the Actions tab again and wait for the build to finish.
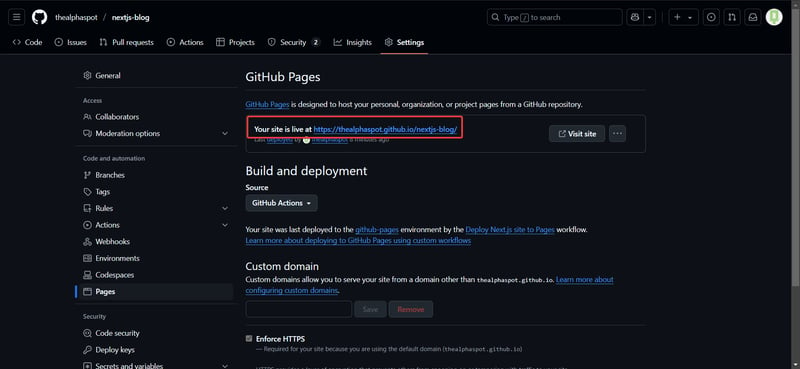
Step 10: Go to the repository Settings then select Pages. You should be able to see that your site was deployed successfully.
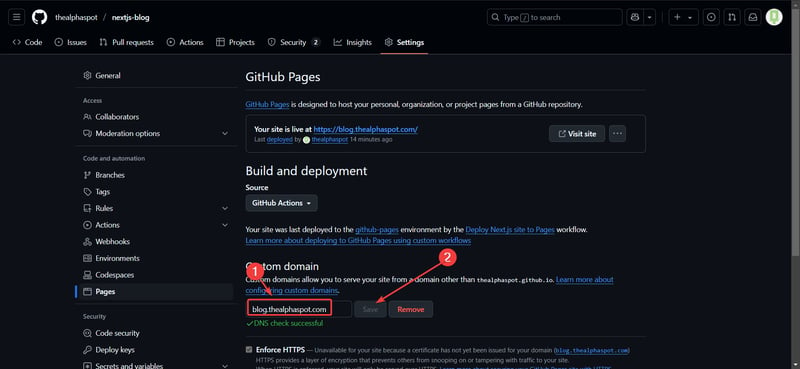
Step 11: Copy the URL, open your registrar and go to the domain DNS settings
Step 12: Add a new record. Check the Github's documentation for setting up custom domains. For this article I chose to use a subdomain.
| Scenario | DNS Record Type | DNS Record Name | DNS Record Value |
|---|---|---|---|
| subdomain | CNAME | SUBDOMAIN.example.com | USERNAME.github.io |

Step 13: Add your custom domain in GitHub pages.
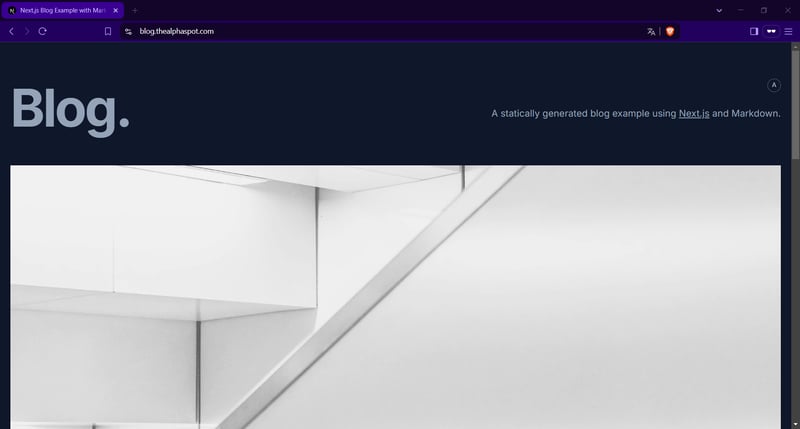
Step 14: Open your custom domain and verify that the site is loading properly.
Each time you push changes to the production branch, an automatic build will be triggered and once the build is completed, you will see your changes live.
If you liked this tutorial, please check out my blog and find more useful articles and tutorials @thealphaspot.
If you prefer a blog with CMS make sure you read this article first, so you don't fall for my mistakes.

Top comments (0)