I recently came across AWS Chalice and was fascinated by the simplicity and usability it offers.
AWS Chalice is a serverless framework that allows you to build serverless applications using Python, and deploy them on AWS using Amazon API Gateway and AWS Lambda.
I decided to play around with it and was actually able to create and deploy a sample REST API on AWS within a few minutes.
In this article, I will walk you through the steps required to build and deploy a serverless application that gets the latest news from Google News using Chalice.
Prerequisites
This tutorial requires an AWS account. If you don’t have one already, go ahead and create one. Our application is going to use only the free-tier resources, so cost shouldn’t be an issue.
You also need to configure security and create users and roles for your access.
How to Configure AWS Credentials
Chalice uses the AWS Command Line Interface (CLI) behind the scenes to deploy the project. If you haven’t used AWS's CLI before to work with AWS resources, you can install it by following the guidelines here.
Once installed, you need to configure your AWS CLI to use the credentials from your AWS account.
$ aws configure
AWS Access Key ID [****************OI3G]:
AWS Secret Access Key [****************weRu]:
Default region name [us-west-2]:
Default output format [None]:
How to Install Chalice
Next, you need to install Chalice. We will be using Python 3 in this tutorial, but you can use any version of Python supported by AWS Lambda.
Verify Python Installation
$ python3 --version
Python 3.8.6
Install Chalice
$ python3 -m pip install chalice
Verify Chalice Installation
$ chalice --version
chalice 1.20.0, python 3.8.6, darwin 19.6.0
How to Create a Project
Next, run the chalice new-project command to create a new project.
$ chalice new-project daily-news
This will create a daily-news folder in your current directory. You can see that Chalice has created several files in this folder. We'll be working with the app.py and requirements.txt files only in this article.
Let’s take a look at the contents of app.py file:
The new-project command created a sample app daily-news. It defines a single view /, that returns the JSON body {"hello": "world"} when called. You can now modify this template and add more code to read news from Google.
We will be using Google’s RSS feed to get our news. Since RSS feeds consist of data in XML format, we will need a Python library called Beautiful Soup for parsing the XML data.
You can install Beautiful Soup and its XML parsing library using pip, like this:
$ python3 -m pip install bs4
$ python3 -m pip install lxml
Next add the following imports to app.py. This essentially adds imports from urllib to make HTTP calls and bs4 to parse XML.
Next, you need to add a method to fetch the RSS feed from Google. We will use urllib to make an HTTP call to Google's RSS endpoint and get the response. You can then parse the response to extract the news title and publication date, and create a list of news items.
To do this, add the following code to your app.py:
Update the index method in app.py to invoke this method and return the list of news items as a result.
Note that you installed a few dependencies to make the code work. These dependencies were installed locally, and will not be available to the AWS Lambda container at runtime.
To make them available to AWS Lambda, you will need to package them along with your code.
To do that, add the following to the requirements.txt file. Chalice packs these dependencies as part of your code during build and uploads them as part of the Lambda function.
How to Deploy the Project
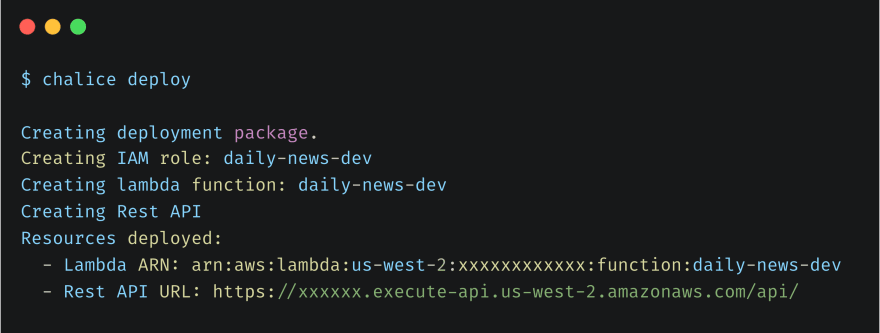
Let’s deploy this app. From the daily-news folder, run the chalice deploy command.
This deploys your API on Amazon API Gateway and creates a new function on AWS Lambda.
Let's try accessing the API now. You can use curl to invoke the API Gateway URL that you received during chalice deploy. The response of the API call would return a list of news items as shown below.
How to Clean Up Resources
You can also use the chalice delete command to delete all the resources created when you ran the chalice deploy command.
Conclusion
Congratulations! You just deployed a serverless application on AWS using Chalice. It wasn’t too hard, was it?
You can now go ahead and make any modifications to your app.py file and rerun chalice deploy to redeploy your changes.
You can also use Chalice to integrate your serverless app with Amazon S3, Amazon SNS, Amazon SQS, and other AWS services. Take a look at the tutorials and keep exploring. The full source code for this tutorial can be found here.
Thank you for staying with me so far. Hope you liked the article. You can connect with me on LinkedIn where I regularly discuss technology and life. Also take a look at some of my other articles on Medium. Happy reading 🙂


Top comments (0)