Submission category
This is my submission to GitHub Actions Hackathon under DIY Deployments.
Have you wondered how you can deploy your react app on netlify as quickly as possible? Github Actions makes it easy and facilitates quick deployments using github workflow. In this post, I am going to show you how to trigger automatic deployments to netlify using github workflow.
- Create a simple react app using
npx create-react-app - Run
npm run buildin your terminal. This will create your build folder in the root directory. Netlify allows to drag and drop a build folder in the drop area as you can see it on the image below. Fill free to use this option. Go login in to netlify netlify > sites you will see where to drop this build folder. Once dropped, the site will go live in a few seconds.
Netlify can also give access to deploy using netlify-cli via your terminal. You can
Refer to this resource.
Connect your local repository to a github repostitory(remote), and refer to this guide. Then you will have a remote repository and then be able to add actions.
Then, it's time to set github workflow on your repository. To do it, go to github > actions and add a github workflow. There are many templates they provide. But in this article, I am going to use Node.js.
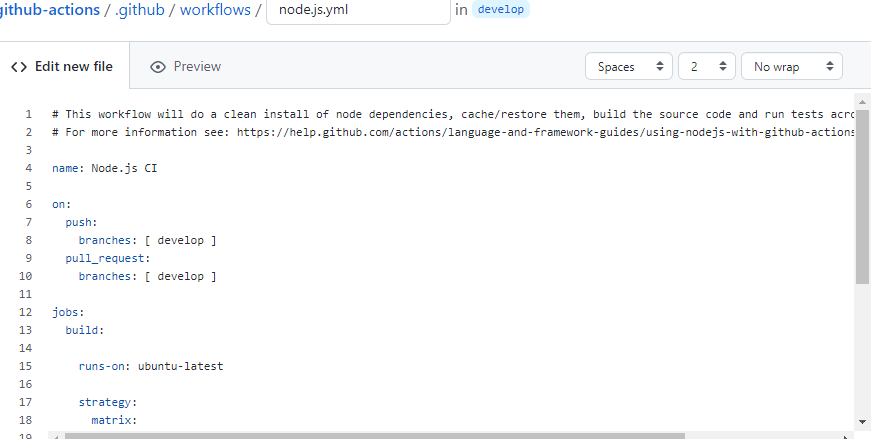
Once you have chosen NodeJs, you will be given the template below.
Fill free to edit the template with the following edits.
name: CI/CD

on:
  push:
    branches: [ develop ]
  pull_request:
    branches: [ develop ]

jobs:
  build:

    runs-on: ubuntu-latest

    strategy:
      matrix:
        node-version: [12.x, 14.x]

    steps:
    - name: Checkout repository
      uses: actions/checkout@v2

    - name: Set up Node.js ${{ matrix.node-version }}
      uses: actions/setup-node@v1
      with:
        node-version: ${{ matrix.node-version }}

    - name: Install dependencies
      run: npm install

    - name: Run the tests
      run: npm test

    - name: Build
      run: npm run build
Then, click to start a commit and commit the new file. Your gitworkflow will run successfully.
- Now it's time to deploy to netlify:
To deploy to netlify, we need 2 thigs:
- Our Netlify site_ID
- Netlify personal-Access token
To find the site_ID, go to your already deployed app > Site overview > site settings > General then, copy that site_ID
To find Netlify pesonal access token, click your profile picture, go to *user setting > application *. Generate a token and copy as you will need it later.
After you have copied both Site_ID, and netlify personal access token, It's time to go on github and put in the repository secrets. Go to github > settings > secrets and click add new secret. Then add netlfy site ID and Personal access token.
- After adding the secrets on github, Lets then add this step of deploying our site to netlify in our Node.js.yml file
- name: Deploy Site
      env:
        NETLIFY_SITE_ID: ${{ secrets.NETLFY_APP_ID }}
        NETLIFY_AUTH_TOKEN: ${{ secrets.NETLIFY_ACCESS_TOKEN }}
      run: netlify deploy --prod
Make sure you replace ${{secrests.The name of the secret you put on your github}}
The final github workflow will look like:
Final YML file
name: CI/CD

on:
  push:
    branches: [ develop ]
  pull_request:
    branches: [ develop ]

jobs:
  build:

    runs-on: ubuntu-latest

    strategy:
      matrix:
        node-version: [12.x, 14.x]

    steps:
    - name: Checkout repository
      uses: actions/checkout@v2

    - name: Set up Node.js ${{ matrix.node-version }}
      uses: actions/setup-node@v1
      with:
        node-version: ${{ matrix.node-version }}

    - name: Install dependencies
      run: npm install

    - name: Run the tests
      run: npm test

    - name: Build
      run: npm run build
    - name: Deploy Site
      env:
        NETLIFY_SITE_ID: ${{ secrets.NETLFY_APP_ID }}
        NETLIFY_AUTH_TOKEN: ${{ secrets.NETLIFY_ACCESS_TOKEN }}
      run: netlify deploy --prod
- After all your github workflow is set well, go in your root folder of your react app and add
netlify.tomlfile and add this code.
[build]
command = "npm run build"
publish = "build"
You may also put additional staffs like redirects rules in netlify.toml especially when your react is built with react-router dom. Or Go to publish folder and create a new file _redirects and write the code below:
/* /indext.html 200
After setting the above workflow, and make sure you have the above netlify.toml file, your application will automatically be deployed to netlify in such less amount of time as that time your workflow will take you to be complete.
Happy Coding ^_^


Top comments (0)