
If you spend any time on twitter or reddit you will have noticed that there are a lot of people out there that want to tell you what react state solution you should use. I'm not gonna do that here! I just want to show you my favorite solution, and hopefully you will like it and learn a thing or two.
If we step away from the "classic setup" for a second. Instead of pushing everything to a giant Redux store, consider handling navigational state with a router (Or NextJs/RemixJs), Api date with ReactQuery and small things with local state! In that case we are often left with a minimal amount of global state that we have to deal with our self. And Zustand is a perfect library for that.
But enough talk... lets write some code.
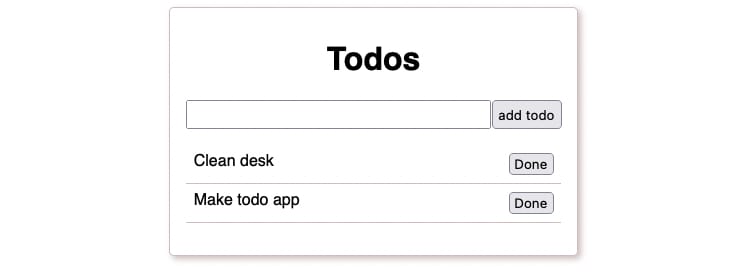
A simple todo app.
For this example we are going to build yet another todo app. I'm sorry, it's not very creative but it is a pretty good usecase.
Below we have a very basic skeleton todo app.
export default function App() {
  const todos = [
    { id: 0, title: "Clean desk" },
    { id: 0, title: "Make todo app" }
  ]

  return (
    <div className="App">
      <h1>Todos</h1>

      <form>
        <input type="text" name="newtodo" />
        <input type="submit" value="add todo" />
      </form>

      <ul>
        {todos.map((todo) => {
          return (
            <li key={todo.id}>
              <span>{todo.title}</span>
              <button>Done</button>
            </li>
          );
        })}
      </ul>
    </div>
  );
}
It's just a little form for adding todos, and a Array.map() that loops over the todos constant to list out the todo's.
Since this article is about Zustand and not css styles, i'm gonna skip over those. But you can grab mine here if you like.
Adding Zustand to our project
Installing Zustand into our project is as simple as running one of the following commands on our command line.
# cd path/to/your/project

npm install zustand

# or

yarn add zustand
Create the store
Now for the fun part. Let's create our Zustand store. To do so we create a new file called todoStore.js and add the code below.
import create from "zustand";

const useTodoStore = create((set) => ({
    todos: [
      { id: 0, title: "Clean desk" },
      { id: 0, title: "Make todo app" }
    ],
  })
);

export default useTodoStore;
In this snippet we first import a function called create() from the Zustand library. Next we declare a constant "useTodoStore" and assign the create function to it.
The create function accepts a callback function that has to return a object containing our store. In this case we only add a todos array to this object, and this array contains two object being a single todo each. You can consider this our default state. In a real world app this array would probably be empty.
And let's not forget to export useTodoStore so we can use it in the rest of our app.
Add todos
Next we need a function in our store that will be responsible for adding todos.
import create from "zustand";
import { v4 as uuidv4 } from "uuid";

const useTodoStore = create((set) => ({
    todos: [
      { id: 0, title: "Clean desk" },
      { id: 0, title: "Make todo app" }
    ],
    addTodo: (title) =>
      set((state) => ({
        todos: [...state.todos, { id: uuidv4(), title }]
      })),
  })
);

export default useTodoStore;
Here we add another entry to our store object called addTodo and we make it equal to an arrow function. This arrow function accepts a function called set() that we recieve from the create function.
Inside our new arrow function we call the set function and pass that yet another arrow function that in turn recieves the current state, and it has to return a new section of the state we want to change. So in this case we return a new object that has a todo entry and we spread the current todo state and tag on a new todo object.
For the id of the new todo we use a function called uuidv4() (That we added as a new import at the top) (npm install uuid) to generate a unique id, and for the title we use the title that got passed to our addTodo function.
State/Store functions can sometime get a bit messy, but i hope my explenation got you through this one. At least i tried to keep it as simple as possible.
Remove todos
We also need the option to remove todos from the list, so lets add another function to our store to do just that.
import create from "zustand";
import { v4 as uuidv4 } from "uuid";

const useTodoStore = create((set) => ({
    todos: [
      { id: 0, title: "Clean desk" },
      { id: 0, title: "Make todo app" }
    ],
    addTodo: (title) =>
      set((state) => ({
        todos: [...state.todos, { id: uuidv4(), title }]
      })),
    removeTodo: (id) =>
      set((state) => ({
        todos: state.todos.filter((todo) => todo.id !== id)
      }))
  })
);

export default useTodoStore;
This new removeTodo function has the same structure as the addTodo function, but in this case we use the Array.filter method to remove the todo by checking if the id is the same as the id passed to this removeTodo function.
Tip: If you want to know more about the javascript Array.filter() method, i have a youtube video covering this and other array methods in the context of api response data: "Useful javascript array methods for dealing with api data"
Import useTodoStore
Now that we have our store in place lets use it inside our app, by first importing it in our app.js file.
import useTodoStore from "./todoStore.js";
Render todo's from the store
Next we want to grab our todos state from our store and use it to list out the todo's
import useTodoStore from "./todoStore.js";

export default function App() {
  const todos = useTodoStore((state) => state.todos);

  return (
    <div className="App">
      <h1>Todos</h1>

      ...form...

      <ul>
        {todos.map((todo) => {
          return (
            <li key={todo.id}>
              <span>{todo.title}</span>
              <button>Done</button>
            </li>
          );
        })}
      </ul>

    </div>
  );
}
Se here we create a new constant called todos and we set it equal to our imported useTodoStore function. The useTodoStore accepts an arrow function that accepts the current state and has to return the part of the state we want to use. So in this case our arrow function should return state.todos.
Since we already had the logic for mapping the todos we dont have to change anything and our state todo items should be listed!
Wire up the add todo form
To be able to add todos we have to wire up our form to the store. For this we have to grab our addTodos function from the store.
import useTodoStore from "./todoStore.js";

export default function App() {
  const todos = useTodoStore((state) => state.todos);
  const { addTodo } = useTodoStore((state) => ({
    addTodo: state.addTodo
  }));

  const addtodoHandler = (e) => {
    e.preventDefault();
    const input = e.target["newtodo"];
    if (input.value.trim() > "") {
      addTodo(input.value);
      input.value = "";
      input.focus();
    }
  };

  return (
    <div className="App">
      <h1>Todos</h1>

      <form onSubmit={addtodoHandler}>
        <input type="text" name="newtodo" />
        <input type="submit" value="add todo" />
      </form>

      ...List...

    </div>
  );
}
In this case we create another call to useTodoStore, and have it return a object that contains our addTodo function from the store. We then use object de-structuring to grab this function from the returned object.
We return a object here, because later on we also want to grab our removeTodo function from the store, and this way we can do that in one go.
We also create a new function called addTodoHandler that grabs the entered todo title from the event, checks if the title isn't an empty string, and finally we call the addTodo function to push our new todo to the store.
To keep things tidy we also clear out the form field and focus it again so we can continue adding todos.
To call this new function we add it on to onSubmit attribute of our form.
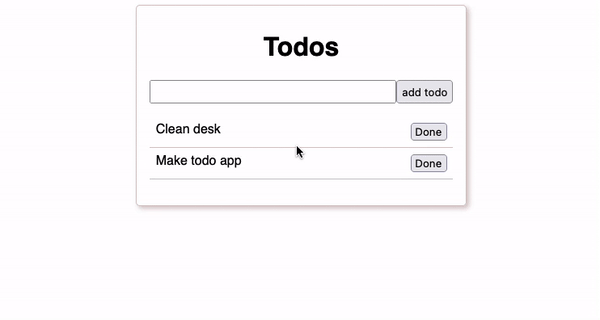
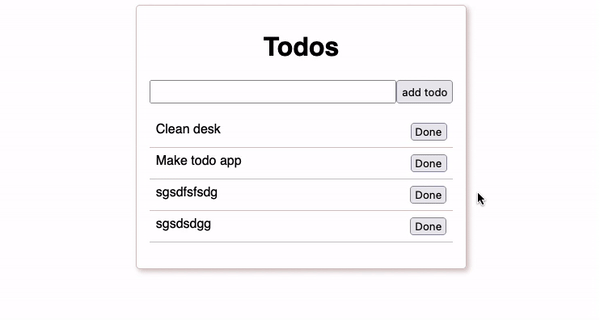
Because the addTodo function updates the state in our store, our list should update immediately like shown in the example below.
Remove todo button
Ofcourse we also want to remove todos when they are done, so lets wire up our done buttons to remove them.
import useTodoStore from "./todoStore.js";

export default function App() {
  const todos = useTodoStore((state) => state.todos);
  const { addTodo, removeTodo } = useTodoStore((state) => ({
    addTodo: state.addTodo,
    removeTodo: state.removeTodo
  }));

  ...addtodoHandler...

  return (
    <div className="App">
      <h1>Todos</h1>

      ...Form...

      <ul>
        {todos.map((todo) => {
          return (
            <li key={todo.id}>
              <span>{todo.title}</span>
              <button
                onClick={() => {
                  removeTodo(todo.id);
                }}
              >
                Done
              </button>
            </li>
          );
        })}
      </ul>

    </div>
  );
}
Here we make it so that our useTodoStore function also returns the state.removeTodo function, and we grab it by adding it to our object de-structuring.
To use it we add an onClick attribute to our done button and add a arrow function to it that calls our removeTodo function passing it the todo.id.
Now when we click our button the removeTodo function gets called and it will remove the todo with that id from the store, and thus from our view.
Somewhat persist our data
The downside of using in memory state is that it disappears when we reload the page. This means we have to either push our state to a database, or in this case we can get away with adding a bit of localStorage.
One of the nice things about Zustand is that it has this functionality sort of build in. So lets add that.
Tip: If you want to learn how to use localstorage yourself my buddy Chris has written up this amazing article: "Vanilla JavaScript localStorage"
import create from "zustand";
import { persist } from "zustand/middleware";
import { v4 as uuidv4 } from "uuid";

const useTodoStore = create(
  persist((set) => ({
    todos: [
      { id: 0, title: "Clean desk" },
      { id: 0, title: "Make todo app" }
    ],
    addTodo: (title) =>
      set((state) => ({
        todos: [...state.todos, { id: uuidv4(), title }]
      })),
    removeTodo: (id) =>
      set((state) => ({
        todos: state.todos.filter((todo) => todo.id !== id)
      }))
  }))
);

export default useTodoStore;
In this snippet we grab another function called persist from "zustand/middleware". And all we have to do is inside our create function wrap our callback function with this persist function.
Now when we add todos the current state gets pushed to the browsers localStorage and when we refresh that page Zustand auto populates with the date that got stored.
If you want you could pretty easily create your own Zustand middleware and use that to persist your data to a remote database.
I might create an article on that as well so don't forget to follow me!
Completed todo app
You can check out this CodeSandBox for a finished version of this little todo app.
Thats it...
That's how easy it is to add some global state to your React app with Zustand! I hope you like it, and that you learned something from this article!
Follow me on Youtube, Twitter or here on Dev.to @Vanaf1979 for more things to come.
Thanks for reading, stay safe and stay the right kind of positive!

Top comments (0)