This blog post walks you through how to scaffold a web application, run it locally in a container, and then deploy it to a Kubernetes cluster created with IBM Cloud Kubernetes Service using a Helm chart.
Containers are a standard way to package apps and all their dependencies so that you can seamlessly move the apps between environments. Unlike virtual machines, containers do not bundle the operating system. Only the app code, runtime, system tools, libraries, and settings are packaged inside containers. Containers are more lightweight, portable, and efficient than virtual machines.
For developers looking to kickstart their projects, the IBM Cloud Developer Tools CLI enables rapid application development and deployment by generating template applications that you can run immediately or customize as the starter for your own solutions. In addition to generating starter application code, Docker container image and CloudFoundry assets, the code generators used by the dev CLI and web console generate files to aid deployment into Kubernetes environments. The templates generate Helm charts that describe the application’s initial Kubernetes deployment configuration and are easily extended to create multi-image or complex deployments as needed.
Services used
This blog post uses the following runtimes and services:
Architecture

- A developer generates a starter application with IBM Cloud Developer Tools.
- Building the application produces a Docker container image.
- The image is pushed to a namespace in IBM Cloud Kubernetes Service.
- The application is deployed to a Kubernetes cluster.
- Users access the application.
Before you begin
- Set up the IBM Cloud Container Registry CLI and your registry namespace
- Install IBM Cloud Developer Tools — Script to install Docker, kubectl, helm, ibmcloud cli and required plug-ins
- Understand the basics of Kubernetes
Create a Kubernetes cluster
IBM Cloud Kubernetes Service delivers powerful tools by combining Docker and Kubernetes technologies, an intuitive user experience, and built-in security and isolation to automate the deployment, operation, scaling, and monitoring of containerized apps in a cluster of compute hosts.
The major portion of this tutorial can be accomplished with a Free cluster. Two optional sections relating to Kubernetes Ingress and custom domain require a Paid cluster of type Standard.
- Create a Kubernetes cluster from the IBM® Cloud catalog.
- For ease of use, check the configuration details like the number of CPUs, memory and the number of worker nodes you get with Lite and Standard plans.
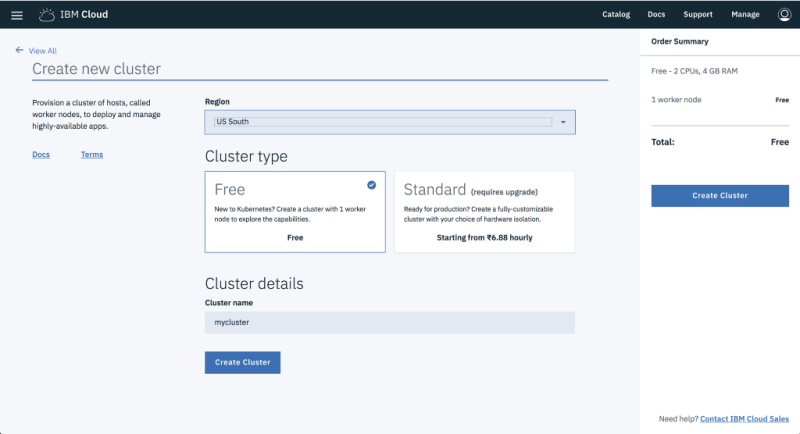
- Select the Cluster type and click Create Cluster to provision a Kubernetes cluster.
- Check the status of your Cluster and Worker Nodes and wait for them to be ready.
Configure kubectl
In this section, you’ll configure kubectl to point to your newly created cluster going forward. kubectl is a command line tool that you use to interact with a Kubernetes cluster.
- Use ibmcloud login to log in interactively. Provide the organization (org), region and space under which the cluster is created. You can reconfirm the details by running ibmcloud target command.
- When the cluster is ready, retrieve the cluster configuration:
ibmcloud cs cluster-config <CLUSTER NAME>
- Copy and paste the export command to set the KUBECONFIG environment variable as directed. To verify whether the KUBECONFIG environment variable is set properly or not, run the following command: echo $KUBECONFIG
- Check that the kubectl command is correctly configured:
kubectl cluster-info
Create a starter application
The ibmcloud dev tooling greatly cuts down on development time by generating application starters with all the necessary boilerplate, build and configuration code so that you can start coding business logic faster.
- Start the ibmcloud dev wizard.
ibmcloud dev create
- Select Backend Service / Web App > Java - MicroProfile / JavaEE > Web App - Java MicroProfile / Java EE Basic to create a Java starter. (To create a Node.js starter instead, use Backend Service / Web App > Basic Web > Node> Web App - Express.js Basic )
- Enter a name for your project.
- Enter unique hostname for your project. The host name is used if you deploy your application as a Cloud Foundry app .mybluemix.net.
- Do not add a DevOps toolchain, select manual deployment.
- Do not add additional services.
This generates a starter application complete with the code and all the necessary configuration files for local development and deployment to cloud on Cloud Foundry or Kubernetes.
Build the application
You can build and run the application as you normally would using mvn for java local development or npm for node development. You can also build a docker image and run the application in a container to ensure consistent execution locally and on the cloud. Use the following steps to build your docker image.
- Ensure your local Docker engine is started.
docker ps
- Change to the generated project directory.
cd <projectname>
- Build the application.
ibmcloud dev build
- This might take a few minutes to run as all the application dependencies are downloaded and a Docker image, which contains your application and all the required environment, is built.
Run the application locally
- Run the container.
ibmcloud dev run
- This uses your local Docker engine to run the docker image that you built in the previous step.
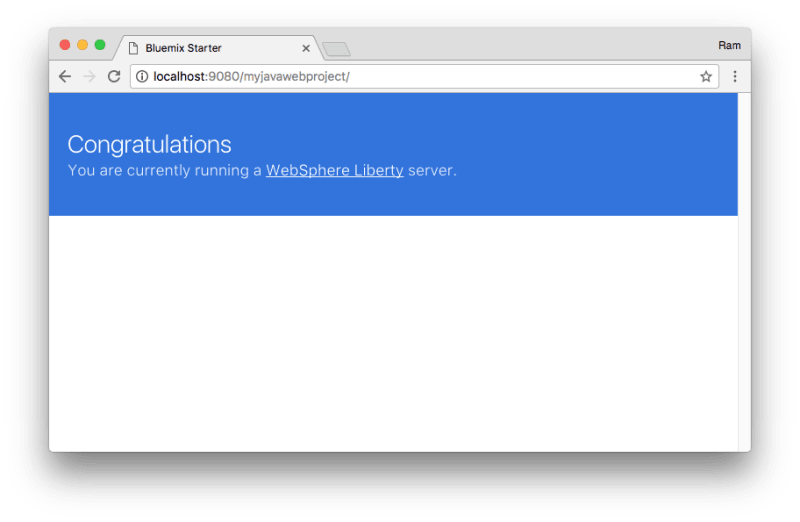
- After your container starts, go to http://localhost:9080/. If you created a Node.js application, use port 3000.
Deploy the application to a cluster using helm
In this section, you first push the Docker image to the IBM Cloud private container registry, and then create a Kubernetes deployment pointing to that image.
- Find your namespace by listing all the namespace in the registry.
ibmcloud cr namespaces
If you have a namespace, make note of the name for use later. If you don’t have one, create it.
- Set MYNAMESPACE and MYPROJECT environment variables to your namespace and project name respectively
export MYNAMESPACE=<NAMESPACE>

export MYPROJECT=<PROJECTNAME>
- Identify your Container Registry (e.g. registry.ng.bluemix.net) by running
ibmcloud cr info
- Set MYREGISTRY env var to your registry.
export MYREGISTRY=<REGISTRY>
- Tag the docker image that is used to create a container to run your app locally
docker images

docker tag <DOCKER IMAGE NAME> ${MYREGISTRY}/${MYNAMESPACE}/${MYPROJECT}:v1.0.0
- For Java app, replace with your project name and for node app with the name of the image ending with -run.
- Push the docker image to your container registry on IBM Cloud
docker push ${MYREGISTRY}/${MYNAMESPACE}/${MYPROJECT}:v1.0.0
- On an IDE, navigate to values.yaml under chartYOUR PROJECT NAME and update the image repositoryvalue pointing to your image on IBM Cloud container registry. Save the file.
- For image repository details, run echo ${MYREGISTRY}/${MYNAMESPACE}/${MYPROJECT}
- Helm helps you manage Kubernetes applications through Helm Charts, which helps define, install, and upgrade even the most complex Kubernetes application. Initialize Helm by navigating to chartYOUR PROJECT NAMEand running the below command in your cluster
helm init
To upgrade helm, run this command helm init --upgrade
- To install a Helm chart, run the below command
helm install . --name ${MYPROJECT}
- You should see ==> v1/Service. Remember the Nodeport which is a 5-digit number(e.g., 31569) under PORT(S). This is your portnumber.
- For the public IP of worker node, run the below command
ibmcloud cs workers <CLUSTER NAME>
- Access the application http://worker-ip-address:portnumber/nameofproject
Don’t stop here. Continue your Kubernetes journey with the following sections
- Use the IBM-provided domain for your cluster or Use your own custom domain
- Monitor application health
- Continuous deployment to Kubernetes

Top comments (0)