Hello ! when it comes to e-commerce applications the one thing we can't avoid is state management with "add to cart" functionality ,
today am going to show you how to build one and also an optimal way to do it without the use of Redux which I see people using a lot , it comes along with a lot of boiler plate which you would want to avoid at all cost.
its all about optimization 😉 let's hit the road.
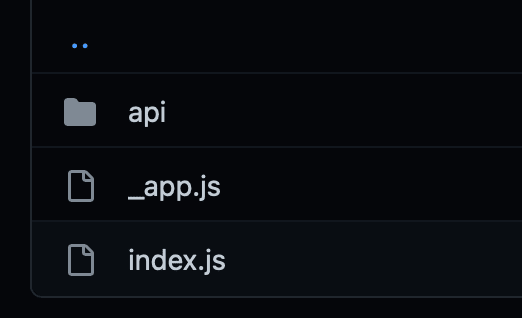
Folder structure
inside pages/
Home Page pages/index.js
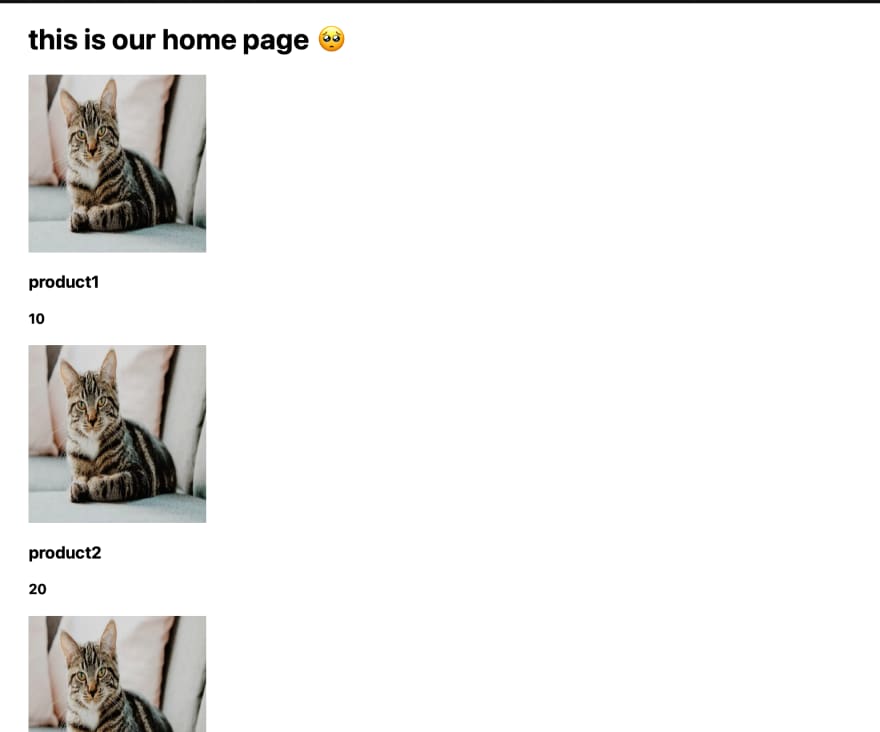
your home page should look something like this for the first time
import Head from 'next/head'
import Image from 'next/image'
import styles from '../styles/Home.module.css'

export default function Home() {
  return (
    <div className={styles.container}>
      <Head>
        <title>Product Cart System</title>
        <meta name="description" content="Generated by create next app" />
        <link rel="icon" href="/favicon.ico" />
      </Head>
        <h1>this is our home page 🥺</h1>
    </div>
  )
}
Set Up Products
Now lets create a dummy products to be able to add to our
basket
import Head from 'next/head'
import Image from 'next/image'
import styles from '../styles/Home.module.css'


const DummyProducts = [
  {
    id: 1,
    name: 'product1',
    price: 10,
    image: 'https://images.unsplash.com/photo-1518791841217-8f162f1e1131?ixlib=rb-1.2.1&ixid=eyJhcHBfaWQiOjEyMDd9&auto=format&fit=crop&w=800&q=60',
    description: 'this is a dummy product description'
  },
  {
    id: 2,
    name: 'product2',
    price: 20,
    image: 'https://images.unsplash.com/photo-1518791841217-8f162f1e1131?ixlib=rb-1.2.1&ixid=eyJhcHBfaWQiOjEyMDd9&auto=format&fit=crop&w=800&q=60',
    description: 'this is a dummy product description'

  },
  {
    id: 3,
    name: 'product3',
    price: 30,
    image: 'https://images.unsplash.com/photo-1518791841217-8f162f1e1131?ixlib=rb-1.2.1&ixid=eyJhcHBfaWQiOjEyMDd9&auto=format&fit=crop&w=800&q=60',
    description: 'this is a dummy product description'

  },
  {
    id: 4,
    name: 'product4',
    price: 40,
    image: 'https://images.unsplash.com/photo-1518791841217-8f162f1e1131?ixlib=rb-1.2.1&ixid=eyJhcHBfaWQiOjEyMDd9&auto=format&fit=crop&w=800&q=60',
    description: 'this is a dummy product description'
  },
]
...
Warming up
good we have set a a DummyProducts variable with 4 objects in an array but we won't see anything yet unless we map each object and display individual item in the 'DummyProducts' array on our screen
...
const DummyProducts = [...] // contains a lot of data 😮💨
export default function Home() {
return (
<div className={styles.container}>
<Head>
<title>Product Cart System</title>
<meta name="description" content="Generated by create next app" />
<link rel="icon" href="/favicon.ico" />
</Head>
<h1 className={styles.heading}>Cart Quantity 🛒 (0)</h1>
<div className={styles.products}>
{DummyProducts.map(product => (
<div className={styles.product} key={product.id}>
<Image src={product.image} width={200} height={200} placeholder={'blur'} blurDataURL={product.image} />
<h3 className={styles.name}>{product.name}</h3>
<p className={styles.description}>{product.description}</p>
<h4 className={styles.price}>${product.price}</h4>
<button className={styles.addToCart}>Add to cart</button>
</div>
))}
</div>
</div>
)
}
lets see what we got.
Yes for Next.js anytime we are using an external url in the in-built next's image component we need to explicitly state
the domain of the url in the next.config.js file, this is
how its done
inside the next.config.js file
/** @type {import('next').NextConfig} */
const nextConfig = {
  reactStrictMode: true,
  images: {
    domains: ['images.unsplash.com'], // <--add this
  },
}

module.exports = nextConfig
this is how its simply done 😁 , now lets see what we have on our screen
Hurray !! 🥳
But wait our page looks ugly lets add some little styling to it.
inside styles/Home.module.css
.container {
  padding: 0 2rem;
}
.products{
  display: grid;
  grid-template-columns: repeat(auto-fit, minmax(200px, 1fr));
  grid-gap: 2rem;
  position: relative;
  z-index: 2;
  width: 70%;
  align-self: center;
  margin:0 auto;
  border:1px solid rgb(193, 193, 193);
  padding:30px;
  background-color: #fff;
  margin-top:100px;
}
.heading{
  font-size:2rem;
  font-weight:bold;
  text-align:center;
  margin-bottom:30px;
  padding:20px;
}
.name{
  font-size:1.5rem;
  font-weight:bold;
  text-align:center;
}
.description{
  font-size:0.9rem;
  text-align:center;
}
.price{
  font-size:1.2rem;
  font-weight:bold;
  text-align:center;
  color: green;
}
.addToCart{
  width:100%;
  padding:14px;
  background-color: #000000;
  color: white;
  border: none;
  cursor: pointer;
}
.addToCart:hover{
  background-color: rgb(69, 69, 69);
  color: #ffffff;
}
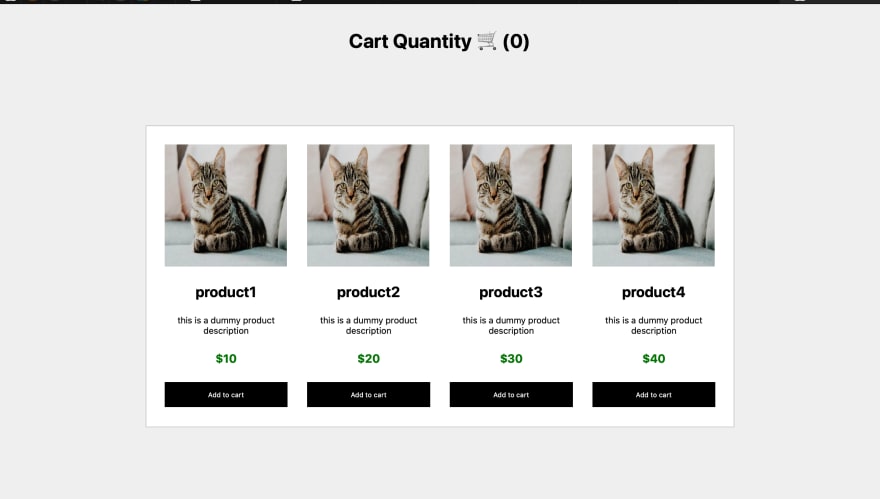
Lets see what we got
Now thats minimal 😎
Lets get to the real deal
we are done with the visualization part
lets get to the real deal
Setting up useContext
“useContext” hook is used to create common data that can be accessed throughout the component hierarchy without passing the props down manually to each level.
for next js, we go to the root of our application and set context there so that data can be accessed throughout our application.
inside pages/_app.js
import '../styles/globals.css'
import React, { createContext } from 'react'

export const CartSystem = createContext()

function MyApp({ Component, pageProps }) {

  return (
    <CartSystem.Provider value={{}}>
      <Component {...pageProps} />
    </CartSystem.Provider>
  )
}

export default MyApp
just like this , our useContext is set into an exported variable CartSystem and has a ready Provider with undefined value, and this is where we set up our reducer and state value.
Setting up the reducer and state object
we will need only one state which will be cart
with initial value of an empty array
for simplicity sake our reducer and states will all be in the same file.
import '../styles/globals.css'
import React, { createContext,useReducer } from 'react'

export const CartSystem = createContext()


const initailState = {
    cart: []
}

function MyApp({ Component, pageProps }) {

  const Reducers = ()=>{

  }

  const [state,dispatch] = useReducer(Reducers,initailState)

  return (
    <CartSystem.Provider value={{}}>
      <Component {...pageProps} />
    </CartSystem.Provider>
  )
}

export default MyApp
Now this is an update of our pages/_app.js file
the structure of the Reducer function has been created and and an initialState object as well .
The useReducer hook returns two values , a dispatch and a state
I will drop a link to read more about useReducer Hook incase you are new to it .
now lets pass these data as value through our context so that
our application can get access to all of the data anywhere
...

 return (
    <CartSystem.Provider value={{state,dispatch}}>
      <Component {...pageProps} />
    </CartSystem.Provider>
  )

...
with this we can access what ever is in the state in any component in our application
Accessing state Data from the pages/index.js file
to access data from our product page we need to use the
useContext hook to grab data coming from the CartSystem.Provider in our pages/_app.js file
import Head from 'next/head'
import Image from 'next/image'
import styles from '../styles/Home.module.css'

import React,{useContext} from 'react'
import {CartSystem} from './_app'

const DummyProducts = [...]

export default function Home() {

  const {state,dispatch}  = useContext(CartSystem)

  return (
    <div className={styles.container}>
      <Head>
        <title>Product Cart System</title>
        <meta name="description" content="Generated by create next app" />
        <link rel="icon" href="/favicon.ico" />
      </Head>
      <h1 className={styles.heading}>Cart Quantity 🛒 (0)</h1>
      <div className={styles.products}>
        {DummyProducts.map(product => (

          ...
javascript
we import useContext and CartSystem from react and _app.js respectively.
then we grab the data using the useContext hook by passing the
CartSystem as an argument in the useContext hook and distructuring the values state and dispatch from it.
since our initial state is an empty array we won't be able to display anything from it lets try creating a function to add items to cart.
...

export default function Home() {

  const {state,dispatch}  = useContext(CartSystem)

  const addToCart =(product)=>{
      dispatch({type:'ADD_TO_CART',payload:product})
  }

  return (

...
we create a function addToCart and assign a dispatch with action type 'ADD_TO_CART' and a payload of the item that will be selected , now inside our reducer at pages/_app.js file lets create the 'ADD_TO_CART' action so that our function can be implemented
...

function MyApp({ Component, pageProps }) {

  const Reducers = (state,action)=>{

    switch(action.type){
        case 'ADD_TO_CART':
           const {id, name, price,description} = action.payload
            const cartItem = state.cart.find(item => item.id === id)
            if (cartItem) {
                return {
                    ...state,
                    cart: state.cart.map(item => item.id === id ? {...item, quantity: item.quantity + 1} : item)
                }
            } else {
                return {
                    ...state,
                    cart: [...state.cart, {id, name, price, description, quantity: 1}]
                }
            }
        default:
        return state;
    }


  }

  const [state,dispatch] = useReducer(Reducers,initailState)
...
now the reducer function takes two parameters state and action, we use a switch statement to check the action and perform a task base on the action , in our case we are listening for the ADD_TO_CART action.
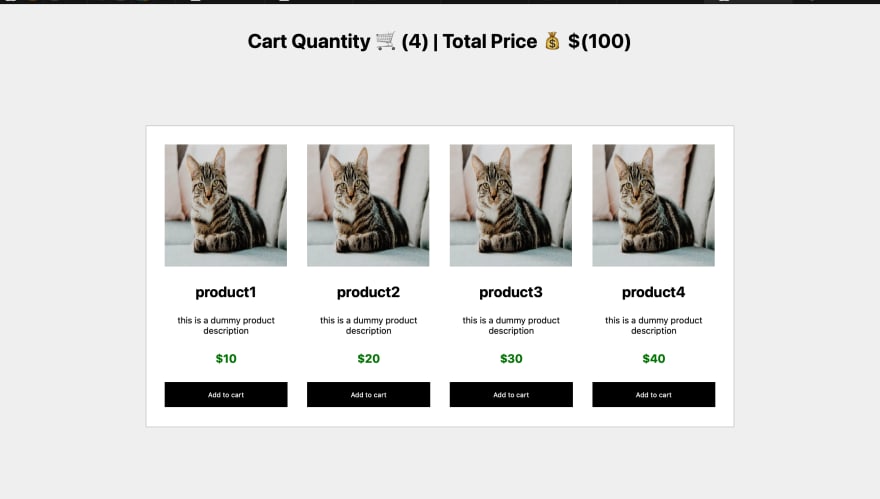
now that the ADD_TO_CART function is set let us implement this action on our Add to cart button and see what we got
import Head from 'next/head'
import Image from 'next/image'
import styles from '../styles/Home.module.css'
import React,{useContext,useEffect} from 'react'
import {CartSystem} from './_app'

const DummyProducts = [...]

export default function Home() {

  const {state,dispatch}  = useContext(CartSystem)

  const addToCart =(product)=>{
      dispatch({type:'ADD_TO_CART',payload:product})
  }

  // add all the products price in cart
  const total = state.cart.reduce((total,item)=>{
    return total + item.price * item.quantity
  },0)

  // add all product quantity items
  const totalItems = state.cart.reduce((total,item)=>{
    return total + item.quantity
  },0)

  return (
    <div className={styles.container}>
      <Head>
        <title>Product Cart System</title>
        <meta name="description" content="Generated by create next app" />
        <link rel="icon" href="/favicon.ico" />
      </Head>
      <h1 className={styles.heading}>Cart Quantity 🛒 ({totalItems}) | Total Price 💰 $({total})</h1>

      <div className={styles.products}>
        {DummyProducts.map(product => (
          <div onClick={()=>addToCart(product)} className={styles.product} key={product.id}>
            <Image src={product.image} width={200} height={200} placeholder={'blur'} blurDataURL={product.image} />
            <h3 className={styles.name}>{product.name}</h3>
            <p className={styles.description}>{product.description}</p>
            <h4 className={styles.price}>${product.price}</h4>
            <button className={styles.addToCart}>Add to cart</button>
          </div>
        ))}
      </div>
    </div>
  )
}
Finally
now we did some changes in our pages/index file
I added two functions that would find the total quantity and the total price of the products
then finally added the addToCart function to the add to cart button and now we have our selves a fully working add to cart system
*Now we have build a minimal add to cart system without installing any libraries or using redux our code is still in its minimal state , the same goal can be accomplished with redux but why the stress ? *
let me know if you want the full continuation of this lesson
through the commentsbelow is the link to the complete application repository
Complete Project Repository


Top comments (2)
Nice tutorial you can improve the readability by adding Markdown syntax highlighting to the code blocks so its not all one colour.
thanks a lot i have added that 😊