This article was originally published on the DeadSimpleChat Blog: Build Electron App with Vue in 3 easy steps
In this article we will be building a Electron App in Vue. I am going to show you step by step way of how you can build the electron app in Vue.js
It is pretty easy to build electron app in Vue js first we will be scaffolding a Electron app.
Step 1: Scaffolding a Electron App
To build a electron app the first step is you need latest LTS versions of NodeJs and NPM. Type the below commands to check if you have NodeJs and NPM installed
node -v
npm -v
Type the below command to create a new directory and initialize a new project
mkdir vue-electron-app && cd vue-electron-app
npm init
When you npm init you will be presented with a lot of options. you can specify the settings as you wish.
💡
New to DeadSimpleChat? It's a turn key chat that you can easily add to your website or App —without any complicated code. For Virtual / Live events, SaaS App, Social Platform, Education, Gaming, Finance Sign Up for Free
The only thing you need to remember is to make the entry point main.js and not index.js
package name: (vue-electron-app)
version: (1.0.0)
description:
entry point: (index.js) main.js
test command:
git repository:
keywords:
author: DeadSimpleChat Team
license: (ISC)
About to write to /home/ali/Documents/work/vue-electron-app/package.json:

{
  "name": "vue-electron-app",
  "version": "1.0.0",
  "description": "",
  "main": "main.js",
  "scripts": {
    "test": "echo \"Error: no test specified\" && exit 1"
  },
  "author": "DeadSimpleChat Team",
  "license": "ISC"
}


Is this OK? (yes)
Now open the code in your favorite editor. I am using VS Code you can see the package.json
Now let us install the electron.js type the below command to install and save the electron as a dependency in the package.json
npm install --save-dev electron
Also, let us add a script in the package.json to start the electron app
  "scripts": {
    "start": "electron ."
  },
So the package.json looks like this
{
  "name": "vue-electron-app",
  "version": "1.0.0",
  "description": "",
  "main": "main.js",
  "scripts": {
    "test": "echo \"Error: no test specified\" && exit 1",
    "start": "electron ."
  },
  "author": "DeadSimpleChat Team",
  "license": "ISC",
  "devDependencies": {
    "electron": "^22.0.0"
  }
}
Now, we stated that we need the entry point to be main.js but have not created the main.js file. Let us create it in the root folder
Also, let us add a index.html file along with the main.js file. Add the below code in the index.html file
<!DOCTYPE html>
<html>
  <head>
    <meta charset="UTF-8">
    <!-- https://developer.mozilla.org/en-US/docs/Web/HTTP/CSP -->
    <meta http-equiv="Content-Security-Policy" content="default-src 'self'; script-src 'self'">
    <title>Hello World!</title>
  </head>
  <body>
    <h1>Hello World!</h1>
  </body>
</html>
In the main.js file import the app and browserWindow module from electron. let us add a createWindow() function that loads index.html into a new BrowserWindow instance.
then call the createWindow function to open the window.
Let us run the command npm start and you can see the app has opened the window along with the webpage
The main.js file looks like
const { app, BrowserWindow } = require('electron')

const createWindow = () => {
    const win = new BrowserWindow({
      width: 800,
      height: 600
    })

    win.loadFile('index.html')
  }

  app.whenReady().then(() => {
    createWindow()
  })
Managing the window lifecycle
To close the electron app when the window is closed paste the below code in the main.js file
for Windows and Linux
app.on('window-all-closed', () => {
  if (process.platform !== 'darwin') app.quit()
})
for mac OS
app.whenReady().then(() => {
  createWindow()

  app.on('activate', () => {
    if (BrowserWindow.getAllWindows().length === 0) createWindow()
  })
})
Now when you close the window the app will close and the main.js file looks like
const { app, BrowserWindow } = require('electron')

const createWindow = () => {
    const win = new BrowserWindow({
      width: 800,
      height: 600
    })

    win.loadFile('index.html')
  }

  app.whenReady().then(() => {
    createWindow()
  })

  // for windows and linux
  app.on('window-all-closed', () => {
    if (process.platform !== 'darwin') app.quit()
  })

  // for mac os
  app.whenReady().then(() => {
    createWindow()

    app.on('activate', () => {
      if (BrowserWindow.getAllWindows().length === 0) createWindow()
    })
  })
Step 2 : Adding Vue to Electron Application
Now, that we have created an electron application we need to add Vue to it.
There are two methods of adding Vue to our electron application I will show you both of these methods below. Then we will be building a chat application using electron and Vue
Adding Vue via CDN
To add Vue via CDN open the index.html file and add the below code
<script src="https://unpkg.com/vue@3/dist/vue.global.js"></script>
After adding the script tag we need to console to debug our vue application. In the main.js file in the createWindow function below the win.loadfile() add the following line
win.webContents.openDevTools()
So the main.js looks like
const { app, BrowserWindow } = require('electron')

const createWindow = () => {
    const win = new BrowserWindow({
      width: 800,
      height: 600
    })

    win.loadFile('index.html')
    win.webContents.openDevTools()
  }

  app.whenReady().then(() => {
    createWindow()
  })

  // for windows and linux
  app.on('window-all-closed', () => {
    if (process.platform !== 'darwin') app.quit()
  })

  // for mac os
  app.whenReady().then(() => {
    createWindow()

    app.on('activate', () => {
      if (BrowserWindow.getAllWindows().length === 0) createWindow()
    })
  })
This will open the dev tools besides the app when you launch the app
When you open the app you will see in the console that there is an error. Electron has refused to load the CDN because of content security
let's fix that. In the index.html file edit the content-security meta tag and add the vuejs cdn script to it
<meta http-equiv="Content-Security-Policy" content="default-src 'self'; script-src https://unpkg.com/vue@3/dist/vue.global.js;">
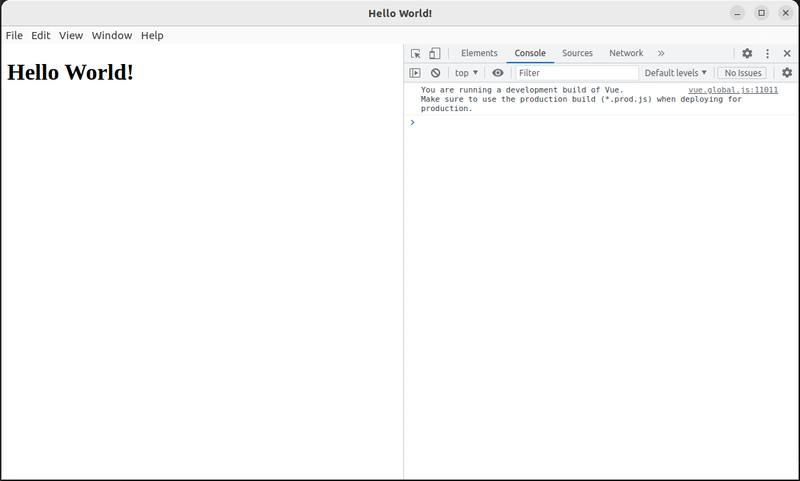
Once you add it you can see that the Vue Js is loaded in the electron application
Step 3 : Building the Electron App with Vue: Chat Application
Now that we have started the electron application and added Vue to it. We can start working on building an application
💡 New to DeadSimpleChat? It's a turn key chat that you can easily add to your website or App —without any complicated code. For Virtual / Live events, SaaS App, Social Platform, Education, Gaming, Finance Sign Up for Free
We will be building a chat application with Electron and Vue Js.
First let us initialize the Vue Application
Replace the index.html with the below code
What are we doing here. We have initialized a hello world application with Vue. We added a div tag inside the body assigned it with the id='app' and in the script tag below we have initialized the createApp and returned the message hello Vue
Now, this will not work because the electron does not process the script tags in the index.html as it is. We need to assign the 'self' unsafe-eval option in the content security meta for the electron app to process the script tag
<meta http-equiv="Content-Security-Policy" content="default-src 'self'; script-src https://unpkg.com/vue@3/dist/vue.global.js 'unsafe-inline' 'self' 'unsafe-eval' ">
this should now work. You can see the hello Vue message when you start the application
Now, let us build the chat application
Getting a Chat Provider
To add chat to our Vue application we need a chat provider. We recommend DeadSimpleChat
Go to the DeadSimpleChat website and create a free account by click on the Get Started for Free button
then once you have created an account you will land up on the Dashboard page.
There click on the create chat room button to create a chat room
Next on the create chat room page give the chat room a name and click on the save button to create the chat room
Then on the General settings page click on the embed info to get the embed information
On the embed info page copy the embed code. We will need that to add chat to our vue application
Adding Chat code to the Vue Application
On our Vue Application open the index.html page and paste the embed code where you want the chat to appear inside the body tag
When you add the tag and restart the application you will see that the chat has not appeared in the application.
This is because we have not whitelisted the chat room URL in the content security. If you look at the embed code you can extract the url from the code like for example
iframe url:
<iframe src="https://deadsimplechat.com/CGOC0byXC" width="100%" height="600px"></iframe>
and we can take out the https url from this code that would be
https url:
https://deadsimplechat.com/CGOC0byXC
Add the iframe src tag along with the http url that we just extracted to the content security meta tag
The content security meta tag looks like this:
<meta http-equiv="Content-Security-Policy" content="frame-src https://deadsimplechat.com/CGOC0byXC; default-src 'self'; script-src https://unpkg.com/vue@3/dist/vue.global.js 'unsafe-inline' 'self' 'unsafe-eval' ">
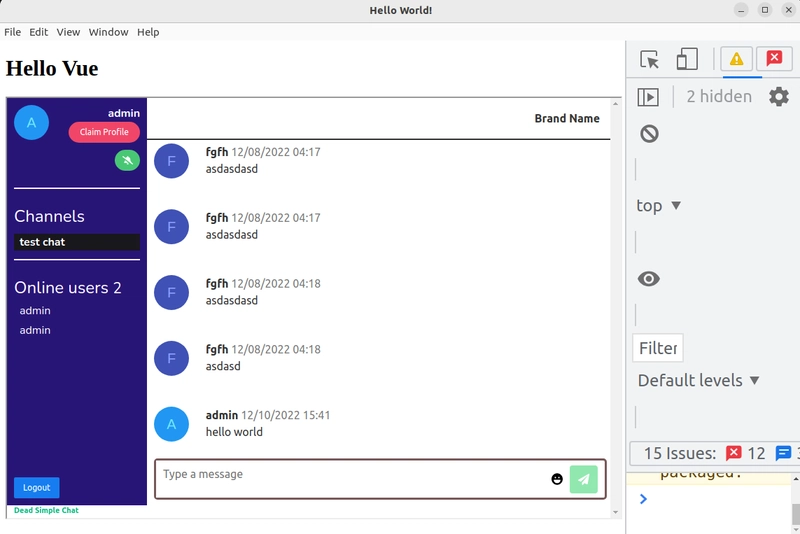
And now when you re-load the app you will see that the chat has loaded.
And now that we have successfully created a chat application with electron and vue. we do not need the console so let us close the console on the side panel
go to main.js file and comment out the below code
win.webContents.openDevTools();
Now when you restart the app you can see the final application
Now the main.js and the index.html looks like
<!DOCTYPE html>
<html>
  <head>
    <meta charset="UTF-8">
    <!-- https://developer.mozilla.org/en-US/docs/Web/HTTP/CSP -->
    <meta http-equiv="Content-Security-Policy" content="frame-src https://deadsimplechat.com/CGOC0byXC; default-src 'self'; script-src https://unpkg.com/vue@3/dist/vue.global.js 'unsafe-inline' 'self' 'unsafe-eval' ">
    <script src="https://unpkg.com/vue@3/dist/vue.global.js"></script>
    <title>Hello World!</title>
  </head>
  <body>
    <div id="app">
        <h1>{{message}}</h1>
        <iframe src="https://deadsimplechat.com/CGOC0byXC" width="100%" height="600px"></iframe>
    </div>
    <script>
        const { createApp } = Vue
            createApp({
                data() {
                    return {
                        message: 'Hello Vue'
                 }
                }
    }).mount('#app')
    </script>
  </body>
</html>
and the main.js file looks like
const { app, BrowserWindow } = require('electron')

const createWindow = () => {
    const win = new BrowserWindow({
      width: 800,
      height: 600
    })

    win.loadFile('index.html')
    // win.webContents.openDevTools()
  }

  app.whenReady().then(() => {
    createWindow()
  })

  // for windows and linux
  app.on('window-all-closed', () => {
    if (process.platform !== 'darwin') app.quit()
  })

  // for mac os
  app.whenReady().then(() => {
    createWindow()

    app.on('activate', () => {
      if (BrowserWindow.getAllWindows().length === 0) createWindow()
    })
  })
Thus we have created an electron and vue application
Conclusion
DeadSimpleChat is a Pre-built Chat solution for Group chat, 1-1 Chat, Live Streaming, Virtual events, education, SaaS, Gaming and any other use-case
With features like
10 Million Concurrent users Plan
Chat API
Webhooks
Chat SDK
99.999% Uptime
It is the best chat in the world.
We have created an electron app with Vue and added Chat to it. With DeadSimpleChat we can also easily initialize the DeadSimpleChat SDK in the electron app and use the SDK methods to control the application
Chat application can also be customized and controlled through the UI based tools. So, it is truly flexible you can use it as a no-code chat or you can write code and easily use the chat through our APIs and SDK and webhooks.
You can learn more about DeadSimpleChat here


Top comments (0)