A Create React App (CRA) templates were introduced quite recently and there is not much info present on how to create them. In this article, I'm going to share my experience of developing a custom template and releasing it to the npm.
CRA templates are a way to automate the routine setup. Basic Create React App CLI execution generates an app without any React Router, linter, prettier setup, so you need to add all of these dependencies on your own and configure them, but why waste time when you know from the beginning that you'll be building an app with Redux, for example. Templates could help with that. It's a way to generate an app with all the deps and tools you need. Of course, if such a template is present ;)
CRA basic templates
Currently, there are only two official CRA templates present. cra-template and cra-template-typescript
you could generate CRA from a template by simply providing --template flag.
For example:
npx create-react-app my-app --template typescript

# or

yarn create react-app my-app --template typescript
Building your own CRA template
1. Starting a project
To start building CRA template I would start with generating a new project with CRA itself
yarn create react-app your-cra-template-name
Adjust package name in your package.json with cra-template-[your-custom-template-name].
Note, that it should start with the cra-template- prefix. This way CRA knows that this would be an actual template.
2. Remove deps and setting up tools
Remove everything you don't need from the CRA app and add everything you need.
3. Create a template
When your project is ready to become a template you need to do some preparation.
3.1 Create template/ folder
From your project root create template/ folder.
mkdir template/
3.2 Add gitignore file to the template/ folder
Add gitignore into the created template folder template/gitignore. You can copy gitignore from the CRA but don't forget to remove the . in front of the file.
cp .gitignore template/gitignore
Please note: it is important that the gitignore file inside the template folder should be without "." in front!
This way CRA would know that you're creating a template and it will replace this file later. Otherwise, you'll receive build failures.
3.3 Create template.json at your project root
List all of your dependencies and scripts that you need for the new app created from your template to have. For example
{
  "dependencies": {
    "@types/enzyme": "^3.10.4",
    "@types/jest": "^24.9.0",
    "@types/node": "^12.0.0",
    "@types/react": "^16.9.0",
    "@types/react-dom": "^16.9.0",
    "@types/react-redux": "^7.1.5",
    "@types/react-router-dom": "^5.1.3",
    "@typescript-eslint/eslint-plugin": "^2.16.0",
    "@typescript-eslint/parser": "^2.16.0",
    "enzyme": "^3.11.0",
    "enzyme-adapter-react-16": "^1.15.2",
    "eslint": "^6.8.0",
    "eslint-config-airbnb-typescript": "^6.3.1",
    "eslint-config-prettier": "^6.9.0",
    "eslint-plugin-import": "^2.20.0",
    "eslint-plugin-jsx-a11y": "^6.2.3",
    "eslint-plugin-prettier": "^3.1.2",
    "eslint-plugin-react": "^7.17.0",
    "eslint-plugin-react-hooks": "^2.3.0",
    "prettier": "^1.19.1",
    "react-redux": "^7.1.3",
    "react-router-dom": "^5.1.2",
    "react-scripts": "3.3.0",
    "redux": "^4.0.5",
    "redux-devtools-extension": "^2.13.8",
    "typescript": "~3.7.2"
  },
  "scripts": {
    "lint": "eslint --ext .js,.jsx,.ts,.tsx ./",
    "fix": "eslint --ext .js,.jsx,.ts,.tsx  --fix ./"
  }
}
3.4 Copy src/ and public/ folders into your template/ folder
cp -a ./src/. template/src && cp -a ./public/. template/public
3.5 Copy any configuration files that you might want to include with your template
For example
cp .eslintignore .eslintrc .prettierrc tsconfig.json README.md template/
Prepare the template for publishing to the NPM
Prepare your package.json
Add the license, author, description, description, keywords, repository URL, bugs URL. You find a good example in my template package.json
Add main and files properties
It's important to point CRA where to look while building your app from the template. Adding 'main' and files points to proper files.
{
  "main": "template.json",
  "description": "A quick start Create React App template with React Router, Redux, TypeScript, Enzyme and custom ESlint configurations",
  "keywords": [
    "react",
    "create-react-app",
    "cra-template",
    "template",
    "enzyme",
    "eslint",
    "redux",
    "react-redux",
    "react-router",
    "react-router-dom",
    "typescript",
    "prettier"
  ],
  "files": ["template", "template.json"],
  "repository": {
    "type": "git",
    "url": "https://github.com/alexandr-g/cra-template-typescript-redux",
    "directory": "/"
  }
}
I'd suggest using pre-publish script to make it easier for incremental template updates
For your convenience, you can add pre-publish scripts
{
  "clean-files": "rm -rf ./template/public ./template/src && rm -f ./template/.eslintrc",
  "copy-files": "cp -a ./src/. template/src && cp -a ./public/. template/public && cp .eslintrc template/",
  "prepublishOnly": "yarn clean-files && yarn copy-files"
}
Publishing to the NPM
When everything is ready you can publish your package to the NPM.
Create npm account
If you haven't already, navigate to the npm sign up and create an account.
Login to npm via terminal
From your project root login to npm with your credentials
npm login
Publish your package to the npm with public access
npm publish --access public
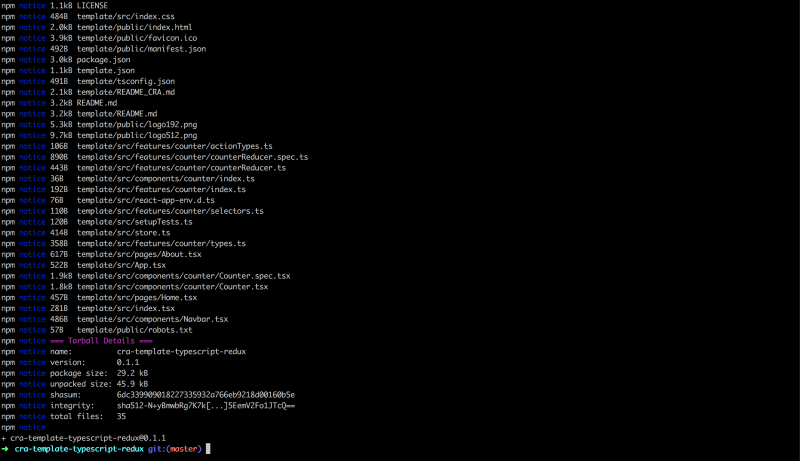
This is how successful release looks like.
If the name of your package is already taken you'll receive an error on this step - just try another name. When publishing was successful you can start using your template. Happy coding!
A quick start Redux + TypeScript Create React App template
I created an opinionated quick start Create React App (CRA) template with configured Redux, TypeScript, React Router, Enzyme and custom ESlint configuration.
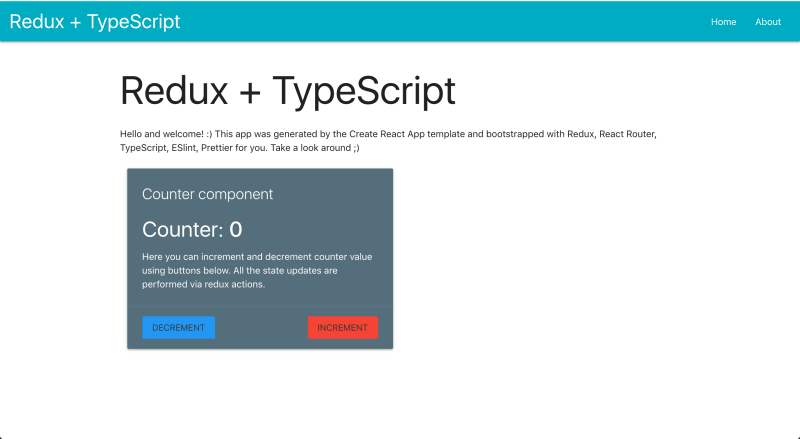
Just install and play with it already. It configures TypeScript with Redux project with tons of useful tools and configurations, like automatic code formatting and ESLint setup for the TypeScript.
Usage
npx create-react-app your-project-name --template typescript-redux
Or
yarn create react-app your-project-name --template typescript-redux
npx command installs the most recent stable version of CRA from npm.
--template parameter points to this template, note that cra-template- prefix is omitted.
Motivation
You know the pain. You start a new project from scratch and need to configure it again and again. It needs routing, ok you setup Router, then you need Redux - ok, oh 😩 Redux boilerplate is taking so much time to type. Wait... what if you could have all the tools you want just from the beginning? I want to focus on building amazing projects and not spending hours configuring them. That's why I've created this template. It's here for you to use.
Try now!
Redux + TypeScript Create React App template on GitHub
Redux + TypeScript Create React App template on NPM
Originally posted on oleks.pro

Top comments (2)
awesome!
Great job