
This article is intended for those who already have some experience with React and are complete beginners to React Native. After reading this article you can expect to be able to create a React Native application and start to explore some of the differences you'll run into while developing in React Native vs. traditional React. I have included links within this article as well as a list at the bottom for your reference. I hope you enjoy learning React Native with me. Let's get started!
1. Setup
There are 2 types of setup instructions for React Native - Expo CLI and React Native CLI. Let's go over the differences between these 2.
React Native CLI
- only available for Mac users
- more options to customize native features, especially iOS
- more of a learning curve
- requires the use of XCode or Android Studio
Expo CLI
- available for Windows, Linux and Mac
- limitations on features/customization
- allows you to share projects in development (Android only)
- simplifies and does a lot of the work for you, like with deploying to app stores. No need to use XCode or Android Studio
There used to be a third option, Create React Native App (CRNA), but that has been merged with Expo.
You can read more about Expo vs. React Native CLI from a smarter person here: https://levelup.gitconnected.com/expo-vs-react-native-cli-a-guide-to-bootstrapping-new-react-native-apps-6f0fcafee58f
I currently am using Expo to develop with React Native which seems to be the preferred method for most developers I've talked to. This blog post is geared towards users who chose the Expo CLI Quickstart instructions. This guide should work for all the major OS: Windows, Mac and Linux.
Helpful hint for Windows users: I ran into a lot of issues with Gitbash and found that I had a much better experience using Powershell. I highly recommend using Powershell to run your expo/react native commands instead of Gitbash.
2. Creating a new application
Now that you've set up your expo environment, let's spin up a new React Native App! Simply make sure you're in your project directory (the folder where you keep all your code projects). Let's try inputting this command in the terminal:
expo init RNToDoApp
You can currently use uppercase letters in the application name, unlike regular React.
You're going to get a response that looks like this:
? Choose a template: (Use arrow keys)
  ----- Managed workflow -----
> blank               minimal dependencies to run and an empty root component
  blank (TypeScript)  same as blank but with TypeScript configuration
  tabs                several example screens and tabs using react-navigation
  ----- Bare workflow -----
  bare-minimum        minimal setup for using unimodules
For our purposes let's leave the arrow selection on the first option. If you want to know more about the differences between the templates, let me know and I can try to learn more about that in a future post.
Now you should see a prompt telling you that your configuration is almost completed. Click in the incomplete section for name and provide a name for your application. This entry can include spaces.
? Please enter a few initial configuration values.
  Read more: https://docs.expo.io/versions/latest/workflow/configuration/ » 50% completed
 {
   "expo": {
     "name": "<The name of your app visible on the home screen>",
     "slug": "RNToDoApp"
   }
 }
You'll receive another prompt asking:
Yarn v1.15.2 found. Use Yarn to install dependencies? (Y/n)
Unless you have a have a problem with using yarn, you can say "y" here.
3. Fire it Up 🔥
You should have received a success message and instructions for firing up your new React Native App:
Your project is ready at C:\Users\Manda\Git\RNToDoApp

To get started, you can type:

  cd RNToDoApp
  yarn start
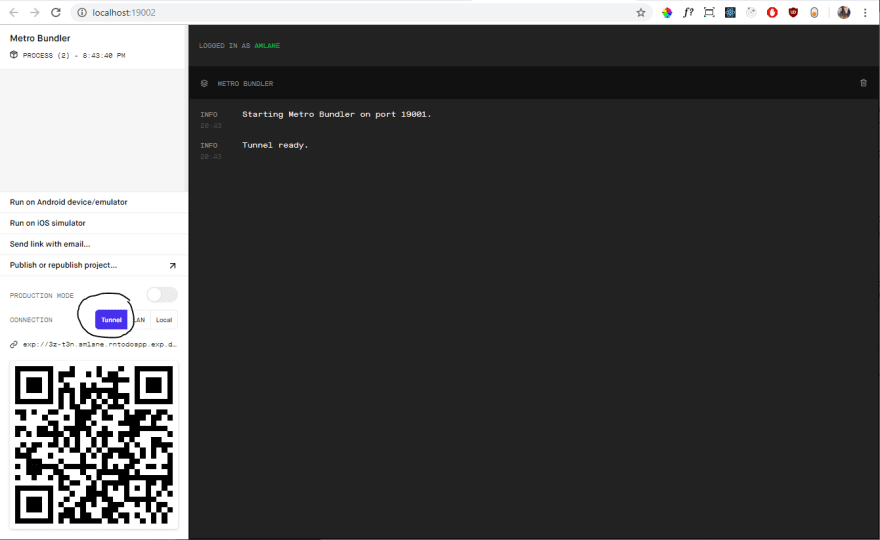
After you follow the instructions above, you'll notice a couple things happen. First, the Expo Developer tool will start up in your default browser. You'll also see a QR code in your terminal. This is where things start to get fun. 😃
Based on my own experiences, the experiences of others and the almighty Stack Overflow, I would select "Tunnel" instead of LAN (the default setting) in the Expo Developer Tool for the best experience.
Now you just open your camera, scan the code and... Oh we have to download an app now. 😵
Go to the App store on your phone and down the app called "Expo." Make sure you sign in to your account (create one if you haven't already). I would leave notifications on for Expo since it makes opening a project faster. Here are what the icons look like for Android and iOS, respectively:

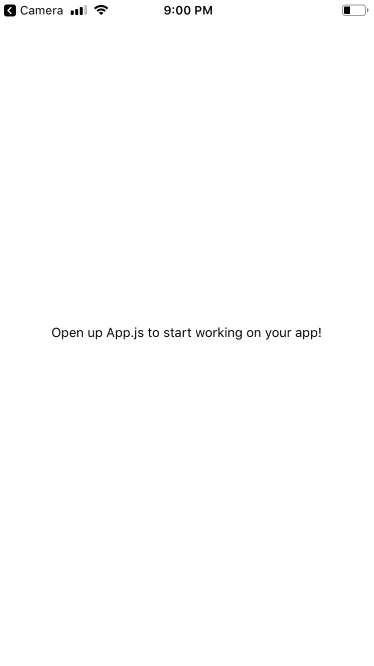
Okay now we can open our app! 🎉 Scan the Tunnel QR code in your Expo developer tools. You should get a notification on your phone to Open the Project in Expo. Here is what your project will look like once it's loaded:
4. Let's start to look at the code
Open up the RNToDoApp directory in your favorite code editor. I use VSCode.
Navigate to the App.js file. Here is what you'll see:
import React from 'react';
import { StyleSheet, Text, View } from 'react-native';

export default function App() {
  return (
    <View style={styles.container}>
      <Text>Open up App.js to start working on your app!</Text>
    </View>
  );
}

const styles = StyleSheet.create({
  container: {
    flex: 1,
    backgroundColor: '#fff',
    alignItems: 'center',
    justifyContent: 'center',
  },
});
Not so different from the App.js we see in a normal React app. There are some differences though. Notice the imports at the top bringing in Stylesheet, Text and View.
Let's look at Text and View first. This is still JSX, but rather than using HTML tags, in React Native you use built in components. In this case, <Text> is a built-in component that displays some text, while <View> is like a <div> or <span>.
Let's look at Stylesheet now. If you notice at the bottom of your App.js file - by chaining our Stylesheet component with the .create() method and then assigning it to the styles variable, we are able to pass our styles through the style prop that's available on most React Native components (more on that in a moment).
As you may have noticed, the CSS property names are camel cased in React Native (much like styled components) and don't include the all the same features you might be used to, like linear-gradient. You'll start to notice there are other differences as well, such as React Native doesn't use "pixels" it uses "points."
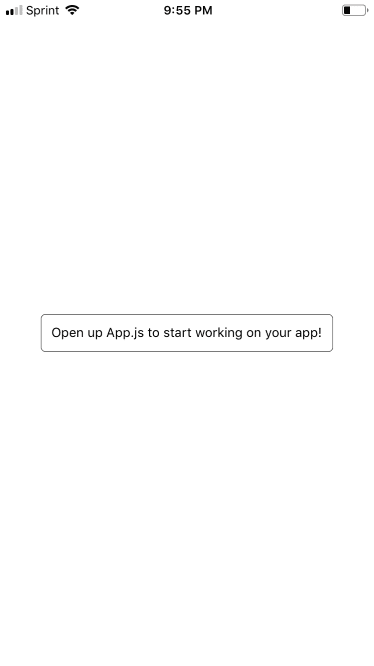
Our app is pretty boring right now. I think it needs some styling. Let's add a border around the text to make it really pop.
First we'll need to create another object and add it to our Stylesheet like this:
const styles = StyleSheet.create({
  container: {
    flex: 1,
    backgroundColor: '#fff',
    alignItems: 'center',
    justifyContent: 'center',
  },
  //  Here we are adding a "class" of textBox with properties to create our border.
  textBox: {
    borderRadius: 5,
    borderWidth: 0.5,
    borderColor: '#000',
    padding: 10
  }
});
You'll notice if you save, nothing happens. That's because we need to apply our style to the Text component on line 7, like this:
 export default function App() {
  return (
    <View style={styles.container}>
      <Text style={styles.textBox}>Open up App.js to start working on your app!</Text>
    </View>
  );
}
Now when you save your App.js file, you'll notice the expo app on your phone rebuilds and you can see your stylish new border.
Okay, you're right. Our app is looking great... but it's still pretty boring. We need to add some functionality! Let's add a button that sends us a secret message.
Let's start by importing the "Button" component. Now would be a good time to start exploring how the Button component is different from a <button> you are used to working with in HTML.
First of all,
<Button />is self closing and requires a title prop that is a string.In React you're used to using the prop
onClickfor event handling. In React Native, you'll be usingonPressinstead.Buttons do not have a style prop and are default styled (based on if you are using an Android or iPhone). You can use the "color" prop to change the color of your button though. Find more details about this under "Handling Touches" in the React Native docs.
So why would we use the <Button /> component, you ask? Well - you wouldn't.
We'll talk more about the components we use to handle touchables in Part II.
Now let's finish this up by creating a function that will alert our phones with a top secret message. See my code below as a reference.
export default function App() {

  secretMsg = () => {
    alert('Drink more Ovaltine')
  }

  return (
    <View style={styles.container}>
      <Text style={styles.textBox}>Open up App.js to start working on your app!</Text>
      <Button title='Press Me' color='pink' onPress={secretMsg} />
    </View>
  );
}
After you save this code you'll see you have a button that, if pressed, will send you an alert with your secret message.
If you made it this far - great job! You're done! You really deserve a high five.
Thank you for reading. In the meantime before I release Part II, you can learn more about React Native with these resources:
How to build a weather app in React Native, by Nathan Thomas: https://medium.com/hackernoon/building-your-first-react-native-app-77a192734ff1
React Native documentation: https://facebook.github.io/react-native/docs/getting-started

Top comments (4)
great post one thing that should be continued after this post is to learn how that layout and style work that help easily visualize and I wrote many tutorials about rn layout
React Native Travel Article App UI Clone #1 : Initial setup
kris ・ Nov 4 '19 ・ 8 min read
React Native Travel Article App UI Clone #2 : Destinations Section
kris ・ Nov 5 '19 ・ 11 min read
Thank you for sharing! I will definitely check them out. :)
Hello kris, please get back to me when avalable please. I am looking for some help on developing React, Node js On demand App.. Thanks
Louissbiz @g
Wow thanks for this guide! I searched the entire internet just to find alot of guide not beginner friendly at all . Thanks alot for this man. Really helped alot. Almost gave up until i found your guide