Amazon Inspector
Is a vulnerability management service that continuously scans your AWS workloads for vulnerabilities, automatically discovers and scans Amazon EC2 instances and container images residing in Amazon Elastic Container Registry (Amazon ECR) for software vulnerabilities and unintended network exposure.
An Amazon Inspector assessment covers:
Network Reachability.
Common vulnerabilities and exposures (CVE).
Center for Internet Security (CIS) benchmarks – currently only with Amazon inspector classic.
Security best practices – currently only with Amazon inspector classic.
Source: Amazon Inspector Amazon Inspector Classic
In this demo I will walk you through a step-by-step guide on creating Linux and Windows EC2 instances, installing Inspector agent on them, enabling and configuring Amazon Inspector classic and Amazon Inspector then downloading a full report of all findings, so let’s get started!
First let’s create a new Linux EC2 instance.
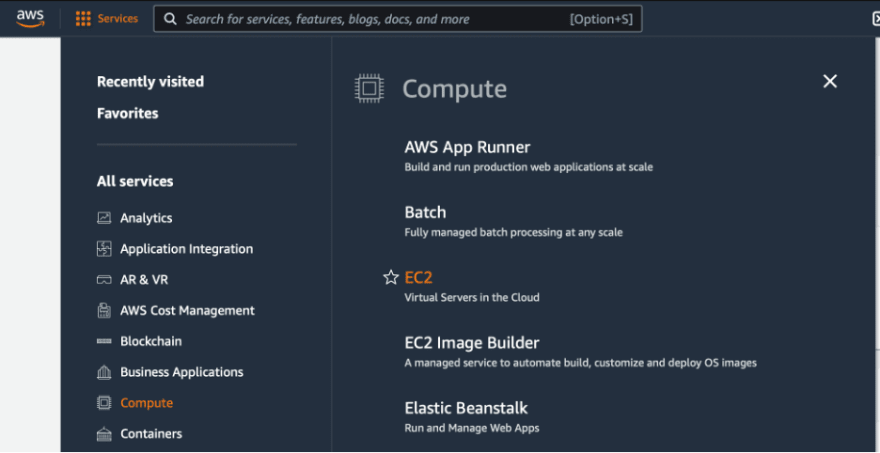
Login to your AWS account, click Services and you will find EC2 under Compute section.
It will take you to EC2 dashboard page.
On the left side of the screen you will find instances click on it, then click Launch instances.
For this demo, you can select one of the free tier Amazon Linux AMI’s.
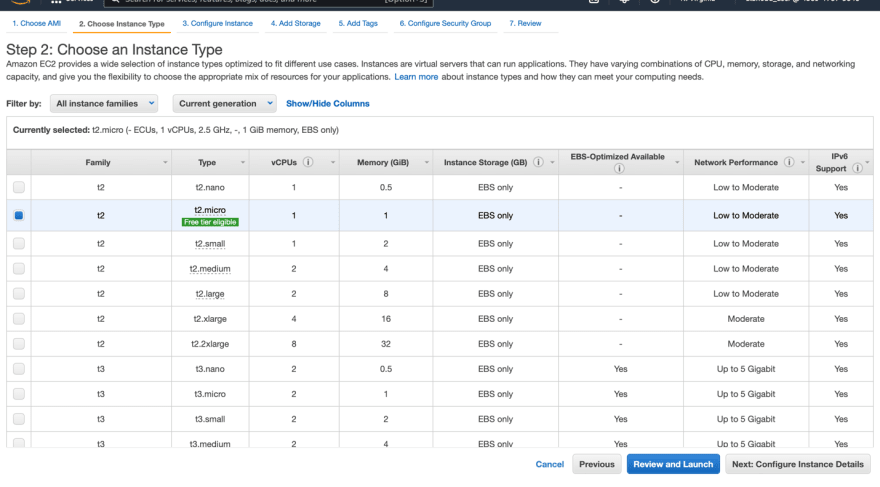
For the instance type, you can select the free tier t2.micro then click Review and Launch.
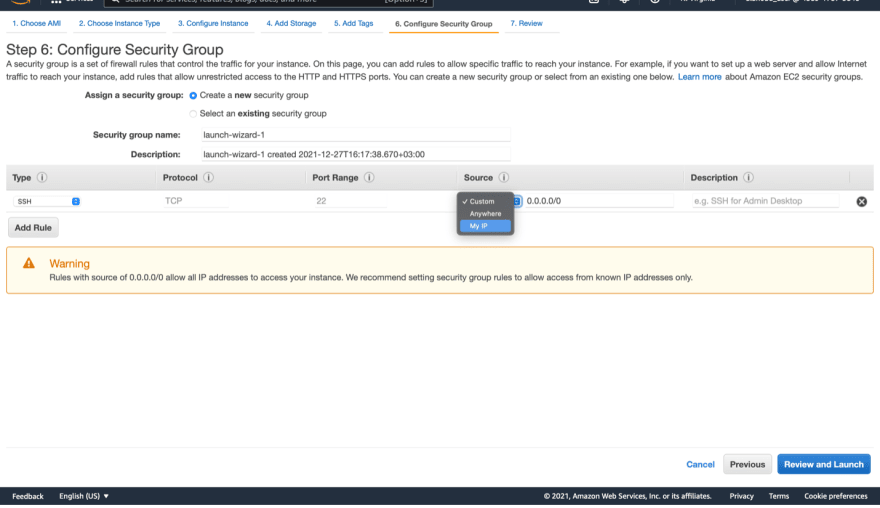
You will get this security warning message because we did not change the security group rules and it is now widely open.
To change it click Edit security groups.
For now, you can allow only your IP address then click Review and Launch.
Once you click Launch, it will ask you to either create a new key pair or use an existing one - I will create a new key pair and name it Demo-KP.
You must download the key pair first, then launch the instance.
Now let’s create another instance with Windows image.
Click on Launch instances.
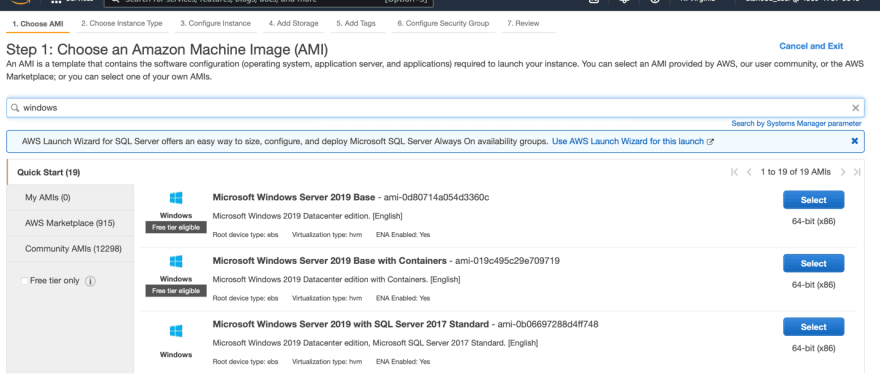
Search for Windows in the search bar, then select one of the free tier windows images.
For the instance type, you can select t2.micro as well.
Then click Review and Launch.
Again, you will see the security warning message.
Click Edit security groups and change it to your IP address, then click Launch.
It will ask you to create or use an existing key pair, you can use the one you created earlier.
Then check the box below and click Launch Instances.
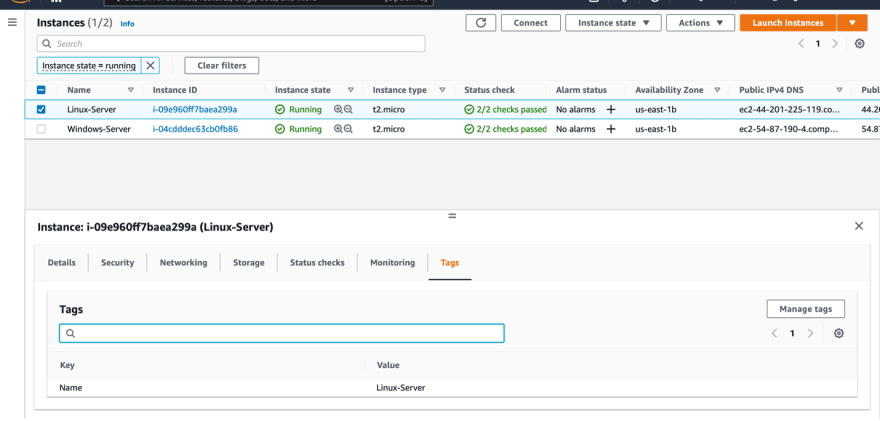
Now we have two running EC2 instances; Linux and Windows.
Let’s add new tag to each one of them.
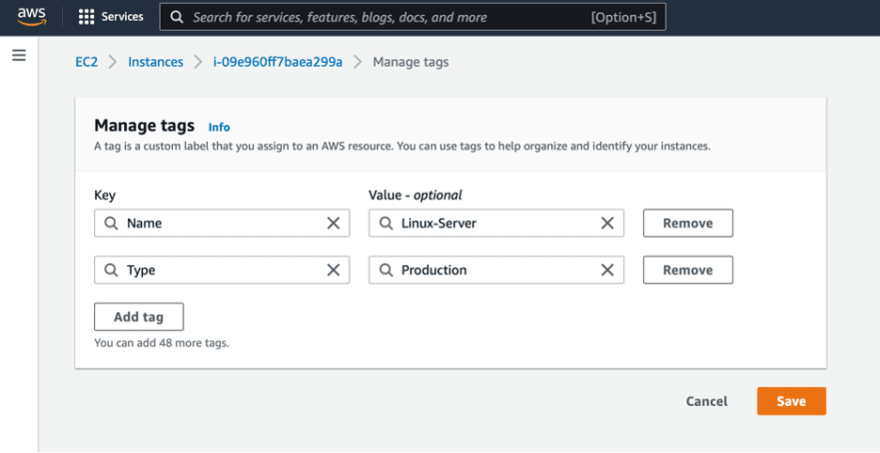
Select each instance and click Tags then Manage tags.
Add a new tag with the Key “Type” and Value “Production” then click Save.
Select the Linux instance and copy the IP address.
Now let’s open the terminal, login to the Linux instance and install Amazon Inspector’s agent.
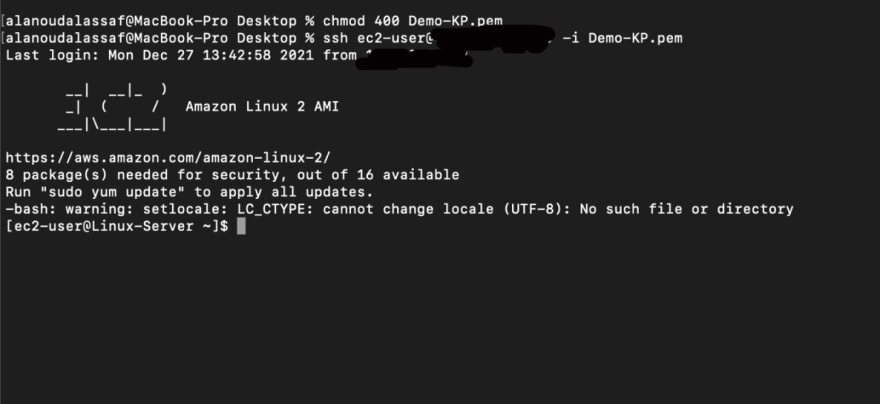
To login, first you need to change the permissions for the Key file by running this command:
chmod 400 [your key file]
Then login to the instance by running this command:
ssh ec2-user@[Your EC2 instance IP address] -i [your key file]
You are now logged in.
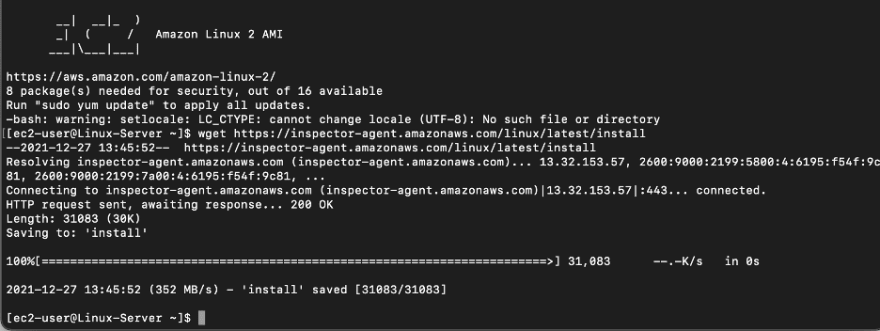
Next you will need to download Amazon Inspector’s agent script by running this command:
wget https://inspector-agent.amazonaws.com/linux/latest/install
Once it’s completed, you can install the agent by running this command:
sudo bash install
Amazon Inspector’s agent has been installed in the Linux instance.
Now let’s go back to the console and connect to the Windows instance.
In the EC2 instances page select the Windows instance then click Connect.
Select RDP client then Get password.
Browse to your key pair then click Decrypt password.
Copy the password as you will need it to access your Windows instance.
I will use Microsoft Remote Desktop to connect to the Windows instance.
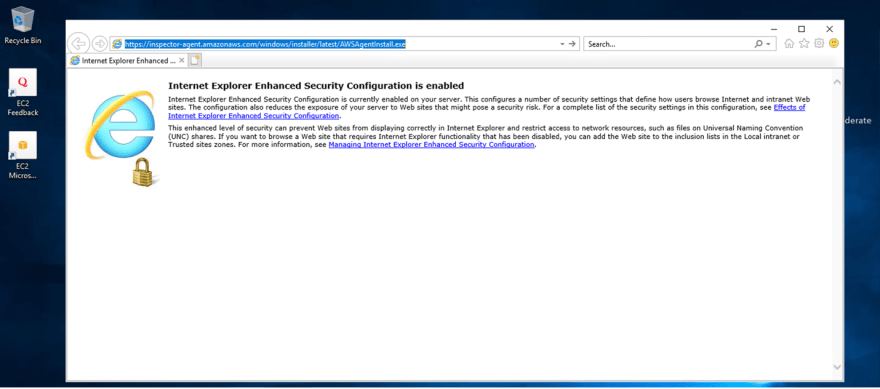
Now that you are logged in, you will need to download Amazon Inspector’s agent using this URL:
https://inspector-agent.amazonaws.com/windows/installer/latest/AWSAgentInstall.exe
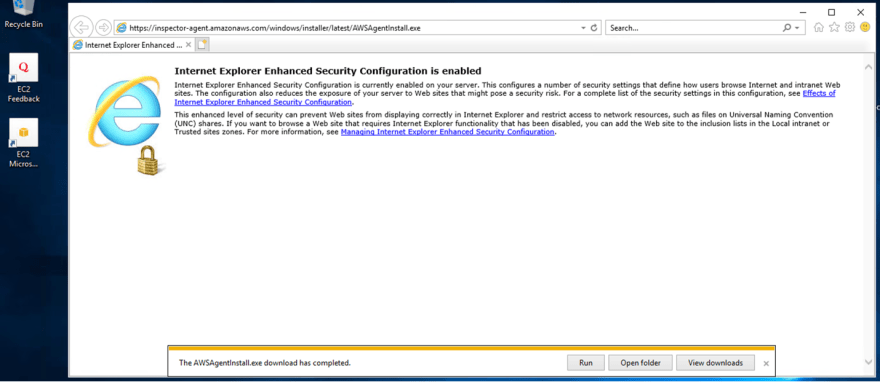
Once the download is completed, click on Run.
Check the box to agree to the license terms and conditions, then click Install.
Now that the installation is completed, let’s go back to the AWS console and enable Amazon Inspector.
You can find Inspector under the Security, Identity & Compliance section.
It will take you to Amazon Inspector’s main page, click Get Started.
Let’s start first with Inspector Classic.
You can click Switch to Inspector Classic on the left side of the screen and it will open a new tab.
Click on Get started.
It will ask you to setup your assessment; if you want to allow Network assessments, Host assessments or both, as well as the frequency of the scanning (weekly or once).
Once you chose the desired assessment runs, it will ask you to confirm it, click OK.
Then it will take you to Amazon Inspector classic dashboard.
Now let’s create a new assessment target.
Click Assessment targets on the left side of the screen then click Create.
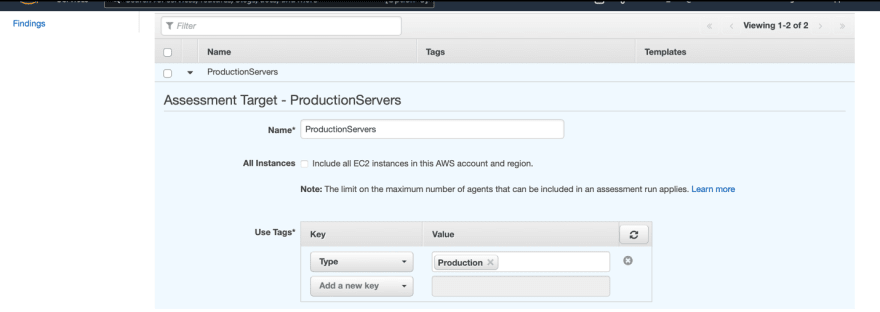
Give it a name, then add the tag that is associated to the instances you want to run inspector on – you have the option to include all EC2 instances in your account and region as well - then save it.
Now let’s create a new assessment template.
Click Assessment templates on the left side of the screen then Create.
Name your assessment template, select the target that you created in the previous step, then add the rules packages that you want to include in this template and choose the duration to run the assessment (AWS recommends 1 hour) but for this demo I will choose 15 minutes.
You also have the option to connect it to SNS if you want to receive notifications.
Add the desired tags and you can check the box below to set a schedule to automatically run the assessment.
For this demo you can uncheck the box then click Create and run.
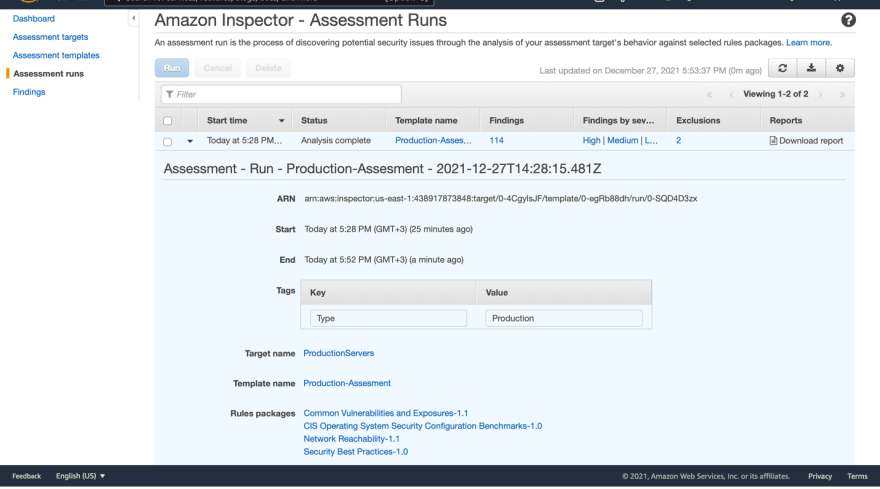
It will start the analysis, once it's completed it will show you the number of findings.
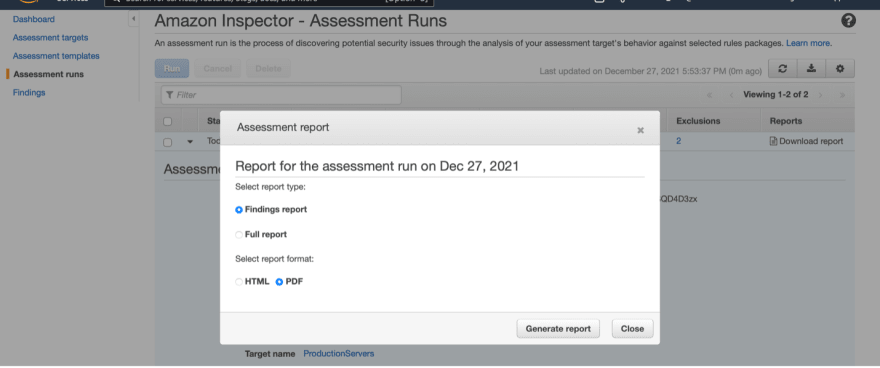
Click on Download report.
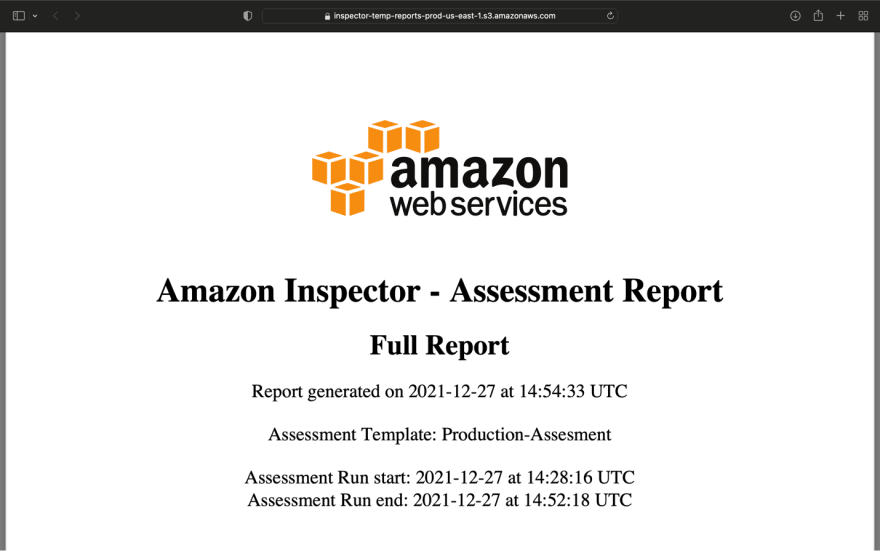
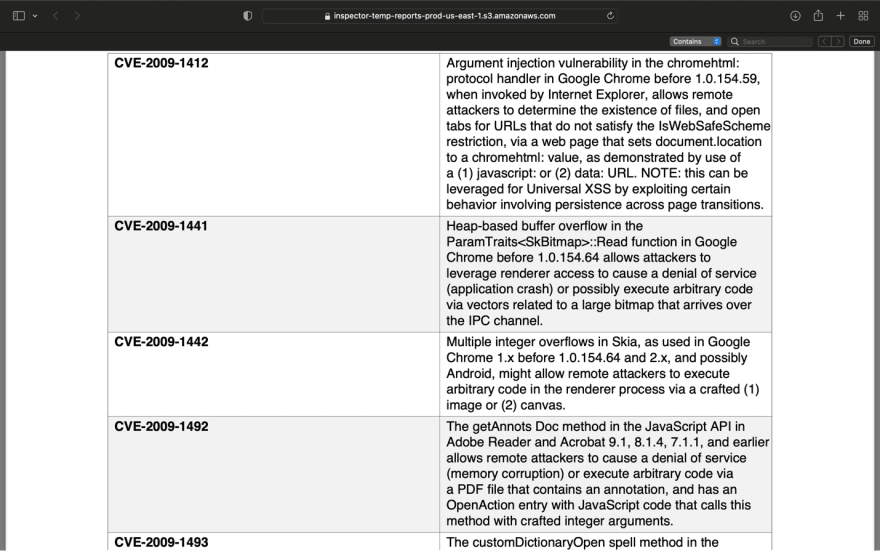
You can select whether you want only the findings report or the full report (the full report will also include the rules packages) then choose the desired format HTML or PDF.
You can see below some screenshots of the full report in PDF format.
Let’s go back to the console.
Click on Findings on the left side of the screen.
You will see all findings with details and you have the option to filter them based on severity level.
Lastly, let’s go back to the Inspector tab.
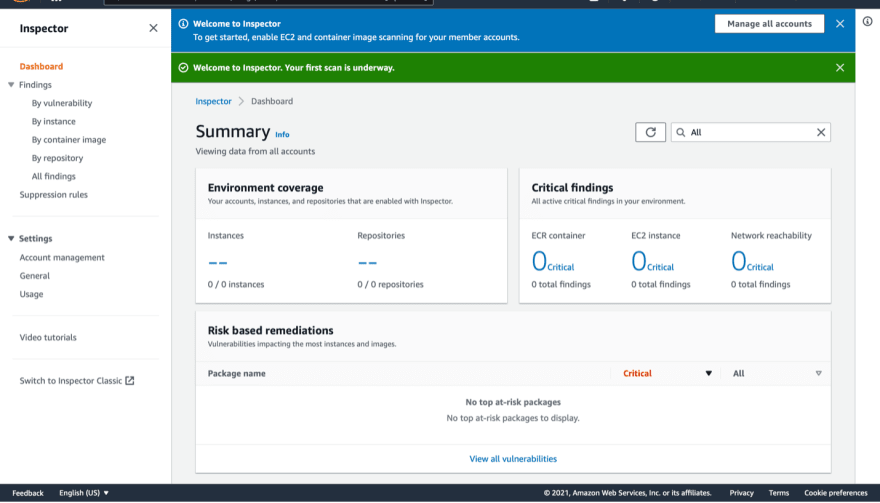
Click Enable Inspector.
You will see the dashboard which contains a summary, and on the left side of the screen you can check the findings based on vulnerability, instance, container image, repository, and all findings as well.
Now we can manage vulnerabilities, network exposure and deviation from security best practices in a centralized automated way!
We have configured both Amazon Inspector and Amazon Inspector classic, installed Inspector agents on Linux and Windows servers, and have a well-written organized full report with all details.





















Oldest comments (0)