In this article, I am going to show you how to create 2 separate containers, connected to a Docker network bridge, both using a centos image and having mount points pointing to the same local directory and its files.
Let’s get started!
Objectives:
- Ensure Docker is installed, and the Docker daemon is running.
- Create a new local directory called “webfiles”.
- Create two files named “infofile.txt” and “exportfile.txt” in that directory.
- Create a docker network called “webnet”.
- Start two containers using the centos image, and assign both to the “webnet” network.
- Create mount points to the local “webfiles” directory in both containers
- Verify both containers can see the file created in Step #3.
Pre-requisites:
- AWS user account with admin access, not a root account.
- Cloud9 IDE, comes with Docker installed.
- An account with Docker and Docker Hub.
Resources Used:
For this article, I used Configure Networking and Command Line Reference Sections from the Docker documentation
Steps for implementation of this project:
- Ensure Docker is installed, and the Docker daemon is running.
- Create a new local directory called “webfiles”.
- Create two files named “infofile.txt” and “exportfile.txt” in that directory
- Create a docker network called “webnet”.
- To verify if a Docker bridge network has been successfully created
- Start two containers using the centos image, and assign both to the “webnet” network. Create mount points to the local “webfiles” directory in both containers
- Verify both containers are attached to the network bridge
- Verify both containers can see the files created in the local directory from Step #3.
- Clean up the Docker Containers, Images, and Network Bridge
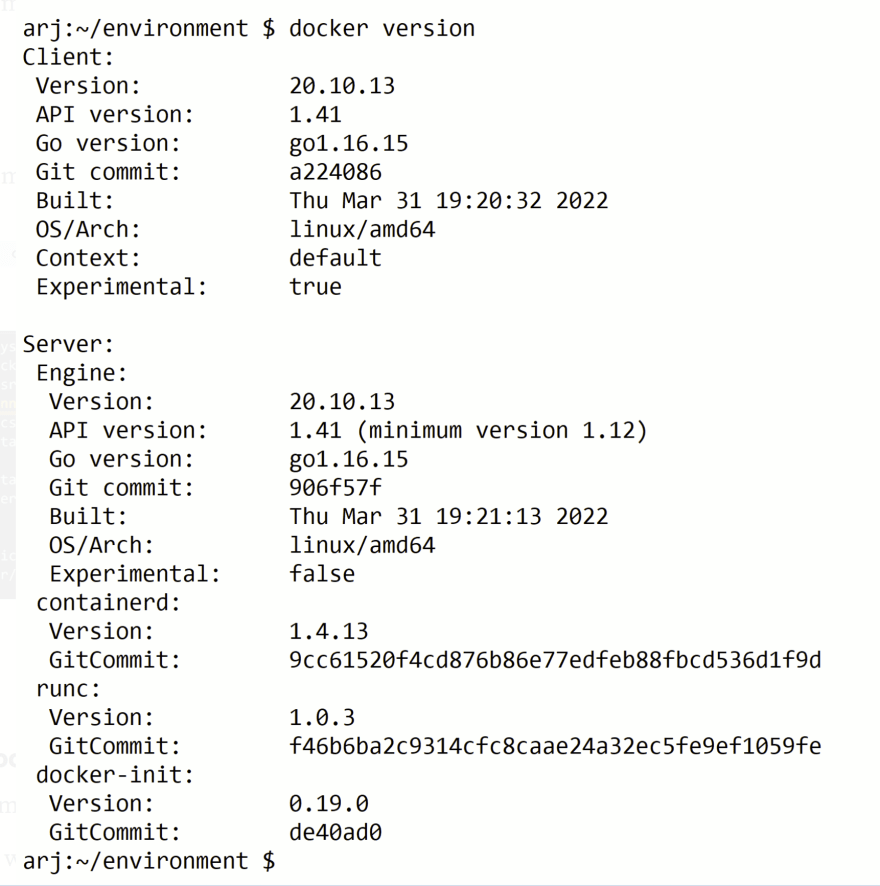
1. Ensure Docker is installed, and the Docker daemon is running.
- Run this command to check whether Docker is installed
docker version
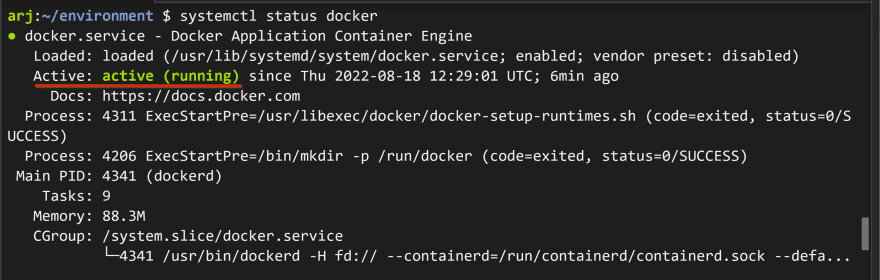
- Run this command to check whether Docker Daemon is running
systemctl status docker
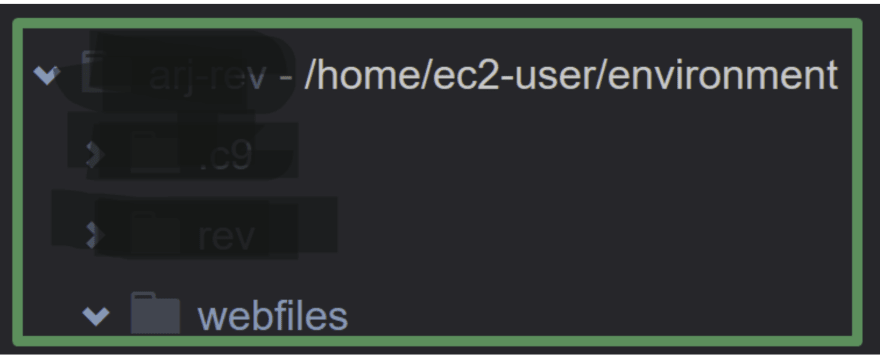
2. Create a new local directory called “webfiles”.
- This is the same directory to which we will mount both of our containers
- Can do it two ways
- One way — Right click and select new folder on Cloud9 environment
- Name it as
webfiles
- Second way — From the command-line interface on Cloud9 IDE, run this command
mkdir <directory name>
mkdir webfiles

3. Create two files named “infofile.txt” and “exportfile.txt” in that directory.**
- Create 2 files, infofile.txt and exportfile.txt
- Can do it two ways to add these 2 files
- One way — Right click and select new file from the directory that you just created on Cloud9 environment
- Name it as
infofile.txt - Name it as
exportfile.txt

- Second way — From the command-line interface on Cloud9 IDE, run this command
touch <directory name>/<file name>
touch webfiles/infofile.txt
touch <directory name>/<file name>
touch webfiles/exportfile.txt

- Run this command to verify
ls -lt webfiles/

4. Create a docker network called “webnet”.
docker network create -d bridge <network name>
docker network create -d bridge webnet

5. To verify if a Docker bridge network has been successfully created
type the following command:
docker network ls
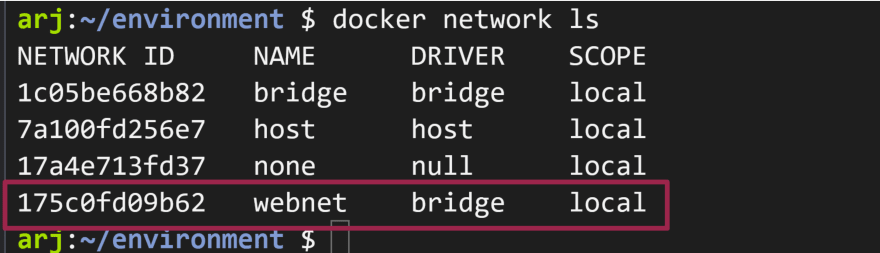
- This will list all the Docker networks.
- The first three are created by default.
- default bridge network is listed, along with host and none.
- The latter two
hostandnoneare not fully-fledged networks, but are used to start a container connected directly to the Docker daemon host’s networking stack, or to start a container with no network devices.
6. Start two containers using the centos image, and assign both to the “webnet” network. Create mount points to the local “webfiles” directory in both containers
- Repeat the same command with a different container name to create 2 containers
docker run -dit --name <container name> --network <network name> --mount type=bind,source="$PWD"/webfiles,target=/webfiles centos:latest
docker run -dit --name web01 --network=webnet --mount type=bind,source="/home/ec2-user/environment"/webfiles,target=/webfiles centos:latest
docker run -dit --name web02 --network=webnet --mount type=bind,source="/home/ec2-user/environment"/webfiles,target=/webfiles centos:latest

- The network was created by the first command, but when used to run the second container, it acts as a reference to the already-established network.

what this command means
docker run ->is the base command to start the container.
-dit -> combining three flags -d, -i, and -t means to detach the container from the host and setup an interactive session.
--name <container name> -> creates container name
--network <network name> ->this will create and reference the new network bridge
--mount type=bind, -> create a mount point
source=<"/absolute path from host"/webfiles>,
source="/home/ec2-user/environment"/webfiles, ->this is the local host directory
target=</path in container>
target=/webfiles -> location of mount point within the container where you want to store the files. If it does not exist, it will be created.
centos:latest -> latest image that docker will use to build our container.
- To see the containers that we created just now
docker ps -a

Container status is “UP”
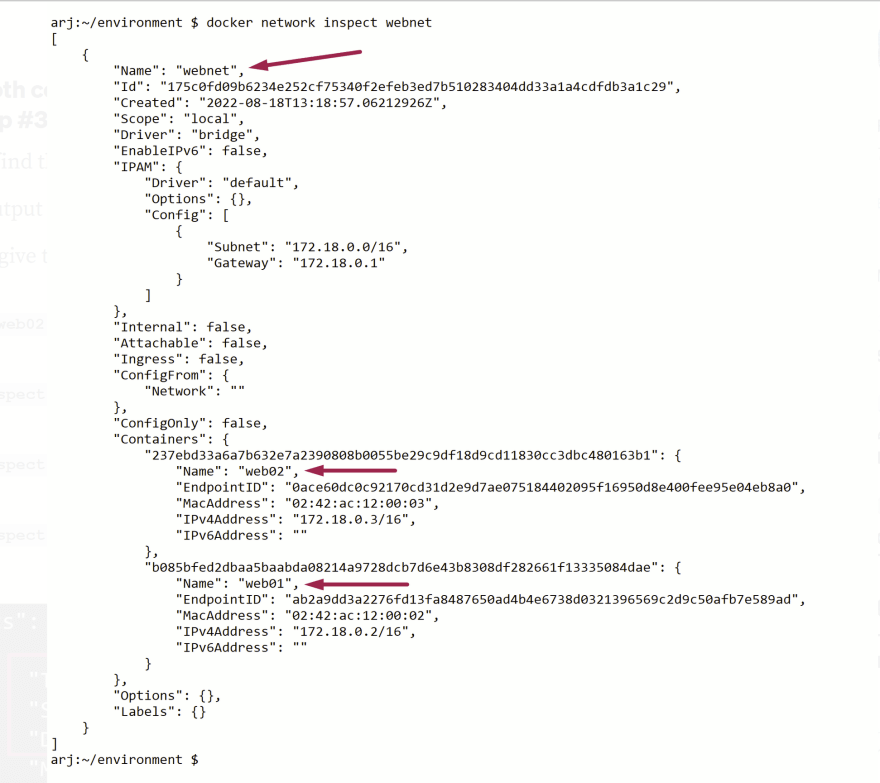
7. Verify both containers are attached to the network bridge
docker network inspect <network name>
docker network inspect webnet
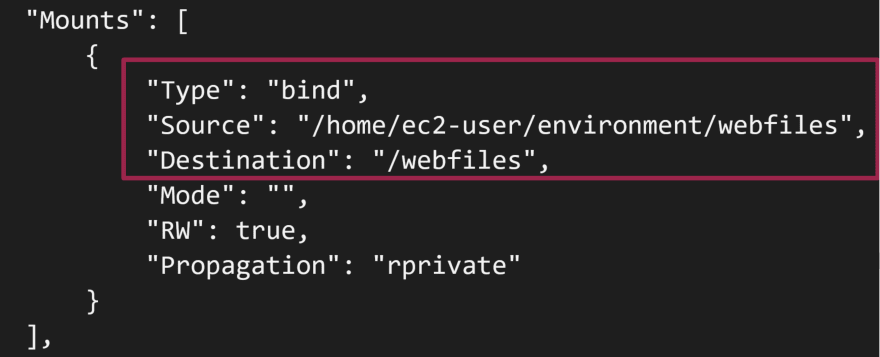
8. Verify both containers can see the files created in the local directory from Step #3.
- First, find the Mount point
- The output is big, have to scroll down to find “Mounts” section
- It will give the same Mount Type and Mount Path for both the containers
web01 OR web02
docker inspect <container name>
docker inspect web01
docker inspect web02
- Let’s verify if the files are accessible from the first container or not.
- Run this command to open up a bash terminal:
docker exec -it <container name> bash
docker exec -it web01 bash
- List the directories inside the container using this command.
ls
- Now, change the directory to the target directory
cd /webfiles
- You can see the exportfile.txt and infofile.txtfiles with this command
ls

- Exit out of the container with the
exitcommand - Repeat the same steps to verify if the files are accessible from the second container or not.
9. Clean up the Docker Containers, Images, and Network Bridge
- Run the following commands to clean up your containers and images
# for removing containers

docker rm -f $(docker ps -a -q)
# for removing images

docker rmi -f $(docker images -a -q)
- Run the following commands to remove the Docker Network Bridge
# for removing Docker Network Bridge

docker network rm <network name>

docker network rm webnet

What we have done so far
In Cloud9 environment, we created two separate containers. Both the containers use a centos image, are assigned to the same Docker network bridge, have mount points pointing to the same local directory, and can see the files inside that directory.

Top comments (0)