In the beginning there were punched cards. And since that beginning, technologists have continued to find better and better ways to deploy code to bring end user value. And as those new techniques have become more complex and required more scale, the tooling has also moved forward. A couple of months back, I noticed that I hadn't written anything about my experiences with Kubernetes (K8s). I've been writing about Serverless and Containers for a couple of years now, and my exclusion of K8s hasn't been because I don't like it or think it's not amazing, just more blind neglect as I've been down other content. Well, consider this the beginning of the page being turned on that.
To quickly define what is K8s if you haven't used it, here's the definition straight from the project.
Kubernetes, also known as K8s, is an open source system for automating deployment, scaling, and management of containerized applications. -- Kubernetes Website
Getting Started
My intention in this article is to just scratch the surface of a local K8s setup using the following:
This article will just scratch the surface of some of these technologies but I plan to dig further into them as the months go by.
Minikube
There are lots of ways to run K8s locally. Kind annd Minikube are two of the most popular. For me, Minikube seemed like the perfect place to start.
Straight from the Minikube website, Getting Started has binaries for just about every platform. Pick the one that works for you, and let's get going!
With Minikube downloaded, here are the steps I took to get it launached.
# Make sure Docker is running first
minikube start
# Run the Minikube Dashboard
minikube dashboard
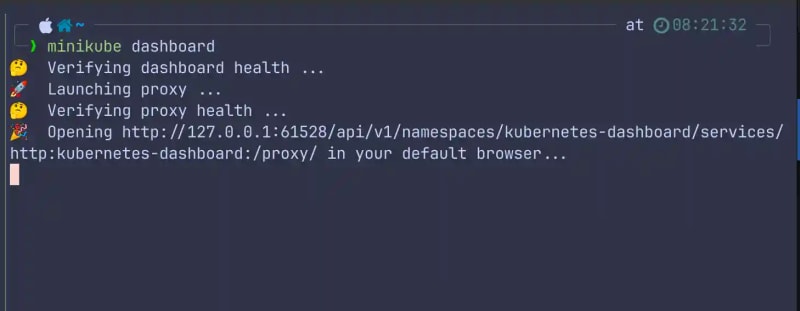
After running the dashboard command, the terminal will show the following output.
The terminal will also kickoff a browser session that will launch into the default K8s namespace.
Namespaces
A quick aside as I mentioned the default namespace above. In K8s you can define multiple namespaces. Think of them as a way to segment different K8s resources. Resources don't need to be unique across namespaces but they must be unique inside of one.
In Kubernetes, namespaces provide a mechanism for isolating groups of resources within a single cluster. Names of resources need to be unique within a namespace, but not across namespaces. Namespace-based scoping is applicable only for namespaced objects (e.g. Deployments, Services, etc.) and not for cluster-wide objects (e.g. StorageClass, Nodes, PersistentVolumes, etc.). -- Kubernetes
For this working sample, I created a namespace to run the 2 services that I'm going to launch.
kubectl create namespace payload-changer
Deploying some Code
I could probably stop here and call it an article because I've got a local cluster running and my dashboard is showing my default namespace. But let's take it a step further and deploy some code.
K8s resources are defined with YAML and can be applied to their respective resource type and kind. For more on that, K8s API documentation will give you a much a deeper appreciation.
Instead of basic YAML, I'm going to be leveraging Helm for resource definition and ArgoCD for deployment. Both of these tools are mainstream in the K8s ecosystem so there's plenty of support and documentation. I'll do some deeper dives down the line on them as well.
For the balance of the article, I'm going to be working with two Rust services that leverage the Axum framework. These are similar to the services I wrote about here
ArgoCD Launch and Run
Let's dive in a little bit more to ArgoCD and how to configure this local setup to get these services deployed.
Install and Forwarding
Installing ArgoCD into the local cluster requires running the kubectl CLI.
# Create the ArgoCD namespace
kubectl create ns argocd

# Install ArgoCD
kubectl apply -n argocd -f https://raw.githubusercontent.com/argoproj/argo-cd/v2.5.8/manifests/install.yaml

# Port forward to run the UI
kubectl port-forward svc/argocd-server -n argocd 8080:443
If I visit the forwarded port at http://localhost:8000, I'm greeted by this screen.
Now to logging in, I need to grab the default password.
# Default Password
kubectl -n argocd get secret argocd-initial-admin-secret -o jsonpath="{.data.password}" | base64 -d
With that output, I can take the username of admin and the password that printed out in the terminal and login.
Creating the New Applications
Creating applications in ArgoCD can be done via the Admin GUI but I'd much prefer to just do it in the CLI. Adding the applications requires running these two commands.
Note the path infra in there. If you explore the repositories you'll notice that I have the Rust source code in src and my Helm chart is in infra. I'm not going to dive into Helm in this article, but I will in the future.
# Add Service A

argocd app create service-a \
--repo https://github.com/benbpyle/argocd-k8s-service-a.git \
--path infra \
--dest-server https://kubernetes.default.svc \
--dest-namespace default

# Add Service B

argocd app create service-b \
--repo https://github.com/benbpyle/argocd-k8s-service-b.git \
--path infra \
--dest-server https://kubernetes.default.svc \
--dest-namespace default
Progress and Output
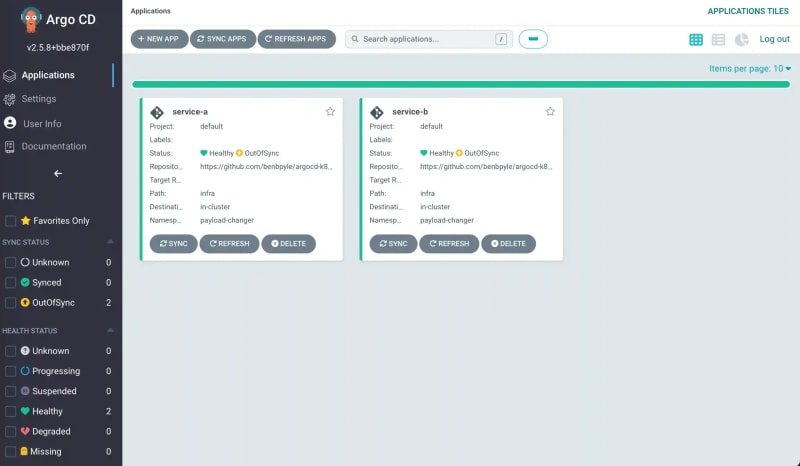
The local K8s cluster is coming along. When I log into ArgoCD now, I should see two apps under management.
And then a visit over to the Minikube dashboard will also show that I've got two services launched as deployments.
Running the Services
Good stuff so far right? Setting up a local cluster hasn't been that difficult.
Now with 2 services up and running, let's run a few requests through and see what is returned. But first, I need to expose Service B because this example doesn't include an Ingress Controller or an API Gateway. Don't worry, more to come on that in the future too!
I'm going to expose service-b on port 8081 and forward it to the bound local pod port of 3000.
# Expose the service over 8081

kubectl port-forward svc/service-b -n payload-changer 8081:300
With that open, I'm going to issue a request.
 curl -v http://localhost:8081\?name=Demo | json_pp
* Host localhost:8081 was resolved.
* IPv6: ::1
* IPv4: 127.0.0.1
  % Total    % Received % Xferd  Average Speed   Time    Time     Time  Current
                                 Dload  Upload   Total   Spent    Left  Speed
  0     0    0     0    0     0      0      0 --:--:-- --:--:-- --:--:--     0*   Trying [::1]:8081...
* Connected to localhost (::1) port 8081
> GET /?name=Demo HTTP/1.1
> Host: localhost:8081
> User-Agent: curl/8.6.0
> Accept: */*
>
< HTTP/1.1 200 OK
< content-type: application/json
< content-length: 53
< date: Sun, 25 Aug 2024 14:54:26 GMT
<
{ [53 bytes data]
100    53  100    53    0     0   3810      0 --:--:-- --:--:-- --:--:--  4076
* Connection #0 to host localhost left intact
{
   "key_one" : "(Demo)Field 1",
   "key_two" : "(Demo)Field 2"
}
Wrapping Up
We did it! We took K8s for a local test spin with Minikube and ArgoCD. Sure, this is more work than building a binary with SAM or CDK and shipping it out to a Lambda. But when you have the need to run K8s, I think as developers we have the responsibility to get as close to our runtime as possible. It's why I feel so strongly about using Rust, learning about the different Lambda runtimes, and how other tools in your tool chain works.
Things come and go all the time. It's the nature of technology but K8s has proven itself to be the defacto container orchestration platform on the market. And as a builder, it matters that you maintain as much breadth and situational awareness as possible. Popping your head up from time to time to pick up new skills and improve your craft will do you wonders in the job market.
My hope over the coming months is that I can showcase K8s from a developer's perspective and perhaps demystify some of the confusion and try and show that it's not a divided battle of one is better than the other. Serverless and K8s have a place in the ecosystem together. And the more you learn about each, the more you will be better equipped to navigate the techincal challenges that lie ahead.
Thanks for reading and happy building!


Top comments (0)