
Git is a tool that is obligatory to any software project nowadays. If for some very weird reason it isn’t, then you are doing a big mistake. Versioning and maintaining the code is what allows the software to live much longer life and make us, the developers much happier. My experience with it has been only superior, therefore I wanted to share some of this in couple of hidden, or rarely used commands that made my life much much easier.
git log — oneline — decorate — all — graph
The* *git log is a no brainer really. If you want to check the history of your repository, then that's the command that you will be using mostly. The problem is that the default output is too verbose in my opinion. It includes the information you don't really need and doesn't include the one you might be interested in. So the default output looks like this:
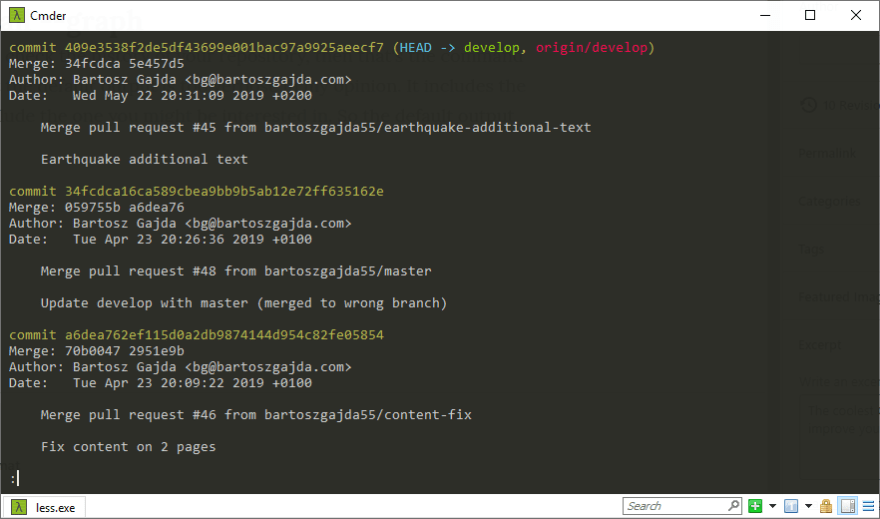
As you can see it includes many of the information you might not need. I am using standard sized terminal windows, and I could only fit 3 latest commits. The great alternative to this is to use the extra flags in the log command. I am applying the *online, graph, decorate *and all flags. Now the output look like this:

Now the log command shows much more information in condensed form. Let’s focused on the flags that I have added. Each of these have very distinct yet useful role in making the log output more usable.
--oneline- This is a shorthand for "--pretty=oneline --abbrev-commit" used together. Instead of showing the full 40-byte hexadecimal commit object name, show only a partial prefix.--decorate- This flag prints out the ref names of any commits that are shown.--all- This command makes all the refs inrefs/, along withHEAD, listed on the command line as--graph- This draws a text-based graphical representation of the commit history on the left hand side of the output.
Read more here.
git rebase -i
The rebase itself is used a lot to change or update the base of our working tree. The not so commonly used version of it is the interactive rebase. The rebase in this mode allows us to rewrite the history of our tree a bit, by changing various elements of the commits that have been made. The typical output shown in the terminal, after running the git rebase -i may look like this:
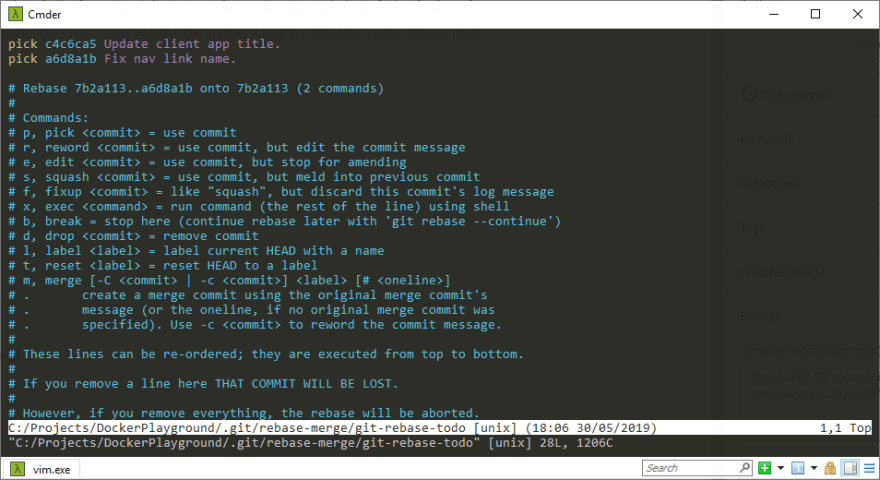
On this screen you can see the plethora of options to choose from. Additionally, you can reorder the commits if you need to, so that in the history, they will appear upside down or any combination you like.
Read more here.
git commit — am
I have came across many situations where my commit message seemed to be okay, but after couple thoughts I wanted to change them to something more descriptive. The git commit --am command is what allows you to do it.

On the image above you can see the screen that you get, after applying the command mentioned above. From this point it’s very easy to change the message in the commit as needed. Very easy to remember and very useful in daily workflow.
Read more here.
git cherry-pick
The git cherry-pick is probably one of the least known commands in the Git, but it's very useful in my opinion. It allows you to apply some other commit into your working tree by using it's hash. It's quite useful when someone working on completely different branch has made some valuable or interesting changes and you want to test them in your branch/tree without having to merge or rebase.
The first thing you need is the hash of the commit you want to pick. You can use the git log command shown above to retrieve it. You don't need the full hash, the short version will do as well. Then we use git cherry-pick command with commit's hash added at the end.

On the image above you can the change that cherry-pick will make to our working tree. Initially it was clean, and after successful applying the commit, we are 1 ahead of origin/master. It is surprisingly useful command, especially when you exchange code a lot in your team.
Read more here.
git checkout -
The last one is quite simple and it may be known to you already. The dash ( — ) flag applied to checkout command indicates last used branch. So if you were on a master, switched to develop and what to switch back, you don’t have to specify whole name of it.

Read more here.
That will be it for this post. I hope you will find the commands here useful and they will ease up you Git workflow. If you have your favorite Git command, you want to share, please don’t hesitate in doing so in the comments section below or any of the social medias :)
Improve your #Git skills with 5 commands that can drastically improve your daily workflow.
bartoszgajda.com/2019/05/21/5-g…
#git #programming #vcs #github #bitbucket #gitlab #repository #codemanagement18:11 PM - 30 Jan 2020
0
0


Top comments (0)