
Written by Deepak Gupta✏️
JAMstack sites are made up of static files that are served via CDN, but does that mean they give you a static experience? The answer is a big no.
There is a common misconception that the phrase “static site” describes a website that is inflexible or fixed. What it really means is that no server is required to serve the site.
A JAMstack site, at its core, is made up of prerendered files that are served statically and progressively enhanced via an API using JavaScript. UnlikePHP projects such as WordPress, we don’t need an intermediate step to generate HTML files on every browser request. Files are already stored as they are supposed to be rendered on the browser. These static files often contain JavaScript code that calls an API to do most of the dynamic stuff.
But doesn’t that mean we’re building a server? Not exactly. Since we’re using serverless functions, we don’t need to create a server in the true sense.
In this tutorial, we’ll show how JAMstack sites handle dynamic content and interactions. We’ll demonstrate some of the most common dynamic actions a JAMstack site will need to perform, including:
- Loading data asynchronously — We’ll create a page in which you type the name of a Pokémon to get details about it asynchronously
- Reading and writing to a database — We’ll use the serverless function and database-as-a-service (DBaaS) solution to dynamically read and write to a database
- Adding a login page (i.e., user authentication) to the above app

1. Loading data asynchronously
Let’s say you’re requesting some data from an API. Depending on the situation, the server might take some time to process the request while blocking the main thread, rendering the webpage unresponsive.
We can use callbacks, promises, and async/await (i.e., asynchronous JavaScript features) to perform long network requests without blocking the main thread.
JavaScript contains many asynchronous libraries. We’ll use the Fetch API to load our data.
Now let’s build a page that enables the user to search for details of Pokémon by name using the PokéAPI.
Step 1. Create a form with an input field and a search button 
<form>
   <label for="name">Get Pokemon Details</label>
   <input type="text" id="name" name="name" required />
   <button type="submit">Search</button>
</form>
Step 2. Listen for the submit event on the button, call the API with the data in the input field, and cache the result
<script type = "module" >
  import displayResult from './displayResult.js';
  const form = document.querySelector('form');
  const handleSubmit = async event => {
  event.preventDefault();
  const name = form.elements['name'].value;
  let character;
  const fromCache = localStorage.getItem(name);
  if (fromCache) {
    character = JSON.parse(fromCache);
  } else {
    character = await fetch(
        `https://pokeapi.co/api/v2/pokemon/${name}`
      )
      .then(response => response.json())
      .catch(error => console.error(error));
    localStorage.setItem(name, JSON.stringify({
      name: character.name,
      moves: character.moves,
      weight: character.weight,
      height: character.height,
      types: character.types,
      sprites: character.sprites,
    }));
  }
  displayResult(character);
};
form.addEventListener('submit', handleSubmit);
</script>
Note: We’re using a helper function called displayResult, which forms the shape of data from our API result and does some more checks on the DOM.
const createResultRow = container => character => {
  if (!'content' in document.createElement('template')) {
    console.error('your browser does not support the template element');
  }
// load the template for a result row
  const template = document.getElementById('search-result-template');
  const result = document.importNode(template.content, true);
  const types = character.types.map(({
    type
  }) => type.name).join(', ');
  const moves = character.moves.map(({
    move
  }) => move.name).join(', ');
// update the template content
  result.querySelector('.name').textContent = character.name;
  result.querySelector('.type').textContent = types;
  result.querySelector('.weight').textContent = character.weight;
  result.querySelector('.height').textContent = character.height;
  result.querySelector('.moves').textContent = moves;
// update the character image and add alt text
  const img = result.querySelector('.image');
  img.src = character.sprites.front_default;
  img.alt = character.name;
// add the new row to the results container
  container.appendChild(result);
};
export default character => {
  const searchResult = document.getElementById('search-result');
// remove any existing search results
  while (searchResult.firstChild) {
    searchResult.removeChild(searchResult.firstChild);
  }
// loop through the results and create a new listing for each character
  [character].map(createResultRow(searchResult));
};
Step 3. Finally, show the result on the DOM 
This is how we can load data asynchronously in a static state. See the demo in action on CodeSandbox.
2. Reading and writing to a database
You may be wondering, how will we read and write to a database if we haven’t set one up? Put simply, database-as-a-service (DBaaS) solutions eliminate the need to set up or host a database.
DBaaS tools automatically generate APIs to carry out CRUD operations on the database by simply uploading or creating the data type we want to store. For this tutorial, we’ll use Fauna to create a small email subscriber app (you’ll need to create a Fauna account before you proceed with the following steps).
Step 1. Create a database and name it Email
Step 2. Click Security from the left nav bar and select the database we just created 
Step 3. Once saved, store the secret key somewhere since it is shown only once
Step 4. Next, create a file with the extension .gql, name it schema.gql, and add the following code
type Email {
  id: String!
}
type Query {
  emails: [Email!] !
}
Step 5. Upload this file in the GraphQL tab, and we’re ready to perform CRUD
Now we have a database and a highly scalable, securable GraphQL API at no cost.
We can use the custom URL with the secret key, which is provided by Fauna on the client side, to carry out the read and write operation. But since we can’t put our sensitive keys in the client-side code, we’ll use the serverless function to pass a private server key to Fauna for read and write access to the database. Serverless functions are critical for keeping private keys private, and they can easily handle expensive computing tasks from the client side.
The diagram below shows the final structure of our app. We’ll call the serverless function (Lambda) — in our case, we’ll use Netlify functions from our JAMstack App (HTML deployed on CDN). The serverless function will be responsible for holding our private keys and making a call to our database.

Below is the code for our serverless functions that store email details to the database.
/* Import faunaDB sdk */
const faunadb = require('faunadb');
const key = 'your faunadb key goes here';
// your faunaDB key
const q = faunadb.query;
const client = new faunadb.Client({
  secret: key
});
// These are required for CORS
const headers = {
  'Access-Control-Allow-Origin': '*',
  'Content-Type': 'application/json',
  'Access-Control-Allow-Methods': '*',
};
exports.handler = (event, context, callback) => {
  return client.query(
    q.Create(
        q.Collection("Email"),
        {
            data: {
                id: event.queryStringParameters.email
            }
        }
      )
  ).then((response) => {
    console.log("success", response)

    return callback(null, {
      statusCode: 200,
      headers,
      body: JSON.stringify(response)
    })
  }).catch((error) => {
    return callback(null, {
      statusCode: 400,
      headers,
      body: JSON.stringify(error)
    })
  })
}
Deploy this function to any serverless support service. For more information on deploying a serverless function in Netlify, see the official documentation.

The HTML code will be similar to the first app we created; only the script code will change.
<script>
 const form = document.querySelector('form');
const handleSubmit = async event => {
 event.preventDefault();
 const email = form.elements['email'].value;
 fetch(`http://localhost:9000/.netlify/functions/create?email=${email}`)
  .then(res => res.json())
  .then(data => {
   const successHTML =
    document.querySelector('.email-msg').innerHTML = `
            Your email is sucessfully added ${data.data.id}!
            Thanks for being a part of testing! Cheers :)
          `;
  });
}
form.addEventListener('submit', handleSubmit);
</script>
Replace the URL provided by the services with the localhost URL in the above function and add it to your HTML code.
The only change from the first app is the query string passed, which is our email from the client. If successful, the app will display a message in the email-msg class.

See the demo in action on CodeSandbox.
3. User authentication
Let’s examine how user authentication is done in JAMstack.
- Use a third-party service such as OAuth, AWS Cognito, or Netlify Identity to help implement an authentication system
- Use JSON Web Tokens (JWT) to exchange and verify user information between services
- Use a serverless function to validate the token and allow users to log into the app (we can also create a delegation token using a serverless function or Auth0 or use delegation tokens to authorize direct access to services from the client side)
- Write client-side code to manage the login and logout
For the sake of simplicity, we’ll use OAuth’s built-in script. We’ll call Google’s authorization server (assuming it as our serverless function), which will :
- Handle redirects back to your application
- Validate access tokens
- Store the access token that the authorization server sends to your app and retrieves when the app subsequently makes authorized API calls
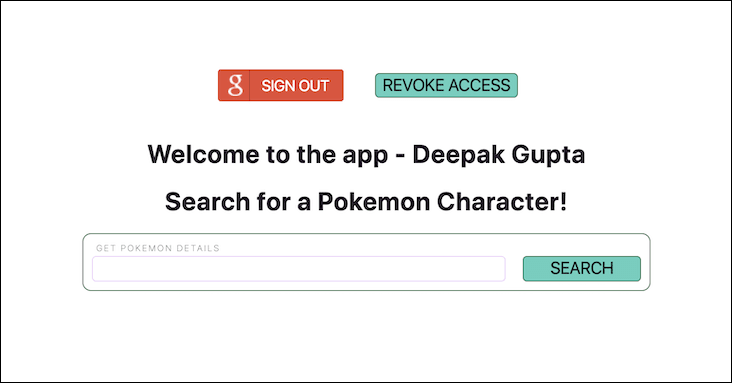
Let’s add a login page to the first Pokémon app we created (we can simply reuse the code for this stage).
For google authentication, create a file called google-authentication.js and add the following code.
var GoogleAuth;
const SCOPE = 'https://www.googleapis.com/auth/userinfo.email';
function handleClientLoad() {
  // Load the API's client and auth2 modules.
  // Call the initClient function after the modules load.
  gapi.load('client:auth2', initClient);
}
function initClient() {
  // Initialize the gapi.client object, which app uses to make API requests.
  // Get API key and client ID from API Console.
  // 'scope' field specifies space-delimited list of access scopes.
  gapi.client.init({
      'apiKey': 'your api key',
      'clientId': 'your client id',
      'scope': SCOPE
  }).then(function () {
    GoogleAuth = gapi.auth2.getAuthInstance();
// Listen for sign-in state changes.
    GoogleAuth.isSignedIn.listen(updateSigninStatus);
// Handle initial sign-in state. (Determine if user is already signed in.)
    var user = GoogleAuth.currentUser.get();
    setSigninStatus();
// Call handleAuthClick function when user clicks on
    //      "Sign In/Authorize" button.
    $('#sign-in-or-out-button').click(function() {
      handleAuthClick();
    });
    $('#revoke-access-button').click(function() {
      revokeAccess();
    });
  });
}
function handleAuthClick() {
  if (GoogleAuth.isSignedIn.get()) {
    // User is authorized and has clicked "Sign out" button.
    GoogleAuth.signOut();
  } else {
    // User is not signed in. Start Google auth flow.
    GoogleAuth.signIn();
  }
}
function revokeAccess() {
  GoogleAuth.disconnect();
}
function setSigninStatus(isSignedIn) {
  var user = GoogleAuth.currentUser.get();
  var isAuthorized = user.hasGrantedScopes(SCOPE);
  if (isAuthorized) {
    $('#sign-in-or-out-button').html('Sign out');
    $('#revoke-access-button').css('display', 'inline-block');
    $('#auth-status').html(`Welcome to the app - ${user.Qt.Ad}`);
    document.getElementById('app').style.display = 'block';
} else {
    $('#sign-in-or-out-button').html('Sign In/Authorize');
    $('#revoke-access-button').css('display', 'none');
    $('#auth-status').html('You need to be authorised to use the app');
    document.getElementById('app').style.display = 'none';
  }
}
function updateSigninStatus(isSignedIn) {
  setSigninStatus();
}var GoogleAuth;
const SCOPE = 'https://www.googleapis.com/auth/userinfo.email';
function handleClientLoad() {
  // Load the API's client and auth2 modules.
  // Call the initClient function after the modules load.
  gapi.load('client:auth2', initClient);
}
function initClient() {
  // Initialize the gapi.client object, which app uses to make API requests.
  // Get API key and client ID from API Console.
  // 'scope' field specifies space-delimited list of access scopes.
  gapi.client.init({
      'apiKey': 'AIzaSyDJM2tpYAm_9za_sZHBajTKCezSoRalNtg',
      'clientId': '1021021275901-8fqh15chm5lgkfpc98m2iuu0n8iiq2j5.apps.googleusercontent.com',
      'scope': SCOPE
  }).then(function () {
    GoogleAuth = gapi.auth2.getAuthInstance();
// Listen for sign-in state changes.
    GoogleAuth.isSignedIn.listen(updateSigninStatus);
// Handle initial sign-in state. (Determine if user is already signed in.)
    var user = GoogleAuth.currentUser.get();
    setSigninStatus();
// Call handleAuthClick function when user clicks on
    //      "Sign In/Authorize" button.
    $('#sign-in-or-out-button').click(function() {
      handleAuthClick();
    });
    $('#revoke-access-button').click(function() {
      revokeAccess();
    });
  });
}
function handleAuthClick() {
  if (GoogleAuth.isSignedIn.get()) {
    // User is authorized and has clicked "Sign out" button.
    GoogleAuth.signOut();
  } else {
    // User is not signed in. Start Google auth flow.
    GoogleAuth.signIn();
  }
}
function revokeAccess() {
  GoogleAuth.disconnect();
}
function setSigninStatus(isSignedIn) {
  var user = GoogleAuth.currentUser.get();
  var isAuthorized = user.hasGrantedScopes(SCOPE);
  if (isAuthorized) {
    $('#sign-in-or-out-button').html('Sign out');
    $('#revoke-access-button').css('display', 'inline-block');
    $('#auth-status').html(`Welcome to the app - ${user.Qt.Ad}`);
    document.getElementById('app').style.display = 'block';
} else {
    $('#sign-in-or-out-button').html('Sign In/Authorize');
    $('#revoke-access-button').css('display', 'none');
    $('#auth-status').html('You need to be authorised to use the app');
    document.getElementById('app').style.display = 'none';
  }
}
function updateSigninStatus(isSignedIn) {
  setSigninStatus();
}
Don’t worry about the code; it’s just a modified sample from Google. We simply replaced the scope, API key, and clientId.
For the client-side code, we’ll edit the index.html file.
Step 1. Include the above script in the HTML code
<script src="./google-authentication.js"></script>
Step 2. Add the login button above the main tag in the body
<center style="margin-top: 100px">
<button class="loginBtn loginBtn--google" id='sign-in-or-out-button'>
</button>
<button id="revoke-access-button" style="display: none; margin-left: 25px">Revoke access</button>
</center>
Step 3. Set the display as none for the app and make it appear after login, which happens in the Google-authenticated script we added
<main id='app' style="display: none;">
Note: We can do a serverless function call after authentication with the token or the user data to get the authenticated data we need. The above process is just a small test app to demonstrate how the authentication works.

That’s all there is to it! If you want to see the full demo in action, head to CodeSandbox.
Conclusion
Skipping servers and using the JAMstack to build and deliver websites can save time, money, and headaches when it comes to DevOps. These are much more than static sites; with JAMstack, your app can respond to user interactions, store data, handle user authentication, and just about anything else you’d want a modern website to do.
Plug: LogRocket, a DVR for web apps

LogRocket is a frontend logging tool that lets you replay problems as if they happened in your own browser. Instead of guessing why errors happen, or asking users for screenshots and log dumps, LogRocket lets you replay the session to quickly understand what went wrong. It works perfectly with any app, regardless of framework, and has plugins to log additional context from Redux, Vuex, and @ngrx/store.
In addition to logging Redux actions and state, LogRocket records console logs, JavaScript errors, stacktraces, network requests/responses with headers + bodies, browser metadata, and custom logs. It also instruments the DOM to record the HTML and CSS on the page, recreating pixel-perfect videos of even the most complex single-page apps.
Try it for free.
The post Dynamic and async functionality in JAMstack appeared first on LogRocket Blog.

Top comments (0)