
Written by Preetish HS✏️
Vue is an amazing, lightweight, and progressive frontend framework. Since Vue is flexible, users are not forced to use TypeScript. And unlike Angular, older versions of Vue did not have proper support for TypeScript. For this reason, most Vue applications have historically been written in JavaScript.
Now with official support for TypeScript, it’s possible to create TypeScript projects from scratch using Vue CLI. However, we still need some third-party packages with custom decorators and features to create a true, complete TypeScript application, and the official documentation does not include all the information you need to get started.
To help paint a fuller picture, we’ll demonstrate how to build a new Vue + TypeScript application using Vue CLI.

Getting started
Start with this line of code:
vue create typescript-app
Choose manually select features and configure it as shown below.

After the project setup, we’ll run the project to test it once.
cd typescript-app
npm run serve
Open localhost:8080 (or the URL your console shows after starting the project), and we can see it running successfully.
As we move through this tutorial, we’ll review the following and show how to write them using TypeScript.
- Class-based components
- Data, props, computed properties, methods, watchers, and emit
- Lifecycle hooks
- Mixins
- Vuex
Open the HelloWorld.vue file from the components directory, and you’ll see a structure like below.
Note: For each instance, I’ll show both the TypeScript and JavaScript-equivalent code so you can easily compare the two. Let’s get started!
1. Class-based components
//Typescript code
<script lang="ts">
import { Component, Vue } from 'vue-property-decorator'
@Component
export default class HelloWorld extends Vue {
}
</script>
The JavaScript-equivalent code would be:
<script>
export default {
name: 'HelloWorld'
}
</script>
To use TypeScript, we need to first set the lang attribute in the <script> tag to ts.
vue-property-decorator is a third-party package that uses the official vue-class-component package and adds more decorators on top of that. We could also explicitly use the name attribute to name the component, but using it as a class name will suffice.
@component({
  name: 'HelloWorld'
})
Importing a component
The code to register components inside the other components is written inside the @Component decorator, like below.
<template>
  <div class="main">
    <project />
  </div>
</template>
<script lang="ts">
import { Component, Vue } from 'vue-property-decorator'
import Project from '@/components/Project.vue'
@Component({
  components: {
    project
  }
})
export default class HelloWorld extends Vue {
}
</script>
The JavaScript-equivalent code would be:
<template>
  <div class="main">
    <project />
  </div>
</template>
<script>
import Project from '@/components/Project.vue'
export default {
  name: 'HelloWorld',
  components: {
    project
  }
})
</script>
2. Data, props, computed properties, methods, watchers, and emit
Using data
To use data properties, we can simply declare them as class variables.
@Component
export default class HelloWorld extends Vue {
  private msg: string = "welcome to my app"
  private list: Array<object> = [
    {
      name: 'Preetish',
      age: '26'
    },
    {
      name: 'John',
      age: '30'
    }
  ]
}
The JavaScript-equivalent code would look like this:
export default {
  data() {
    return {
      msg: "welcome to my app",
      list: [
        {
          name: 'Preetish',
          age: '26'
        },
        {
          name: 'John',
          age: '30'
        }
      ]
    }
}
Using props
We can use the @Prop decorator to use props in our Vue component. In Vue, we can give additional details for props, such as required, default, and type. We first import the Prop decorator from vue-property-decorator and write it as shown below. We could also use readonly to avoid manipulating the props.
import { Component, Prop, Vue } from 'vue-property-decorator'
@Component
export default class HelloWorld extends Vue {
  @Prop() readonly msg!: string
  @Prop({default: 'John doe'}) readonly name: string
  @Prop({required: true}) readonly age: number
  @Prop(String) readonly address: string
  @Prop({required: false, type: String, default: 'Developer'}) readonly job: string
}
</script>
The JavaScript-equivalent code would be as follows.
export default {
  props: {
    msg,
    name: {
      default: 'John doe'
    },
    age: {
      required: true,
    },
    address: {
      type: String
    },
    job: {
      required: false,
      type: string,
      default: 'Developer'
    }
  }
}
Computed properties
A computed property is used to write simple template logic, such as manipulating, appending, or concatenating data. In TypeScript, a normal computed property is also prefixed with the get keyword.
export default class HelloWorld extends Vue {
  get fullName(): string {
    return this.first+ ' '+ this.last
  }
}
Here is the JavaScript equivalent:
export default {
  fullName() {
    return this.first + ' ' + this.last
  }
}
We can write complex computed properties, which has both getter and setter, in TypeScript as follows.
export default class HelloWorld extends Vue {
  get fullName(): string {
    return this.first+ ' '+ this.last
  }
  set fullName(newValue: string) {
    let names = newValue.split(' ')
    this.first = names[0]
    this.last = names[names.length - 1]
  }
}
The JavaScript-equivalent code would be:
fullName: {
  get: function () {
    return this.first + ' ' + this.last
  },
  set: function (newValue) {
    let names = newValue.split(' ')
    this.first = names[0]
    this.last = names[names.length - 1]
  }
}
Methods
Methods in TypeScript, like normal class methods, have an optional access modifier.
export default class HelloWorld extends Vue {
  public clickMe(): void {
    console.log('clicked')
    console.log(this.addNum(4, 2))
  }
  public addNum(num1: number, num2: number): number {
    return num1 + num2
  }
}
The JavaScript-equivalent code is as follows.
export default {
  methods: {
    clickMe() {
      console.log('clicked')
      console.log(this.addNum(4, 2))
    }
    addNum(num1, num2) {
      return num1 + num2
    }
  }
}
Watchers
Watcher are written differently from how we usually write in JavaScript. The most-used syntax for a watcher in JavaScript is:
watch: {
  name: function(newval) {
    //do something
  }
}
We don’t tend to use handler syntax often.
watch: {
  name: {
    handler: 'nameChanged'
  }
}
methods: {
  nameChanged (newVal) {
    // do something
  }
}
However, the TypeScript syntax is similar to the second method. In TypeScript, we use the @Watch decorator and pass the name of the variable we need to watch.
@Watch('name')
nameChanged(newVal: string) {
  this.name = newVal
}
We can also set the immediate and deep watchers.
@Watch('project', {
  immediate: true, deep: true
})
projectChanged(newVal: Person, oldVal: Person) {
  // do something
}
Here is the JS-equivalent code:
watch: {
  person: {
      handler: 'projectChanged',
      immediate: true,
      deep: true
    }
}
methods: {
  projectChanged(newVal, oldVal) {
    // do something
  }
}
Emit
To emit a method from a child component to a parent component, we’ll use the @Emit decorator in TypeScript.
@Emit()
addToCount(n: number) {
  this.count += n
}
@Emit('resetData')
resetCount() {
  this.count = 0
}
In the first example, function name addToCount is converted to kebab-case, very similarly to how the Vue emit works.
In the second example, we pass the explicit name resetData for the method, and that name is used instead. Since addData is in CamelCase, it is converted to kebab-case again.
<some-component add-to-count="someMethod" />
<some-component reset-data="someMethod" />


//Javascript Equivalent
 methods: {
    addToCount(n) {
      this.count += n
      this.$emit('add-to-count', n)
    },
    resetCount() {
      this.count = 0
      this.$emit('resetData')
    }
}
3. Lifecycle hooks
A Vue component has eight lifecycle hooks, including created, mounted, etc., and the same TypeScript syntax is used for each hook. These are declared as normal class methods. Since lifecycle hooks are automatically called, they neither take an argument nor return any data. So we don’t need access modifiers, typing arguments, or return types.
export default class HelloWorld extends Vue {
  mounted() {
    //do something
  }
  beforeUpdate() {
    // do something
  }
}
The JavaScript-equivalent code is shown below.
export default {
  mounted() {
    //do something
  }
  beforeUpdate() {
    // do something
  }
}
4. Mixins
To create mixins in TypeScript, we must first create our mixin file, which contains the data we share with other components.
Create a file called ProjectMixin.ts inside the mixins directory and add the following mixin, which shares the project name and a method to update the project name.
import { Component, Vue } from 'vue-property-decorator'
@Component
class ProjectMixin extends Vue {
  public projName: string = 'My project'
  public setProjectName(newVal: string): void {
    this.projName = newVal
  }
}
export default ProjectMixin
In JavaScript, we’d write this code as follows.
export default {
  data() {
    return {
      projName: 'My project'
    }
  },
  methods: {
    setProjectName(newVal) {
      this.projName = newVal
    }
  }
}
To use the above mixin in our Vue component, we need to import Mixins from vue-property-decorator and our mixin file itself and write it as follows.
//Projects.vue
<template>
  <div class="project-detail">
    {{ projectDetail }}
  </div>
</template>
<script lang="ts">
import { Component, Vue, Mixins } from 'vue-property-decorator'
import ProjectMixin from '@/mixins/ProjectMixin'
@Component
export default class Project extends Mixins(ProjectMixin) {
  get projectDetail(): string {
    return this.projName + ' ' + 'Preetish HS'
  }
}
</script>
The JavaScript-equivalent code would be:
<template>
  <div class="project-detail">
    {{ projectDetail }}
  </div>
</template>
<script>
import ProjectMixin from '@/mixins/ProjectMixin'
export default {
  mixins: [ ProjectMixin ],
  computed: {
    projectDetail() {
      return this.projName + ' ' + 'Preetish HS'
    }
  }
}
</script>
5. Vuex
Vuex is the official state management library used in most Vue.js applications. It’s a good practice to split the store into namespaced modules. We’ll demonstrate how to write that in TypeScript.
First, we need to install two popular third-party packages:
npm install vuex-module-decorators -D
npm install vuex-class -D
In the store folder, let’s create a module folder to place each of our namespaced store modules.
Create a file called user.ts to have the user state.
// store/modules/user.ts
import { VuexModule, Module, Mutation, Action } from 'vuex-module-decorators'
@Module({ namespaced: true, name: 'test' })
class User extends VuexModule {
  public name: string = ''
  @Mutation
  public setName(newName: string): void {
    this.name = newName
  }
  @Action
  public updateName(newName: string): void {
    this.context.commit('setName', newName)
  }
}
export default User
The vuex-module-decorators library provides decorators for Module, Mutation, and Action. The state variables are declared directly, like class variables. This is a simple module that stores a user’s name and has a mutation and an action to update the user name.
We don’t need to have state as our first parameter in Mutations and context in case of Actions — the library takes care of that. It’s already injected into those methods.
Below is the JavaScript-equivalent code.
export default {
  namespaced: true,
  state: {
    name: ''
  },
  mutations: {
    setName(state, newName) {
      state.name = newName
    }
  },
  actions: {
    updateName(context, newName) {
      context.commit('setName', newName)
    }
  }
}
In the store folder, we need to create an index.ts file to initialize vuex and register this module:
import Vue from 'vue'
import Vuex from 'vuex'
import User from '@/store/modules/user'
Vue.use(Vuex)
const store = new Vuex.Store({
  modules: {
    User
  }
})
export default store
Using Vuex in components
To use Vuex, we can leverage a library called vuex-class. This library provides decorators to bind State, Getter, Mutation, and Action in our Vue component.
Since we are using namespaced Vuex modules, we first import namespace from vuex-class and then pass the name of the module to get access to that module.
<template>
  <div class="details">
    <div class="username">User: {{ nameUpperCase }}</div>
    <input :value="name" @keydown="updateName($event.target.value)" />
  </div>
</template>
<script lang="ts">
import { Component, Vue } from 'vue-property-decorator'
import { namespace } from 'vuex-class'
const user = namespace('user')
@Component
export default class User extends Vue {
  @user.State
  public name!: string

  @user.Getter
  public nameUpperCase!: string

  @user.Action
  public updateName!: (newName: string) => void
}
</script>
The JavaScript-equivalent code would be:
<template>
  <div class="details">
    <div class="username">User: {{ nameUpperCase }}</div>
    <input :value="name" @keydown="updateName($event.target.value)" />
  </div>
</template>
<script>
import { mapState, mapGetters, mapActions} from 'vuex'
export default  {
  computed: {
    ...mapState('user', ['name']),
    ...mapGetters('user', ['nameUpperCase'])
  }
  methods: {
    ...mapActions('user', ['updateName'])
  }
}
</script>
Conclusion
Now you have all the basic information you need to create a Vue.js application completely in TypeScript using a few official and third-party libraries to fully leverage the typing and custom decorator features. Vue 3.0 will have better support for TypeScript out of the box, and the whole Vue.js code was rewritten in TypeScript to improve maintainability.
Using TypeScript might seem a bit overwhelming at first, but when you get used to it, you’ll have far fewer bugs in your code and smooth code collaboration between other developers who work on the same code base.
Experience your Vue apps exactly how a user does
Debugging Vue.js applications can be difficult, especially when there are dozens, if not hundreds of mutations during a user session. If you’re interested in monitoring and tracking Vue mutations for all of your users in production, try LogRocket.
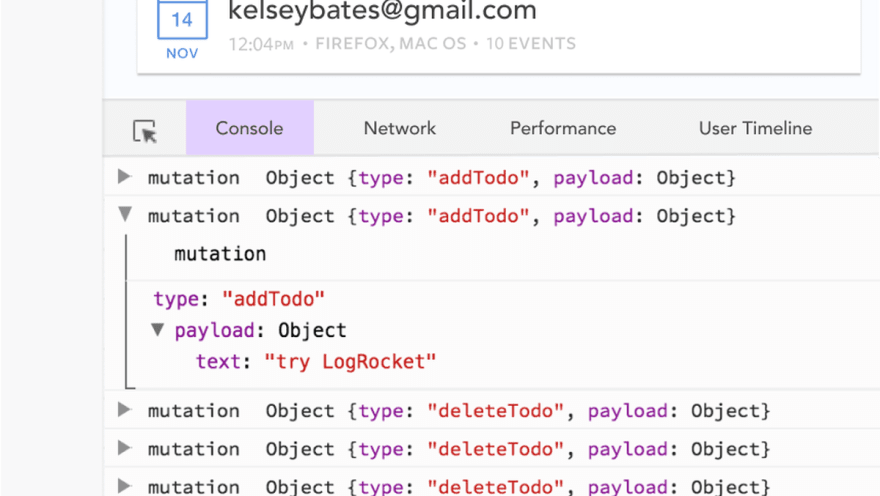
LogRocket is like a DVR for web apps, recording literally everything that happens in your Vue apps including network requests, JavaScript errors, performance problems, and much more. Instead of guessing why problems happen, you can aggregate and report on what state your application was in when an issue occurred.
The LogRocket Vuex plugin logs Vuex mutations to the LogRocket console, giving you context around what led to an error, and what state the application was in when an issue occurred.
Modernize how you debug your Vue apps - Start monitoring for free.
The post How to write a Vue.js app completely in TypeScript appeared first on LogRocket Blog.

Top comments (1)
Nice post.
The only thing I prefer is using the Vue.extends instead of vue-property-decorator. Why? Because the Vue.extends has more support from the Vue Core Team and the syntax doesn't change too much as we usually use with the JS version.
How to use it? Pretty simple: