
Written by Maciej Cieślar✏️
When working on a relatively young application, people often tend to disregard the need for scalability in order to implement features quicker. However, I believe that even at the earliest stages of a project, it is crucial to ensure our code is as scalable as possible.
Recently, as I was working on a project, I was faced with a challenge to add WebSockets to a NestJS application. While a relatively straightforward task thanks to the phenomenal documentation, it had one big downside: it introduced a state to the previously stateless application.
Backend applications nowadays are easily scalable thanks to tools such as Docker and Kubernetes. The complexity of creating many instances of an application has been significantly reduced — that is, as long as the application stays stateless. By having no state, an application can be turned off and on again, with no unexpected behavior. In other words, the applications are easily disposable.
Each implementation of the WebSocket protocol has to keep the currently open connections in some form of a state. That means that if we had two instances of the application, events dispatched by the second instance would never reach the clients connected to the first.
That being said, there are some ways of “sharing” the pool of open connections between many instances. One way is to use Redis’ publish/subscribe mechanism to forward emitted events between all instances of the application to make sure each open connection receives them.
The implementation below fully embraces the Nest ecosystem and covers cases such as: emitting events to one user only; emitting events to all open connections; and emitting events to all authenticated users.
Note: In the NestJS documentation, there is a very simple way of adding Redis to forward events between instances in a few lines of code. If you are looking for a simple, but limited, solution, take a look here. If you would like to find out for yourself how to implement the mechanism described above, by all means, do carry on.
This article assumes a basic understanding of Docker, TypeScript, and RxJS.
Setting up a Nest application
I have already described in great detail the setup I will be using here in this article. In short, we are using the Nest CLI to scaffold the application for us and Docker with docker-compose to add Redis and Postgres for local development.
I would advise you to download the repository and follow along, since I will be explaining only the relevant code, without the Nest boilerplate files such as modules.

Adding Redis
Redis is an in-memory data structure store that can be used as a database, cache, or publish/subscribe client. Note that these are just a few of the possibilities of Redis. If you are interested in learning more, here you go.
Normally, you’d have to install Redis on your computer, but thanks to the application being containerized with Docker, we don’t have to do that. Docker takes care of installing and starting Redis for us.
To communicate with Redis from Node runtime, there are a few libraries available. We are going to use ioredis due to the great number of features it provides while maintaining robust performance.
We have to create a Nest module to encapsulate the code related to Redis. Inside the RedisModule, we have the providers array, in which we create the ioredis clients to communicate with Redis. We also implement RedisService, which abstracts away both listening on and sending Redis messages.
As mentioned, we create two Redis clients with different purposes: one for subscribing and one for publishing messages.
//redis.providers.ts

import { Provider } from '@nestjs/common';
import Redis from 'ioredis';

import { REDIS_PUBLISHER_CLIENT, REDIS_SUBSCRIBER_CLIENT } from './redis.constants';

export type RedisClient = Redis.Redis;

export const redisProviders: Provider[] = [
 {
   useFactory: (): RedisClient => {
     return new Redis({
       host: 'socket-redis',
       port: 6379,
     });
   },
   provide: REDIS_SUBSCRIBER_CLIENT,
 },
 {
   useFactory: (): RedisClient => {
     return new Redis({
       host: 'socket-redis',
       port: 6379,
     });
   },
   provide: REDIS_PUBLISHER_CLIENT,
 },
];
Note that the host and port values would normally be configured through some form of config, like ConfigService, but here it was omitted for simplicity.
With those providers registered in the RedisModule, we are able to inject them as dependencies in our services.
So let’s create a RedisService.
//redis.service.ts

import {
 REDIS_PUBLISHER_CLIENT,
 REDIS_SUBSCRIBER_CLIENT,
} from './redis.constants';
import { RedisClient } from './redis.providers';

export interface RedisSubscribeMessage {
 readonly message: string;
 readonly channel: string;
}

@Injectable()
export class RedisService {
 public constructor(
   @Inject(REDIS_SUBSCRIBER_CLIENT)
   private readonly redisSubscriberClient: RedisClient,
   @Inject(REDIS_PUBLISHER_CLIENT)
   private readonly redisPublisherClient: RedisClient,
 ) {}

 // ...
}
In the constructor, we are injecting both Redis clients as expected.
Then we define two methods: fromEvent and publish. Let’s first take a look at the fromEvent method.
 public fromEvent<T>(eventName: string): Observable<T> {
   this.redisSubscriberClient.subscribe(eventName);

   return Observable.create((observer: Observer<RedisSubscribeMessage>) =>
     this.redisSubscriberClient.on('message', (channel, message) => observer.next({ channel, message })),
   ).pipe(
     filter(({ channel }) => channel === eventName),
     map(({ message }) => JSON.parse(message)),
   );
 }
It tells Redis to keep an eye out for the provided event by using the subscribe method of the redisSubscriberClient. Then we return an observable in which we are listening for any new messages by attaching a listener on the message event.
When we receive a new message, we first check whether the channel (Redis name for event) is equal to the provided eventName. If it is, we use JSON.parse to turn the Redis-sent string into an object.
 public async publish(channel: string, value: unknown): Promise<number> {
   return new Promise<number>((resolve, reject) => {
     return this.redisPublisherClient.publish(channel, JSON.stringify(value), (error, reply) => {
       if (error) {
         return reject(error);
       }

       return resolve(reply);
     });
   });
 }
The publish method takes a channel and an unknown value and uses the redisPublisherClient to publish it. We assume that the provided value can be stringified with JSON.stringify since Redis has no way of transporting JavaScript objects.
With these two methods, we have successfully abstracted away all the troublesome code of connecting to the underlying Redis clients and can now use a reliable API to send events between instances by using the RedisService.
Creating a state of sockets
We’ve already mentioned that the currently open WebSocket connections have to be kept in some kind of state. Libraries like socket.io, which we will be using here, do it for us.
The libraries provide useful methods such as .send or .emit, making it really hard to actually get the currently active sockets (connections) in a specified format. In order to make it easier for ourselves to retrieve and manage the sockets, we are going to implement our own socket state.
In our implementation of the state, we are interested in retrieving sockets for a specified user. This way, if instance No. 3 dispatches an event that the user with ID 1234 should receive, we will be able to easily check on all instances whether they have any sockets for the user with this ID.
We are assuming that the application we are creating supports some kind of authentication. How to authenticate an incoming socket will be covered later; for now, let’s just assume that we have a userId available for each socket.
This is going to be really simple. We are going to store the sockets in the following format: Map<string, Socket[]>. To put it in words, the key will be the user’s id and corresponding value will be all of their sockets.
Let’s create a Nest module named SocketStateModule and the service that takes care of keeping the state.
//socket-state-service.ts

@Injectable()
export class SocketStateService {
  private socketState = new Map<string, Socket[]>()

  // ...
}
First we define a private property that holds the state in the map, then we add a few methods to make it easier to use the service.
public add(userId: string, socket: Socket): boolean {
   const existingSockets = this.socketState.get(userId) || []

   const sockets = [...existingSockets, socket]

   this.socketState.set(userId, sockets)

   return true
 }
The add method takes as arguments userId and socket, which represent a newly open connection. First it saves the existing sockets for the user (or an empty array, if there are no existing sockets) in existingSockets. Then it appends the provided socket at the end of the collection and saves the new collection of sockets in the state.
public remove(userId: string, socket: Socket): boolean {
   const existingSockets = this.socketState.get(userId)

   if (!existingSockets) {
     return true
   }

   const sockets = existingSockets.filter(s => s.id !== socket.id)

   if (!sockets.length) {
     this.socketState.delete(userId)
   } else {
     this.socketState.set(userId, sockets)
   }

   return true
 }
The remove method filters out the unwanted socket from the currently existing sockets for the user. Each socket has a unique id that can be used to check for equality. If, after removing the socket, the user doesn’t have any more sockets in the state, the array is completely removed from the map to save memory. If there are some sockets left in the array after filtering, we simply set it back in the state.
 public get(userId: string): Socket[] {
   return this.socketState.get(userId) || []
 }

 public getAll(): Socket[] {
   const all = []

   this.socketState.forEach(sockets => all.push(sockets))

   return all
 }
There are also two more methods: get and getAll. In the get method, we return all the sockets belonging to a given user (or an empty array if there are none).
In getAll, we make use of the forEach method of Map and take sockets of each user and merge them all into a single array.
Creating an adapter
One of Nest’s best features is that it lets developers deal with the underlying libraries — such as Express and Fastify for servers, or socket.io and ws for sockets — through well-defined, reliable abstractions.
This way, from a developer’s point of view, the libraries are easily exchangeable without any significant changes to the codebase. In order to make it work, Nest has its own set of adapters that “fit” an API of a library to the API expected by Nest. It makes it very easy for Nest to support many libraries with different APIs.
Since we would like to track currently open sockets, we have to extend the adapter for socket.io. The adapter is available as a part of the @nestjs/platform-socket.io package. By extending the existing adapter, we can override only the methods we need, leaving everything else up to the adapter.
In Nest’s documentation, it is explained in great detail how custom adapters work and why they are so powerful. I recommend reading it before proceeding any further.
export class SocketStateAdapter extends IoAdapter implements WebSocketAdapter {
 public constructor(
   private readonly app: INestApplicationContext,
   private readonly socketStateService: SocketStateService,
 ) {
   super(app);
 }

 private server: socketio.Server;

 public create(port: number, options: socketio.ServerOptions = {}): socketio.Server {
   this.server = super.createIOServer(port, options);

   this.server.use(async (socket: AuthenticatedSocket, next) => {
     const token = socket.handshake.query?.token || socket.handshake.headers?.authorization;

     if (!token) {
       socket.auth = null;

       // not authenticated connection is still valid
       // thus no error
       return next();
     }

     try {
       // fake auth
       socket.auth = {
         userId: '1234',
       };

       return next();
     } catch (e) {
       return next(e);
     }
   });

   return this.server;
 }

 public bindClientConnect(server: socketio.Server, callback: Function): void {
   server.on('connection', (socket: AuthenticatedSocket) => {
     if (socket.auth) {
       this.socketStateService.add(socket.auth.userId, socket);

       socket.on('disconnect', () => {
         this.socketStateService.remove(socket.auth.userId, socket);
       });
     }

     callback(socket);
   });
 }
}
Our class extends IoAdapter and overrides two methods: create and bindClientConnect.
The create method is, as its name indicates, responsible for creating an instance of a WebSocket server. We use the createIOServer method of IoAdapter to reuse code as much as possible and to make sure everything is as close to the original adapter as possible.
Then we set up a middleware for authentication — in our example, a fake one. We assume that the authentication is token-based.
In the middleware, we first check whether there was a token provided in the places we expect it to be: the authorization header or in the query’s token param.
If there is no token provided we set socket.auth to null and call next to carry on with the execution of other middleware. If there were a token we would normally check and validate it with an AuthService, but that is beyond the scope of this article.
Instead, we will mock the payload of the validated token to be an object with single property userId equal to 1234. The token validation is placed inside a try/catch block since a token validation method can throw an error. If it does, we should catch it and call next with the error param to indicate to socket.io that an error has occurred.
The second method is bindClientConnect, which takes care of registering connections listeners in our socket server. Here we have access to the server, where we can listen on the connect event. The middleware we defined in the create method will be executed beforehand, so we can safely check for the auth property on the socket object.
Now remember: we also allow for there to be unauthenticated sockets, so we have to first check whether the auth property exists at all. If it does, we use the previously defined method of socketStateService to add the socket to the pool of user’s sockets.
We also register an event listener for the disconnect event to remove the socket from the state. And just to be perfectly sure we don’t have any memory leaks we use the removeAllListeners method of the socket object to remove the disconnect event listener.
Regardless of whether there has been the auth property, we have to call the callback function provided as the second argument to let the socket.io adapter keep the reference to the socket as well.
To register our custom adapter, we have to use the useWebSocketAdapter method of a Nest application:
//adapter.init.ts

export const initAdapters = (app: INestApplication): INestApplication => {
 const socketStateService = app.get(SocketStateService);
 const redisPropagatorService = app.get(RedisPropagatorService);

 app.useWebSocketAdapter(new SocketStateAdapter(app, socketStateService, redisPropagatorService));

 return app;
};
The redisPropagatorService is explained below.
//main.ts
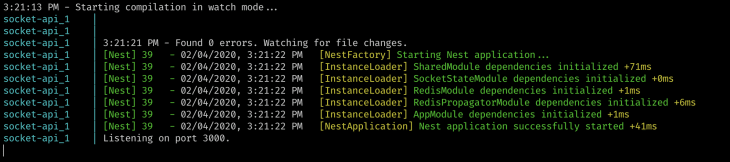
async function bootstrap(): Promise<void> {
const app = await NestFactory.create(AppModule);
initAdapters(app);
await app.listen(3000, () => {
console.log(`Listening on port 3000.`);
});
}
bootstrap();
Creating the Redis event propagator
With both the Redis integration and our own socket state and adapter in place, all that’s left to do is create one last service for dispatching events across all instances of the application.
To do that, we have to create one more Nest module called RedisPropagatorModule.
In RedisPropagatorService, we will be listening to any incoming Redis events from other instances and dispatch events to them as well. Voilà! Our own publish/subscribe service!
There are three types of events that go through Redis:
- Emit event to all open connections
- Emit event only to the authenticated users
- Emit event only to a specified user
In the code, we are going to define them as follows:
export const REDIS_SOCKET_EVENT_SEND_NAME = 'REDIS_SOCKET_EVENT_SEND_NAME';
export const REDIS_SOCKET_EVENT_EMIT_ALL_NAME =
 'REDIS_SOCKET_EVENT_EMIT_ALL_NAME';
export const REDIS_SOCKET_EVENT_EMIT_AUTHENTICATED_NAME =
 'REDIS_SOCKET_EVENT_EMIT_AUTHENTICATED_NAME';
And now let’s create the service:
@Injectable()
export class RedisPropagatorService {
 private socketServer: Server;

 public constructor(
   private readonly socketStateService: SocketStateService,
   private readonly redisService: RedisService,
 ) {}

 public propagateEvent(eventInfo: RedisSocketEventSendDTO): boolean {
   if (!eventInfo.userId) {
     return false;
   }

   this.redisService.publish(REDIS_SOCKET_EVENT_SEND_NAME, eventInfo);

   return true;
 }

 public emitToAuthenticated(eventInfo: RedisSocketEventEmitDTO): boolean {
   this.redisService.publish(
     REDIS_SOCKET_EVENT_EMIT_AUTHENTICATED_NAME,
     eventInfo,
   );

   return true;
 }

 public emitToAll(eventInfo: RedisSocketEventEmitDTO): boolean {
   this.redisService.publish(REDIS_SOCKET_EVENT_EMIT_ALL_NAME, eventInfo);

   return true;
 }

 // ...
}
In the constructor, we make use of both previously created services. We have defined three useful methods. All of them do one simple thing: they dispatch the expected Redis event with the provided info. The only difference is in the propagateEvent method, where we don’t want to publish the event unless the userId is provided.
Other than that, both the emitToAll and emitToAuthenticated methods can be called from anywhere in our codebase. That is not the case for propagateEvent; this method will be called each time our socket server dispatches an event to the frontend client.
Listening to event dispatches
In order to make use of the Nest ecosystem to the fullest extent, we are going to create an interceptor that will have access to each socket event response. This way, we won’t have to manually call propagateEvent in every one of our gateways.
//redis-propagator.interceptor.ts

@Injectable()
export class RedisPropagatorInterceptor<T> implements NestInterceptor<T, WsResponse<T>> {
 public constructor(private readonly redisPropagatorService: RedisPropagatorService) {}

 public intercept(context: ExecutionContext, next: CallHandler): Observable<WsResponse<T>> {
   const socket: AuthenticatedSocket = context.switchToWs().getClient();

   return next.handle().pipe(
     tap((data) => {
       this.redisPropagatorService.propagateEvent({
         ...data,
         socketId: socket.id,
         userId: socket.auth?.userId,
       });
     }),
   );
 }
}
The interceptor can subscribe to the observable returned by the next.handle() method. Each WebSocket event sent by our server will go through here. By using RxJS’ tap method, we can react to the response without altering it.
Each dispatched event, before being returned to the frontend client, is propagated across all of our instances in which we send the event to all the sockets belonging to the user.
Keep in mind that the auth object is optional, so we use TypeScript’s new optional chaining syntax to make sure our code doesn’t break when there is no auth object.
Inside the propagateEvent method, we reject the events without userId. This is because such events have no interest in being propagated across instances — the connection is unique.
Remember, the event is sent to the frontend client whether the propagateEvent method is used or not. So if there is no auth object, the event sent by the gateway will still reach the frontend client. We are simply making sure that it is sent to all other sockets the user might have open.
We’ll show how to attach the interceptor in the example at the end of the article.
Creating event listeners in RedisPropagatorService
Aside from dispatching the events to other instances, we would also like to listen to the events coming from other instances.
@Injectable()
export class RedisPropagatorService {
 // ...

 private socketServer: Server;

 public constructor(
   private readonly socketStateService: SocketStateService,
   private readonly redisService: RedisService,
 ) {
   this.redisService
     .fromEvent(REDIS_SOCKET_EVENT_SEND_NAME)
     .pipe(tap(this.consumeSendEvent))
     .subscribe();

   this.redisService
     .fromEvent(REDIS_SOCKET_EVENT_EMIT_ALL_NAME)
     .pipe(tap(this.consumeEmitToAllEvent))
     .subscribe();

   this.redisService
     .fromEvent(REDIS_SOCKET_EVENT_EMIT_AUTHENTICATED_NAME)
     .pipe(tap(this.consumeEmitToAuthenticatedEvent))
     .subscribe();
 }

 public injectSocketServer(server: Server): RedisPropagatorService {
   this.socketServer = server;

   return this;
 }
}
Thanks to the redisService, we can easily subscribe to a Redis event. Using the RxJS tap operator, we can call one of our methods to react appropriately to streams of events of an observable.
Changing the socketStateAdapter
We have also created an injectSocketServer method that lets us inject a WebSocket server instance into our service. It would be better to do this through a dependency injection, but it’s not really possible when writing a custom adapter. Nevertheless, with this method in place, we have to adjust the code of the adapter:
export class SocketStateAdapter extends IoAdapter implements WebSocketAdapter {
 public constructor(
   private readonly app: INestApplicationContext,
   private readonly socketStateService: SocketStateService,
   private readonly redisPropagatorService: RedisPropagatorService,
 ) {
   super(app);
 }

 public create(port: number, options: socketio.ServerOptions = {}): socketio.Server {
  const server = super.createIOServer(port, options);
  this.redisPropagatorService.injectSocketServer(server);
  // ...
}
We have used a dependency injection to get the instance of redisPropagatorService, and during the creation of the WebSocket server, we simply inject it into our singleton service.
With that out of the way, let’s get back to our redisPropagatorService and define the methods used for listening for events.
consumeSendEvent method
First we’ll create a method called consumeSendEvent to listen to the Redis event that tells us to send an event to a specified user.
 private consumeSendEvent = (eventInfo: RedisSocketEventSendDTO): void => {
   const { userId, event, data, socketId } = eventInfo;

   return this.socketStateService
     .get(userId)
     .filter((socket) => socket.id !== socketId)
     .forEach((socket) => socket.emit(event, data));
 };
In the eventInfo, we pass the following information:
export class RedisSocketEventSendDTO {
 public readonly userId: string;
 public readonly socketId: string;
 public readonly event: string;
 public readonly data: unknown;
}
Knowing where to send the event (userId), what the event is called (event), what data it should contain (data), and which socket the event originated from (socketId), we can safely send the event to the existing user’s sockets.
We do that by first getting the user’s sockets — making sure we are not sending the same event twice by filtering the sockets by the provided socketId — and then using the emit method of each socket to send the event.
If there are no sockets currently open for the user, which would be the case if the user had only one open connection on some other instance, the socketStateService’s get method will return an empty array and all the following methods won’t be executed.
Inside the interceptor, we use the propagateEvent method to send the event across all of our instances. The event is then sent to the frontend client. This is why we keep track of the socket the event originated on: to ensure we don’t send the same event on the same socket twice.
consumeEmitToAllEvent
 private consumeEmitToAllEvent = (
   eventInfo: RedisSocketEventEmitDTO,
 ): void => {
   this.socketServer.emit(eventInfo.event, eventInfo.data);
 };
The method is very simple — all there is to do is to use the emit method of the socket server to emit the event to all currently open connections, authenticated or not.
consumeEmitToAuthenticated
 private consumeEmitToAuthenticatedEvent = (
   eventInfo: RedisSocketEventEmitDTO,
 ): void => {
   const { event, data } = eventInfo;

   return this.socketStateService
     .getAll()
     .forEach((socket) => socket.emit(event, data));
 };
In the consumeEmitToAuthenticated method, we make use of the getAll method of the socketStateService. After getting all the authenticated sockets we use the emit method of the socket to send the event.
Working example
The last thing to do is to create a gateway that listens to the incoming events and check whether everything is working as expected.
@UseInterceptors(RedisPropagatorInterceptor)
@WebSocketGateway()
export class EventsGateway {
 @SubscribeMessage('events')
 public findAll(): Observable<any> {
   return from([1, 2, 3]).pipe(
     map((item) => {
       return { event: 'events', data: item };
     }),
   );
 }
}
With the use of the @UseInterceptors decorator, we register the interceptor that emits the events across all instances. The interceptor has to be registered on each gateway we create if we wish to have the events propagated.
And now for a simple HTML file with the socket.io-client library:
<!DOCTYPE html>
<html lang="en">
 <head>
   <meta charset="UTF-8" />
   <meta name="viewport" content="width=device-width, initial-scale=1.0" />
   <meta http-equiv="X-UA-Compatible" content="ie=edge" />
   <title>Sockets test</title>
 </head>
 <body>
   <script src="https://cdnjs.cloudflare.com/ajax/libs/socket.io/2.3.0/socket.io.dev.js"></script>
   <script>
     window.s = io('http://localhost:3000', {
       query: {
         token: '123',
       },
     });

     s.emit('events', { event: 'events', data: { test: true } });
     s.on('events', (response) => {
       console.log(response);
     });
   </script>
 </body>
</html>
The provided token is obviously fake, we just want to simulate that there is one.
After getting the code from the repository, in order to start the app, run:
docker-compose up
Once the server is up and running, open the file and check the console:

Knowing that there is a token provided, we can check by opening the second tab that both tabs should receive the same events (since they are two sessions from one user):
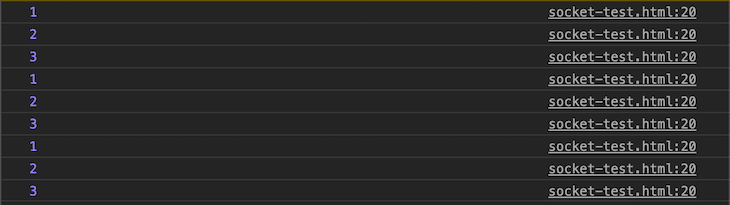
By refreshing one tab, we are causing the second one to also receive the events. Our events go through the Redis client, which then forwards them to the same instance they originated from, but this time, we send it only to the sockets that have not received the event yet.
The full code is available here.
Summary
When adding WebSockets to our applications, we are faced with a decision: whether our application is going to be scalable or not. Deciding upfront to go with the scalable solution could benefit us greatly once the application needs to be replicated across many instances. Thanks to the modularity of Nest, once implemented, the solution can be easily copied to other projects.
Making sure our applications are scalable is hard work. For the most part, it requires a radical change of thinking on our part. But it sure is worth it.
Plug: LogRocket, a DVR for web apps

LogRocket is a frontend logging tool that lets you replay problems as if they happened in your own browser. Instead of guessing why errors happen, or asking users for screenshots and log dumps, LogRocket lets you replay the session to quickly understand what went wrong. It works perfectly with any app, regardless of framework, and has plugins to log additional context from Redux, Vuex, and @ngrx/store.
In addition to logging Redux actions and state, LogRocket records console logs, JavaScript errors, stacktraces, network requests/responses with headers + bodies, browser metadata, and custom logs. It also instruments the DOM to record the HTML and CSS on the page, recreating pixel-perfect videos of even the most complex single-page apps.
Try it for free.
The post Scalable WebSockets with NestJS and Redis appeared first on LogRocket Blog.

Top comments (2)
Thank you. just learning nestjs and socket io. if you may can you please provide more on saving the chats and identifying who sends chats to who. thank you so much :)
How to emit event to a specific connected client?