
Why Microservices
Traditionally, development teams built applications in one large codebase. This technique suited the way teams worked and what their users needed, but the modern user demands reliable, fast responses and near-constant updates to applications. The developers behind these applications want to try new techniques, tools, and languages to see if they improve a user's experience. Meeting these needs is difficult when an entire application is inside one large, tightly coupled codebase, often referred to as a "monolithic" application. As a result, microservices — breaking individual application components into smaller, self-contained "micro" services — has emerged as an alternative to this monolithic architecture. These microservices generally communicate with each other via standard APIs and run in containers that package applications and their dependencies into recreatable and scalable self-contained units.
One major benefit to microservices is that if your service experiences increased demand, you can add more instances to cope. You can then reduce them again when no longer needed, keeping your infrastructure needs and costs as efficient as necessary. This ability to add instances of a service with ease also means that you can upgrade or update services in a microservices architecture without any downtime for your entire application. Of course, microservices bring their own challenges as well. For a more in-depth exploration of the advantages and challenges with microservices, read this article.
In this article, I'm going to walk you through how to use Heroku as a way to deploy and become comfortable with microservices and then close with best practices.
The Services
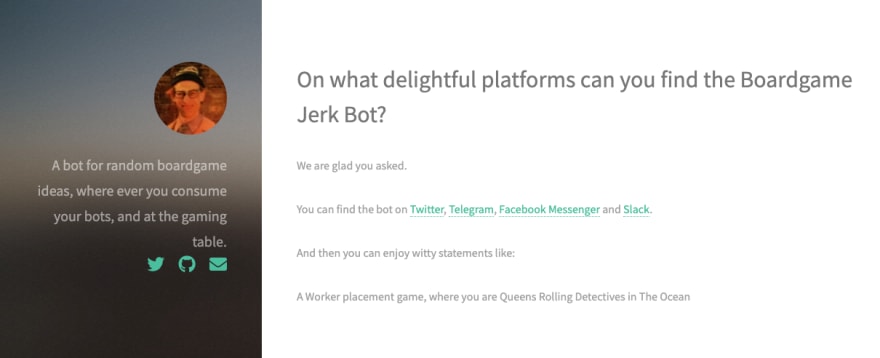
To show how to set up a microservices-based application on Heroku, I have a small novelty bot that generates random board game ideas. The application consists of the following components and services:
- an NPM package of the lexicon of the bot
- a series of bots that use the package
- a Twitter bot that tweets on a schedule
- a Telegram bot that responds when asked
- a website that displays a random phrase provided by the bot on every reload
I won't go too much into the code of each service since they are all small and don't add to the focus of this post, apart from communicating with each other over HTTPS requests (you can find all the code on GitHub). Instead, I focus on showing how to deploy each of these components as a microservice to Heroku and how communication between these services works.
NPM Module
At the core of the bot is an npm module that uses the tracery library to generate a series of random strings based on dictionaries of words. It returns text to the bots in the form of:
A {mechanic} game, where you are {you_are} {doing} {with_what} in {in}
which results in something like:
"A Role playing game, where you are Researchers Growing Great Old Ones in A Post apocalyptic world"
The module is not a microservice or deployed to Heroku, but a utility library hosted on npm. If you are interested in looking more into the code, have a look at the GitHub repository.
API Service
In theory, I could use the npm module in all JavaScript-based services, but that's not microservice-friendly, and it restricts the programming languages I could use in the long run. To solve this, the first service is an HTTP API that wraps the module and returns a string. It's a small node.js application that uses Express.js. You can find the full code on GitHub.
To deploy the service to Heroku, you need first to create a new Heroku project and git remote using the Heroku CLI:
heroku create {NAME}
And then commit and push to the Heroku remote:
git push heroku master
If you use a language that Heroku buildpacks support, pushing to the remote triggers a detection and build process, which, for this application, is more than enough.
Heroku uses "dynos" to run instances of your applications. Dynos have different process types based on whether the task is long-running, one-off, or open to external traffic. The Heroku build process can create these for you depending on your buildpack, but you can also create a Procfile that explicitly defines what process and command to use to run your app. For this service, create a Procfile file and add the following:
web: node ./index.js
Since the service accepts external HTTP traffic, you need to use web for the process type, as it is the only type that allows it. Read the Procfile documentation for more details on the other types.
If you now visit your dashboard, you can see the new application. Click the Open app button to find the URL, or use the following command:
heroku open
Telegram bot
The next service powers the telegram bot that generates a random game idea when someone types a certain keyword.
You can see the full code for the service on Github. Again, it's a small service and uses the slimbot dependency to make calls to the Telegram API.
The Telegram bot API has a couple of odd quirks. Instead of specifying an endpoint it should listen to requests to and from, your application broadcasts an API key that the Telegram API listens to. You then use the "botfather" to create a bot, and it gives you the access token.
As you shouldn't expose that token to the public, use the Config Vars section of an application's preferences to define environment variables passed to the application. You can couple this with a local .env file for when you are running and testing the application locally. To make it easier to move the service around, you should also create a variable for the host of the API service.

Config vars section of Heroku dashboard
Add a Procfile, which is similar to the API service, but runs a different JavaScript file:
web: node ./telegram.js
Create a Heroku project and commit and push the code. After the build finishes, your application should be ready and listening for requests from anyone who installed the Telegram bot.

Telegram bot example
Twitter bot
The next service powers the Twitter bot that tweets a random game idea on a weekly schedule.
You can see the full code for the service on Github. Again, it's a small service and uses the twit dependency to make calls to the Twitter API.
Most of the steps for setting it up on Heroku are the same as for the Telegram bot, but in addition to the host variable, you need a different set of Config Vars to authenticate against the Twitter API (read more in the Twitter documentation).
To run the bot on a schedule, you need to use the Heroku scheduler. As I want it to run every Wednesday, I define the scheduler job to run the following every day:
$ if [ "$(date +%u)" = 3 ]; then bin/run_bot_heroku.sh; fi
And the bin/run_bot_heroku.sh takes the place of the Procfile with the following contents:
#!/bin/bash
node twitter.js

Twitter bot example
Website Service
The final service is the website. This is static HTML, plus a small JavaScript snippet that calls the API service on page load to display an example of the bot output. You can see the full code on GitHub. Heroku doesn't officially support hosting vanilla HTML (as opposed to HTML generated by Rails etc.), but adding an entire web application is too much for this simple site. The workaround is to create an index.php file with the following content:
<?php include_once("index.html"); ?>
When you create a Heroku project and commit and push the code, the build then detects the PHP file and uses the PHP/Apache buildpack, automatically generating a dyno with a web process type.
The one negative to this approach is the environment variables, so I hardcoded the URL.
Website example
That's it. We now have a series of services deployed to Heroku that interact with other external APIs and platforms, but fetch their data from one independent service. If you update one, it doesn't affect the others. We can add further services for different platforms without affecting the others, and change individual services with new features and bug fixes.
Applying Microservices Best Practices with Heroku
Switching to microservices involves technical and organizational changes, some of which Heroku offers tools to assist.
Automation
In this tutorial, I had two different git remotes: one for GitHub, and one for Heroku. Instead, you can connect Heroku to a GitHub repository and automatically build and deploy code straight from a branch. The automatic deployment includes creating preview versions of your apps and pipelines, which are great for testing builds as part of a continuous delivery workflow before deploying to production.
Monitoring
Managing and analyzing metrics and logs is more complicated with a microservices architecture than with a monolith, as with microservices, you have to source and gather information from multiple sources and aggregate them.
Heroku helps with this task by providing aggregated metrics for applications at a team level. You can use Logpex to collate log entries into one API and consume those with another tool, such as Grafana.
Maintaining State
Another common complexity with microservices is maintaining state for services as they scale or as they come and go. Heroku offers database and data management services (Postgres, Redis, and Kafka) that you can share between services. This isn't strictly a microservice, but it can help provide a data infrastructure for yours.
Team Collaboration
As different teams and team members can work on different application services independently, the use of microservices encourages and requires better communication. In addition to collaborating on code, you can add collaborators to your Heroku applications who can manage and maintain deployments, addons, and admin tasks.
Conclusion
In this article, I created a handful of small services for a hobby project and got them running with minimal time and effort using Heroku. I can now continue to add new services for other bot platforms as I work on support for them and know they continue running with minimal action on my part.

Top comments (0)