
Chatbots have a variety of use cases. One of the more common uses is to help reduce repetitive customer service work, enabling human agents to focus on more complex and personal tasks. In this tutorial, I create a basic bot for a small company that assists the customer support team. The bot can answer a selection of common questions about a fictional software application. The bot uses natural language processing (NLP) to recognize certain questions and respond appropriately, directing the user to a human support agent if they ask, or the bot is unable to understand or answer.
There are a lot of platforms available for creating bots, but I decided to try Einstein from Salesforce, as it can integrate with Salesforce data and workflows, which are commonly used by customer service teams.
Einstein Chatbot
Einstein is AI for the Salesforce Platform, providing infrastructure for creating predictive models to interact with Salesforce data. This includes analytics, text, and image analysis, as well as a bot platform that combines text analysis and Salesforce workflows.
Create Community and Add Chat
I wanted to add a bot to an external site I had set up with Heroku, but following the steps for creating and adding it to a Salesforce Community seemed to be the easiest and fastest way to see what was possible as I didn’t need to set up a custom server or whitelisting.
The first step is to create the community and add the chat capabilities that my bot will use to talk to the customers. I used this Trailhead module as a guide. For my specific case, I called my community “Customer Support,” and chose a domain that suited, https://acme-users-developer-edition.um6.force.com/support. I also changed some of the settings to “Acme Support” to suit my use case, and added my domain to the Website URL step.
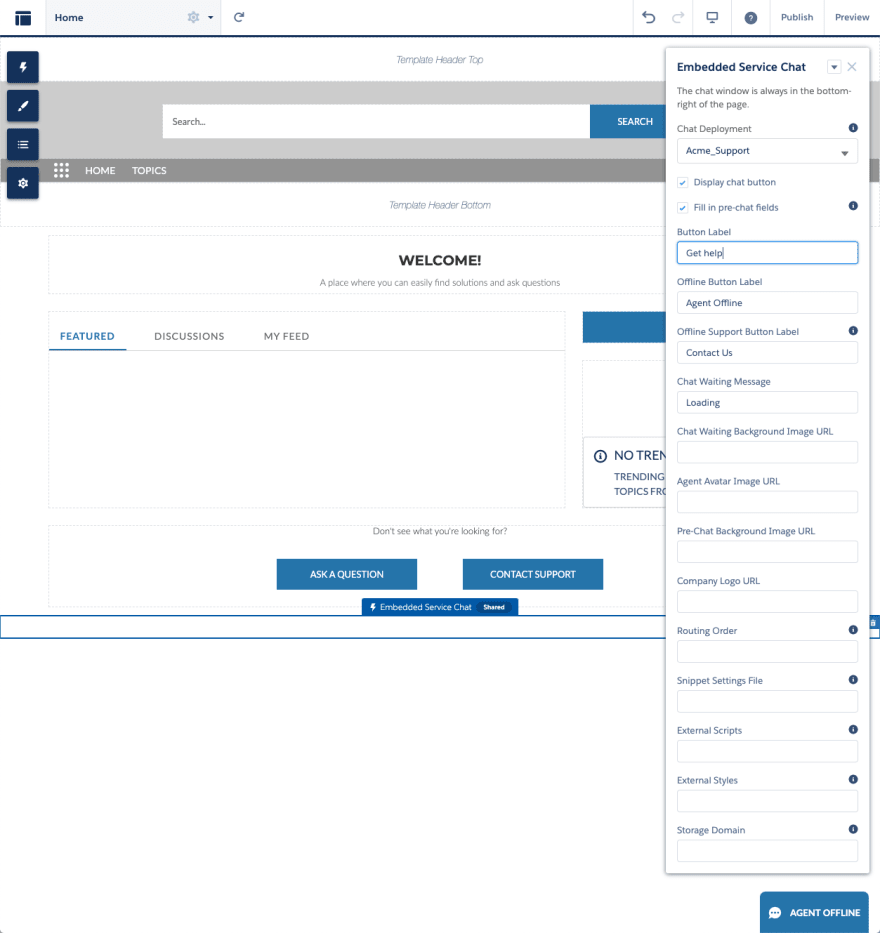
When you add the embedded chat to your community components, make sure you select the correct Chat Deployment and configure its look to suit your use case.
If you want to add the bot to a web page of your own, instead of creating a community for the bot, create a “web chat” button (following the same steps mentioned in the Trailhead module above), then follow this Trailhead module to get started.
At the end of the webchat flow in the trailhead, the module is a code snippet that you can paste into your web page (including Apex pages) to add your bot. The flow for creating an Einstein-powered bot is the same, regardless if you are implementing the bot on a Salesforce community or your custom site.
Wherever you decide to host the bot, update the values in the code snippet to make sure you add the domain to the Website_ URL_ text field, for example, "https://acme-computers.herokuapp.com/". You can customize the bot experience by changing the CSS and JavaScript values, or adding custom JavaScript values using the embedded_svc.settings.extraPrechatFormDetails and embedded_svc.settings.extraPrechatInfo parameters. Use extraPrechatFormDetails to send additional information to the chat transcripts, and extraPrechatInfo to map those values to new or existing records in Salesforce. Find more details in the documentation.
Create Einstein Bot
Now to the interesting part, adding and configuring a bot with Einstein. To get started I followed this Trailhead module.
Creating a bot requires a degree of pre-planning and consideration for how a user might interact with a bot, and the various types of questions and requests they might have for it. It’s worth thinking through how your customers currently interact with human support agents and find ways to create parallels with a bot. A bot should also have an element of personality, and getting that personality right requires thinking about your current business branding, and when people might interact with your bot. For example, the tone of voice may need to change, depending on the user's situation. For example, it may be more appropriate for the bot to use less humor when dealing with a serious problem rather than when greeting a user for the first time. The Salesforce docs provide additional resources you can read.
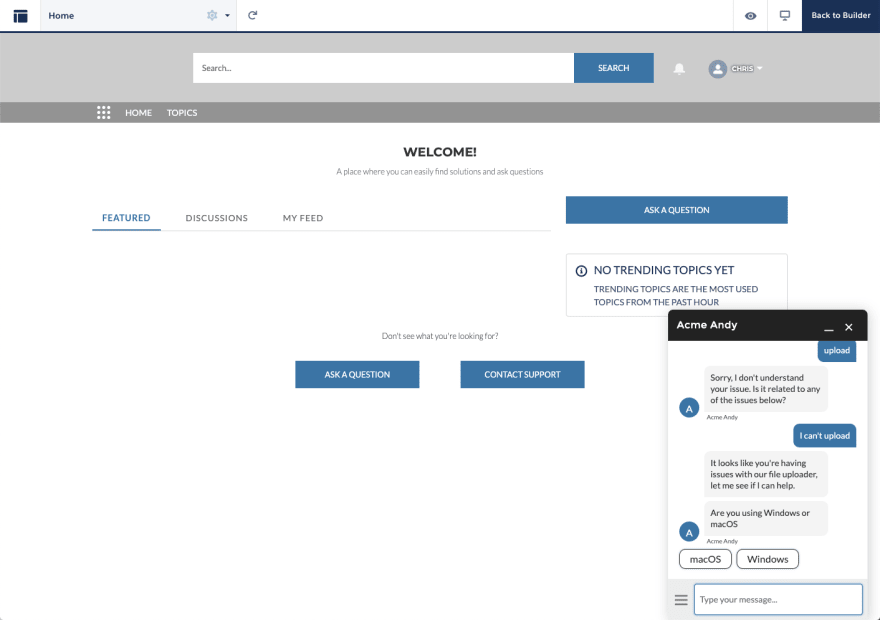
This example Acme support bot is designed to help people experiencing problems with a simple piece of software that lets people log in to an account, and upload particular files.
You can see the initial settings I added below. For the menu items, I added two of the common problem areas people have: Login Issues and Upload Issues, plus several other general options.
Build Einstein Bot
With the bot in place, you can start making it suit the use case. First, here's an overview of the bot builder sections and what you can use them to change.
- Overview: Basic bot information and settings. It’s worth checking that there is a deployment defined in the Channels section. If you have followed similar steps so far, this is probably already set to the values from the earlier chat setup steps. In this section, you can also set the kind of information you want to store between sessions.
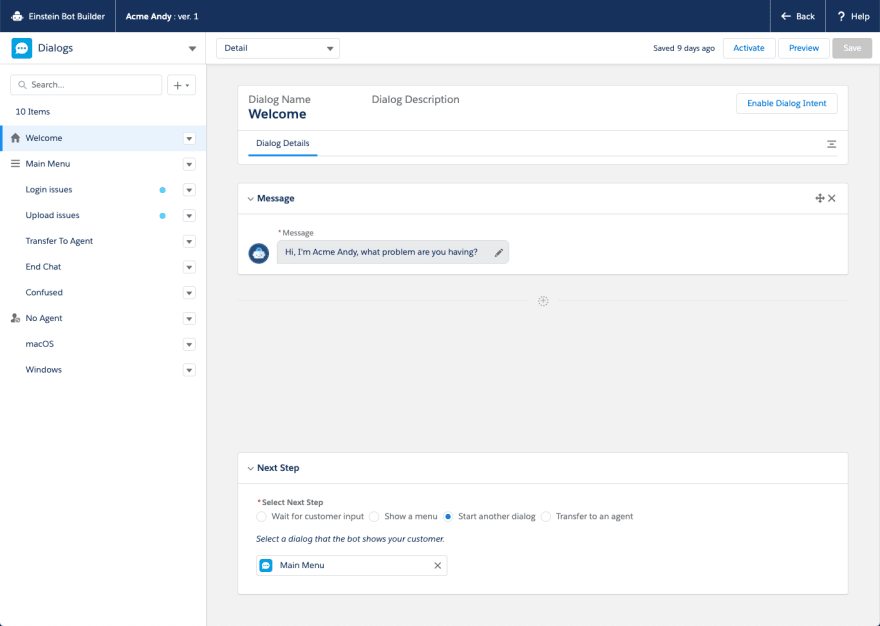
- Dialogs (see above screenshot): Define the potential interaction points a user has with a bot. For example, this can include the different types of questions the bot asks the user to prompt discussion.
- Entities: The types of data that you want to collect from a user. For example, you can collect customer details, more information about technical issues, or purchasing preferences.
- Variable: A container that stores a specific piece of data collected from the user. These are where you store the values of entities you defined, or Salesforce defines for you.
Next, I'm going to look in detail at the most interesting part, the dialogs.
Configuring Dialogs
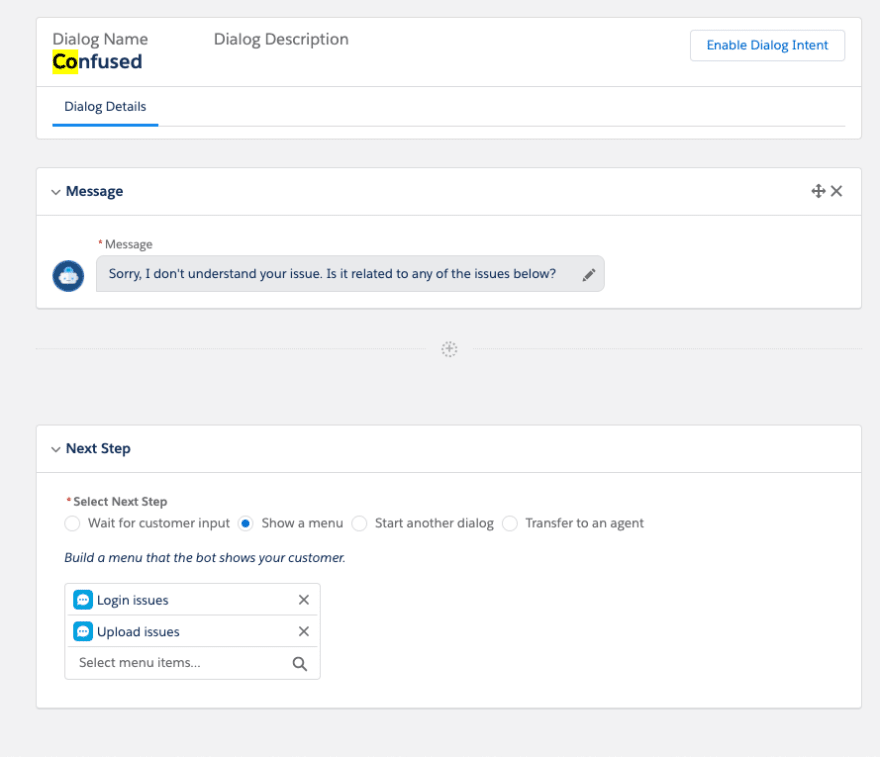
There are a handful of pre-defined functions for some of the dialogs you can see on the left-hand menu. The house icon shows that this is the default dialog the bot starts from, and the three horizontal lines show this is the main menu a user can always return to. There are also default dialogs for ending a chat, transferring to a human, or when the bot doesn’t understand (defaults to “Confused”).
In the right-hand panel of each dialog, you can define the initial message and the next steps, such as a request for more details.
To use Einstein with a bot, you need to click the Enable Dialog Intent button on the top right of the main panel. Then, click the Dialog Intent pane where you start adding “Utterances”. Utterances are the ways a user might ask a bot a particular question. Once you have added a minimum of 20, you can enable Einstein from the toggle above. With Einstein disabled, a bot can only handle exact matches to the utterances; with Einstein, it can infer the question. Once a bot has matched an utterance, it switches to the corresponding dialog.
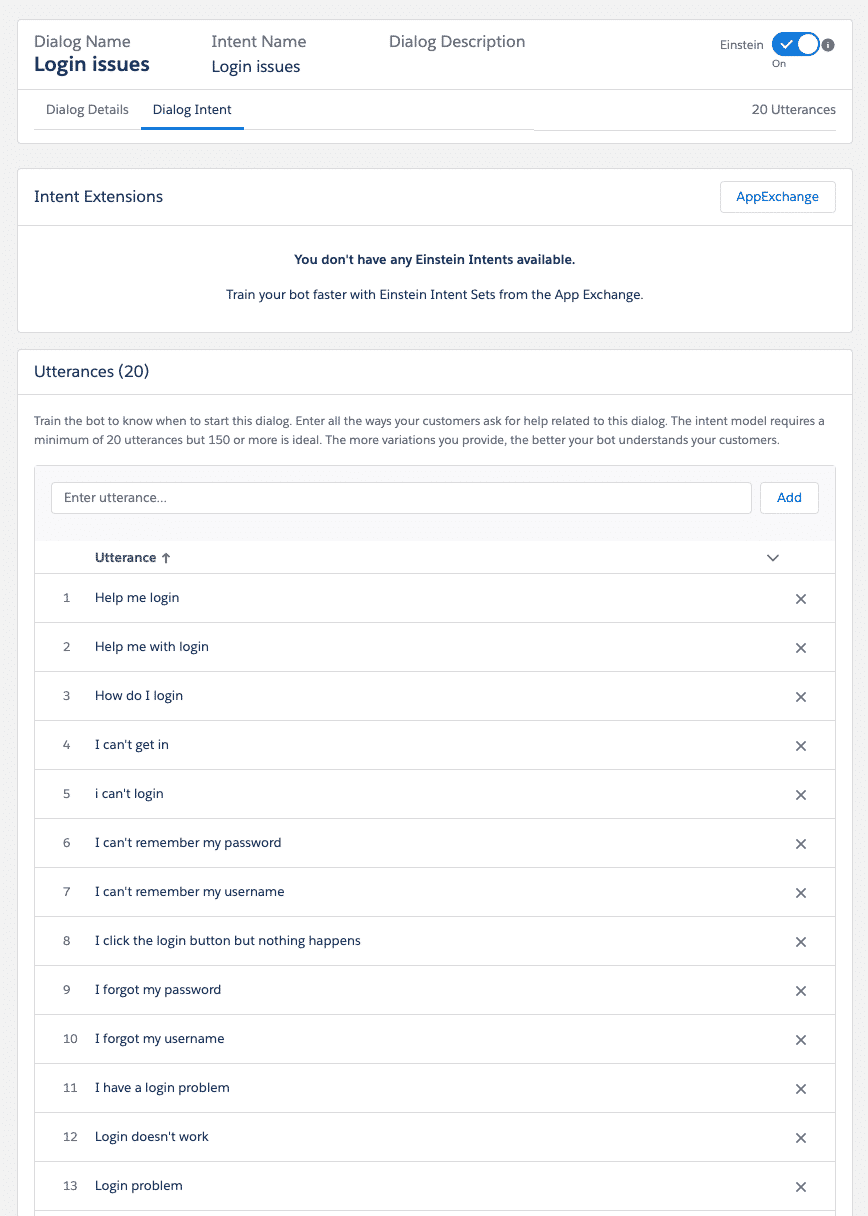

For this example, I added utterances for the login issues and upload issues dialogs. If Einstein finds a match, then the bot displays a message and presents a new menu item that either takes a customer to somewhere for further information or directs them to a service representative. In a production chatbot, you probably make this more complex.
After your bot receives input, you can trigger the next steps based on that input, which can be various options including asking further questions, redirecting to other dialogs, call Salesforce Flow or Apex objects, or rules that trigger different combinations of the above based on the user's next steps.
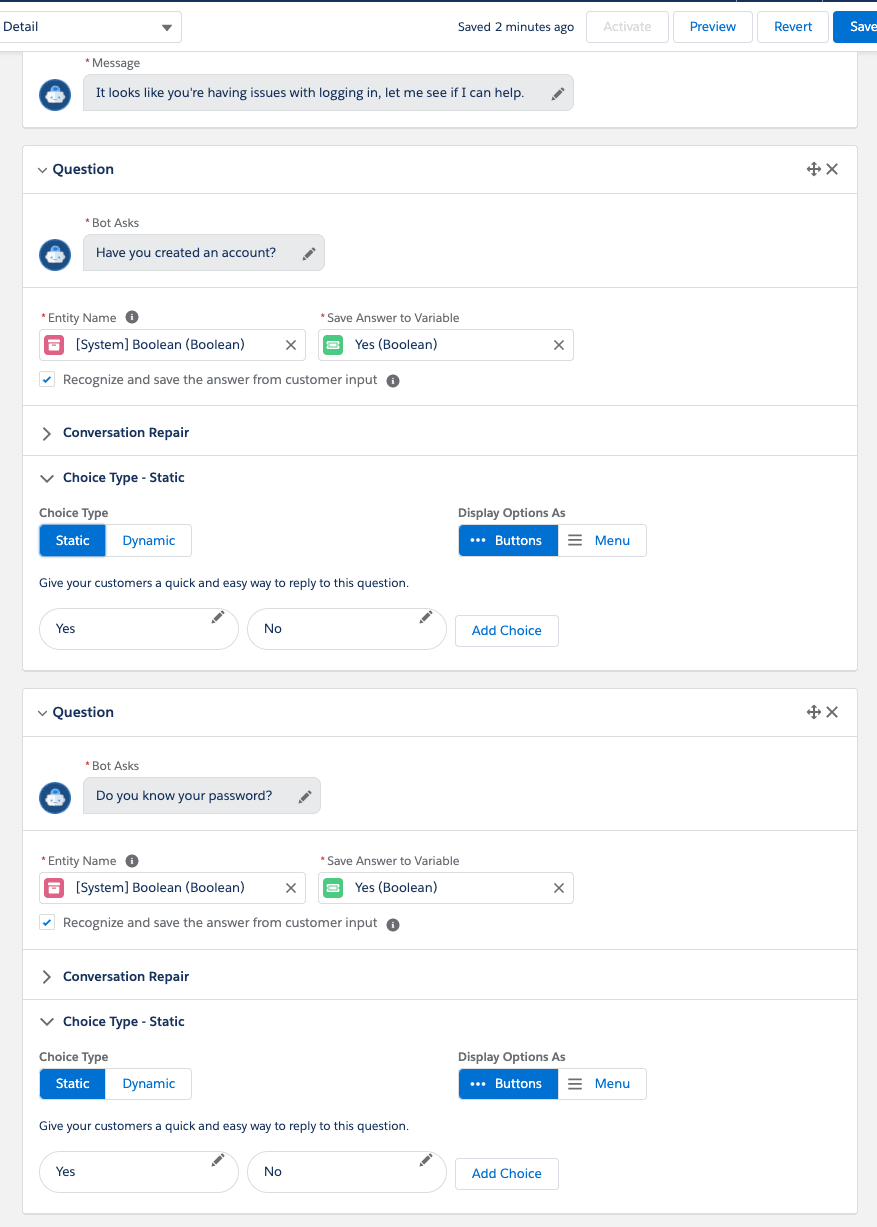
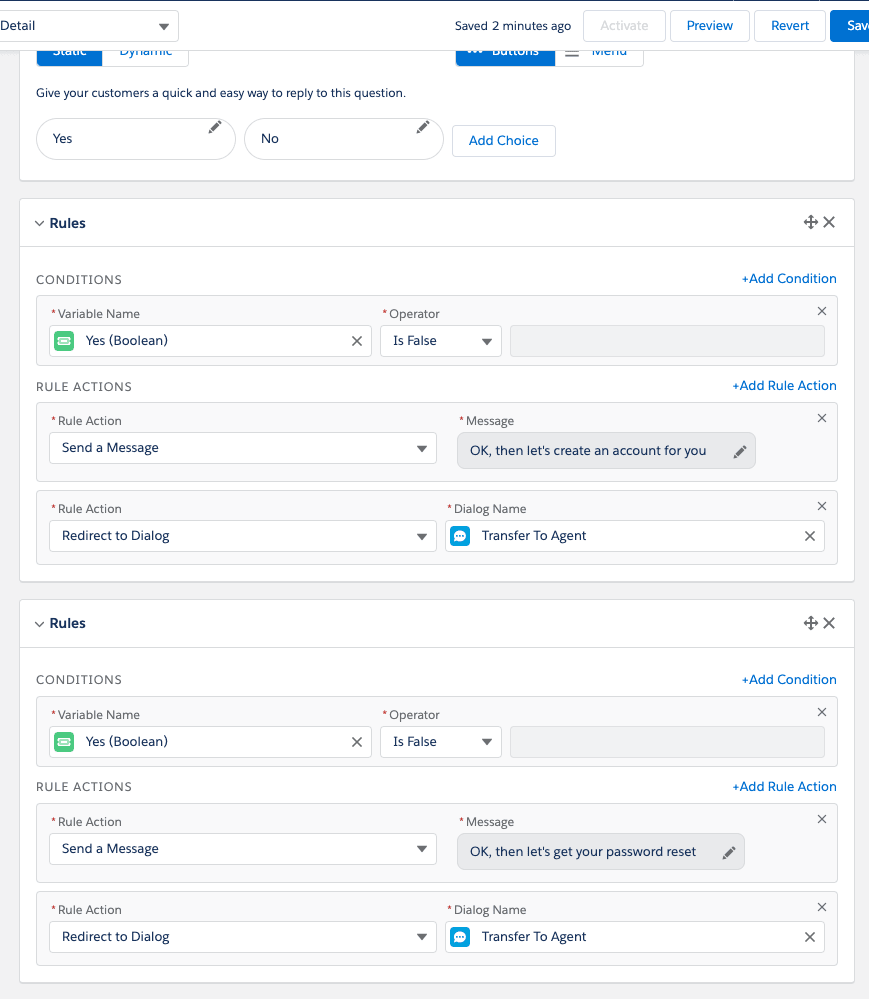
For example, once my bot identifies that the user is having login issues it asks if the user has an account, or has forgotten their password, storing their answers and redirecting them to a human agent for help. I could have triggered an Apex or Workflow instead. I used static choices, but you can also populate these choices from Salesforce objects, or send a user into a new account or password reset flow.
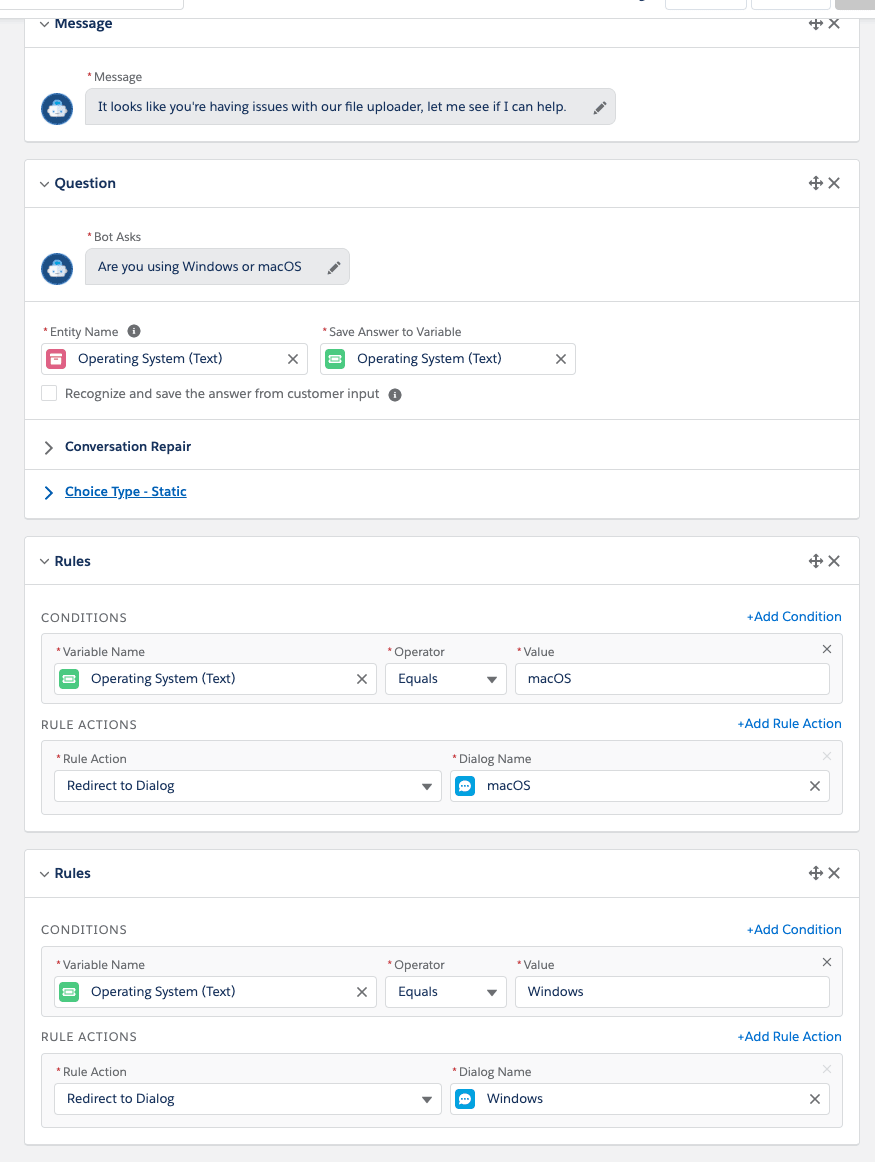
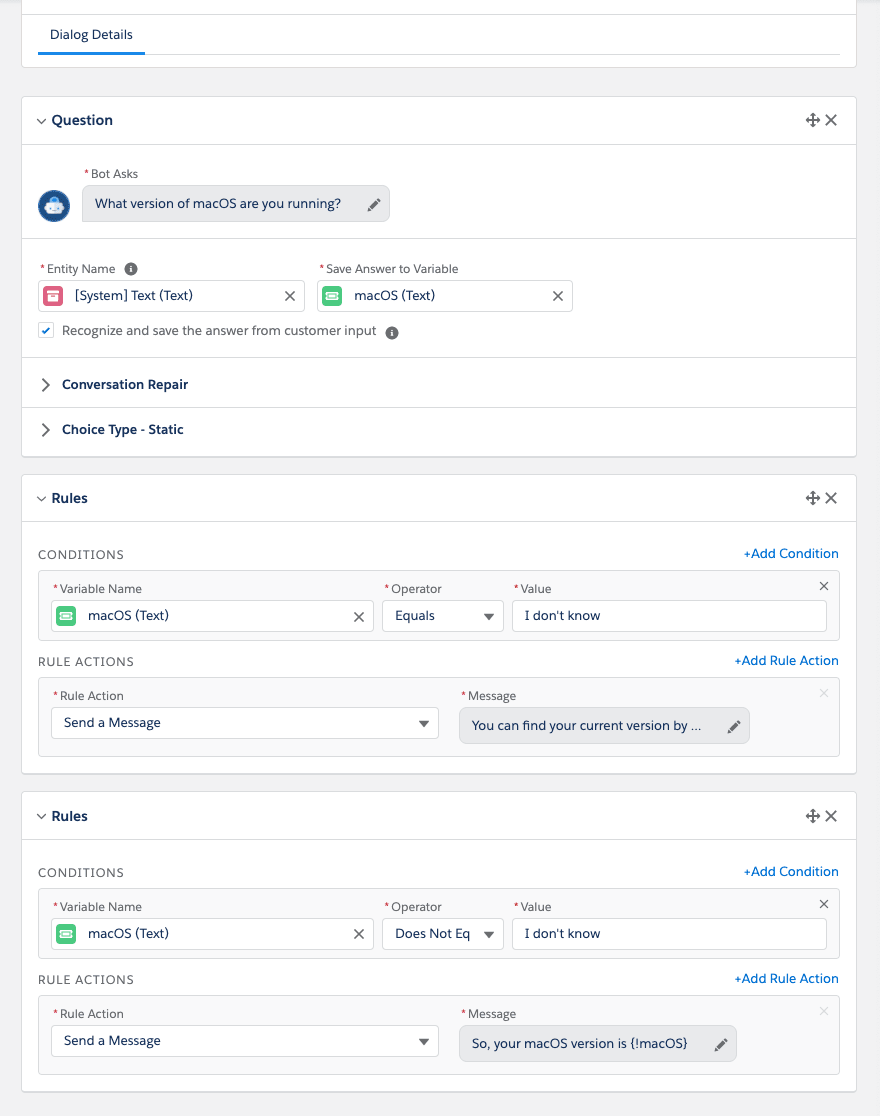
You can output the data that a user-entered to confirm it with them. For example, after understanding that a user is having issues with uploading a file, the bot then understands that the user is using macOS, and asks what version they are using. If they select a value, the bot repeats it. If not, the bot provides instructions on how to find the version and asks again.
To improve the user's bot experience, consider customizing the “Confused” dialog text. Below I changed the text and presented a menu, showing the general issues users experience.
Preview Bot
You can test the Einstein bot by first clicking the Activate and Preview buttons. Note that you can’t make changes to the bot while it is active. Select the appropriate Embedded Service Channel, fill in contact details, and test your utterances, intents, and dialogs.
Activate Bot
When the bot is ready, click the Activate button, switch back to the community you created earlier, and switch the community into Preview mode. Now you can chat with the bot as a typical user would.
Training a Bot Over Time
No matter how much you train it beforehand, when you deploy your bot live after further tweaks and configuration, people will use your bot in ways you didn’t anticipate. There are two ways you can debug problems and adapt to your bot.
The first is the Performance page. Here you can see event transcripts of past sessions and the events that took place.
The second is the Model Management page, which shows you how well your utterances are performing with users and utterances they are using instead/in addition to. From this page, you can add more utterances, and retrain the language model based on common usage.
Conclusion
In this article, I showed how to add Salesforce's Einstein bot platform to your customer service toolset, and some of the configuration and features you can use to create a bot experience for your customers. I covered how to add an Einstein chatbot to a Salesforce or external webpage, and how to customize values passed to the bot from those webpages.
We have all used chatbots that leave us frustrated, confused, and wanting to reach a human. Creating the user experience behind a chatbot to make it usable, valuable, and personal is the hardest part of the process. I hope using a platform that integrates directly with customer data helps you to create the experience your customers are looking for.

Top comments (0)