
This article was originally published on the InnoGames Techblog and can be found here.
Introduction
While developing a game it’s often required to put a player into a certain state or change the player’s progression. This is especially necessary if we want to test new game features or bug fixes. Regardless of whether we test it manually or write an automated test, we always need a player account who meets all the requirements and conditions to test the feature.
When testing manually, we usually make use of in-game cheats that we have implemented just for testing purposes. E.g. to give out resources, immediately finish a timer or unlock a feature.
In our automated frontend tests (end to end tests) the test runner acts like a real player. For example, it simulates a button click and waits for something to appear on the screen. Also here we usually use in-game cheats to change the player’s progression before running the actual tests.
Then we have backend system integration tests. They have full access to the game’s backend code which makes it possible to reuse Entity and Repository classes from the game code in order to set up a player. This is the fastest approach because they directly manipulate the database without the overhead of making several cheat requests. We abstracted the player setup into a builder-like API that allows us to define the whole player state by configuring a single object (You can find more information about this architecture in an earlier blog post: How to make your tests more readable and maintainable). Here’s an example of what the player setup looks like in a backend test:
@Test
public void testCollectProduction() {
   buildScenario(scenario -> scenario
      .withPlayer(player -> player
         .withResource(ResourceConstants.COINS, 100)
         .withCity("MainCity", city -> city
            .withBuilding("SomeProductionBuilding", building -> building
               .withProduction(production -> production
                  .withResource(ResourceConstants.COINS)
                  .withAmount(20)
                  .withFinishNow()
               )
            )
         )
      )
   );

   // ... test action and assertions are here ...
}
At some point we wondered if we couldn’t use the same thing in frontend tests instead of using cheats, as the cheats are very limited. So we came up with a solution that allows us to use the exact same player setup code in frontend tests without additional effort! The “Player Setup Endpoint”.
The Player Setup Endpoint
To demonstrate this endpoint I created a demo project where we can configure a players name, level and equipment through the player setup endpoint. You can find the full source code on GitHub. It is written in Java using Spring Boot. Let’s start with a very simple example. This is a plain HTTP request to the endpoint:
POST /setup-player HTTP/1.1
Host: localhost:8080
Content-Type: text/plain
Accept: application/json

player
    .withName("Hero")
    .withLevel(2)
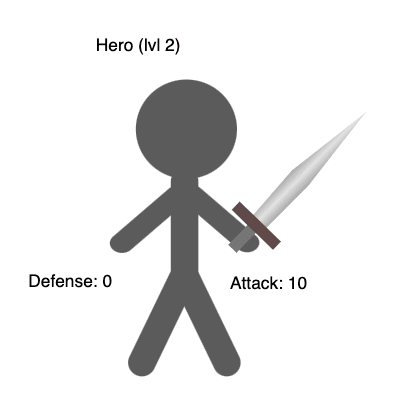
As you can see, the request body actually contains code. It’s the same code that we use in our backend tests. We configure a player object by setting the players name to “Hero” and the level to 2.
The demo project also provides an endpoint to show the current state of the player as an SVG image. Just open http://localhost:8080/player in a browser. For our Hero with level 2 you will see this image:

To give the player a weapon, simply call withWeapon() on the player object. The weapon itself can be configured the same way by using “with…”-methods on the weapon object.
POST request to /setup-player:
player
    .withName("Hero")
    .withLevel(2)
    .withWeapon(weapon -> weapon
        .withType(Weapon.Type.SWORD)
        .withAttackPoints(10)
    )
GET request to /player:
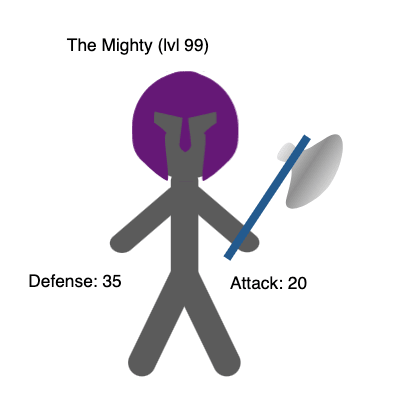
Now let’s configure everything that the demo project supports:
POST request to /setup-player:
player
    .withName("The Mighty")
    .withLevel(99)
    .withWeapon(weapon -> weapon
        .withType(Weapon.Type.AXE)
        .withAttackPoints(20)
        .withColor("#26639b")
        .entityRef(ref("weapon"))
    )
    .withHeadgear(headgear -> headgear
        .withType(Headgear.Type.HELMET)
        .withDefense(35)
        .withColor("#711284")
        .entityRef(ref("helmet"))
    )
GET request to /player:
You might be wondering about the entityRef() calls. The entityRef() method accepts a reference holder object that will be filled with the entity that is created during the player setup. We heavily use this in the backend tests to be able to access the newly created entities afterwards (You can read more about it in the blog post I mentioned above). In our endpoint we use it together with the ref() function which is a special feature of the player setup endpoint. It creates a reference holder object with the passed name assigned to it. The response body then contains all references that are created that way. In the last example we defined two references, “weapon” and “helmet”. Here’s how the response looks like:
{
    "weapon": {
        "id": "13aafbad-54be-425f-a27a-030935d7852a"
    },
    "helmet": {
        "id": "b9b5fa2d-0a00-40b3-b8c3-c4468943ceff"
    }
}
It returns a JSON object with the reference name as property and the entity as value. In our case we only return the “id” field of the entities. Of course you could return the whole entity instead, but the ID should be sufficient in most cases. Knowing the generated IDs can be very helpful for frontend tests in order to do further actions on the new entities.
How it works under the hood
In order to execute custom code through the endpoint, we can take advantage of the Groovy language. Fortunately, Groovy is compatible with Java syntax which allows us to just copy code parts from our backend tests and paste it into the request body. That means the request body is actually a Groovy script!
To integrate Groovy in our Java application, we make use of the groovy package. It comes with a Groovy Shell that is not only able to execute Groovy scripts, but also has the ability to share objects between Java and the Groovy script. The following picture illustrates how the endpoint works:

We create a GivenPlayer object that is a simple data object with a builder-like API. Then we pass this object to the Groovy shell so it is accessible by the Groovy script. Afterwards we execute the script from the request body to configure the player object. When the script execution is done, we can use the same object to finally set up the player.
Here’s the full Java code of the Controller method:
@PostMapping(value = "/setup-player", produces = MediaType.APPLICATION_JSON_VALUE)
public String setUpPlayer(@RequestBody String request) throws JsonProcessingException {
   Player player = playerRepository.getCurrentPlayer();

   // Create sandboxed groovy shell
   var groovyShell = groovyShellFactory.createSandboxShell();

   // Set player property that can be configured inside the groovy script
   var givenPlayer = new GivenPlayer();
   givenPlayer.setEntity(player);
   groovyShell.setProperty("player", givenPlayer);

   // Run requested groovy script which configures the givenPlayer object
   groovyShell.evaluate(request);

   // Use givenPlayer object to set up the player
   playerSetup.setUp(givenPlayer);

   // Return entities that were referenced in the groovy script
   return objectMapper.writeValueAsString(groovyShell.getProperty("references"));
}
I won’t go into detail about how the GivenPlayer object or the playerSetup.setUp() method works. You can find more information about the idea in the blog post I mentioned earlier or have a look into the code on GitHub. In general the playerSetup.setUp() method takes care of creating the real entities by reading the GivenPlayer object.
Let’s focus on how the Groovy Shell is created. Here’s a simplified version of the GroovyShellFactory:
var sandboxClassLoader = new GroovySandboxClassLoader(getClass().getClassLoader());

var compilerConfig = new CompilerConfiguration();
compilerConfig.addCompilationCustomizers(new GroovySandboxImportCustomizer());
compilerConfig.setScriptBaseClass(PlayerSetupScript.class.getName());

var groovyShell = new GroovyShell(sandboxClassLoader, compilerConfig);
groovyShell.setProperty("references", new HashMap<>()); // used to store the references
The configuration of the Groovy Shell contains three custom components. A ClassLoader, an ImportCustomizer and a script base class.
ClassLoader
We use a custom class loader in order to restrict access to classes inside the Groovy script. Even though the endpoint should only be enabled in the test environments it is important to keep an eye on the security aspects. Otherwise the endpoint would be able to break the game in many different ways. Here’s the implementation of the GroovySandboxClassLoader:
public class GroovySandboxClassLoader extends ClassLoader {

   public GroovySandboxClassLoader(ClassLoader parent) {
      super(parent);
   }

   @Override
   protected Class<?> loadClass(String name, boolean resolve) throws ClassNotFoundException {
      if (name.startsWith("java.")
         || name.startsWith("groovy.")
         || name.startsWith("org.codehaus.groovy.")
         || name.equals(PlayerSetupScript.class.getName())
         || GroovySandboxClassWhitelist.getWhitelist().containsKey(name)) {
         return super.loadClass(name, resolve);
      }
      return null;
   }

}
In order to get the Groovy Shell working, we have to allow access to the groovy packages as well as the base script class. In addition we just allow all java classes in order to use basic classes like String. Of cause you could whitelist those as well if you want to have it more secure. The actual whitelist of our own classes is implemented in a separate GroovySandboxClassWhitelist class, because we also use this whitelist in the ImportCustomizer. Here’s a simplified version of the whitelist class:
public class GroovySandboxClassWhitelist {

   // Mapping of "Class name" -> "Alias" (We need the alias for the ImportCustomizer)
   @Getter
   private static final Map<String, String> whitelist = new HashMap<>();

   static {
      addWithAlias(GivenPlayer.class);
      addWithAlias(GivenWeapon.class);
      // ...
   }

   private static void addWithAlias(Class<?> clazz) {
      whitelist.put(clazz.getName(), clazz.getSimpleName());
   }

}
In the demo project we just hard coded the whitelist to keep it simple. However, this would be too much maintenance effort in a larger application. In our real game application we are using the classgraph package to search for classes that should be whitelisted.
ImportCustomizer
Usually we have to add import statements to a Groovy script when we want to use a class. This is where the ImportCustomizer comes in handy. It allows us to automatically import classes, so we can omit the import statements. In our case we import all classes from the ClassLoader whitelist that have an alias defined.
public class GroovySandboxImportCustomizer extends ImportCustomizer {

   public GroovySandboxImportCustomizer() {
      super();

      GroovySandboxClassWhitelist.getWhitelist().entrySet().stream()
         .filter(entry -> !entry.getValue().isBlank())
         .forEach(entry -> addImport(entry.getValue(), entry.getKey()));
   }

}
That makes the GroovySandboxClassWhitelist as the source of truth for the ClassLoader and the ImportCustomizer. We just have to add a class there to make it available in the Groovy script and define an alias to automatically import it.
Script base class
The script base class provides additional behaviour to the Groovy script which is in our case only the ref() function that you saw in the example earlier.
public abstract class PlayerSetupScript extends Script {

   public AtomicReference<?> ref(String name) {
      var references = (Map<String, AtomicReference<?>>) getProperty("references");

      if (!references.containsKey(name)) {
         references.put(name, new AtomicReference<>());
      }

      return references.get(name);
   }

}
It creates a reference holder object and stores it in a property called “references” inside the Groovy script. The property can be accessed by the endpoint after the script execution to return all references in the response.
That’s it! Now we have created all classes that are necessary for our endpoint to execute Groovy scripts. You can find the full source code of the demo project on GitHub. For details of how the actual player setup is implemented I recommend you to check out the article I already mentioned or just have a look into the demo project.
Conclusion
With the power of Groovy, we found a way to make our player setup system accessible to the client.
Of course you have to keep the security aspects in mind. The class whitelist is already a good security factor, but it could still be possible to break the application when executing wrong code. Make sure to only enable this endpoint in the test environments. A downside is that there is no auto completion available for clients using this endpoint. I recommend preparing the configuration in a real Groovy script or somewhere in the backend code. Otherwise, syntax errors can easily occur.
However, it’s now sufficient if we implement the player setup of new game features once in the Backend. The Frontend tests or in-game cheats can make use of it immediately without any additional effort.
InnoGames is hiring! Check out open positions and join our awesome international team in Hamburg at the certified Great Place to Work®.

Top comments (0)