
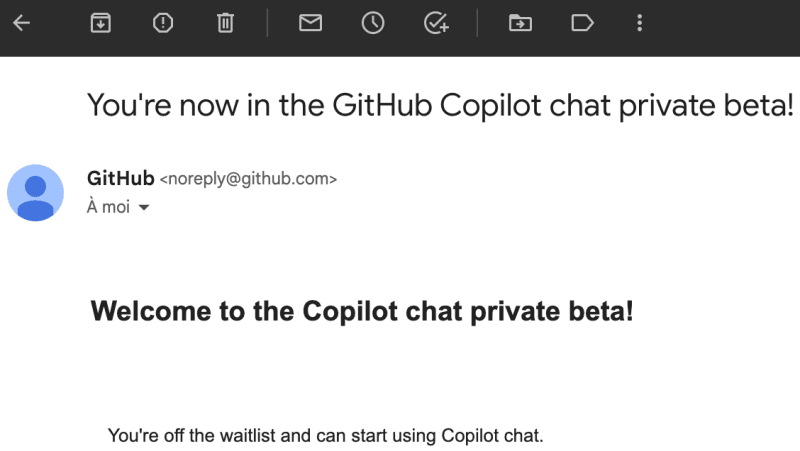
Today, I received the long-awaited email: “You now have access to Copilot Chat.”
So let’s see how to install it and what it can do!
Table of Contents:
Installation
Discovery
Installation :
First, you’ll need to wait to receive an email from GitHub notifying you that you’re on the waitlist.
If you haven’t signed up yet: :
https://github.com/features/preview/copilot-x
So once you receive the email:
You’ll need to install VSCode Insider (which is VSCode but in Beta) using this link:
https://code.visualstudio.com/insiders/
Next, once VSCode Insider is open, go to the extensions marketplace and install:

And after that:
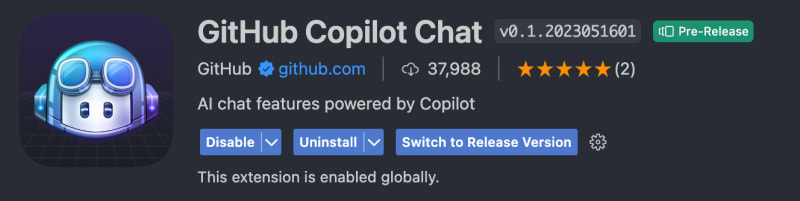
Now you have the Copilot tab on the left side:

Congratulations, you have just accessed one of the tools that will take you to GodMode 💪
Discovery :
Now we will ask some simple questions.
First, let’s start with a simple test in React: Write a login form. It took some time for Copilot to generate the code. I’m not sure why, but it didn’t understand that I was asking for React-specific code.

So I asked again, this time selecting my code:
import React from 'react';

    const Index = () => {
        return (
            <div>

            </div>
        );
    }

    export default Index;
Copilot responds:
“GitHub Copilot: Sure! Here’s an example login form using HTML and CSS that you can add to your Index component:"
[CODE]
"This is just a basic example, but you can customize it to fit your needs. Let me know if you have any questions!"
 import React from 'react';

    const Index = () => {
        return (
            <div>
                <form>
                    <label htmlFor="username">Username:</label>
                    <input type="text" id="username" name="username" required />

                    <label htmlFor="password">Password:</label>
                    <input type="password" id="password" name="password" required />

                    <button type="submit">Login</button>
                </form>

                <style jsx>{`
                    form {
                        display: flex;
                        flex-direction: column;
                        align-items: center;
                    }

                    label {
                        margin-top: 1rem;
                    }

                    input {
                        padding: 0.5rem;
                        margin: 0.5rem;
                        border-radius: 0.25rem;
                        border: none;
                        box-shadow: 0 0 0 1px #ccc;
                    }

                    button {
                        padding: 0.5rem 1rem;
                        margin-top: 1rem;
                        border-radius: 0.25rem;
                        border: none;
                        background-color: #0077cc;
                        color: white;
                        font-weight: bold;
                        cursor: pointer;
                    }

                    button:hover {
                        background-color: #005fa3;
                    }
                `}</style>
            </div>
        );
    }

    export default Index;
By the way,
I forgot to show you, but there are some handy buttons for the generated code:
The first one allows you to copy, the second one to insert where your cursor is, and the last one to insert into a terminal or a new file.

That’s great! Now let’s interact with the generated code by making a request, for example, to not create a style tag and to use styled-components instead:
“Sure! Here’s an example login form using styled-components in your Index component:”
 import React from 'react';
    import styled from 'styled-components';

    const Form = styled.form`
      display: flex;
      flex-direction: column;
      align-items: center;
    `;

    const Label = styled.label`
      margin-top: 1rem;
    `;

    const Input = styled.input`
      padding: 0.5rem;
      margin: 0.5rem;
      border-radius: 0.25rem;
      border: none;
      box-shadow: 0 0 0 1px #ccc;
    `;

    const Button = styled.button`
      padding: 0.5rem 1rem;
      margin-top: 1rem;
      border-radius: 0.25rem;
      border: none;
      background-color: #0077cc;
      color: white;
      font-weight: bold;
      cursor: pointer;

      &:hover {
        background-color: #005fa3;
      }
    `;

    const Index = () => {
      return (
        <div>
          <Form>
            <Label htmlFor="username">Username:</Label>
            <Input type="text" id="username" name="username" required />

            <Label htmlFor="password">Password:</Label>
            <Input type="password" id="password" name="password" required />

            <Button type="submit">Login</Button>
          </Form>
        </div>
      );
    };

    export default Index;
Wow… impressive! Let’s do another test. I’ll add a useState hook and ask Copilot to continue the code by selecting it.
I'll simply ask the question:
"Continue my code, add the useState and display 'Hi' when you submit the form."
The real power here is that since I’m selecting my code, there’s no need to copy and paste it for Copilot to understand.

Here’s the generated code:
 const Index = () => {
      const [formData, setFormData] = useState({
        username: '',
        password: '',
      });

      const handleChange = (e) => {
        setFormData({
          ...formData,
          [e.target.name]: e.target.value,
        });
      };

      const handleSubmit = (e) => {
        e.preventDefault();
        console.log(formData);
      };

      return (
        <div>
          <Form onSubmit={handleSubmit}>
            <Label htmlFor="username">Username:</Label>
            <Input
              type="text"
              id="username"
              name="username"
              value={formData.username}
              onChange={handleChange}
              required
            />

            <Label htmlFor="password">Password:</Label>
            <Input
              type="password"
              id="password"
              name="password"
              value={formData.password}
              onChange={handleChange}
              required
            />

            <Button type="submit">Login</Button>
          </Form>
        </div>
      );
    };

    export default Index;
Indeed, it’s noticeable that Copilot continued your logic and even improved it by grouping the states into an object.
Conclusion
And there you have it, we’ve come to the end of this test. It’s truly impressive to witness the capabilities of this tool and the incredible time savings it offers.
I believe that in the future, these tools will become indispensable for producing rapid and high-quality work.
Don’t let yourself fall behind!
This is my first article on this website, so please don’t hesitate to give me your feedback. Feel free to point out any errors as well!

Top comments (0)