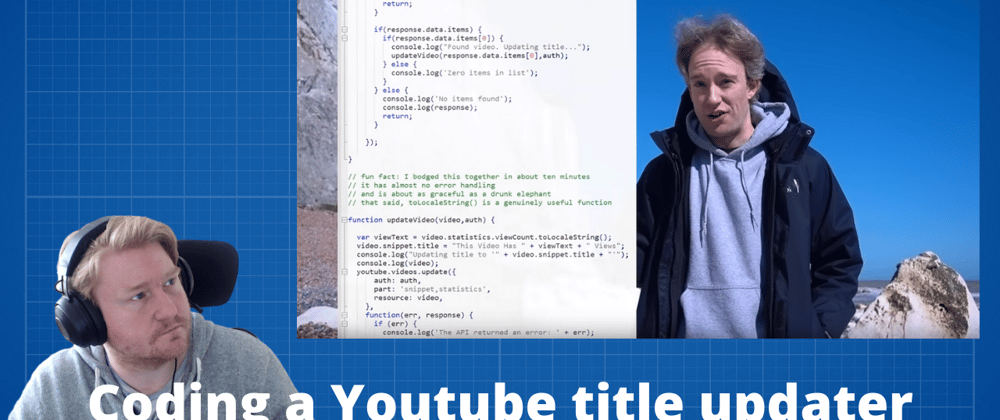
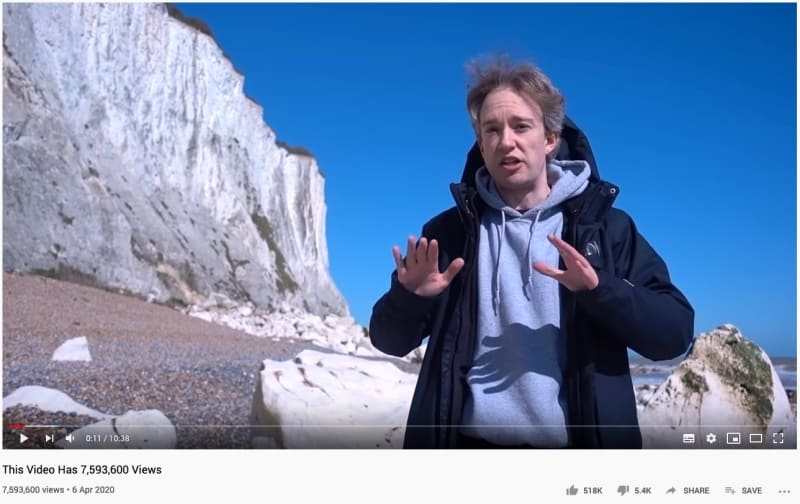
Recently Tom Scott made a Youtube video in which the title would keep up to date with the number of views that the video had.
Its a really good video, but the video isnt about the actual code that does the update, the video is about things not always reamining the same, and that over time, things change. Anyone whose done things like web scraping or even just working with APIs will know that things change, and sometimes without any notice. One day a thing you've built which is being used by hundreds of users might be working fine and then the next day Twitter announces that its shutting off the firehose access to tweets.
Whilst the video wasnt about the code, I was really interested in what it would take. Tom, by his own admission, is a fan of 'The Bodge' - getting something working just well enough to demonstrate that it is possible, even if it is just held together with string and a bit of glue. You just need to know its possible to do, then you can start figuring out how to make it better and more stable.
Whenever thinking about doing something like this I always like to try and break it down into a few steps. So I know that I want to execute a single script to:
Login to Youtube (with the account that contains the video I want to update )
Get the number of current views of the chosen video.
Update the title of the video with the new information
Run this script as often as I like ( Cron Job )
This might be very far from the most optimal way to do this. Im sure there are going to be plenty of people who choose to do this in a different language, or use 'Serverless' setup. There's also a lack of error handling, but feel free to take this as a starting point and making it your own.
Google credentials
First thing that we are going to need are the credentials to access the Youtube API. Head on over to the Google Cloud Console and then in the menu go to APIs & Services -> Credentials.
On the next screen Create a new Credential and select OAuth Client ID. In the Create screen, select Other and give your credential a name.
Back on the credentials screen you will now be able to download your credentials. This is a json file needed to generate a Oauth token that our application will be able to use.
Project start
Lets create a new directory for our project and run npm init to create a package.json. Also create a file that will be our script that we will have our cron job execute. I've called mine update.js.
Youtube API
We are going to be using the Youtube Data API in order to both fetch the statistics of the video and then do the updating. The main documentation can be found here.
Head straight to the guides, give the overview a quick read, and then we're gonna grab the Node.js sample. Copy and paste that into out update.js file and also run npm install googleapis --save to get the google library. The documentation also specifies to install google-auth-library, but I didn't as it didn't seem to be used in the sample project.
Once that is done, you should be able to execute the script from your terminal and be prompted to head to a link in your browser to authorize the application. Once you follow that URL you will be asked to log into your google account and connect it to a YouTube account that uses that same email address.
There will be a warning when authorizing the application ( because the redirect URL is localhost ) this is fine for our use case as this isnt an application that we will be distributing. We can continue on to give us a code that we can copy and paste back in terminal where there is a prompt for it.
Once the code is accepted - the script will run as is and give us some information about the Google Developers Youtube channel.
Whats happening here?
We are creating an OAUTH token that our script is going to use and it gets stored in the home directory of our system in a directory called .credentials. We can choose this directory in this line of the code. Once that is created once, everytime the script runs it checks to see if that exists and is all correct - if it does, then the script will carry on executing, if it doesn't then we just have to go through the process of generating the token.
Script editing time
Assuming that all went well, we now have a starting point for what we want to do.
Now we have a way to authorize with the Youtube Data API and get some information about a given video, its time for the fun stuff.
Im gonna start of with creating some variables that I want to use, one of them is for referencing the API and the other is to hold the Video ID of which I want to be able to change the title of.
I uploaded a test video for this use case, but once the script is up and running, you can change it to anything you want ( which is likely what Tom did for his )
const youtube = google.youtube("v3");
const VIDEO_ID = "NhcZteF-sDE";
The next part is that we want to change the function that is called once we are authorized -- in my script, this can be found on line 23 I changed the function call to a new function that we are going to write called makeAuthCall.
This function is going to go out to YouTube and grab the details we want. This is all based on the documentation and also from that bit in Toms video where he flashed the code.
const makeAuthCall = (auth) => {
  youtube.videos.list(
    {
      auth: auth,
      id: VIDEO_ID,
      part: "id,snippet,statistics",
    },
    (err, response) => {
      if (err) {
        console.log(`some shit went wrong ${err}`);
        return;
      }

      if (response.data.items[0]) {
        // We have found the video and the details
        console.log(`We found the video, now updating...`);
        updateVideoTitle(response.data.items[0], auth);
      }
    }
  );
};
So, when we get a successful response, which is a response that contains some items in the data object, we will then call another function that runs our update to the title of the video and pass through the video object that has videos details and the auth object in the params of the function call.
const updateVideoTitle = (video, auth) => {
  // get the number of views
  let views = video.statistics.viewCount;
  let likes = video.statistics.likeCount;
  let commentCount = video.statistics.commentCount;

  video.snippet.title = `This video has ${views} views, ${likes} likes and ${commentCount} comments`;

  console.log(`Updating title to ${video.snippet.title}`);

  youtube.videos.update(
    {
      auth: auth,
      part: "snippet,statistics",
      resource: video,
    },
    (err, response) => {
      console.log(response);
      if (err) {
        console.log(`There was an error updating ${err}`);
        return;
      }
      if (response.data.items) {
        console.log("Done");
      }
    }
  );
};
This function first assigns some variables to some of the bits we want ( views, likes and comments ) and then we update the video object we passed through to have the new title we want.
We can then call the update function on the API, passing through the authentication object, the options we want to update in the part key and then in the resource key we pass back through the updated video object which contains the update to the title. Upon both error and success we dont do anything -- this is where you might want to handle these situations, I am just choosing not too.
Get this on a server ( Digital Ocean )
OK, so now we can test our script locally and it runs just fine. We now want it in a place where it can run every minute or every second...every Tuesday, whenever you want. Im choosing to use Digital Ocean,you can choose any other service you might want to use such as AWS or Linode.
If you are going to use Digital Ocean and want some free credits, feel free to use this referral link you should get $100 in credit.
The instance we're going to use is a the cheapest $5 a month and under the marketplace tab we're going to use the NodeJS Quickstart.
When this is up and running we can SSH into the droplet and get ready to get our script up and running.
You can get the script onto the machine in a number of ways, I chose to just git clone from github to the machine, but you might choose to use something like Jenkins, Buddy or any of the other numerous services that are able to take a git repository and drop it onto a Droplet.
After cloning the repository down and running npm install, we just need to create the OAUTH credential again by running the script once, but before we do that we need to make sure that our credentials file that we downloaded from Google is in the root.
This isn't really going to be a file that you want to commit into git and as its not something thats going to change often, we can just recreate the file on the server. I just touch a new credentials.json and then copy the contents of the file locally, up to the one on the server.
Now we can run the script once to go through the OAUTH process again and once thats done, we're ready to set this script up to run as a cron job.
Cron job
Cron is just a utility in Linux that allows you to schedule a command to run.
To add a job to the schedule we add it to a file called a cron tab. We can edit this file by running crontab -e. The first time you run this you will be asked to select your preferred editor. Select one and you will presented with the crontab file. This contains some commented out details about cron jobs and a handy guide for writing our own.
The first five integers of a cron job let it know when to schedule:
min hour dayOfMonth month dayOfWeek
and then add the command to be run after. You can use Integers or an asterix to represent EVERY minute/day/month etc. Theres a good overview of cron here.
I have chosen to run the script every minute so mine looks like the following.
* * * * * node GreatScott/update.js
So, once its saved, how do we know it works?
There's a few things you can do. You can have the cron job write to a logfile or have it send an email through setting up a mail service on the server. Me?
I just head over to the video, click like, wait a minute and ...
Yup, thats working.
I coded this live on (Twitch)[https://twitch.tv/DeepfriedDev] and the video can be seen below ( warning, its long ).
The code is available on Github.


Top comments (1)
help