
There are three fundamental ways to store files:
- Storing it directly on the database.
- Storing it in your file system and saving the path to your DB.
- Storing it in some cloud storage like Amazon S3, Google Cloud Storage, or Microsoft Azure Blob Storage and saving the path to your DB.
Each comes with its specific advantages: Security, File Management, Backup etc Each also comes it's drawbacks: Scalability, Cost, and Privacy.
So there's no overall best approach. Instead, the best approach varies with your desired goal and the surrounding circumstances.
Uploading and Storing files on cloud storage like Amazon S3 has been extensively covered and since I'll never recommend storing files directly on your db, the approach I will be talking about in this post is saving it directly to your filesystem.
There's nothing like on-the-ground experience when designing software solutions
A few months ago, my country held the most competitive presidential election in its history. And I had signed up as a volunteer for one of the political underdogs (a story for another day).
My assigned task was supporting other volunteers whenever there was a technical bottleneck. Everything (the software for tracking election result, dashboard, analytics, communication channel etc) worked fine from the moment we got there until the D-day.
The opposition got shady. They were the incumbent and had the power to do so. They were tweaking the results and uploading altered ones. That was when we realize that getting the numbers alone isn't enough, you also need a snapshot of the result paper.
At first, we stored all the files we got from agents on the feed and contributes on Google drive and tried renaming them (Complicated process I know) — that was what brought about the file uploading system which I will share with you today.
How to store files using Multer.
Multer is a node.js middleware for handling multipart/form-data. Form is the user most-friendliest method for uploading files.
Multer is also the most popular among its alternatives, that's because it's pretty powerful and handles files efficiently using busboy.
Sadly, there's little to no helpful information on the npm's page.
That's the gap this guide aims to close.
Here, you will learn everything you need to know about Multer to get started handling multipart/form-data aka files using Node.js,
Express and MongoDB. Let's dive right in.
Note: This tutorial focuses on using Multer, not using CSS/HTML/NodeJS or even MongoDB. If you need with those, use Youtube, freecodecamp, or consult books**.
On the Front-End
- Create your file upload page
<html lang="en">
<head>
<meta charset="UTF-8" />
<meta http-equiv="X-UA-Compatible" content="IE=edge" />
<meta name="viewport" content="width=device-width, initial-scale=1.0" />
<title>Document</title>
</head>
<body>
<p id="feedback-message"></p>
<form
action="/upload"``
method="POST"
id="uploadForm"
enctype="multipart/form-data"
>
<label for="File">File: </label>
<input type="file" name="avatar" />
<br />
<input type="submit" value="Upload File" />
</form>
</body>
</html>
```
### Let's talk about the above block of code
The code you saw above is a basic HTML page.
- It has a _**form**_ element.
- Within that form element is a file select field and a Submit button
- And lastly, a paragraph tag just before the form element to
display the submission status: Success or failure.
### Common painful mistakes here are:
1. **Forgetting the _"enctype"_ attribute.** Always set it to _"multipart/form-data"_ . Multer will not process any form which is not multipart (multipart/form-data).
2. **Forgetting to include the _name_ attribute:** That's what helps Multer group the files it recieves on the server accordingly.
3. **Lack of user feedback:** Provide clear and informative feedback to users after a file upload. This helps them understand if the upload was successful or if any errors occurred.
With everything in place, let's cross over to the server side.
## On the Server Side:
- **Install Multer using NPM**
```cli
npm i multer
```
Then import it into your server root file
```javascript
const express = require('express');
const app = express();
const multer = require('multer');
```
- **Initializing and Setting up Multer**
There are two ways to use Multer:
- Basic and
- Custom.
In Basic, you can set only three properties:
1. **_dest:_** The storage location
2. **_limit:_** Measured in bytes and takes "**fileSize**" as a property.
- **_fileFilter:_** Used to filter uploads based on some conditions (In this example, we used the file extension).
Here's what that looks like:
```javascript
const upload = multer({
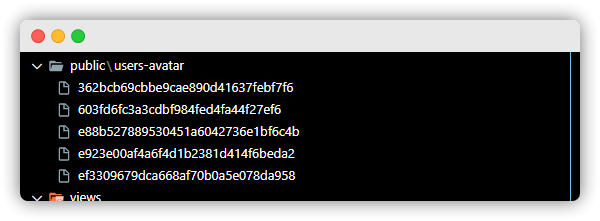
dest: 'public/users-avatar',
//destination folder is automatically created if it's not available
limits: {
fileSize: 5000000 // 5mb
},
fileFilter: (req, file, callback) => {
console.log(file);
if (!file.originalname.match(/\.(png|jpeg|jpg)$/)) {
return callback(new Error('Please upload a Picture(PNG or JPEG)'))
}
callback(undefined, true);
}
})
```
That's all there is with the Basic Configuration.
However, the CUSTOM Storage gives us extra options to work with like changing the filename etc, but that also means more lengthy code to write.
We will talk more about the Custom Approach later.
- Setup your Route and File handler
```javascript
*
**
***
//code that comes before hidden for brevity.
app.get('/upload', (req, res) => {
res.render('index');
})
app.post('/upload', upload.single('avatar'), (req, res) => {
res.redirect('/upload');
res.json({data: "success"})
})
app.listen(process.env.PORT, () => {
console.log('Listening for requests...');
})
```
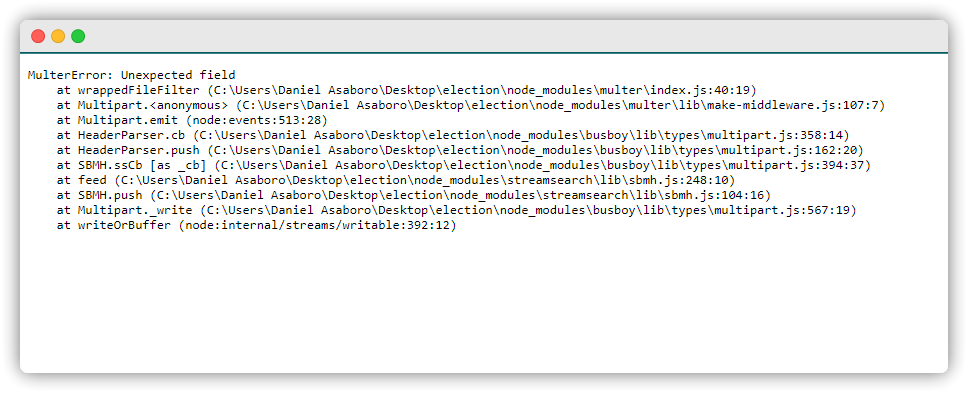
Remember what I said about the **name** attribute in your form?
Pass the value to your upload function when setting up your request handler. This is critical as it is how Multer knows which field it should watch out for in the request object.
If there's a mismatch between the File field name value in your HTML form and the name value you pass to the Upload function on your Server, the upload will fail.
## File Upload and Customization
If your application requires greater control over your file uploads, Multer also gives you the flexibility to use other storage options instead of the plain vanilla **_dest_**.
Multer comes with two built-in storage engines:
- **DiskStorage:**
- **MemoryStorage:**
And there is an option to [include 3rd-Party storage engines](https://github.com/expressjs/multer/blob/master/StorageEngine.md).
A quick tip you should know:
> _If storage is not set and dest is, files will be stored in dest on the local file system with random names. If neither is set, files will be stored in memory._
**See DiskStorage in action:**
It has only two options: **_destination_** and **_filename_**. Both are functions that determine where the file should be stored, ad they accept three parameters: req, file, and callback.
See it in action:
```javascript
var storage = multer.diskStorage({
destination: function (req, file, callback) {
fs.mkdir('public/avatar', function (err) {
if (err) {
console.log(err.stack)
} else {
callback(null, './uploads');
}
})
},
filename: function (req, file, callback) {
callback(null, file.fieldname + '-' + Date.now());
}
});
```
A quick overview of the code block above:
- **destination:** This is used to determine the directories which the uploaded files should be stored. It can also be given as a string as shown above. If no destination is set, the operating system's default directory for temporary files is used.
- **filename:** This is used to determine what the file should be named inside the folder. If no filename is given, each file will be given a random name that doesn't include any file extension (which is not different from what you will naturally get using the _**dest**_ option.)
**Note:**
From the screenshot above, it's clear that Multer will not append any file extension for you. Your function should return a filename plus a file extension. Else, it will be unreadable since no extension is attached to its name.
## Common Painful mistakes
1. **Inadequate file size restrictions:** Define appropriate file size restrictions to prevent excessive uploading of large files which can strain server resources and impact performance.
2. **No file type restrictions:** Specify acceptable file types that can be uploaded to prevent uploading of potentially harmful or irrelevant files.
3. **Lack of validation:** Failing to validate file uploads can lead to security vulnerabilities. Validate file type, size, and format to prevent malicious files from being uploaded. Don't rely solely on client-side validation.
4. **Insufficient server-side handling:** Ensure that the server-side code properly handles the uploaded file, including checking for errors, handling file storage, and performing any necessary processing.
More importantly, never make Multer a global middleware as a user with bad intent can upload files to a route that you didn't anticipate, hereby causing chaos.
So this is a bad approach:
```javascript
const multer = require(‘multer’)
app.use(multer().single(‘photos’)) //This is force multer to handle every request to your server
```
Instead, use the upload functions on routes you handle files only.
## Final words
For most applications, what I've shared above is sufficient.
And for a few, there will be a need for more customization like uploading multiple files from the same field, or multiple files from different fields but the same form.
If that's you, see the [upload.array(), upload.fields(), and upload.none() methods](https://www.npmjs.com/package/multer#:~:text=req.file.-,.array(fieldname,-%5B%2C%20maxCount%5D)). I will talk about handling errors for a better user experience in a future post.
Until then, bye.

Top comments (2)
Please Edit the post as the code blocks has not been close.the md file has not formatted perfectly. the content you've shared is really nice but i can't read it properly
Hi how to upload using the vuejs a javascript framework.