In this step-by-step guide, we'll show you how to integrate Eden AI's Invoice parser API into a Power Apps flow. The same process applies if you want to include other features like : Image tagging, Explicit content detection, Text analysis and many more AI APIs we offer.
Before we start, what is Invoice parsing?
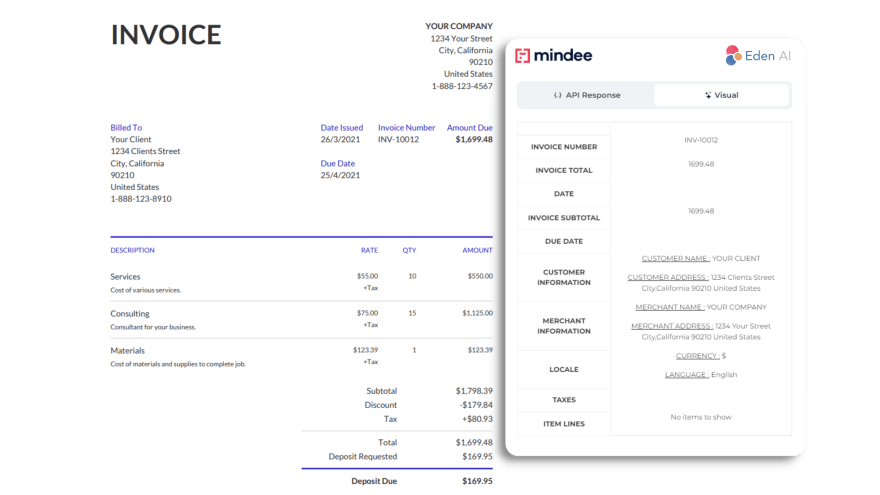
Just like Receipt and Resume Parsing, Invoice Parsing is a tool powered by OCR to extract and digitalize meaningful data, Computer Vision to identify structure of the document, and NLP techniques to pin down the fields. Invoice parser technology extracts key information from an invoice (.pdf, .png or .jpg format) such as the invoice ID, total amount due, invoice date, customer name, etc.
Invoice parser APIs help ensure data accuracy by avoiding errors that can occur during manual data extraction. Then, this information can be used for a variety of purposes and makes it easier to generate reports or export data to other applications and is often used in conjunction with other business management applications.
What is Microsoft Power Apps?
Power Apps is a suite of applications, services, connectors and a data platform that provide a rapid development environment for building custom applications tailored to your business needs.
With Power Apps, you can quickly build custom business applications that connect to your business data stored either on the underlying data platform (Microsoft Dataverse) or in various local and online data sources (SharePoint, Microsoft 365, Dynamics 365, SQL Server, etc.).
Power Apps "democratizes" the creation of custom business applications by allowing users to create feature-rich custom business applications without writing code. It also provides an extensible platform that allows business developers to programmatically interact with data and metadata, apply business logic, create custom connectors and integrate with external data.
How to bring invoice parsing to your app using Power Apps?
Follow the step-by-step guideline below or take a look at the video tutorial:
1. Get started with Microsoft Power Apps
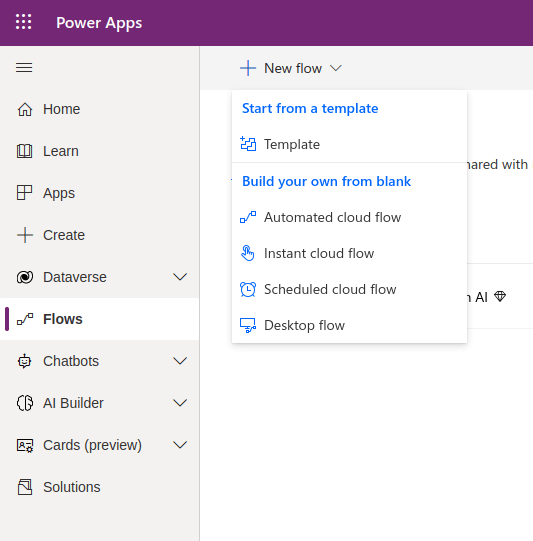
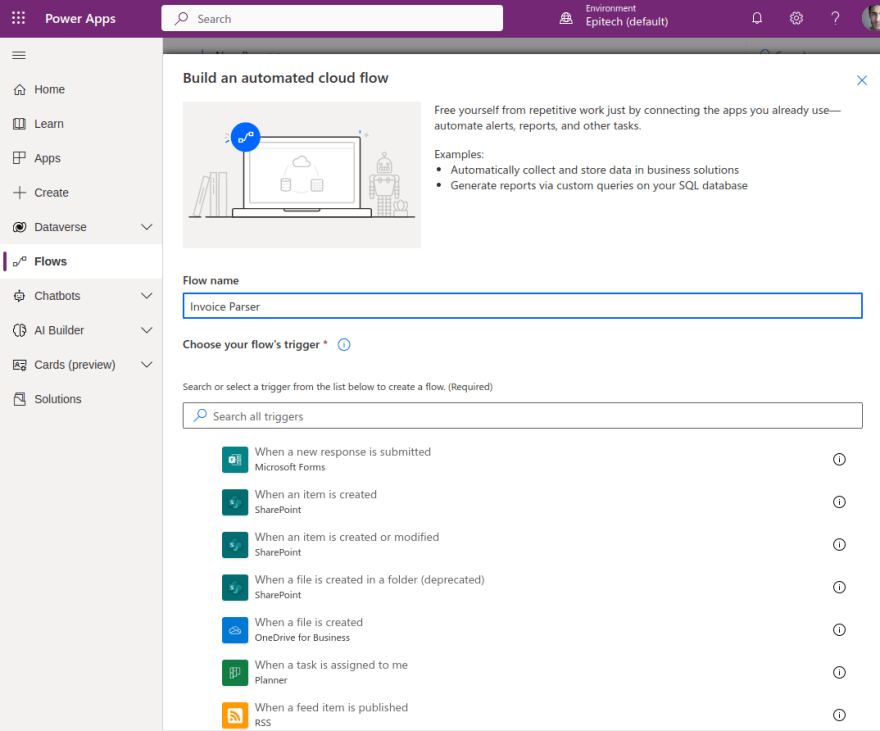
Go to the “Flows” menu, then create a new Automated cloud flow
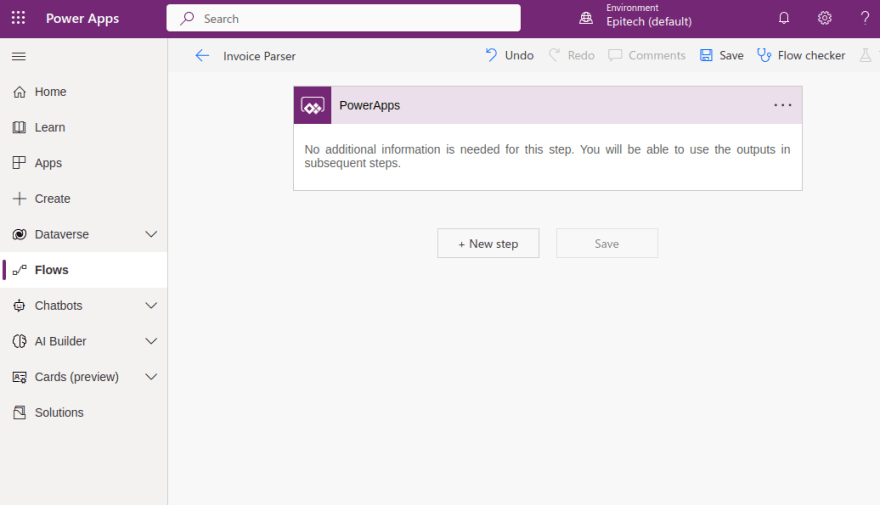
Choose a name for your project then select your flow’s trigger (the event that starts your flow). For this tutorial, we’ll choose a Power Apps action.
2. Create your first step in Power Apps
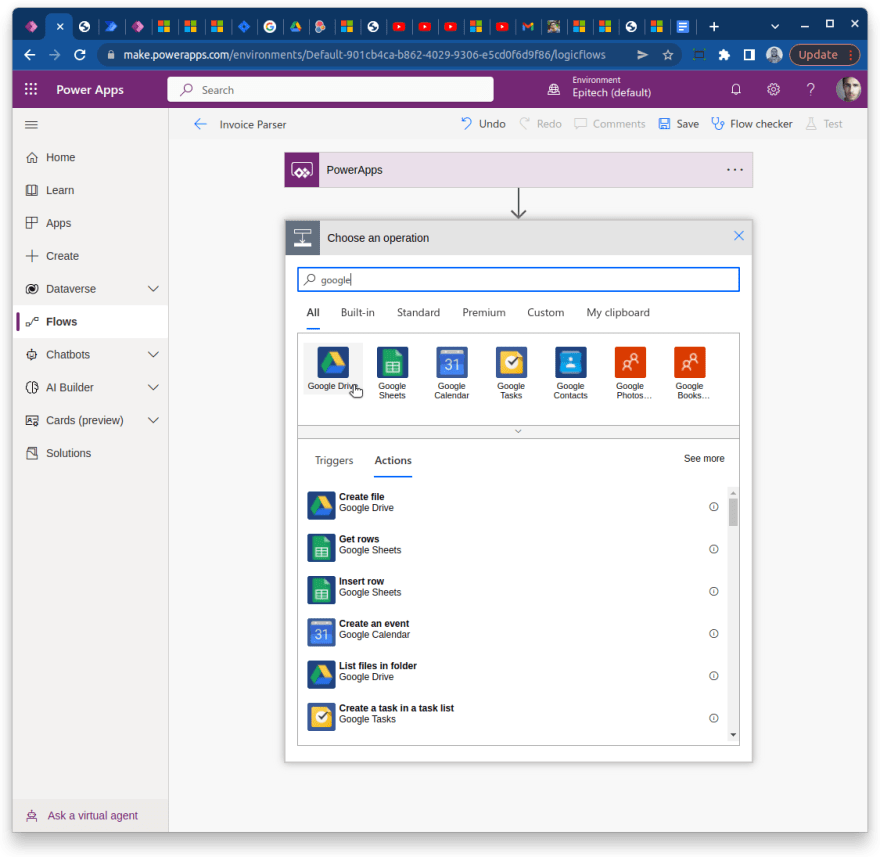
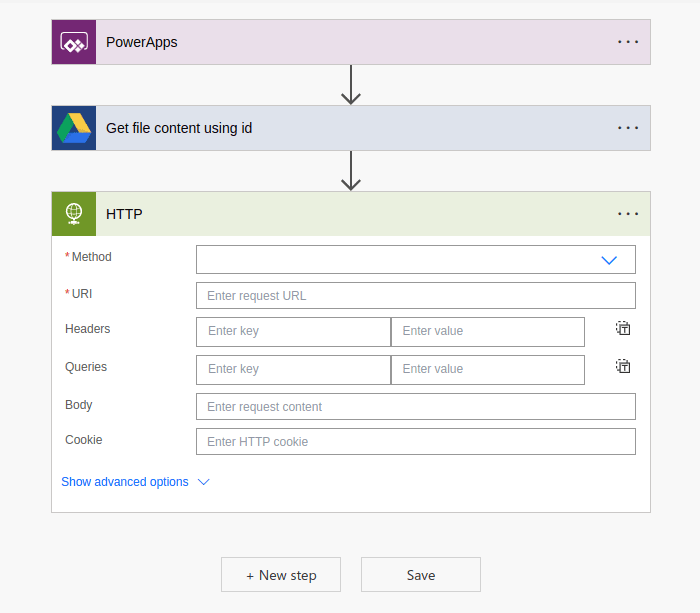
Let's create our first step by clicking on the “New step” button.
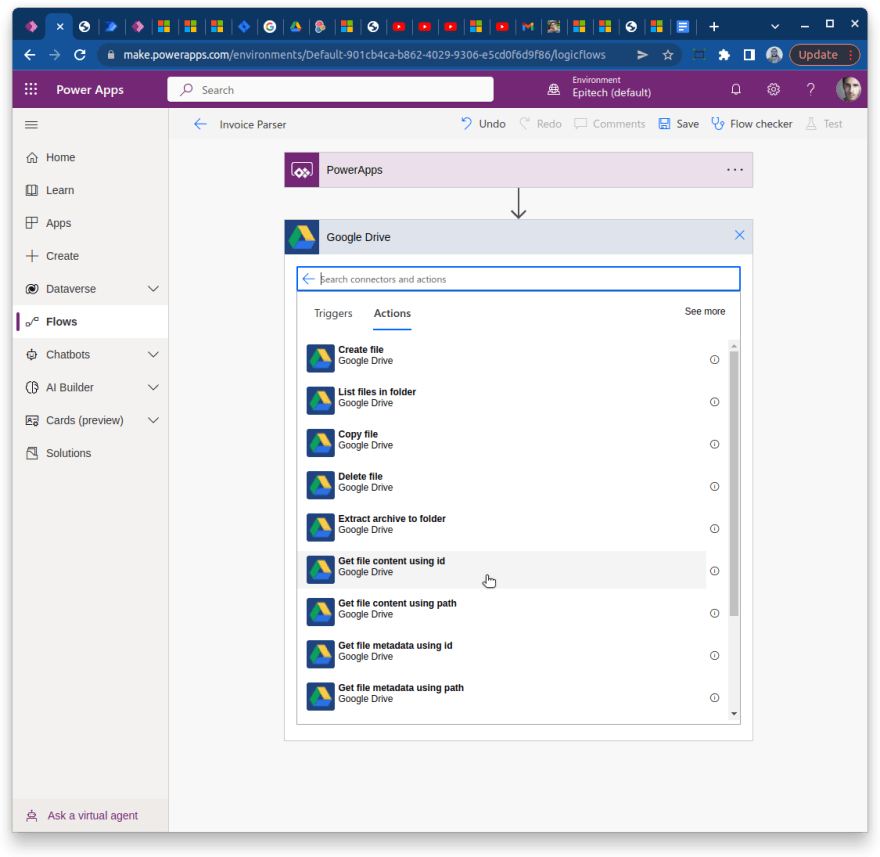
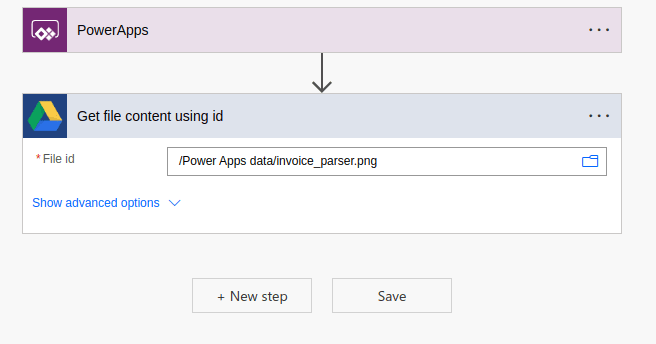
This step will allow you to get our invoice content to perform detection, for example, a module to get your invoice content from a Google Drive file. You will get this file using id.
Then, select the file you’ll want to perform Invoice Parser with:
3. Set up an HTTP request to call the API
You can now add a new step that will perform an API call to Invoice Parser API. Add a new HTTP request step as such:
To set up your HTTP request, you can take a look at Eden AI’s Invoice Parser documentation.
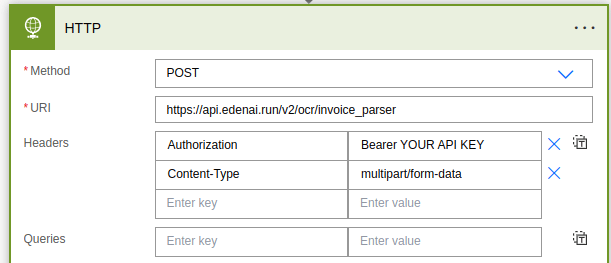
The request is a POST request on this endpoint: https://api.edenai.run/v2/ocr/invoice_parser. To authenticate your request, add your Bearer API Key as an “Authorization” header.
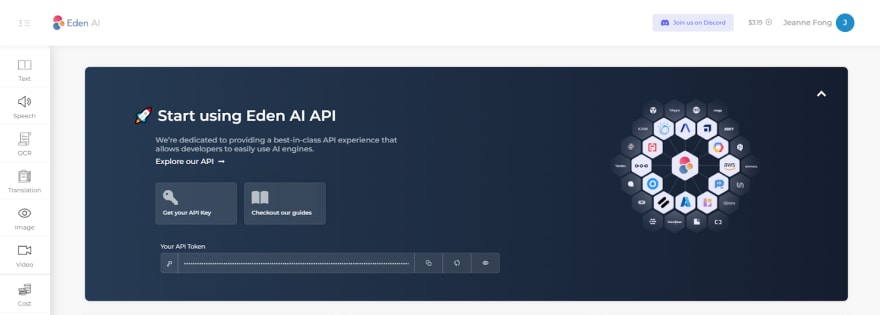
🔑Note that in order to obtain your API key, you'll need to create an account on Eden AI beforehand:
As you can see on the documentation, the parameters need to be passed as multipart/form-data Content-Type:
4. Customize your HTTP request
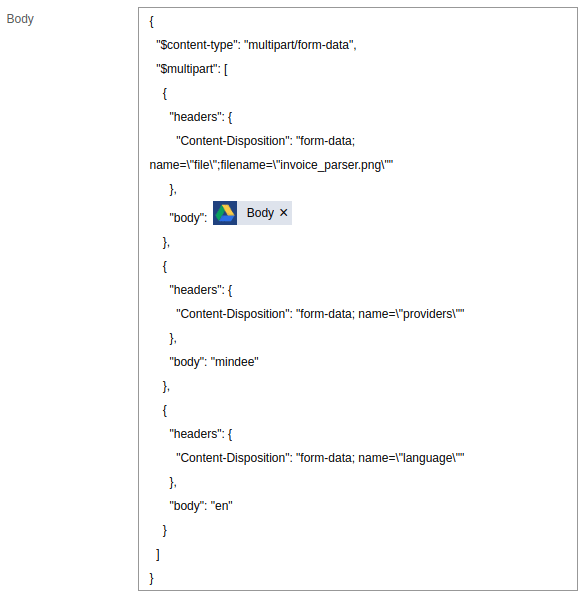
Next, you'll need to set up the “body” part of the request to send the file you got from Google Drive. Invoice Parser has 3 parameters: file, language and providers. For this tutorial, we will analyse an invoice in English with Eden AI's provider Mindee.
code :{
  "$content-type": "multipart/form-data",
  "$multipart": [
    {
      "headers": {
        "Content-Disposition": "form-data; name=\"file\";filename=\"invoice_parser.png\""
      },
      "body": @{body('Get_file_content_using_id')}
    },
    {
      "headers": {
        "Content-Disposition": "form-data; name=\"providers\""
      },
      "body": "mindee"
    },
    {
      "headers": {
        "Content-Disposition": "form-data; name=\"language\""
      },
      "body": "en"
    }
  ]
}
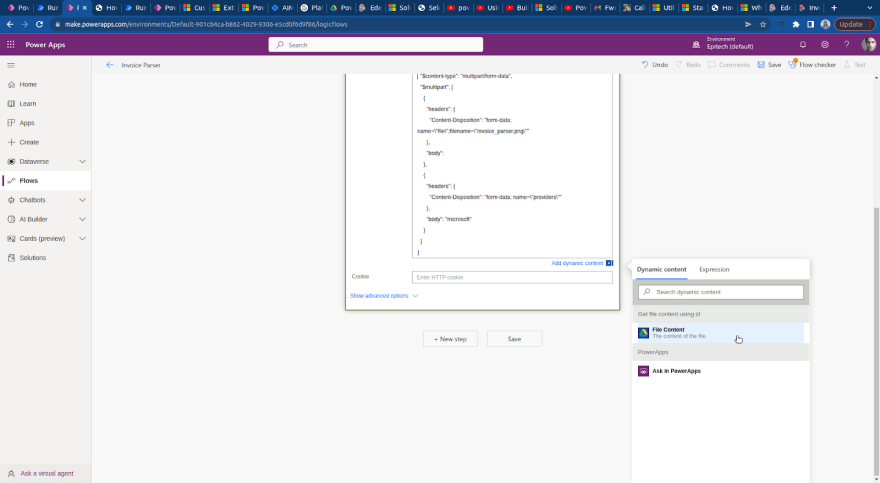
To append the Google Drive file in the body, click on “add dynamic content”, then select “file content” which is the result of the previous step:
5. Add a step to parse the response
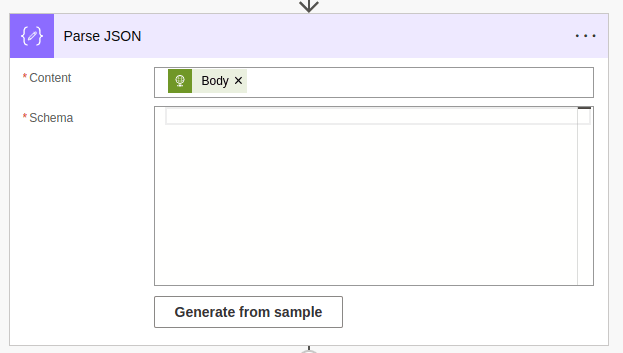
In order to manipulate the response, you'll have to parse it in JSON format. To do so, add a new step “Parse JSON”.
This action takes two parameters: content and schema. The content will be “Body”: the result of the previous HTTP request.
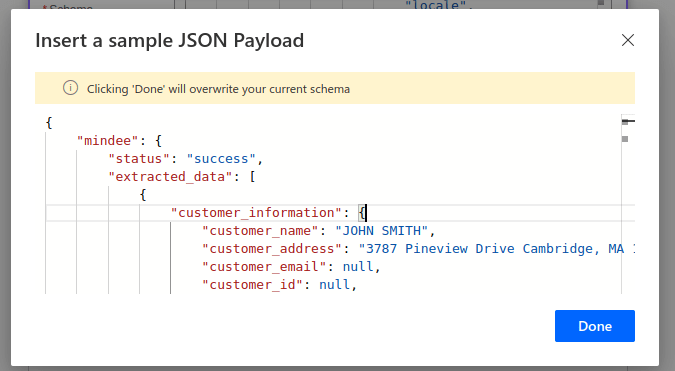
You'll need to give the JSON schema that we can generate from an API response sample by clicking on “Generate from sample”. You can get this sample on the documentation or by doing the request in postman.
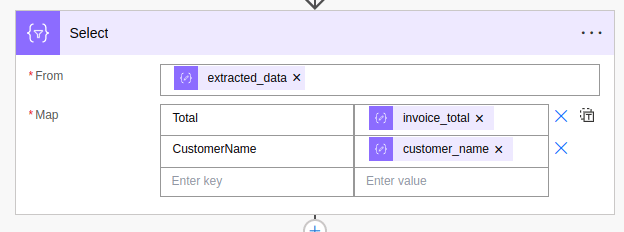
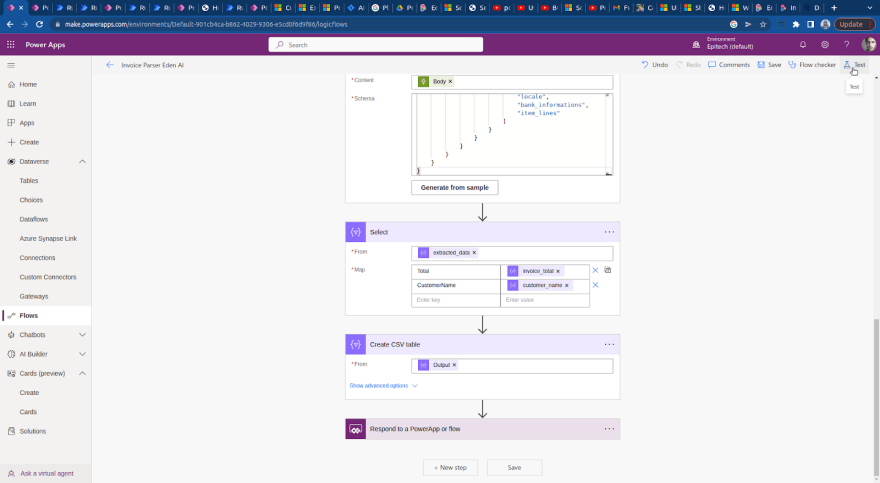
Now that the answer is parsed, you can manipulate it by using a new step action: Select. It allows to select certain attributes of the response object and remap them by giving a custom key if needed.
For example, you will get the “invoice_total” and the “customer_name” values with new key names “Total” and “CustomerName”.
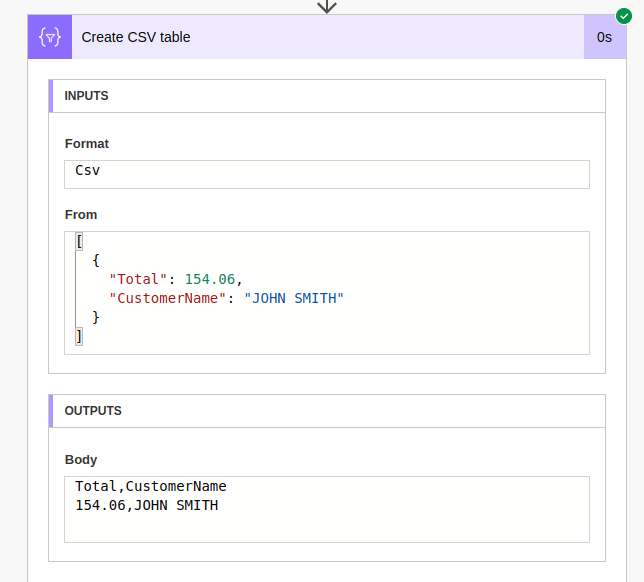
Finally, you can add a last module to create a CSV table from the “select” output
6. Time to test the app!
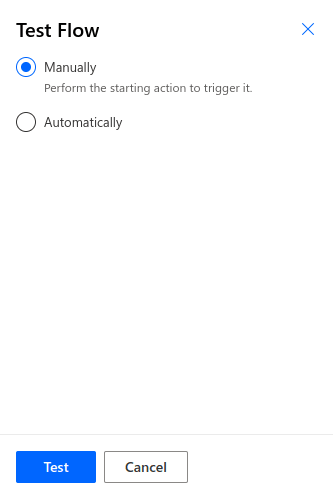
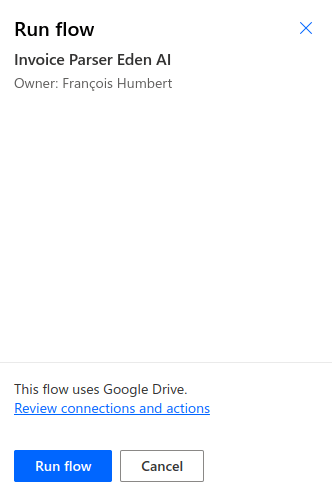
Congrats ! 🥳 You can now test your flow by clicking on the “Test” button. Then select “Manually”, and “Run flow”:
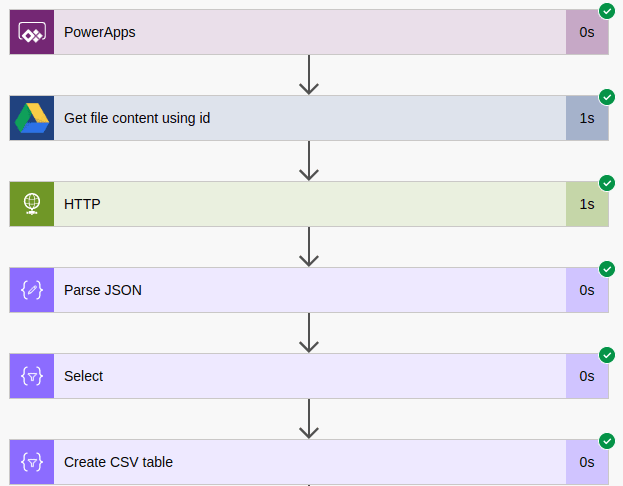
You can see the flow by clicking on “Flow Runs Page”. It displays all the steps with their results as such:
The expected output is a CSV table with two columns with their values: Total and CustomerName
You can now use this workflow directly in your Power Apps App. For instance, you can launch the job by clicking on a custom button:
If you have questions regarding this tutorial, the Eden AI community can help you out on Discord.




Oldest comments (0)