A microcontroller-based soil fertility detection system.
Abstract
Soil is the most used plant growth medium. However, due to various soil conditions, not all plants are also suitable for the particular soil to be used, so a tool or sensor is needed that can read and measure soil fertility. Simple soil fertility measurement can be measured from 2 elements of soil fertility attributes, namely the soil pH element and the soil moisture element. Most of the available soil fertility detection instruments or systems only use one of the soil fertility elements and the data on the detection results can't be stored for a long period, making the readings less effective. From these problems, we conducted research to build a soil fertility detection system that uses a soil pH sensor and a soil moisture sensor that is connected to the Arduino Nano microcontroller and can be run with an application on a smartphone. The results of this study are in the form of a soil fertility detection tool and system that can read soil pH and soil moisture content and an Android smartphone application that is connected to the device via the USB-OTG feature. With this application, a test location is obtained where the soil is tested and then stored in the TinyDB database in the application so that data will not be lost even if the tool is turned off.
Keywords: soil, fertility, pH sensor, moisture sensor, microcontroller, Android application
Hardware Specifications
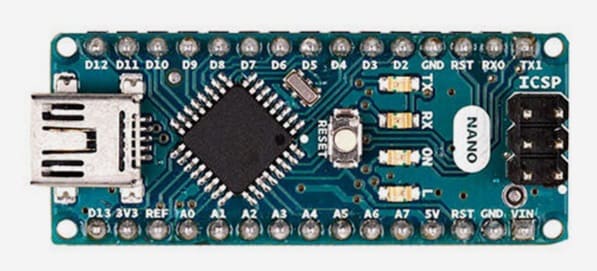
1. Arduino Nano microcontroller
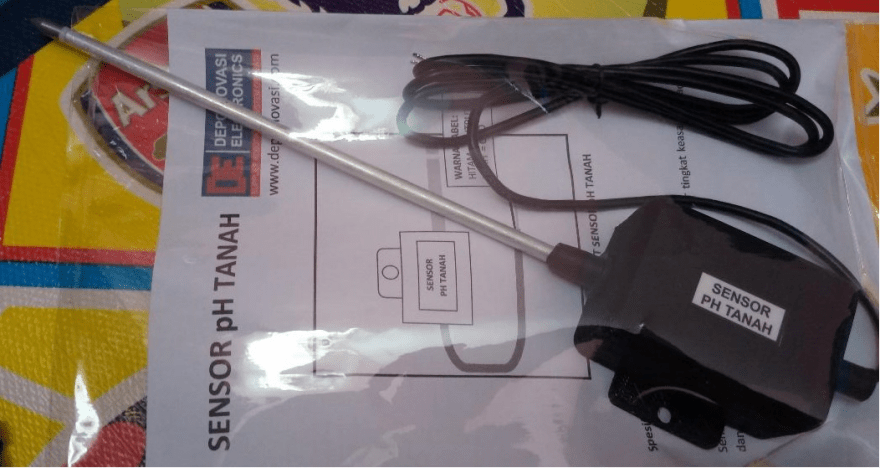
2. Soil pH meter sensor
3. Capacitive soil moisture sensor

4. LED lamp indicator
5. Active Buzzer
6. Voltage Regulator
7. Switch/Push button
8. Diode
9. Jumper cable
10. USB-OTG Adapter
11. Micro USB / Type C USB cable (depends on smartphone USB port)
12. Printed Circuit Board
13. Case
14. Smartphone with support for USB On-The-Go, GPS, and Location Sensor
System Design
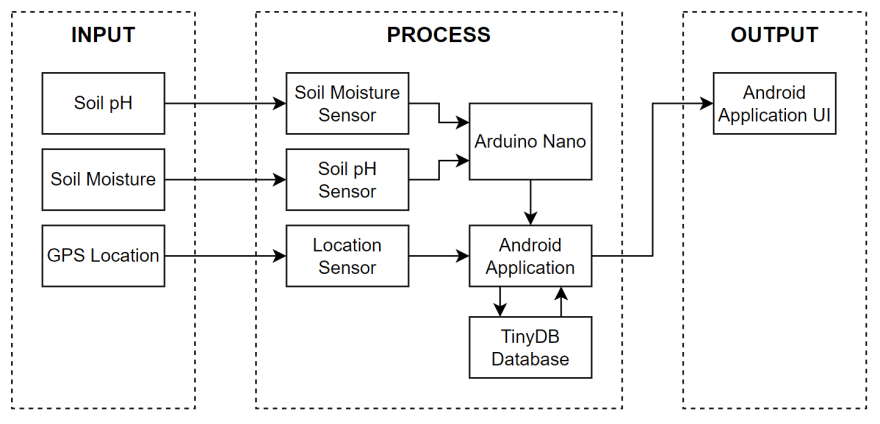
System Block Diagram
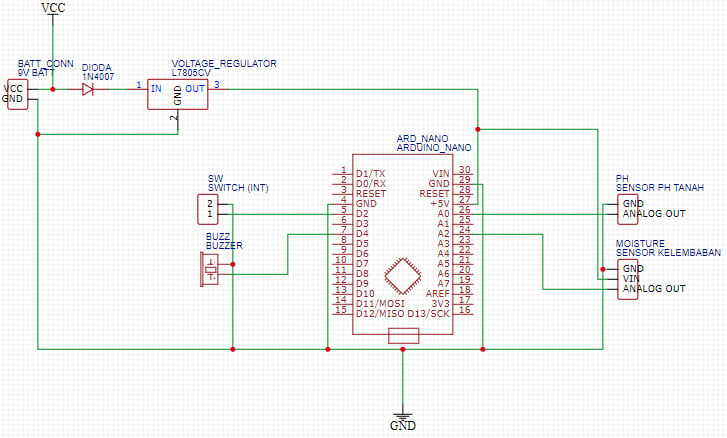
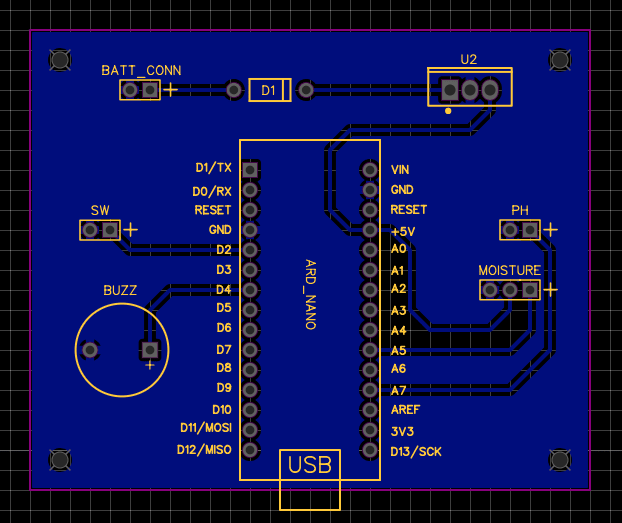
Hardware Schematic
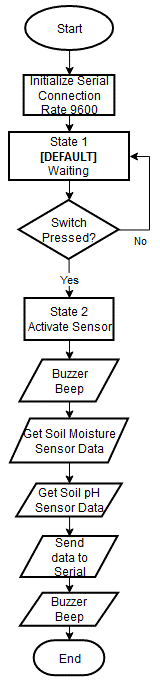
Hardware System Flowchart
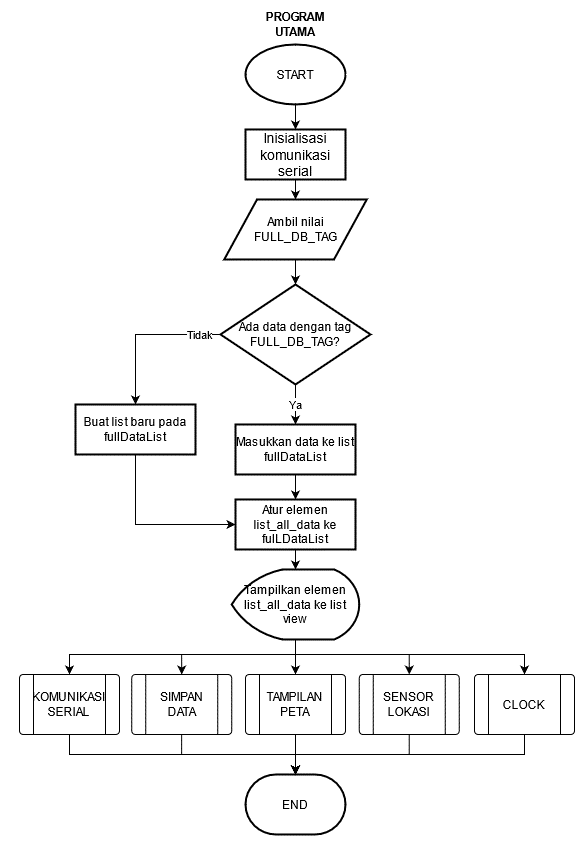
Android App Main Program Flowchart
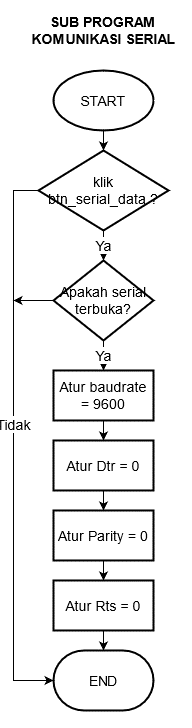
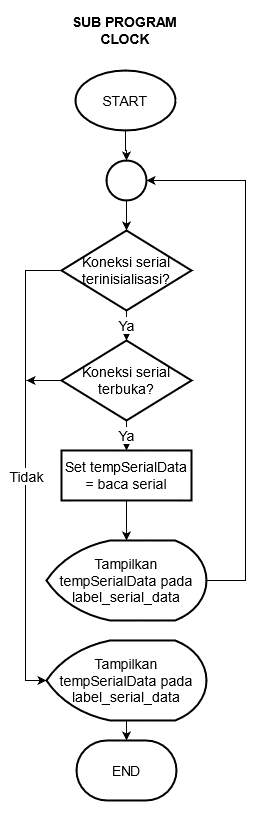
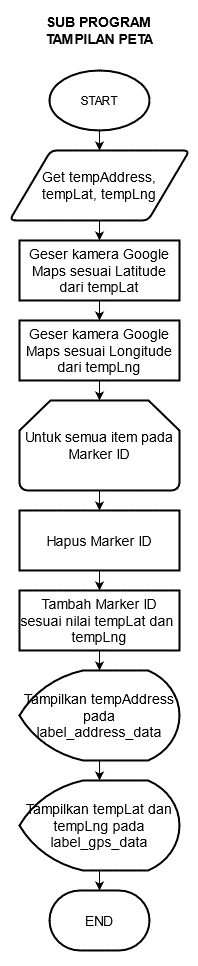
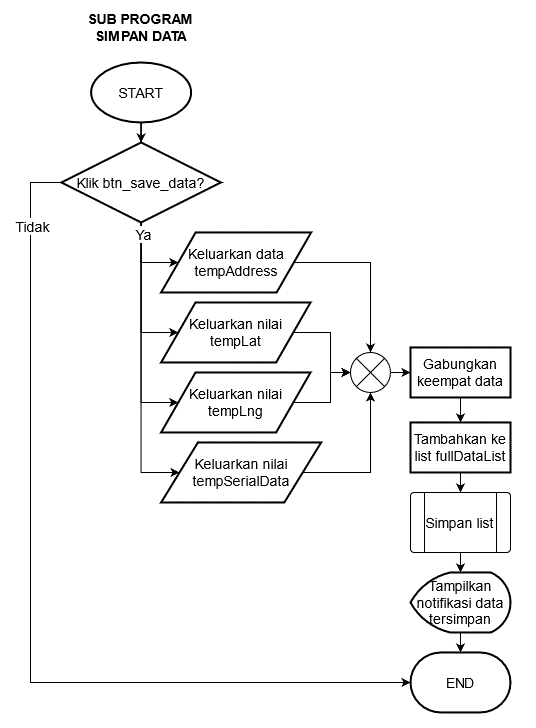
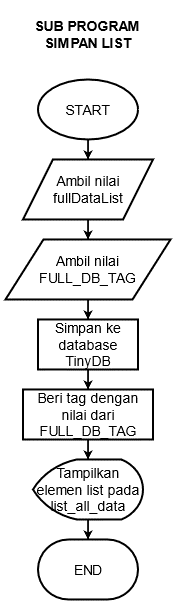
Android App Sub Program Flowchart
- Serial communication
- Clock
- Location sensor
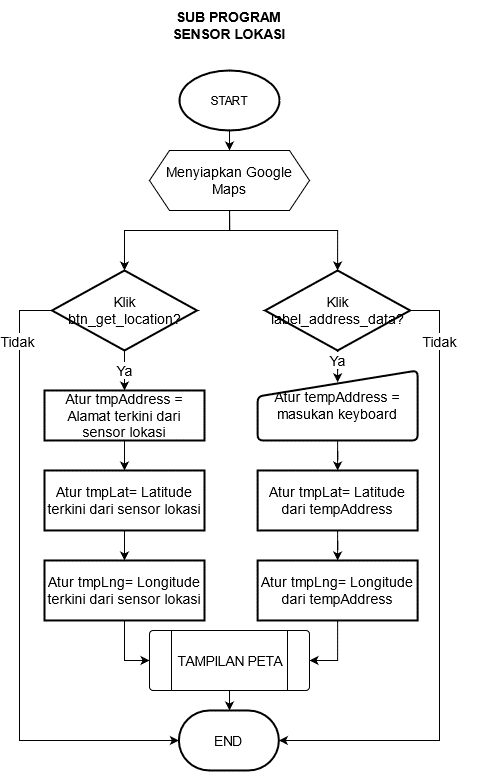
- Show map marker
- Save data
- Delete data
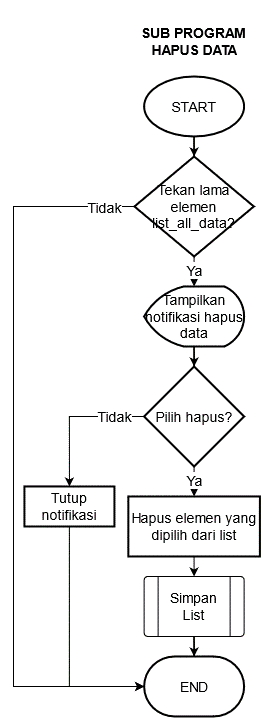
- Save data list
Prototype Implementation
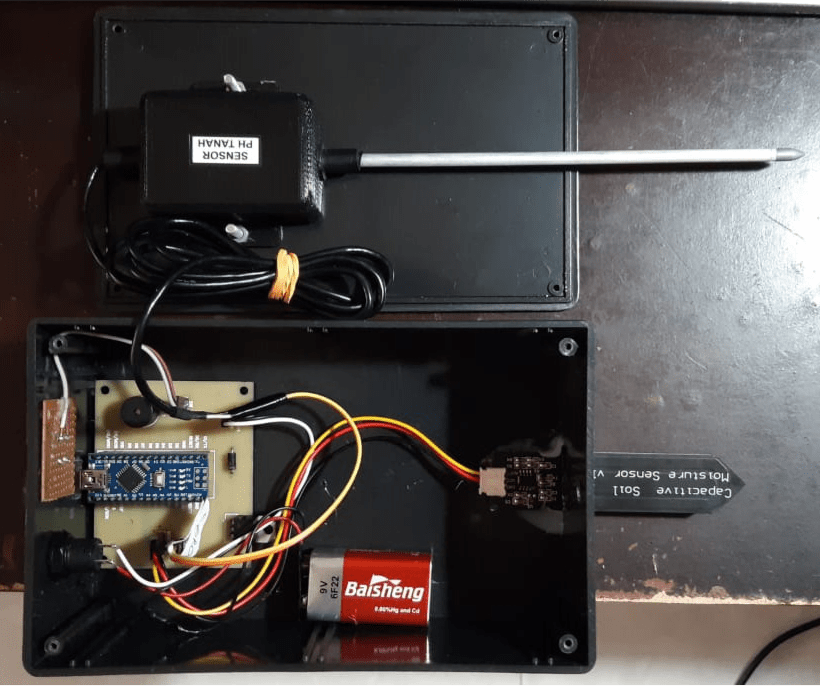
Hardware prototype
- PCB design
- Final prototype
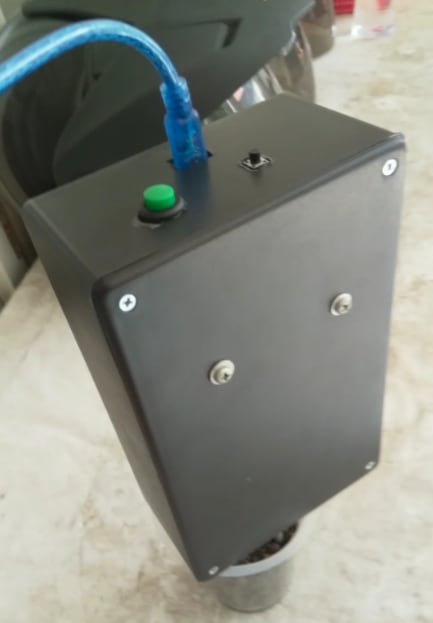
- Prototype on use
Arduino Program
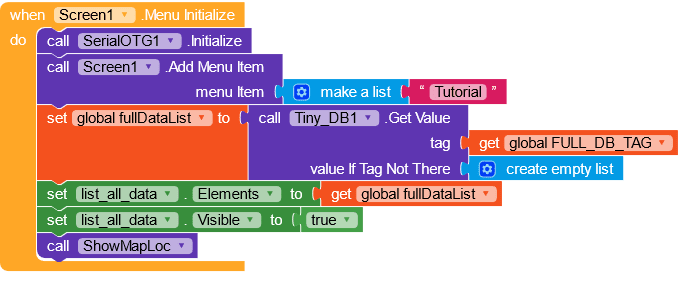
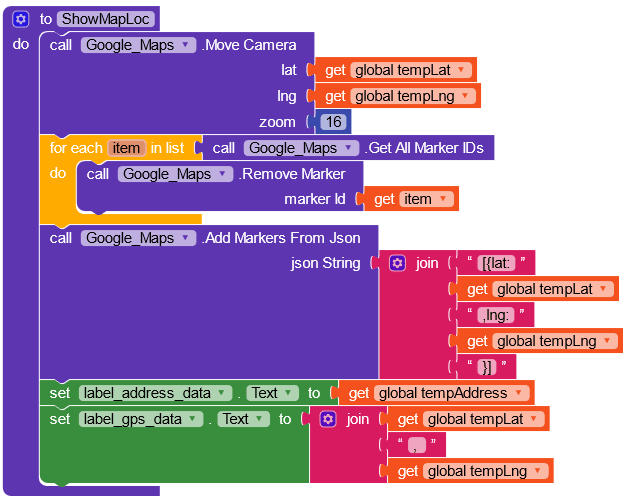
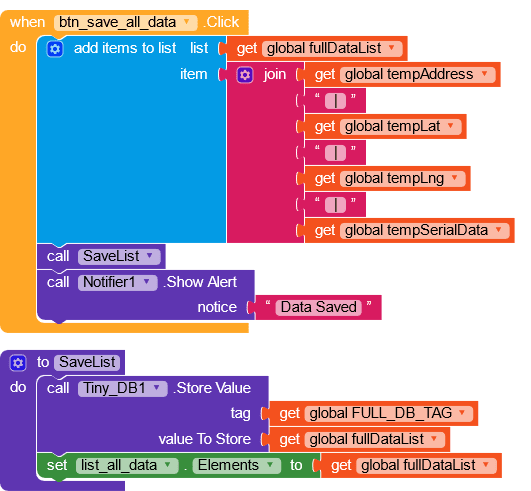
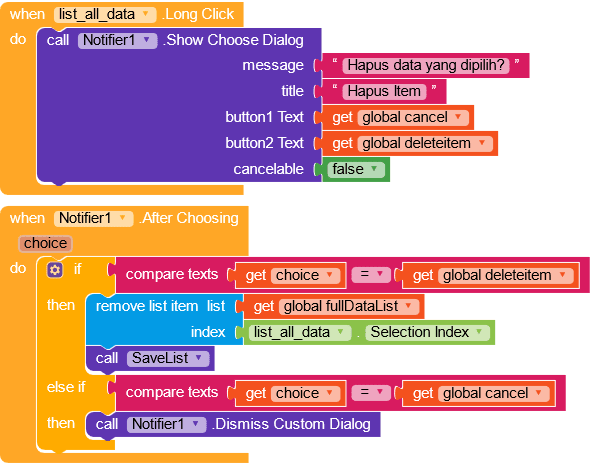
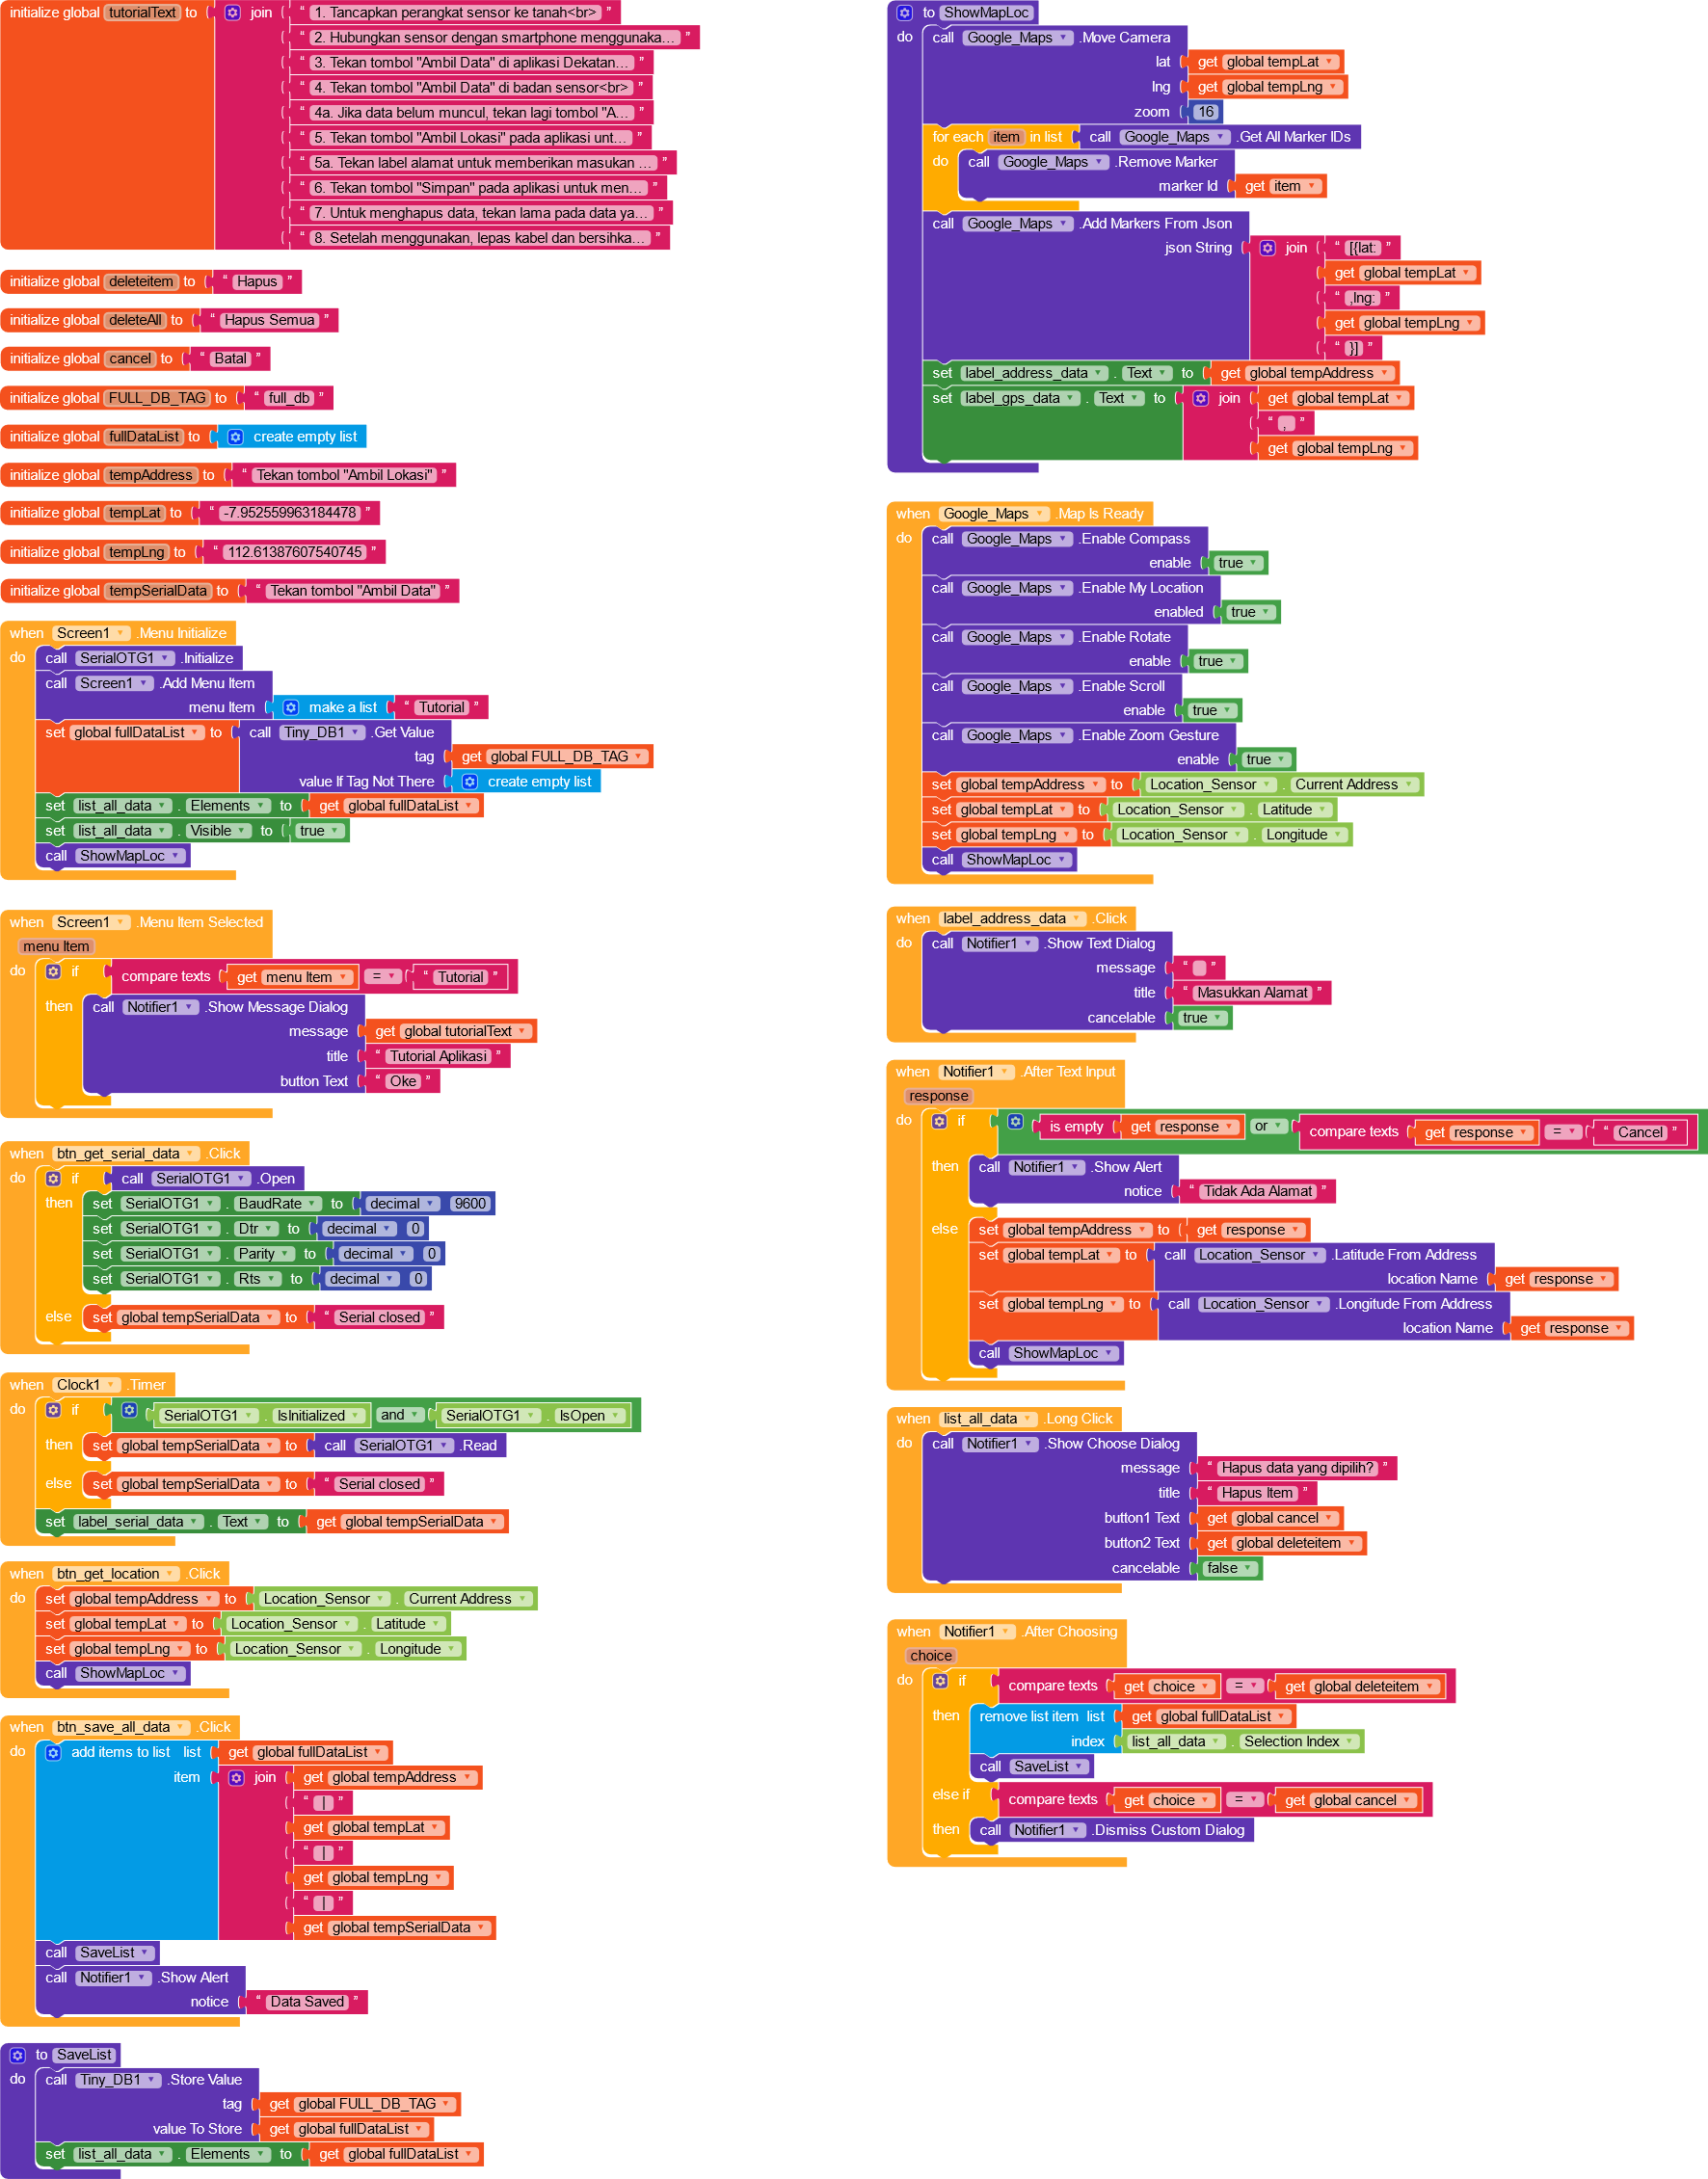
Android Application Program
This Android application uses Kodular Blocks, read more: https://docs.kodular.io/
The full image of these blocks can be seen on: kodular-blocks/kodular-blocks.png.
- Main program initialization
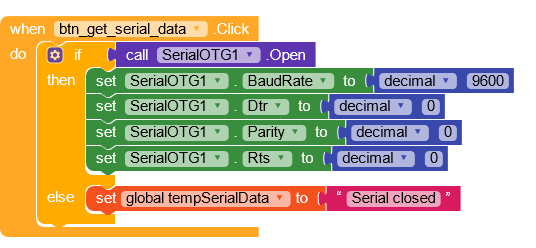
- 0pen serial connection
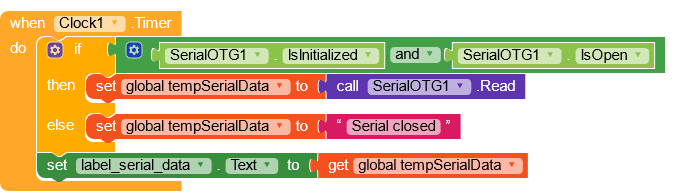
- Read serial data
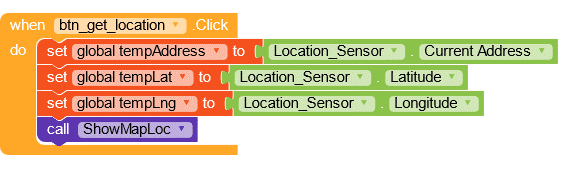
- Get location
- Address input
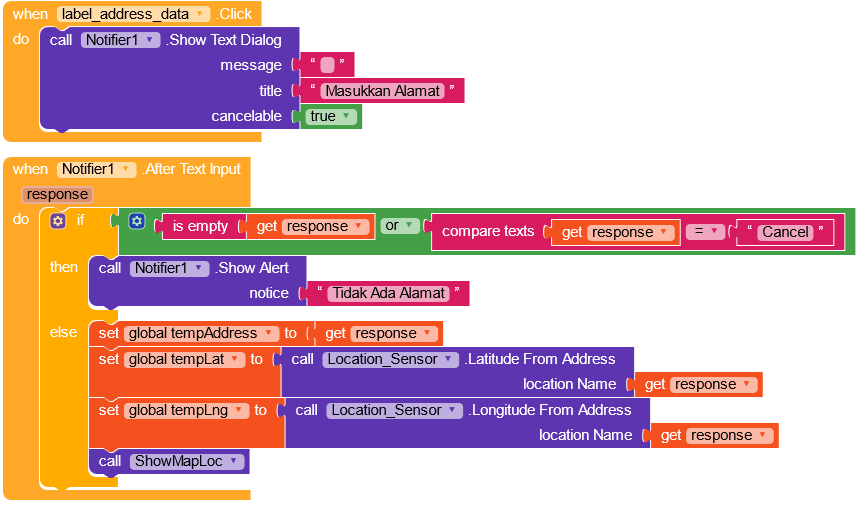
- Show location map
- Save data and list
- Delete data
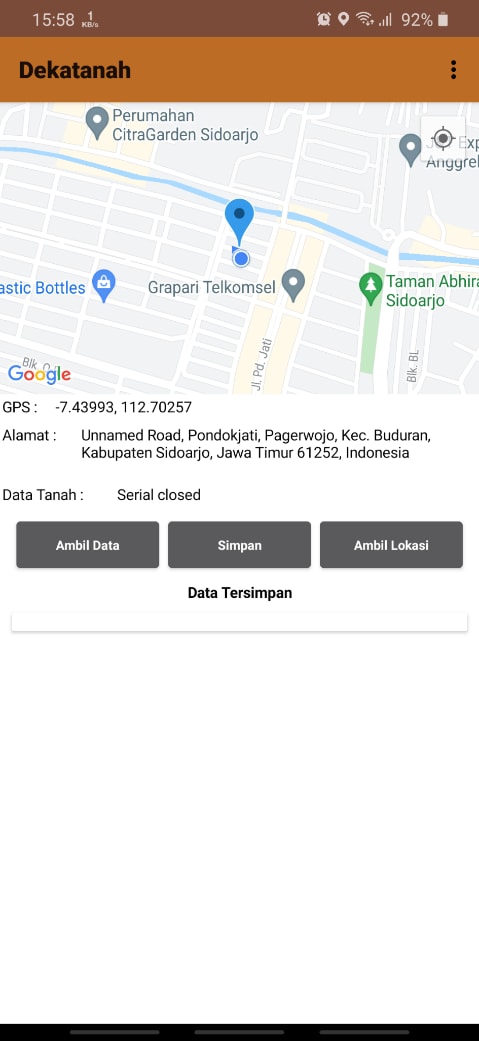
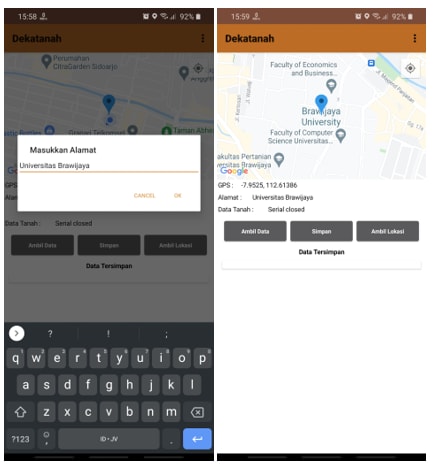
Android Application User Interface

End Notes
This is a simple college project for Praktik Kerja Lapangan which is supervised by a lecturer. There is still much room for improvement.

Top comments (1)
Interesting! What was the most challenging part of building this?