
TL;DR: In this article, I will explain how you can protect your NestJS based API with Auth0. Besides that, the Auth0 Management API is included to receive the current logged in user's profile.
If you don't want to read the article, you can directly head over to the GitHub repository.
Last week I struggled with connecting Auth0 to my NestJS project.
I wanted to restrict certain endpoints of my API to be publicly available.
Since I don't want to store user data and passwords on my own server, I decided to use Auth0.
I have been using NestJS as a framework for my backend applications for some time now. NestJS makes it very easy for new users to start.
It offers a mature CLI and many useful features are already available and can be integrated into the project as needed (e.g. database connections, validation, logging or http requests).
I was desperate and could not find a working solution. I asked for help on Twitter and here on dev.to:
Article No Longer Available
I received some direct message where I got really useful advises.
Unfortunately I could not make it work, so I decided to take a break for a couple of days and stop thinking about it.
This turned out as a very good idea, eventually I was able to solve the problem 🥳.
Configure Auth0
If you don't have an Auth0 account yet, you should head over to their sign up page to create one.
Auth0 offers a generous free tier, which offers passwordless user accounts, two social identity providers (like Google, Facebook, Twitter or GitHub) and support in their community.
For this tutorial and smaller side projects the free plan should be adequate.
Create API
When you're logged in to your dashboard, navigate to the APIs section and create an new API by hitting the Create API button.
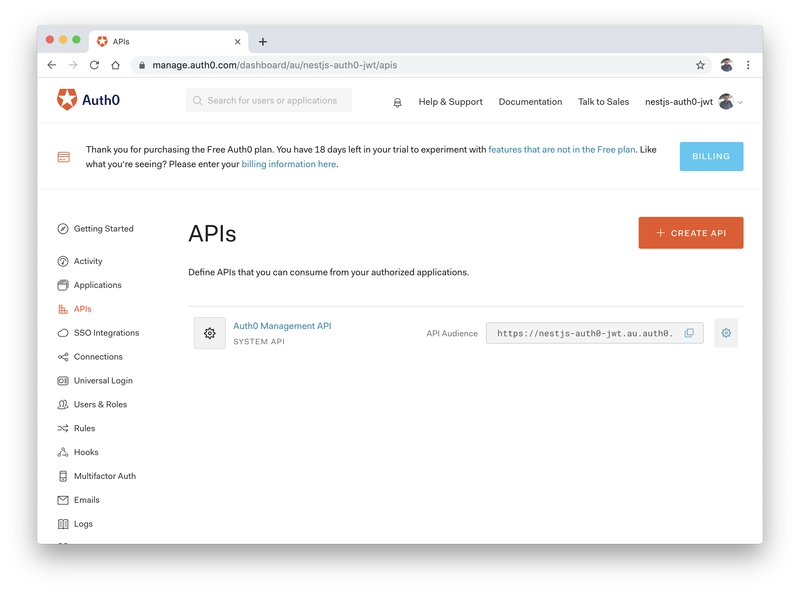
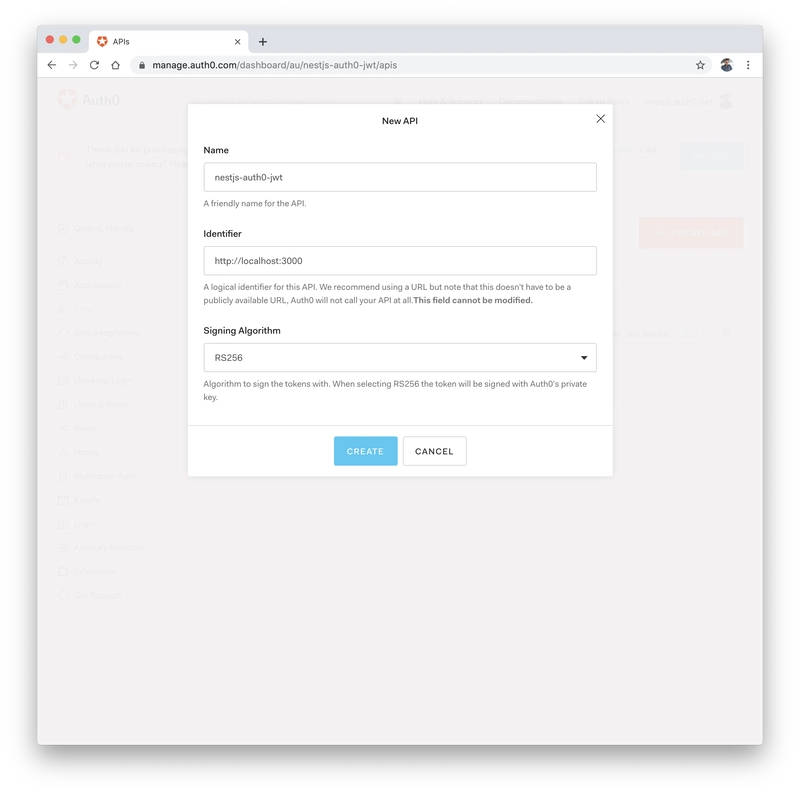
You are then prompted for an API name and an identifier.
Auth0 suggests to use the url as identifier and a friendly name for you API.
The signing algorithm should be left with the default option (RS256).
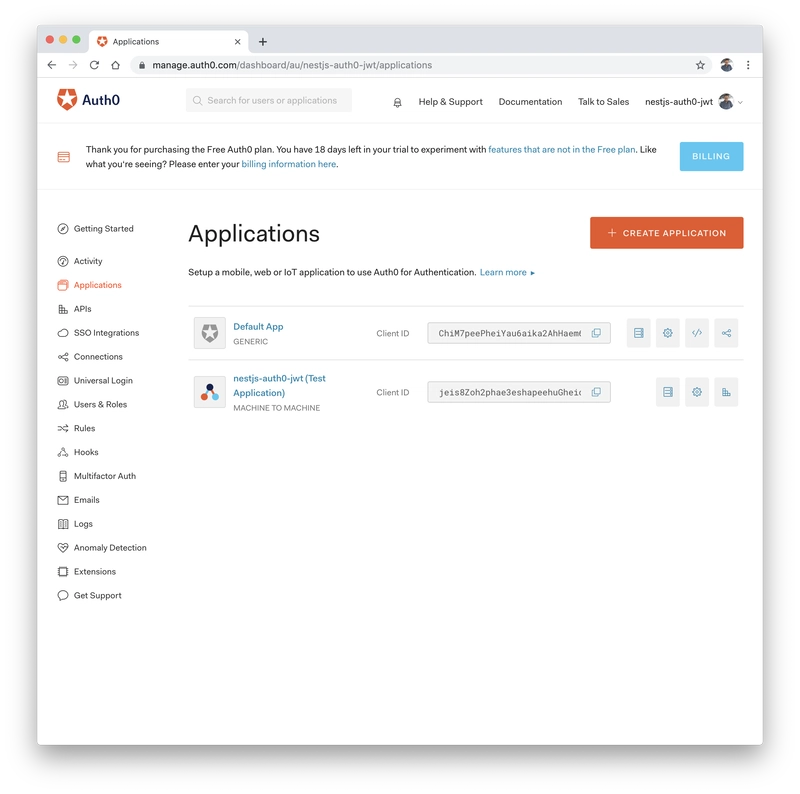
Create Application
Auth0 asks for a type when you're creating a new application.
For this example, the type doesn't matter. For a publicly available application, you might want to read more about application types to choose a type that fits your purpose.


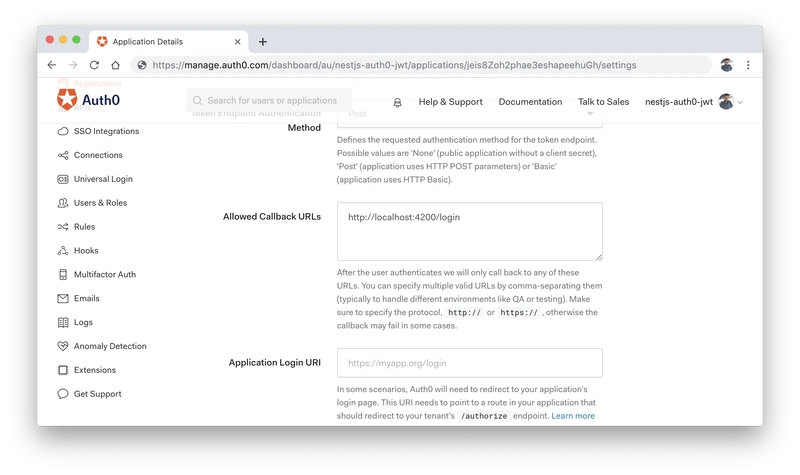
After the application was created, you need to configure an allowed callback URL. A callback URL is a location to which a user can be redirected after successfully authenticating.
Enable Auth0 Management API
Because we also want to read the profile of an authenticated user later on, we have to activate the Auth0 Management API for the application we just created.
The configuration for activating the Auth0 Management API can be found in the APIs tab.
Additionally the read:users scope has to be selected.

Login
We will need to generate an access token to use the API later. The token is generated via the Auth0 login form.
The login form is provided by Auth0 and accessible on your Auth0 tenant domain.
You'll also need your Auth0 client id. Both values can be copied from your application configuration page.

Replace the values in the URL and open it in your browser.
https://$AUTH0_DOMAIN/authorize?audience=http://localhost:3000&scope=SCOPE&response_type=code&client_id=$AUTH0_CLIENT_ID&redirect_uri=http://localhost:4200/login&state=STATE?prompt=none

After you've logged in with an SSO provider (Google is configured by default) or by using an email and password.
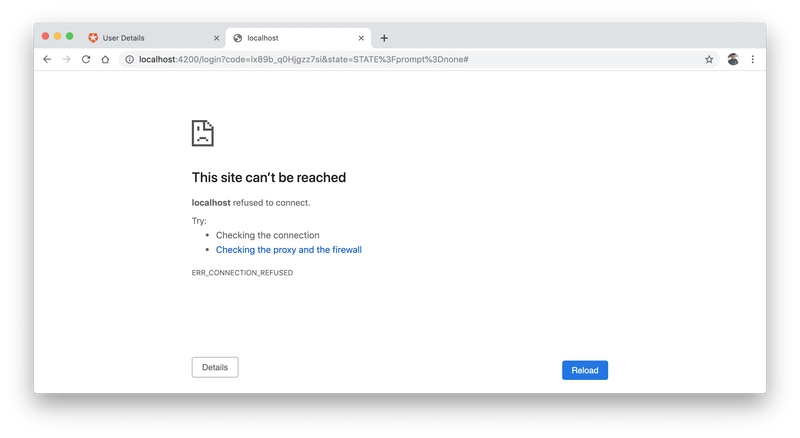
The login form will then redirect you to http://localhost:4200/login, which we configured before.
We don't care that there is no web application running, but you need to copy the value of the code query parameter and save it for later.
The code is required to generate the Bearer token.
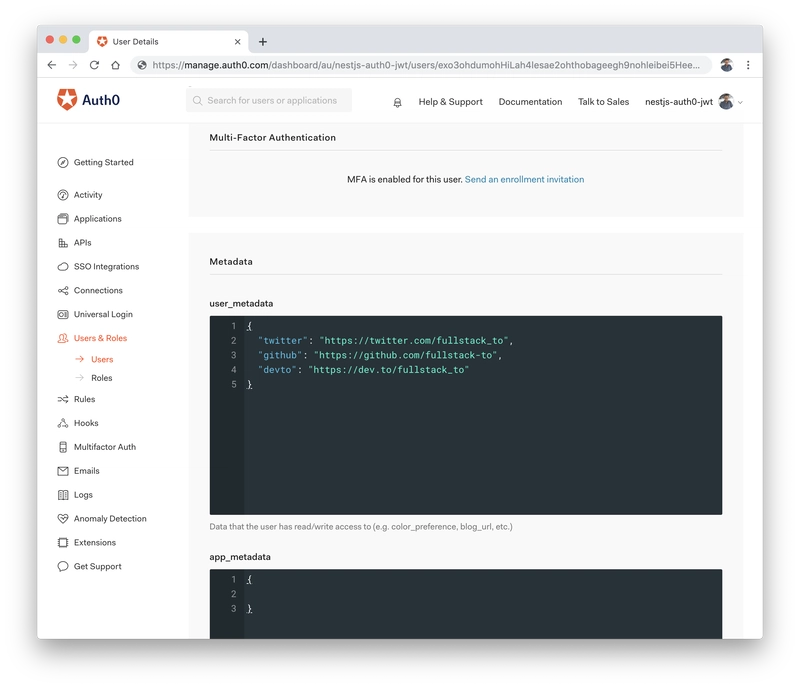
Upate User Metadata
A great thing about Auth0 is, that you can attach metadata to user profiles.
You could use user metadata to link a user profile to other services (e.g. GitHub or dev.to profile) - I am sure you will find many other use cases.

Create new NestJS Application
$ npm i -g @nestjs/cli
$ nest new nestjs-auth0-jwt
If everything went well, a new NestJS application was created with the following directory structure:
nestjs-auth0-jwt
├── src
│   ├── app.controller.spec.ts
│   ├── app.controller.ts
│   ├── app.module.ts
│   ├── app.service.ts
│   └── main.ts
├── test
│   ├── app.e2e-spec.ts
│   └── jest-e2e.json
├── README.md
├── nest-cli.json
├── package-lock.json
├── package.json
├── tsconfig.build.json
├── tsconfig.json
└── tslint.json
Run Application
Navigate to the new directory and start the API:
$ cd nestjs-auth0-jwt
$ npm run start:dev
Once the application is running, you can open your browser and head to http://localhost:3000.

Add dependencies
$ npm install --save @nestjs/passport passport passport-jwt jwks-rsa auth0
$ npm install --save-dev @types/passport-jwt @types/auth0
Create Auth Module
$ nest generate module auth
Create JWT Strategy
$ touch auth/jwt.strategy.ts
import { passportJwtSecret } from 'jwks-rsa';
import { ExtractJwt, Strategy, VerifiedCallback } from 'passport-jwt';

import { Injectable, UnauthorizedException } from '@nestjs/common';
import { PassportStrategy } from '@nestjs/passport';

@Injectable()
export class JwtStrategy extends PassportStrategy(Strategy) {
  constructor() {
    super({
      secretOrKeyProvider: passportJwtSecret({
        cache: true,
        rateLimit: true,
        jwksRequestsPerMinute: 5,
        jwksUri: `https://${process.env.AUTH0_DOMAIN}/.well-known/jwks.json`
      }),

      jwtFromRequest: ExtractJwt.fromAuthHeaderAsBearerToken(), // 1
      audience: 'http://localhost:3000',
      issuer: `https://${process.env.AUTH0_DOMAIN}/`
    });
  }

  validate(payload: any, done: VerifiedCallback) {
    if (!payload) {
      done(new UnauthorizedException(), false); // 2
    }

    return done(null, payload);
  }
}
1: ExtractJwt.fromAuthHeaderAsBearerToken(): Creates a new extractor that looks for the JSON Web Token in the authorization header with the scheme 'bearer'.
2: If no payload is received, the authentication failed.
Update AuthModule
import { Module } from '@nestjs/common';
import { PassportModule } from '@nestjs/passport';

import { JwtStrategy } from './jwt.strategy';

@Module({
  imports: [PassportModule],
  providers: [JwtStrategy],
  exports: [JwtStrategy]
})
export class AuthModule {}
Create API Endpoints
import { ManagementClient, User } from 'auth0';
import * as express from 'express';

import { Controller, Get, Request, UseGuards } from '@nestjs/common';
import { AuthGuard } from '@nestjs/passport';

import { AppService } from './app.service';

@Controller()
export class AppController {
  constructor(private readonly appService: AppService) {}

  @Get()
  getHello(): string {
    return this.appService.getHello(); // 1
  }

  @Get('secret')
  @UseGuards(AuthGuard('jwt')) // 2
  secretEndpoint(@Request() req: express.Request): string {
    return 'this endpoint should be protected';
  }

  @Get('profile')
  @UseGuards(AuthGuard('jwt')) // 2
  async profile(@Request() req: express.Request): Promise<any> {
    const authZero = new ManagementClient({
      // 3
      domain: process.env.AUTH0_DOMAIN,
      clientId: process.env.AUTH0_CLIENT_ID,
      clientSecret: process.env.AUTH0_CLIENT_SECRET,
      scope: 'read:users update:users'
    });

    const response = await authZero
      .getUser({ id: req.user.sub }) // 4
      .then((user: User) => {
        return user;
      })
      .catch(err => {
        return err;
      });

    return response;
  }
}
1: Public available API endpoint.
2: @UseGuards(AuthGuard('jwt'))
3: Create Auth0 Management API Client.
4: The subject in the JWT response is identical to the Auth0 User ID. So the sub property is used as id parameter for the getUser call, which returns the entire user profile.
Use Login Code to retrieve Bearer-Token
$ export AUTH0_DOMAIN=${AUTH0_DOMAIN}
$ export AUTH0_CLIENT_ID=${AUTH0_CLIENT_ID}
$ export AUTH0_CLIENT_SECRET=${AUTH0_CLIENT_SECRET}
$ export CODE=${CODE}

$ curl -X POST -H 'content-type: application/json' -d '{
  "grant_type": "authorization_code",
  "client_id": "'$AUTH0_CLIENT_ID'",
  "client_secret": "'$AUTH0_CLIENT_SECRET'",
  "code": "'$CODE'",
  "redirect_uri": "http://localhost:4200"
}' https://$AUTH0_DOMAIN/oauth/token
{
  "access_token": "eyJ0eXAiOiJKV1QiLCJhbGciOiJSUzI1NiIsImtpZCI6Ik9EQXpOMEZHTWpBd1FVUTJORFpETXpBMVJETXdSRUUyTjBSRE5qRXpNemRFUWtNMk5URTFNUSJ9.eyJpc3MiOiJodHRwczovL25lc3Rqcy1hdXRoMC1qd3QuYXUuYXV0aDAuY29tLyIsInN1YiI6Imdvb2dsZS1vYXV0aDJ8MTEzMDc2NzYwNTUyNTQ5MTY1ODQ5IiwiYXVkIjoiaHR0cDovL2xvY2FsaG9zdDozMDAwIiwiaWF0IjoxNTY1OTg1MzU3LCJleHAiOjE1NjYwNzE3NTcsImF6cCI6IjR0eFZVSm5ZVlRhbzRsczA2dFozRGNCdm5JVk9uY01RIn0.U3dVcaFPY5ZHlz9sntx3O2Svz_HfapBpryrUB9ipIdoIHgu_Skp40FGaLu0Fx-_Uo2GE4pfvM-XR1bQgQGyVbMhALpe2CZrKKCe9k1v4VZ_zxwhYDdV8WNr99jmbMtnm_I9rZIz3YU9dyjWlV_ktHV0bPHj1wIjBUrUc9P_EF5Vw3CeNMxlFXZ2xYldT9XdYUotJHIoJ-e_KWo0hMn_qF5xvWxD-RJIQL7G2ZxEcsmMe9JovwZoAnoqaIyutMP8g7X1UfoTGs-Fa6B1xXhtrYBms--sm_FrM5w0rjIyOuyujulPTeXO8_CbuL1Yz5kCcBsuJdXTiyTcTV9R8W0f4Rg",
  "expires_in": 86400,
  "token_type": "Bearer"
}
Run Application
Replace the variables ${AUTH0_DOMAIN}, ${AUTH0_CLIENT_ID} and ${AUTH0_CLIENT_SECRET} with your previously saved values and start the NestJS application.
$ export AUTH0_DOMAIN=${AUTH0_DOMAIN}
$ export AUTH0_CLIENT_ID=${AUTH0_CLIENT_ID}
$ export AUTH0_CLIENT_SECRET=${AUTH0_CLIENT_SECRET}
$ npm run start:dev
Make Requests without Authentication
Once the Application is running, use cURL to access the API endpoints /secret and /profile.
You will get a 401 (Unauthorized) error because both endpoints have been marked with the AuthGuard annotation and are therefore not publicly available.
$ curl http://localhost:3000/secret
$ curl http://localhost:3000/profile
Make Requests with Authentication
Now you can run the same requests but provide the access token via the Authorization header.
Because you previously authorized yourself, you can now address the two private endpoints /secret and /profile.
The /profile endpoint also returns your profile information from Auth0, which we received from the Auth0 Management API.
The Auth0 Management API uses the sub (subject) field from the JWT response to retrieve your user profile.
For documentation reasons, the JWT response in the example application is logged to the console.
$ curl http://localhost:3000/secret \
  -H 'Authorization: Bearer eyJ0eXAiOiJKV1QiLCJhbGciOiJSUzI1NiIsImtpZCI6Ik9EQXpOMEZHTWpBd1FVUTJORFpETXpBMVJETXdSRUUyTjBSRE5qRXpNemRFUWtNMk5URTFNUSJ9.eyJpc3MiOiJodHRwczovL25lc3Rqcy1hdXRoMC1qd3QuYXUuYXV0aDAuY29tLyIsInN1YiI6Imdvb2dsZS1vYXV0aDJ8MTEzMDc2NzYwNTUyNTQ5MTY1ODQ5IiwiYXVkIjoiaHR0cDovL2xvY2FsaG9zdDozMDAwIiwiaWF0IjoxNTY1OTg1MzU3LCJleHAiOjE1NjYwNzE3NTcsImF6cCI6IjR0eFZVSm5ZVlRhbzRsczA2dFozRGNCdm5JVk9uY01RIn0.U3dVcaFPY5ZHlz9sntx3O2Svz_HfapBpryrUB9ipIdoIHgu_Skp40FGaLu0Fx-_Uo2GE4pfvM-XR1bQgQGyVbMhALpe2CZrKKCe9k1v4VZ_zxwhYDdV8WNr99jmbMtnm_I9rZIz3YU9dyjWlV_ktHV0bPHj1wIjBUrUc9P_EF5Vw3CeNMxlFXZ2xYldT9XdYUotJHIoJ-e_KWo0hMn_qF5xvWxD-RJIQL7G2ZxEcsmMe9JovwZoAnoqaIyutMP8g7X1UfoTGs-Fa6B1xXhtrYBms--sm_FrM5w0rjIyOuyujulPTeXO8_CbuL1Yz5kCcBsuJdXTiyTcTV9R8W0f4Rg'
$ curl http://localhost:3000/profile \
  -H 'Authorization: Bearer eyJ0eXAiOiJKV1QiLCJhbGciOiJSUzI1NiIsImtpZCI6Ik9EQXpOMEZHTWpBd1FVUTJORFpETXpBMVJETXdSRUUyTjBSRE5qRXpNemRFUWtNMk5URTFNUSJ9.eyJpc3MiOiJodHRwczovL25lc3Rqcy1hdXRoMC1qd3QuYXUuYXV0aDAuY29tLyIsInN1YiI6Imdvb2dsZS1vYXV0aDJ8MTEzMDc2NzYwNTUyNTQ5MTY1ODQ5IiwiYXVkIjoiaHR0cDovL2xvY2FsaG9zdDozMDAwIiwiaWF0IjoxNTY1OTg1MzU3LCJleHAiOjE1NjYwNzE3NTcsImF6cCI6IjR0eFZVSm5ZVlRhbzRsczA2dFozRGNCdm5JVk9uY01RIn0.U3dVcaFPY5ZHlz9sntx3O2Svz_HfapBpryrUB9ipIdoIHgu_Skp40FGaLu0Fx-_Uo2GE4pfvM-XR1bQgQGyVbMhALpe2CZrKKCe9k1v4VZ_zxwhYDdV8WNr99jmbMtnm_I9rZIz3YU9dyjWlV_ktHV0bPHj1wIjBUrUc9P_EF5Vw3CeNMxlFXZ2xYldT9XdYUotJHIoJ-e_KWo0hMn_qF5xvWxD-RJIQL7G2ZxEcsmMe9JovwZoAnoqaIyutMP8g7X1UfoTGs-Fa6B1xXhtrYBms--sm_FrM5w0rjIyOuyujulPTeXO8_CbuL1Yz5kCcBsuJdXTiyTcTV9R8W0f4Rg'
I hope that this article will give you an idea of how you can implement an authentication provider like Auth0 in your NestJS application.
It was very cumbersome for me to get Auth0 and authentication integrated in my project, but eventually I got it working and that felt really awesome.

I was not able to get Auth0 authentication working in my NestJS project. I also asked for help here:

I was struggling with this problem for a few days, I then took a break and didn't touch my code for a day or so.
I started again with a clean mind and could solve problem within an hour 🥳.
That's why I love programming, you always have this great moments when you achieved something 💪
And normally you have this little breakthroughs every few hours or days (depending on the size of your projects). For me, that's the most motivating thing in my job!
BTW: I'm writing an article on how I solved it 😉.
I also think that the NestJS documentation on Authentication could be improved to make it easier for people to implement it right and avoid security breaches. However, I don't complain, NestJS is open source and everyone could improve the documentation.
If you have any questions about NestJS, Auth0 or another topic, don't hesitate to write me a DM on Twitter, dev.to or write me a mail: yo@fullstack.to. I'm happy to help you!
Links
If you like my content, you might want to follow me on Twitter?! @fullstack_to
Cover Image by Jason Blackeye on Unsplash

Top comments (6)
Really great! Do you know how I can implement auth0, but instead of saving the user in their database, save it in the database of my application?
You should do both, use Auth0 as an identity provider, and then tie that user via an unique identifier to the user that you create and store in the database of your application.
Why like that? Is it cheaper and better?
Hey Matthias, thanks for posting this great resource!
I know this is an older article by now, but would you have any experience/opinions on implementing your own Roles via Nest.js Guards or do you rely on Auth0 for that too? I ask this because Auth0 does not allow Role management on their free tier so I had abandoned trying to implement it.
Great stuff.
I did the same thing just this week, but did not use Passport, but reading your article, I might switch to your way of doing it, as it allows to use the built in Guards from Passport.
Hallo Matthias, I am building Server-side Rendering (SSR): Angular Universal + NestJS and like to use Auth0 for authentication , do you think that this approach will work ?
Thank you in advance !