If you're coding today without using AI in some way, you're missing out—big time.
Even though many AI tools are not exactly budget-friendly, it's still possible to have some AI running locally and make it your own code assistant.
With that goal in mind, this guide will walk you through an option that could be a great starting point for your first steps in the world of AI—without needing to spend hundreds of dollars a year.
Remember to show your support: follow, share, give it a like, and leave a comment.
Before Getting Started
We'll be using the following tools:
- A VScode :D
- The plugin from continue.dev
- Free autocomplete from mistral.ai
- An integrated chat using Ollama and the Mistral.ai model (running locally with docker)
I was able to run all of this on my test machine: an AMD Ryzen 5 5600 with 16GB of RAM running Ubuntu Linux. I did hit the memory limit a few times, but it worked! So now you have a basic idea of the minimum requirements you'll need.
Step 1 - Accessing Codestral-Mistral Autocomplete:
- Visit the mistral.ai website and create an account.
- In the left-hand menu, click on "Codestral" and generate a new key.
- Copy the generated key and save it in a secure location—we'll use it later.
Step 2 - Setting Up the continue.dev Plugin
- In the VS Code plugin section, search for:
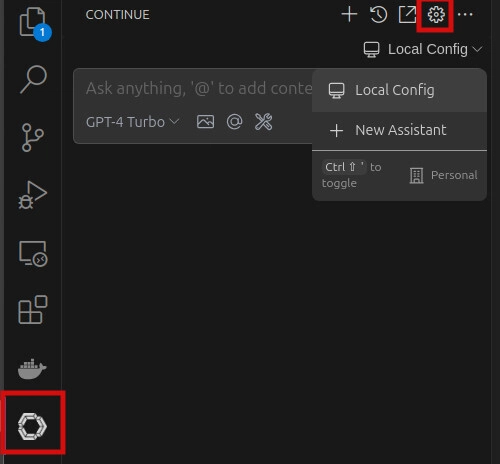
continue.dev, or visit the plugin page to install it. - Once installed, click on the new continue.dev icon and open the plugin settings (cog).
- A JSON configuration file for the plugin will open. We'll need to configure it by adding the Mistral.ai model and the key generated in Step 1.
- Add the following snippet to the JSON file:
 {
  // ... omitted for brevity
  "tabAutocompleteModel": {
    "title": "Codestral",
    "provider": "mistral",
    "model": "codestral-latest",
    "apiKey": "YOUR-CODESTRAL-KEY-HERE"
  },
  // ... omitted for brevity
 }
- Just save, and now your plugin is ready to use, complete with a nice autocomplete feature!

Step 3 - Setting Up the Ollama Server
For this setup, we'll use the Ollama server, an open-source server that runs locally and can be configured to use the Mistral.ai model.
- The goal of this guide is to show you how to integrate AI into your development environment.
Installation of Ollama will be done via a Docker command. If you don't have Docker installed yet, check out this guide and complete the installation.
- Navigate to the folder where you store your projects and run the following command:
git clone https://github.com/getJv/my-ollama.git
- Now, navigate to the directory:
cd my-ollamaand run the command to start the server.
docker compose up --build
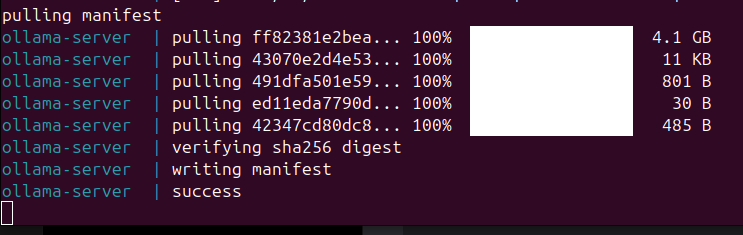
- This command will download the official Ollama image, build it locally, and then start the container. It will take a bit longer only on the first run, as Ollama will download the Mistral.ai model.
At the end, you should see this in your terminal:
Step 4 - Configuring the plugin to use Ollama
- Open the plugin configuration for continue.dev again.
- In the JSON file, now add the following configuration for the key:
models.
 {
  "models": [
    {
      "title": "Codestral",
      "provider": "ollama",
      "model": "mistral:latest",
      "api_base": "http://localhost:11434"
    }
  ],
  // ... omitted for brevity
 }
- save the changes and restart the vscode.
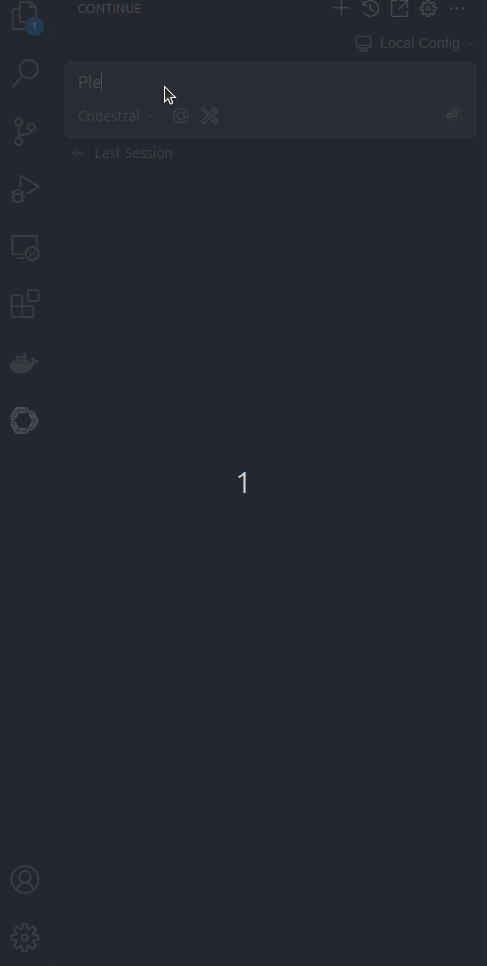
Fantastic! Now you can test your chat feature as shown below:
In case you want to expand this and use more features read the continue.dev docs the ollama or adjust my ollama image as you need.
Remember to show your support: follow, share, give it a like, and leave a comment.

Top comments (0)