In the previous part (Part 1), we learnt about how to get started with Lighthouse CI, what are the different commands available, how to run your first scan and compare the results against a baseline. In this part (Part 2), we continue to look at how to set up a Lighthouse server on Azure so that we can upload the scan results, see trends and compare the scores of your site at different points in time.
Server Command
We ran our scans and we have validated that the scores are above our baseline. You know what would be nice? The ability to see the results on a dashboard with historic data from every scan and ability to link them to a specific commit and build/release in your pipeline. This is exactly what the Lighthouse server enables us to do. To install the Lighthouse server, run npm install @lhci/serverand then run lhci server with the below configuration in place to start the server locally on port 9001 which stores the result in a SQLLite Database.
{
  "server": {
      "port": 9001,
      "storage": {
        "storageMethod": "sql",
        "sqlDialect": "sqllite",
        "sqlDatabasePath": "lhci.db"
      }
    }
}
If you now visit port 9001, you will be greeted with a friendly page asking you to run the lhci wizard command to set-up the server.
Caution: Lighthouse server does not support authentication/authorization now but that is being worked on and so please be aware of the risks here.
Before we get to the wizard part, I’ll show you how to run a publicly available Lighthouse server on Azure. If this whole Azure thing is not important to you, feel free to skip the next bits and head straight over to the Wizard Section or head to the cloud recipes for instructions on running the server on a different cloud.
Lighthouse Server on Azure
There is a docker image available for Lighthouse Server. This means that you can make use of Azure Web App for Containers and pass in configuration as environment variables using App Settings.
Log in to the Azure Portal, create a new Azure Web App for Containers to run the patrickhulce/lhci-server image from DockerHub. The next step is to create a Postgres Database on Azure.
Now that the resources are created, let’s update their configurations
- Once the database is created, go to Connection Security and ensure that ‘Enforce SSL connection’ is set to DISABLED and the ‘Allow access to Azure services’ is set to ON. Take a look at the related issue on GitHub to understand why SSL is not supported at the moment.
- The next step is to add the below snippet to the application settings. Take note of the Postgres connection string. There is a weird
%40thing going on and also we use the default database calledpostgres. You can, of course, use a Postgres client to create a new database and use that in the connection string.
[
  {
    "name": "LHCI_NO_LIGHTHOUSERC",
    "value": "1",
    "slotSetting": false
  },
  {
    "name": "LHCI_STORAGE__SQL_CONNECTION_SSL",
    "value": "0",
    "slotSetting": false
  },
  {
    "name": "LHCI_STORAGE__SQL_CONNECTION_URL",
    "value": "postgresql://username%40myserver:password@myserver.postgres.database.azure.com:5432/postgres",
    "slotSetting": false
  },
  {
    "name": "LHCI_STORAGE__SQL_DIALECT",
    "value": "postgres",
    "slotSetting": false
  },
]
Once you have all this configuration in place, you should be able to see the Lighthouse server home page prompting you to run the wizard to set up your project.

Wizard Command
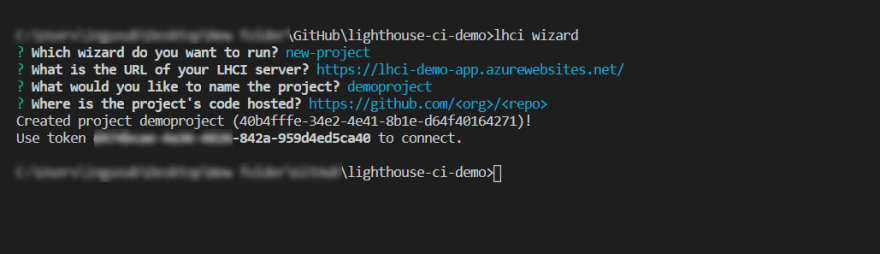
As mentioned earlier, Lighthouse Server does not support any form of authentication or authorization as of now and consequently, there is no project management UI either. To set up a project on the server, run lhci wizard on your command prompt, complete the wizard and take note of the GUID token.
Once you have configured a project on the server, you can update your Lighthouse configuration file as shown below
{
  "upload": {
    "target": "lhci",
    "token": "your-token-xxxx-yyyy-zzzz",
    "serverBaseUrl": "https://myserver.azurewebsites.net/"
  }
}
Upload Command
Now you have all the configuration in place and ready to upload results to your server. You can do that with the lhci upload command. When you run the command, you will get an error message saying Error: Unable to determine current hash with git rev-parse HEAD. Lighthouse CI requires certain metadata before pushing the results to the server and tries to infer that from the git repository. They call this Build Context and you can read more on this from their docs.
To push your results to the server, initialize a git repo, commit your changes and then you can upload your results to the server using the lhci upload command. Once you upload multiple results, you can then compare the scores against two different versions, see what changed and understand general trends in your Lighthouse scores.

Autorun Command
The lhci autorun command combines the healthcheck, collect, assert and upload commands depending on the configuration. I find this very useful and it is nice that this convenient wrapper is available out of the box.
Azure Devops Extension
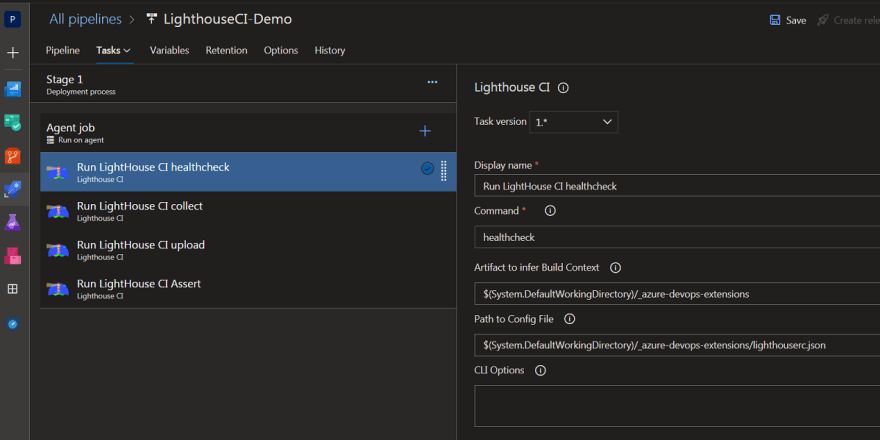
Right now everything works perfect on my machine but still requires some work to get it running successfully inside my deployment pipelines. All my pipelines are hosted on Azure Devops and so I built an extension that features a custom build and releasetask using NodeJS that helps you run Lighthouse CI inside Azure Pipelines.
You specify the command you want to run, point to the configuration file and the extension overrides the build context with relevant predefined variables available inside Azure Pipelines.
In this 2 part Lighthouse series, you have installed Lighthouse-ci CLI, learnt how to configure it, set up the Lighthouse server on Azure and have a good understanding of the different commands (healthcheck, collect, assert, upload and autorun) that is available to you. Once the results are pushed to the server, you would then compare scores, see trends and compare the scores of your site at different points in time.
Right now, I am happy with all the features available considering that this is still in 0.x.y version. Once the server supports authentication and includes a project management UI, then it is ready for prime time. But overall, looks very good to me.

Top comments (0)