
After building a data science app, we want to make it accessible instead of gathering dust in a code dump.
In the previous post, we used Streamlit to quickly spin up a slick-looking app with straightforward Python script, and not even a single line of React.js. Next, we will go over several methods of deployment: hosting it on Heroku, containerizing it with Docker, plus running it from Github direct as an easy way to share.
🍳Prerequisite
- A Github/Gitlab account
- The files in this gist covered from the previous post
☁️Deployment
Among the several deployment options, I find Heroku one of the most beginner-friendly. Before we start, we need to register an account on Heroku, install its CLI, and create a project folder on its UI with a preferred folder name.
Hosting on Heroku
Two additional files from the Gist are needed in the project folder.
Procfile
web: sh setup.sh && streamlit run app.py
setup.sh
mkdir -p ~/.streamlit/

echo "\
[general]\n\
email = \"your-email@domain.com\"\n\
" > ~/.streamlit/credentials.toml

echo "\
[server]\n\
headless = true\n\
enableCORS=false\n\
port = $PORT\n\
" > ~/.streamlit/config.toml
Thereafter in your local terminal, run:
git init
If you are working from your local repo, you could skip the git init part.
Then followed by
heroku git:remote -a <heroku_project_name>
git add .
git commit -am “<commit message>”
git push heroku master
And now instead of only having the app in your local browser, you have a live url to share. It resembles .herokuapp.com.
💡 Tips and Tricks
Like most cloud platforms, Heroku has the function of auto-deploy through Github integration, under the Deploy tab. It's good to test the code beforehand.

Deploy with Docker via GCP or AWS cloud services
Why Docker
While you could have other users git clone your repo and run it locally, they might run into all sorts of issues - such as installing certain packages, or some wrong version might throw everything off, or they could be on a different operating system. All the things you don't want to see happening after all that work. Having the app/code easily accessible & reproducible also can makes it easier for conducting user testing and gather feedback.
Two main concepts
- Container: a Docker container encapsulates an application together with the packages and libraries it requires to run
- Image: a snapshot of a container
Getting ready
To begin with, we can register a DockerHub account and create a repo there.
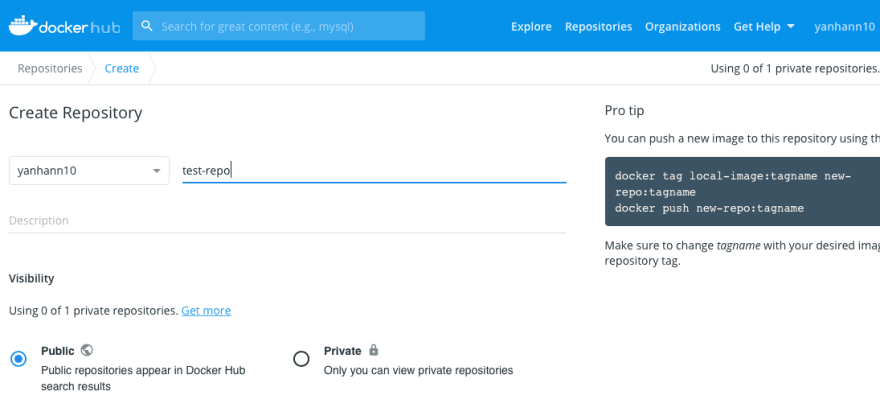
The two options – public and private, are very similar to Github's options. One could grant access to specific people for their private repo. For now, we will create a public one for demo purpose.
Next you will need a Dockerfile, such as this one.
Now we are ready to Dockerize the app, there are just a few key commands to know. Since Docker/Kubernetes (the thing that orchestrates multiple Dockers) can get complex, it is better to start from the bare essentials.
I prefer to work from GCP cloud console or AWS cloud9 so I don't need to install Docker, but you can work from local terminal if you already have Docker installed.
Main commands
In cloud console, choose a project, clone a repo if you have the code on Github or upload the project folder.
- Log in
docker login
It will prompt for Docker Hub username and password.
- Build
docker build --tag=<DockerHub Account Name>/<DockerHub Repo Name>:0.0 .
You could specify a version number or use latest.
- Check
docker images
You should be able to find the image you just built under REPOSITORY
- Push
docker image push <DockerHub Account Name>/<DockerHub Repo Name>
Next you will see the latest version has been reflected in Docker Hub. Clicking the public view on the right, you will be able to share the url and others should be able to pull it.
💡 Tips and Tricks
- Better to use a dash instead of underscore in the docker tags
- If you want to keep your Dockerfile clean and tidy, you can use Hadolint which is a Dockerfile linter and also add this to the make file hadolint streamlit_demo/Dockerfile
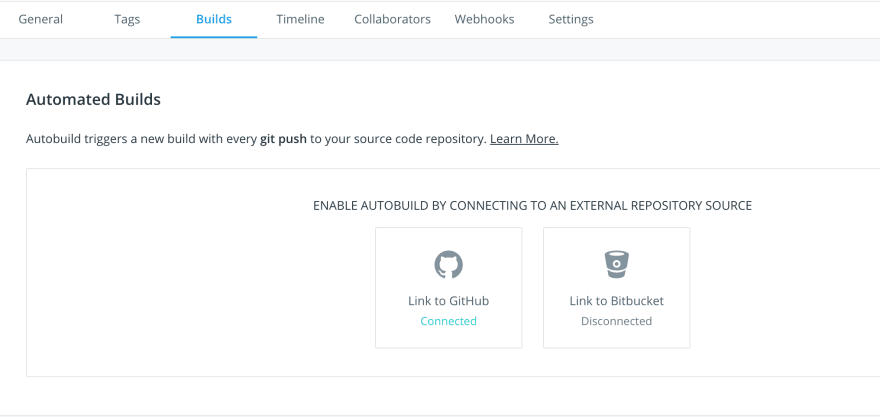
- To save the hassle of having to push to Docker Hub after every update, you can click on Builds > Configure Automated Builds and connect to your Github.
- Instead of running several commands for each project, you can save them in a bash file called run.sh and then run
sh run.shto execute all the commands.
dockerpath="change this to <DockerHub Account Name>/<DockerHub Repo Name>"
#log in
docker login
#build
docker build --tag=$dockerpath:latest .
#push
docker image push $dockerpath
Running the app directly with Github url
The 3rd method is to share the Github url link of your app.py, under the condition that app.py is all the file you need to run the app and you have no other dependencies such as data files or helper scripts etc.
streamlit run <app.py github url>
And see the app in action. However, this method doesn't bring alone the csv files in your folder. So the previous 2 methods are still the most solid for sharing your apps.
Yet another option is that Streamlit will offer its own deployment solution. When that happens, it would be the most convenient solution for Streamlit. But deployment methods we covered earlier are still applicable to all kinds of apps and scripts beyond Streamlit (some tweaking might be needed in the config files).
⌛Wrap-up
Today we reviewed how to use Docker to containerize Streamlit app and how to deploy it to Heroku. You could also deploy it to GCP/AWS/Azure
Additional useful resources
Streamlit wiki - links to articles on GCP/AWS/Azure deployment
Please contain yourself - Clear & thorough explanation of how Docker works in a series.

Oldest comments (0)