
This tutorial was originally published on my technical blog. Check it out if you like Python, Data Science, AI, Web Development, and NLP-related guides.

Introduction
Welcome to the second part of the 3-part technical tutorial series, where we'll be building a Django project that enables users to manage their cryptocurrency portfolios. To implement the functionalities and additional features, we'll be utilizing API calls to coingecko or any other cryptocurrency API.
In the previous part, we set up the project and created the models. Now, we will continue off from that point and add the templates, views and urls and code up the entire project. This will be the most complex and detailed part of this series.
The code for the entirety of the project can be found here -> Github Repo for Django Crypto App
Setting up the URLs
In Django, URLs are defined in the urls.py file for each app. The URL patterns are matched to a view function that will handle the request/response.
In the given code snippet, we can see the import statements for the path and views modules. We are also importing auth_views which is a Django module for handling authentication views. Additionally, we are importing the admin module from Django's contrib package.
The urlpatterns list contains all of the URL patterns for our app. Each URL pattern is defined using the path() function, which takes the following parameters:
-
route: A string that contains a URL pattern. -
view: The view function that should be called when the URL pattern is matched. -
name: A unique name for the URL pattern.
For our project, we have defined URLs for several views:
-
home_view: The default view for our app, accessed at the root URL. -
login_view,logout_view: Views for user authentication. -
signup_view,signup_with_referrer_view: Views for user registration. -
portfolio_view: View for displaying user's portfolio. -
search_view: View for searching and adding new cryptocurrencies to a user's portfolio. -
add_to_portfolio_view,delete_from_portfolio_view: Views for adding/deleting cryptocurrencies from a user's portfolio. -
password_reset: View for resetting the user's password. -
password_reset_done: View displayed after password reset email is sent. -
password_reset_confirm: View for confirming the password reset. -
password_reset_complete: View displayed after the password has been reset.
from django.contrib import admin
from django.contrib.auth import views as auth_views
from django.urls import path

from . import views

urlpatterns = [
    path("", views.home_view, name="home"),

    # user authentication
    path("login/", views.login_view, name="login"),
    path("logout/", views.logout_view, name="logout"),

    path("signup/", views.signup_view, name="signup"),
    path('signup/<str:referral_code>/', views.signup_with_referrer_view, name='signup_with_referrer_view'),

    # wallet page
    path("portfolio/", views.portfolio_view, name="portfolio"),

    # CRUD operations on cryptos
    path("search/", views.search_view, name="search"),
    path("add_to_portfolio/", views.add_to_portfolio_view, name="add_to_portfolio"),
    path('delete_from_portfolio/<int:pk>/', views.delete_from_portfolio_view, name='delete_from_portfolio'),

    # password reset stuff
    path('password_reset/', auth_views.PasswordResetView.as_view(template_name="reset/password_reset.html"), name='password_reset'),

    path('password_reset_done/', auth_views.PasswordResetDoneView.as_view(template_name="reset/password_reset_done.html"), name='password_reset_done'),

    path('password_reset_confirm/<uidb64>/<token>/', auth_views.PasswordResetConfirmView.as_view(
    template_name='reset/password_reset_confirm.html'), name='password_reset_confirm'),

    path('password_reset_complete/', auth_views.PasswordResetCompleteView.as_view(
    template_name='reset/password_reset_complete.html'), name='password_reset_complete'),
]
Overall, the urlpatterns list provides a clear mapping between URLs and the corresponding views, allowing us to easily navigate and use our web application.
Setting Up Templates
Views and templates are important components of the Model-View-Template (MVT) architecture in Django. Views handle the request/response flow and business logic of the application, while templates provide the presentation layer for the user interface.
We will be using some custom CSS and JavaScript files in our templates. These files are located in the static directory of our app. We can import these files using the static template tag in our templates. So go ahead and create a static directory in the main app and add the following files to it:
style.css
We will not be covering a ton of CSS explanation since Django is the focus of this article. The content of the style.css file is as follows:
@import url('https://fonts.googleapis.com/css2?family=Roboto:wght@300;400;500;700&display=swap');


::-webkit-scrollbar {
  width: 10px;
}

::-webkit-scrollbar-track {
  background: #f1f1f1;
}

::-webkit-scrollbar-thumb {
  background: #888;
  border-radius: 10px;
}

::-webkit-scrollbar-thumb:hover {
  background: #555;
}


body {
  overflow-x: hidden !important;
  color: white !important;
  font-family: 'Roboto', sans-serif !important;
  background-color: #130f40 !important;
  background-image: linear-gradient(315deg, #130f40 0%, #000000 74%) !important;
  background-repeat: no-repeat !important;
  background-attachment: fixed !important;
  background-size: cover !important;
  min-height: 100vh !important;
}

.green-arrow {
  font-size: 18px;
  color: green
}

.red-arrow {
  font-size: 18px;
  color: red
}

.flex-container {
  display: flex;
  flex-wrap: wrap;
  justify-content: center;
  gap: 20px;
}

.crypto-item {
  display: flex;
  flex-direction: row;
  justify-content: space-between;
  align-items: center;
  border: 1px solid gray;
  padding: 10px;
  width: 300px;
}

.crypto-info {
  margin-left: 10px;
}

.tt-menu {
  width: 100%;
}

.tt-suggestion {
  padding: 10px;
  font-size: 16px;
  cursor: pointer;
  background-color: #fff;
}

.tt-suggestion:hover {
  background-color: #f5f5f5;
}

.tt-suggestion.tt-cursor {
  background-color: #f5f5f5;
}

.typeahead {
  border-radius: 0;
}


.custom-nav-logo {
  font-family: 'Roboto', sans-serif;
  font-size: 24px;
  font-weight: 500;

}

nav {
  box-shadow: -10px 8px 0px rgb(196 181 253);
  background: #0f0f0f;
  color: white;
  margin-bottom: 50px;
  position: fixed ;
  top: 0;
  width: 100%;
  z-index: 1;
}


footer {
  position: fixed;
  left: 0;
  bottom: 0;
  width: 100%;
  background-color: rgb(0, 0, 0);
  color: white;
  text-align: center;
}

.referral-code {
  background-color: #080808;
  border-radius: 5px;
  padding: 1rem;
  margin-bottom: 1rem;
  border: 1px solid #fff;
}

.referral-code p {
  font-size: 1.1rem;
}

.custom-heading {
  font-family: 'Montserrat', sans-serif;
  font-size: 2.5rem;
  font-weight: 600;
  letter-spacing: 2px;
  text-transform: uppercase;
  text-decoration: underline #fff solid 1px;
  text-underline-offset: 10px;
  margin-bottom: 1rem;
}

.custom-table {
  text-transform: uppercase;
  width: 100%;
  margin-bottom: 1rem;
  color: #fff;
  background-color: rgba(255, 255, 255);
  box-shadow: 10px -8px 0px rgb(253 230 138);
}

th,
td {
  padding: 0.75rem;
  vertical-align: middle;
  border-top: 1px solid rgba(255, 255, 255, 0.1);
}

th {
  font-weight: bold;
  text-transform: uppercase;
  border-bottom: 5px solid rgb(0, 0, 0) text-align: center;
  font-family: 'Roboto', sans-serif;
}

tbody tr:hover {
  background-color: rgba(255, 255, 255, 0.1);
}

.alert {
  border-radius: 2px !important;
  color: #fff !important;
  font-weight: bold !important;
  font-size: 1rem !important;
  letter-spacing: 0.05em !important;
  font-weight: 300 !important;
  padding: 0.5rem 1rem !important;
}

.alert-success {
  background-color: #007f1e;
  color: rgb(0, 0, 0) !important;
  font-weight: bold !important;
}

.alert-info {
  background-color: #009cb4;
  color: rgb(0, 0, 0) !important;
  font-weight: bold !important;
}

.alert-danger {
  background-color: #520008 !important;
  color: rgb(0, 0, 0) !important;
  font-weight: bold !important;
}

.fancy-color {
  background-color: #4158D0;
  background-image: linear-gradient(43deg, #4158D0 0%, #C850C0 46%, #FFCC70 100%);
}

.custom-title {
  margin-left: -175px !important;
  margin-top: -30px !important;
  margin-bottom: 50px !important;
  padding: 0.5rem 0.5rem !important;
  width: fit-content !important;
  background: rgba(255, 255, 255, 0.9);
}

.welcome-user-text {
  font-size: 1rem !important;
  font-weight: 500 !important;
  letter-spacing: 0.05em !important;
}
Remember we defined the urlpatterns list in the urls.py file? Each URL pattern in the list is mapped to a view function. For example, the home_view function is mapped to the root URL of our app. And we also made a templates folder in our app directory. This is where we will store all of our HTML templates and link them to the corresponding views.
Just to give you a peek into the structure of our app, here is a screenshot of the templates folder:

We will be creating the following templates in our app so you can go ahead and make empty HTML files for them. Now let's start writing our views and templates.
Before writing the views, let us first create a base.html file in the templates folder. This file will contain the common HTML code that will be used in all of our templates. We will be using the Bootstrap CSS framework for styling our templates. So we will add the Bootstrap CDN link in the base.html file. We will also add the CSS code that we wrote in the style.css file in the base.html file. The base.html file will look like this:
{% load static %}

<!doctype html>
<html lang="en">
  <head>
    <!-- Required meta tags -->
    <meta charset="utf-8">
    <meta name="viewport" content="width=device-width, initial-scale=1, shrink-to-fit=no">

    <!--Custom CSS-->
    <link href="{% static 'css/custom.css' %}" rel="stylesheet">
    <link href="{% static 'css/style.css' %}" rel="stylesheet">

    <!-- Bootstrap CSS -->
    <link rel="stylesheet" href="https://stackpath.bootstrapcdn.com/bootstrap/4.3.1/css/bootstrap.min.css" integrity="sha384-ggOyR0iXCbMQv3Xipma34MD+dH/1fQ784/j6cY/iJTQUOhcWr7x9JvoRxT2MZw1T" crossorigin="anonymous">
    <link href="https://cdnjs.cloudflare.com/ajax/libs/font-awesome/5.13.0/css/all.min.css" rel="stylesheet">


    <!--Clipboard-->
    <script src="https://cdnjs.cloudflare.com/ajax/libs/clipboard.js/2.0.11/clipboard.min.js"></script>

    <!--Sweet Alert-->
    <script src="https://unpkg.com/sweetalert/dist/sweetalert.min.js"></script>


    <title>Crypto App | {% block title %}{% endblock title %}</title>
  </head>
  <body>
    {% include 'navbar.html' %}
    <div class="container">
      {% block content %}
      {% endblock content %}
    </div>
    {% include 'footer.html' %}
    {% block scripts %}
    {% endblock scripts %}

    <!-- Optional JavaScript -->
    <!-- jQuery first, then Popper.js, then Bootstrap JS -->
    <script src="https://code.jquery.com/jquery-3.3.1.slim.min.js" integrity="sha384-q8i/X+965DzO0rT7abK41JStQIAqVgRVzpbzo5smXKp4YfRvH+8abtTE1Pi6jizo" crossorigin="anonymous"></script>
    <script src="https://cdnjs.cloudflare.com/ajax/libs/popper.js/1.14.7/umd/popper.min.js" integrity="sha384-UO2eT0CpHqdSJQ6hJty5KVphtPhzWj9WO1clHTMGa3JDZwrnQq4sF86dIHNDz0W1" crossorigin="anonymous"></script>
    <script src="https://stackpath.bootstrapcdn.com/bootstrap/4.3.1/js/bootstrap.min.js" integrity="sha384-JjSmVgyd0p3pXB1rRibZUAYoIIy6OrQ6VrjIEaFf/nJGzIxFDsf4x0xIM+B07jRM" crossorigin="anonymous"></script>
  </body>
</html>
Now, since we are referencing the navbar.html and footer.html files in the base.html file, we need to create these files in the templates folder. The navbar.html file will contain the navigation bar of our app and the footer.html file will contain the footer of our app. The navbar.html file will look like this:
<nav class="navbar navbar-expand-md">
  <a class="navbar-brand text-light my-2 my-sm-0 custom-nav-logo" href="{% url 'home' %}">Crypto App</a>

    <button class="navbar-toggler" type="button" data-toggle="collapse" data-target="#navbarNav" aria-controls="navbarNav" aria-expanded="false" aria-label="Toggle navigation">
      <span class="navbar-toggler-icon"></span>
    </button>
    <div class="collapse navbar-collapse" id="navbarNav">
      <ul class="navbar-nav mr-auto">
      </ul>
      <ul class="navbar-nav">
        {% if user.is_authenticated %}
        <div class="btn-group" role="group">
          <a class="btn btn-primary my-2 my-sm-0 mr-2" href="{% url 'portfolio' %}">View My Wallet</a>
          <a class="btn btn-danger my-2 my-sm-0 mr-2" href="{% url 'logout' %}">Logout</a>
        </div>


        {% else %}
        <div class="btn-group" role="group">
          <a class="btn btn-primary my-2 my-sm-0 mr-2" href="{% url 'login' %}">Login</a>
          <a class="btn btn-success my-2 my-sm-0" href="{% url 'signup' %}">Signup</a>
        </div>
        {% endif %}
      </ul>
    </div>
  </nav>
The footer.html file will look like this:
{% load static %}
<footer>

        <div class="row justify-content-center">
            <div class="col-lg-12 col-md-12 col-sm-12 col-xs-12">
                <div class="copy-right text-center">
                    <p>© 2023 Crypto App. Developed By <a href="#" class="text-light">Atharva Shah</a></p>
                </div>
            </div>
        </div>

</footer>
</div>
Now, the final step for the template setup is to write the alerts.html file. This file will contain the code for displaying alerts to the user. In Django, alerts are messages that can be displayed to users after certain events or actions have occurred, such as a successful login or a failed form submission. They are a way to provide feedback to the user about what has happened, and can be used to convey important information or instructions.
Django provides a built-in messaging framework that makes it easy to use alerts in your application. This framework allows you to create different types of messages, such as success, warning, or error messages, and to customize the way they are displayed.
The alerts.html file will look like this:
{% if messages %}
{% for message in messages %}
<div class="alert alert-{{message.tags}} alert-dismissible fade show w-50 d-flex justify-content-center align-items-center ml-auto mr-auto " role="alert">
{{ message }}
<button type="button" class="close" data-dismiss="alert" aria-label="Close">
<span aria-hidden="true">×</span>
</button>
</div>
{% endfor %}
{% endif %}
Setting Up Views
To use views and templates in Django, we first need to import the necessary modules. The requests module is used for sending HTTP requests to external APIs. The auth module is used for user authentication related functionality. The messages module is used for displaying messages to the user. The decorators module is used for adding functionality to views based on certain conditions, such as requiring the user to be logged in or having certain permissions. The forms module is used for creating HTML forms that map to Django models. The models module is used for defining the database schema and ORM of the application.
We can import these modules using the following code snippet in views.py since we will be using them in our views:
import requests
from django.contrib import auth, messages
from django.contrib.auth import authenticate, login, logout
from django.contrib.auth.decorators import login_required, user_passes_test
from django.contrib.auth.forms import AuthenticationForm, UserCreationForm
from django.contrib.auth.hashers import make_password
from django.contrib.auth.models import User
from django.contrib.auth.tokens import default_token_generator
from django.core.exceptions import PermissionDenied
from django.db import IntegrityError
from django.http import HttpResponse, HttpResponseNotAllowed
from django.shortcuts import redirect, render
from django.template.defaultfilters import slugify
from django.utils.http import urlsafe_base64_decode

from .forms import CustomUserCreationForm
from .models import Cryptocurrency, Portfolio, Profile, Referal
Once we have imported these modules, we can start writing our views and templates to create the desired functionality for our application.
🚨 Please note that most of these views depend on each other so we recommend that you follow the order in which they are presented here. and test them at the very end since they are all interconnected and you may get errors if the dependent views/templates are not created yet.
Signup

Let's start with the signup_view function. This view is mapped to the /signup/ URL pattern in the urls.py file. The signup_view function is responsible for displaying the signup form to the user and creating a new user account if the form is valid.
def signup_view(request):
    # check if user is already logged in
    if request.user.is_authenticated:
        return redirect('portfolio')

    if request.method == 'POST':
            form = CustomUserCreationForm(request.POST)

            if form.is_valid():
                user = form.save(commit=False)
                user.password = make_password(form.cleaned_data['password1'])
                user.email = form.cleaned_data['email']
                user.save()
                messages.success(request, 'You have successfully signed up!', extra_tags='success')
                return redirect('login')
    else:
        form = CustomUserCreationForm()
    return render(request, 'signup.html', {'form': form})


# block access to signup page if user is already logged in
def signup_with_referrer_view(request, referral_code):

    # check if user is already logged in
    if request.user.is_authenticated:
        return redirect('portfolio')

    try:
        # get the User Profile of the referrer
        referrer = User.objects.get(profile__referral_code=referral_code)
    except User.DoesNotExist:
        # show error message if referrer does not exist
        return HttpResponse("Referrer does not exist")

    if request.method == 'POST':
        form = CustomUserCreationForm(request.POST)
        if form.is_valid():
            user = form.save(commit=False)
            user.password = make_password(form.cleaned_data['password1'])
            user.email = form.cleaned_data['email']
            user.save()
            # create a referral instance
            referral = Referal.objects.create(user=user, referrer=referrer)
            referral.save()

            if referrer is not None:
                referrer.profile.bonus += 100  # add referral bonus to referrer
                referrer.profile.save()
                messages.success(request, f'{referrer.username} recieved a bonus of 100 points from you because you signed up using their referral link!')


            messages.success(request, 'You have successfully signed up!')
            return redirect('login')
    else:
        form = CustomUserCreationForm()

    return render(request, 'signup.html', {'form': form, 'referrer': referrer})
These are two views that handle user signup with and without a referral code.
The first view is signup_view. It checks whether the user is already logged in. If the user is logged in, then they will be redirected to their portfolio page. If the request method is POST, it will validate the user's input, create a new user, and save them in the database. The password is hashed before it is saved. If the form is not valid, it will render the same template with the form and display the errors. If the request method is not POST, then the view will render the signup form. In both cases, the view will render the signup.html template with the form.
The second view is signup_with_referrer_view. It first checks if the user is already logged in. If they are, they will be redirected to their portfolio page. Then it will try to find the referrer user using the referral code passed in the URL. If the referrer doesn't exist, it will display an error message. If the request method is POST, it will validate the form input and create a new user and save it in the database. It will also create a new referral instance and save it in the database. The referral instance will link the new user to the referrer. It will also add a referral bonus of 100 points to the referrer's profile. Finally, it will redirect the user to the login page with a success message. If the request method is not POST, then the view will render the signup form with the referrer's username displayed on the page. In both cases, the view will render the signup.html template with the form and the referrer's username (if present).
Now, the signup.html template will be rendered by both views. It will display the signup form to the user. To make the form and render it in the template, we will use the Django forms module. We will create a new file called forms.py in the cryptoapp directory and add the following code to it.
from django import forms
from django.contrib.auth.forms import UserCreationForm
from django.contrib.auth.models import User


class CustomUserCreationForm(UserCreationForm):
    username = forms.CharField(required=True, label='Username', help_text='Required. 150 characters or fewer. Letters, digits and @/./+/-/_ only.', widget=forms.TextInput(attrs={'class': 'form-control'}))

    email = forms.EmailField(required=True, label='Email', help_text='Required. Enter a valid email address.', widget=forms.TextInput(attrs={'class': 'form-control'}))

    password1 = forms.CharField(required=True, label='Password', help_text='Required. Enter a valid password.', widget=forms.PasswordInput(attrs={'class': 'form-control'}))

    password2 = forms.CharField(required=True, label='Password confirmation', help_text='Enter the same password as before, for verification.', widget=forms.PasswordInput(attrs={'class': 'form-control'}))

    class Meta:
        model = User
        fields = ['username', 'email', 'password1', 'password2']
Now that the form is ready, we can render it in the signup.html template. We will create a new file called signup.html in the templates directory and add the following code to it.
{% extends 'base.html' %}
{% block title %}
Sign Up
{% endblock title %}
{% block content %}
<h1 class="mb-4">Signup</h1>
<form method="post" class="my-4 p-4 border border-dark rounded">
  {% csrf_token %}
  <div class="form-group">
    <label for="username">Username</label>
        {{ form.username }}

  </div>
  <div class="form-group">
    <label for="email">Email address</label>
    {{ form.email }}
  </div>
  <div class="form-group">
    <label for="password1">Password</label>
    {{ form.password1 }}
  </div>
  <div class="form-group">
    <label for="password2">Confirm Password</label>
    {{ form.password2 }}
  </div>
  <button type="submit" class="btn btn-primary mt-3">Signup</button>


</form>

{% if form.errors %}
  <div class="alert alert-danger mt-3 mb-5">
    <strong>Error:</strong> {{ form.errors }}
  </div>
{% endif %}

<div class="mt-3">
  Already have an account? <a href="{% url 'login' %}" class="text-primary font-weight-bold">Login</a>
</div>

{% endblock %}
This is a Django template for the sign-up page that extends the base template. It displays a sign-up form with fields for username, email, password and confirm password. If there are any form errors, they are displayed in an alert box. It also includes a link to the login page. The template uses Django's template language to display the form fields and errors.
Since after the user signup we want to make a profile for them, we will create a new file called signals.py in the cryptoapp directory and add the following code to it.
import shortuuid
from django.contrib.auth.models import User
from django.db.models.signals import post_save
from django.dispatch import receiver

from .models import Profile

# This file is used to generate a referral code for each user as soon as they sign up.
def generate_referral_code():
    return shortuuid.ShortUUID().random(length=10)

@receiver(post_save, sender=User)
def create_profile(sender, instance, created, **kwargs):
    if created:
        profile = Profile.objects.create(user=instance, referral_code=generate_referral_code())
        profile.save()
This signal code generates a referral code for a user as soon as they sign up. It does this by listening for the "post_save" signal sent by the User model. When a new User instance is created, this signal triggers the "create_profile" function which creates a Profile instance for that user and generates a unique referral code using shortuuid library. This generated referral code is then saved to the Profile instance.
Now to register this signal, we will change the apps.py file.
from django.apps import AppConfig


class MainappConfig(AppConfig):
    default_auto_field = "django.db.models.BigAutoField"
    name = "mainapp"

    def ready(self):
        import mainapp.signals
Login Screen
The view for the login page will be similar to the signup view. In views.py continue to add the following code.
def login_view(request):
    # check if user is already logged in
    if request.user.is_authenticated:
        return redirect('portfolio')

    if request.method == 'POST':
        form = AuthenticationForm(request, data=request.POST)
        if form.is_valid():
            username = form.cleaned_data.get('username')
            raw_password = form.cleaned_data.get('password')
            user = authenticate(request, username=username, password=raw_password)
            if user is not None:
                login(request, user)
                return redirect('portfolio')
        else:
            messages.error(request, "Invalid username or password.", extra_tags='danger')
    else:
        form = AuthenticationForm()
    return render(request, 'login.html', {'form': form})


@login_required(login_url="login")
def logout_view(request):
    logout(request)
    messages.success(request, 'You have successfully logged out!')
    return redirect('home')
These are two views related to user authentication in a Django web application.
login_view handles the user login process. It checks if the user is already logged in, and if not, it accepts a POST request with login credentials (username and password) from a form, validates them using Django's built-in AuthenticationForm form, and logs the user in if they are authenticated. If the form is invalid, it displays an error message. If the request is not a POST request, it displays the login form.
logout_view handles the user logout process. It logs out the user using Django's logout function, displays a success message, and redirects the user to the home page. This view requires the user to be logged in, and if they are not, it redirects them to the login page specified in the login_url argument of the login_required decorator.
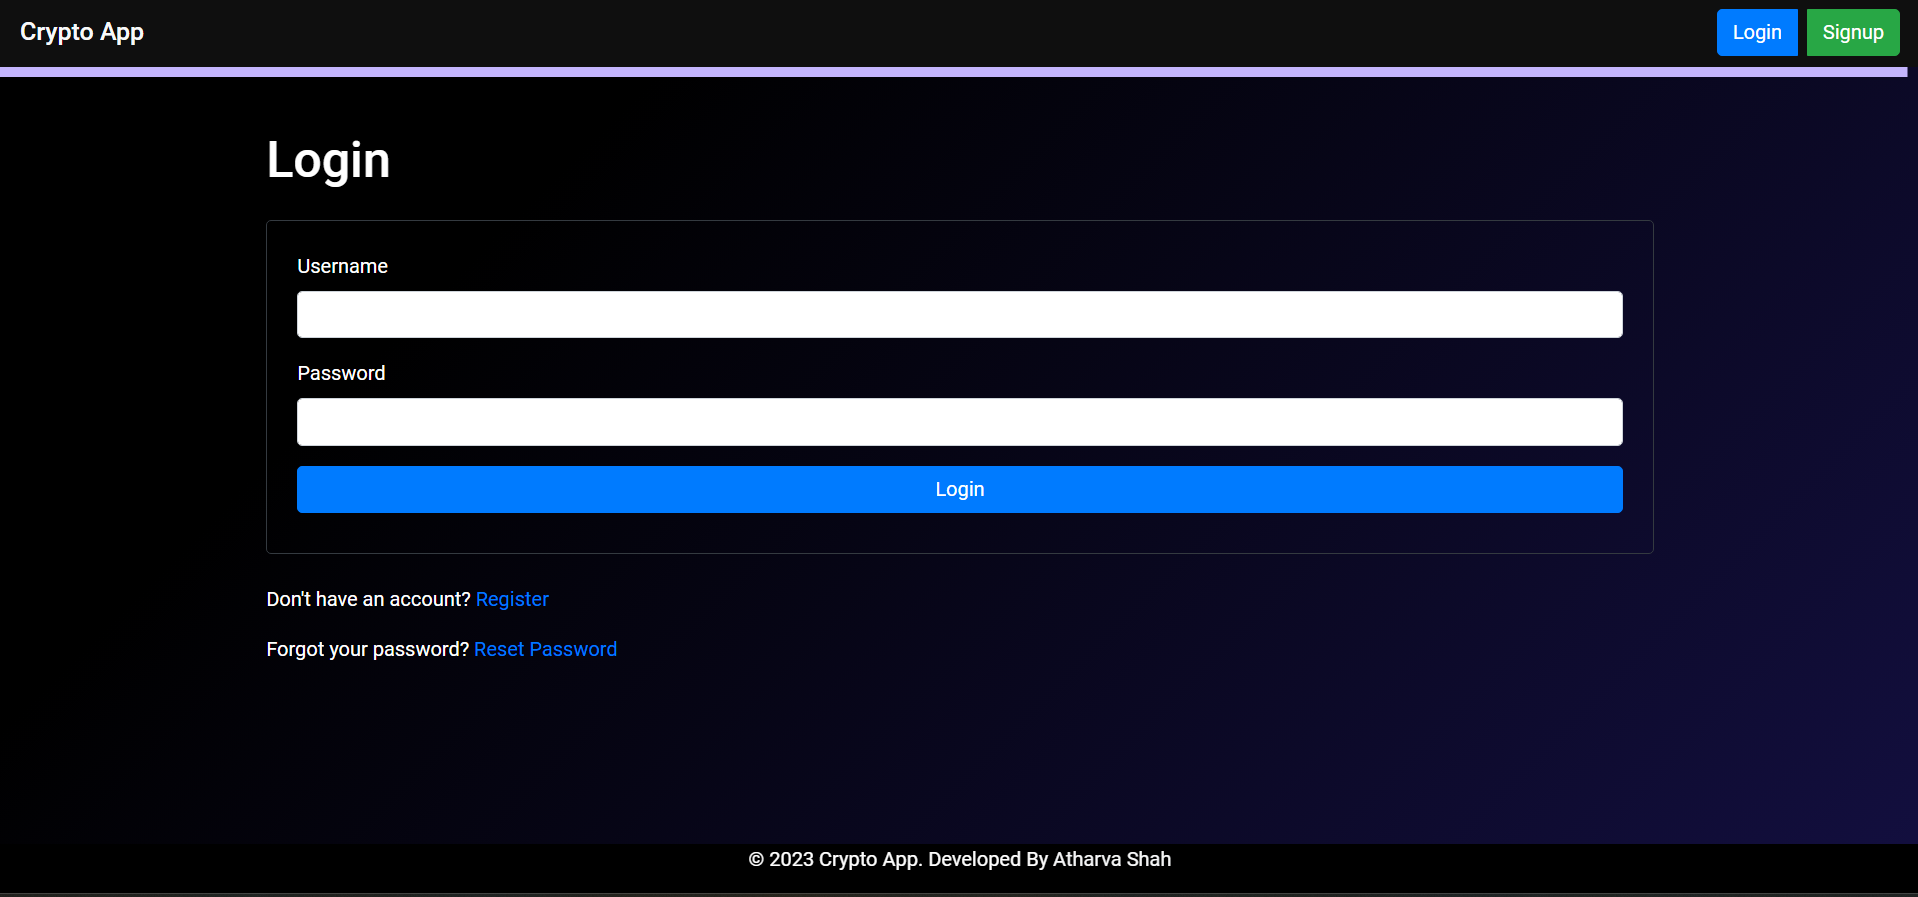
The html template for the login page is similar to the signup page. Create a new file called login.html in the templates directory and add the following code to it.
{% extends 'base.html' %}
{% block title %}
Login
{% endblock title %}
{% block content %}
  <h1>Login</h1>
  {% for message in messages %}
    <p class="alert alert-{{ message.tags }}">{{ message }}</p>
  {% endfor %}
  <form method="post" class="my-4 p-4 border border-dark rounded">
    {% csrf_token %}
    <div class="form-group">
      <label for="username">Username</label>
      <input type="text" name="username" class="form-control">
    </div>
    <div class="form-group">
      <label for="password">Password</label>
      <input type="password" name="password" class="form-control">
    </div>
    <button type="submit" class="btn btn-primary btn-block my-2">Login</button>
  </form>

  <p>Don't have an account? <a href="{% url 'signup' %}">Register</a></p>
  <p>Forgot your password? <a href="{% url 'password_reset' %}">Reset Password</a></p>
{% endblock %}
Now that the login view is ready, we can also take care of the forgot password functionality.
Forgot Password Page
Password Reset Email
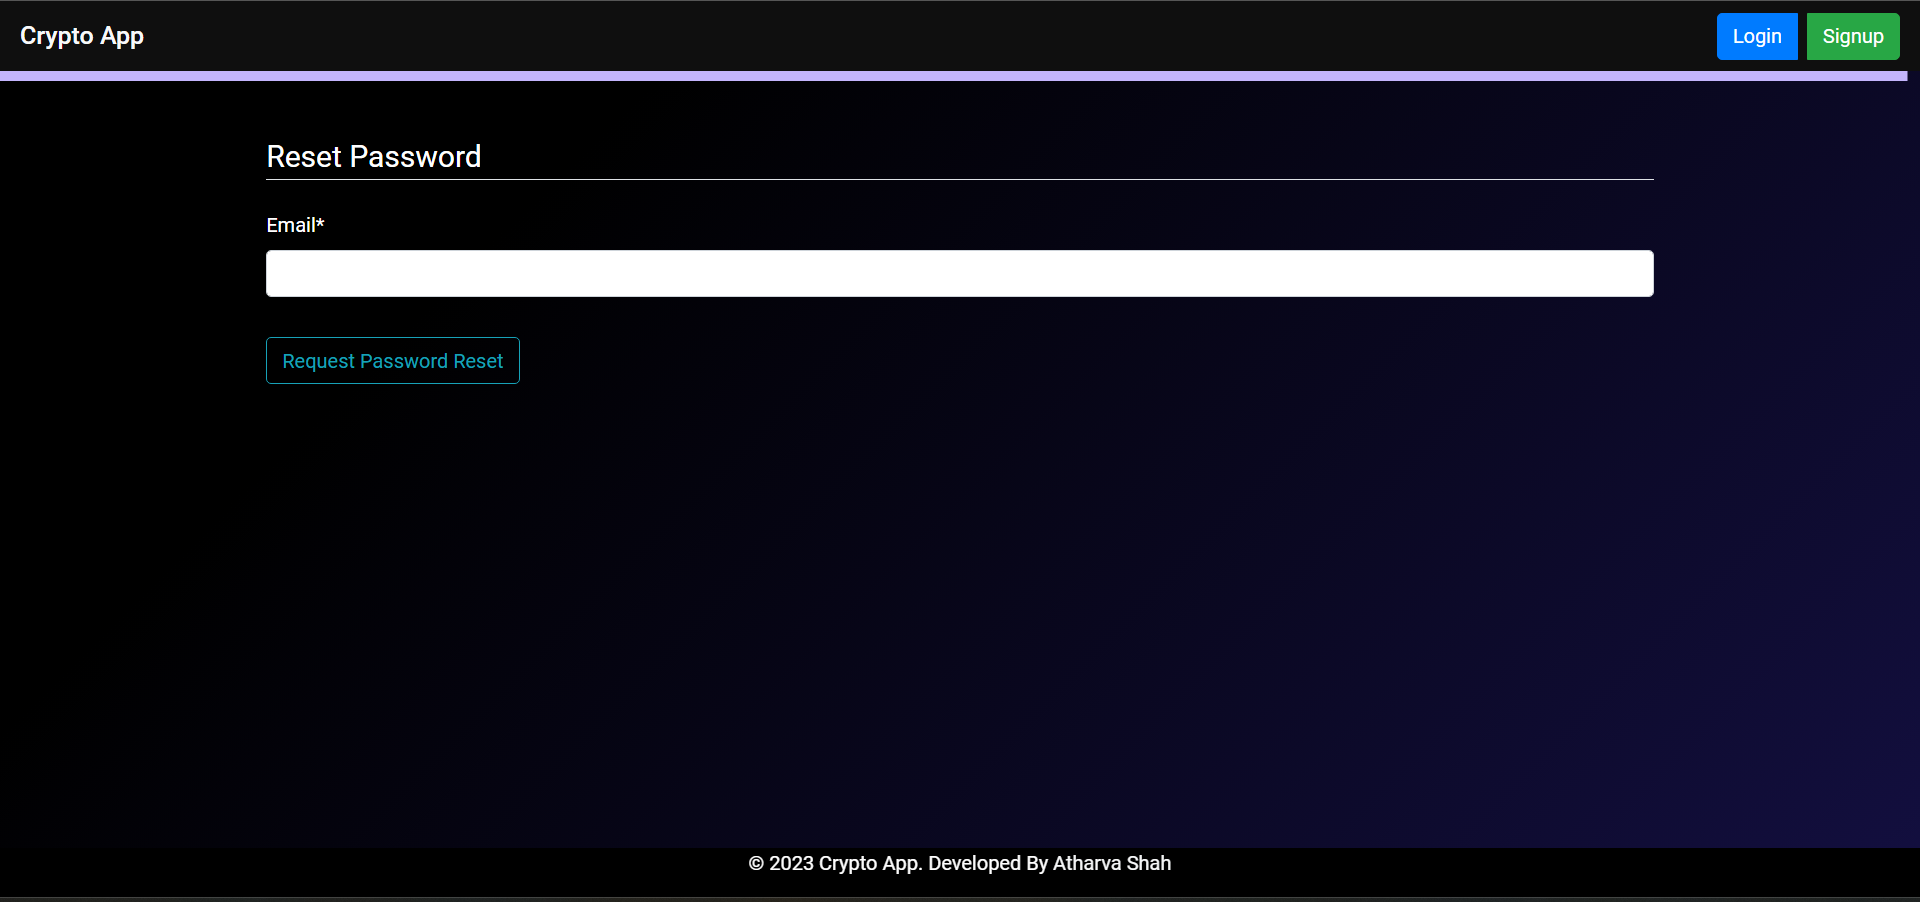
For convience, we will group the forgot password view templates and save them in the reset folder inside the templates directory. Create a new file called password_reset.html in the reset directory and add the following code to it.
{% extends "base.html" %}
{% load crispy_forms_tags %}
{% block content %}
    <div class="content-section">
        <form method="POST">
            {% csrf_token %}
            <fieldset class="form-group">
                <legend class="border-bottom mb-4">Reset Password</legend>
                {{ form|crispy }}
            </fieldset>
            <div class="form-group">
                <button class="btn btn-outline-info" type="submit">Request Password Reset</button>
            </div>
        </form>
    </div>
{% endblock content %}
Now, make a file called password_reset_done.html. It will show a message that an email has been sent to the user's email ID.
{% extends "base.html" %}
{% block content %}
    <div class="alert alert-info">
        An email has been sent with instructions to reset your password
    </div>
{% endblock content %}

Once the user clicks this link he will be redirected to the password reset page. Here he can enter his new password and confirm it.
So for this purpose
Now,make a file called password_reset_confirm.html. It will prompt for the new password.
{% extends "base.html" %}
{% load crispy_forms_tags %}
{% block content %}
    <div class="content-section">
        <form method="POST">
            {% csrf_token %}
            <fieldset class="form-group">
                <legend class="border-bottom mb-4">Reset Password</legend>
                {{ form|crispy }}
            </fieldset>
            <div class="form-group">
                <button class="btn btn-outline-info" type="submit">Reset Password</button>
            </div>
        </form>
    </div>
{% endblock content %}
Make a final file called password_reset_complete.html. It will show a message that the password has been changed successfully.
{% extends "base.html" %}
{% block content %}
    <div class="alert alert-info">
        Your password has been set.
    </div>
    <a href="{% url 'login' %}">Sign In Here</a>
{% endblock content %}
Password Reset Success

Remember we need not define any custom views here since Django provides us with the default views for password reset. Please refer the urls.py file.
Home Page


Now let us focus on the home page. We will show the top 10 cryptocurrencies on the home page. We will use the CoinGecko API to fetch the data.
The view for this page will be:
def home_view(request):
    # get the top 10 crypto currencies by market cap
    top_10_crypto_url_global = 'https://api.coingecko.com/api/v3/coins/markets?vs_currency=USD&order=market_cap_desc&per_page=10&page=1&sparkline=true'
    top_10_crypto_data_global = requests.get(top_10_crypto_url_global).json()

    # check if user is logged in
    if request.user.is_authenticated:

        # get user's crypto currencies
        user_cryptocurrencies = Cryptocurrency.objects.filter(user=request.user)
        user_portfolio = Portfolio.objects.filter(user=request.user).first()

        # get the prices and price changes for user's cryptocurrencies
        names = [crypto.name for crypto in user_cryptocurrencies]
        symbols = [crypto.symbol for crypto in user_cryptocurrencies]
        ids = [crypto.id_from_api for crypto in user_cryptocurrencies]
        prices=[]

        # NOTE: Only showing the price change for the last 24 hours for now and not the percentage change to reduce the number of api calls. Only 10-20 api calls per minute are allowed for free users. Otherwise, I could have used the /coins/{id}/market_chart?vs_currency=usd&days=1 endpoint to get the price change for the last 24 hours and calculate the percentage change from that.

        for crytpo_id in ids:
            prices_url = f'https://api.coingecko.com/api/v3/simple/price?ids={crytpo_id}&vs_currencies=usd&include_24hr_change=true'
            prices_data = requests.get(prices_url).json()

            price_change = prices_data[crytpo_id]['usd_24h_change']
            prices.append(price_change)

        # make a dictionary out of the names and prices
        crypto_price_changes = dict(zip(names, prices))

        context = {
            'top_10_crypto_data_global': top_10_crypto_data_global,
            'user_cryptocurrencies': user_cryptocurrencies,
            'user_portfolio': user_portfolio,
            'crypto_price_changes': crypto_price_changes,
        }

    else:
        context = {'top_10_crypto_data_global': top_10_crypto_data_global}

    return render(request, 'home.html', context)
The function does the following:
- Sends a GET request to the Coingecko API to retrieve data for the top 10 cryptocurrencies by market capitalization in USD.
- Checks if the user is authenticated.
- If the user is authenticated, it retrieves the user's cryptocurrencies from the database and makes an API call to get their prices and price changes for the last 24 hours.
- Creates a dictionary mapping the cryptocurrencies' names to their price changes.
- Renders the home page template with a context dictionary containing the top 10 cryptocurrencies data, user's cryptocurrencies, user's portfolio, and cryptocurrencies' price changes.
The view function handles the case where the user is not authenticated, in which case it only renders the home page template with the top 10 cryptocurrencies data.
The json response for the CoinGecko API can be found here.

Create a new file called home.html in the templates directory and add the following code to it.
{% extends 'base.html' %}
{% block title %}
Home
{% endblock title %}
{% block content %}
<!--Print messages-->
{% if messages %}
{% for message in messages %}
<div class="alert alert-success alert-dismissible fade show" role="alert">
{{ message }}
<button type="button" class="close" data-dismiss="alert" aria-label="Close">
<span aria-hidden="true">×</span>
</button>
</div>
{% endfor %}
{% endif %}
{% if user.is_authenticated %}
<div class="row justify-content-left custom-title">
<h2 class="text-uppercase text-primary welcome-user-text">Welcome {{ user.username | capfirst }} </h2>
</div>
{% endif %}
<!--SEARCH BAR-->
<div class="container mt-5 mb-5">
<div class="row justify-content-center">
<h2 class="text-center custom-heading">Search Cryptocurrency</h2>
</div>
<div class="row mt-3 justify-content-center">
<div class="col-md-6 col-lg-4">
<form action="{% url 'search' %}" method="post">
{% csrf_token %}
<div class="input-group">
<input class="form-control" type="text" placeholder="Search cryptocurrencies..." name="search_query" required>
<div class="input-group-append">
<button class="btn btn-primary" type="submit">Search</button>
</div>
</div>
</form>
</div>
</div>
</div>
<!--GLOBAL CRYPTO CURRENCIES-->
<div class="row justify-content-center">
<h2 class="text-center mt-5 mb-0 custom-heading"> Top 10 CryptoCurrency Rankings </h2>
</div>
<br><br><br>
<div class="flex-container">
{% if top_10_crypto_data_global %}
{% for obj in top_10_crypto_data_global %}
<div class="crypto-item">
<img src={{obj.image}} height='70'>
<div class="crypto-info">
<h3>{{obj.name}}</h3>
<p><b>Rank</b>: {{obj.market_cap_rank}}</p>
<p><b>Market</b> cap: {{obj.market_cap}}</p>
<p><b>Price</b>: {{obj.current_price}}</p>
<p><b>Price Change 24H</b>: {{obj.price_change_24h|floatformat:5 }}
{% if obj.price_change_percentage_24h > 0 %}
<i class="fa fa-arrow-up green-arrow"></i>
{% else %}
<i class="fa fa-arrow-down red-arrow"></i>
{% endif %}
</p<b>
<p><b>Price Change 24H (%)</b>: {{obj.price_change_percentage_24h|floatformat:3 }}
{% if obj.price_change_percentage_24h > 0 %}
<i class="fa fa-arrow-up green-arrow"></i>
{% else %}
<i class="fa fa-arrow-down red-arrow"></i>
{% endif %}
</p>
</div>
</div>
{% endfor %}
{% else %}
<h3>No data</h3>
{% endif %}
</div>
<!--USER CRYPTO CURRENCIES-->
{% if user.is_authenticated %}
<div class="row justify-content-center">
<h2 class="text-center mt-5 mb-3 custom-heading">24H Summary of Your Cryptos </h2>
</div>
{% if user_cryptocurrencies %}
<div class="table-responsive">
<table class="table table-striped table-bordered custom-table">
<thead>
<tr>
<th>#</th>
<th>Owned</th>
<th>Price Shift</th>
</tr>
</thead>
<tbody>
{% for k, v in crypto_price_changes.items %}
<tr>
<td>{{ forloop.counter }}</td>
<td>{{ k }}</td>
<td>{{ v | floatformat:5}}
{% if v > 0 %}
<i class="fa fa-arrow-up green-arrow"></i>
{% else %}
<i class="fa fa-arrow-down red-arrow"></i>
{% endif %}
</td>
</tr>
{% endfor %}
</tbody>
</table>
{% else %}
<h3 class="text-center alert alert-danger">No Cryptocurrencies added to wallet. Use the search bar above. </h3>
</div>
{% endif %}
{% endif %}
<br><br><br>
{% endblock content %}
{% block scripts %}
{% endblock scripts %}
This Django template is used to display a cryptocurrency dashboard with two sections: global top 10 cryptocurrencies and user's owned cryptocurrencies with their price changes in the last 24 hours. It also includes a search bar to find specific cryptocurrencies. The logic involves checking if the user is authenticated, displaying data using a for loop, and using conditional statements to display appropriate messages and symbols.
Add Currency / Search Result Page


Let us move to the search page which can be accessed via looking up a cryptocurrency in the home page search box at the top. Add the following view:
@login_required(login_url="login")
def search_view(request):
    if request.method != 'POST':
        # return HTTP status code 405 if the request method is not POST along with a message
        return HttpResponseNotAllowed(['POST'], 'Only POST requests are allowed for this view. Go back and search a cryptocurrency.')

    if not (search_query := request.POST.get('search_query')):
        return HttpResponse('No crypto currency found based on your search query.')

    api_url = f'https://api.coingecko.com/api/v3/search?query={search_query}'
    response = requests.get(api_url)
    search_results = response.json()
    try:
        data = search_results['coins'][0]
    except IndexError:
        return HttpResponse('No crypto currency found based on your search query.')
    coin_id = data['id']
    image = data['large']
    symbol = data['symbol']
    market_cap = data['market_cap_rank']

    # check if the crypto currency is already in the users portfolio and pass that information to the template
    current_user = request.user
    is_already_in_portfolio = False

    user_cryptocurrencies = Cryptocurrency.objects.filter(user=current_user)
    for cryptocurrency in user_cryptocurrencies:
        if cryptocurrency.name.lower() == coin_id.lower():
            is_already_in_portfolio = True

    context = {
        'data': data,
        'coin_id': coin_id,
        'image': image,
        'symbol': symbol,
        'market_cap': market_cap,
        'is_already_in_portfolio': is_already_in_portfolio,
    }
    return render(request, 'search.html', context)

@login_required(login_url="login")
def add_to_portfolio_view(request):
    if request.method != 'POST':
        return HttpResponse('Need a crypto currency to add to your portfolio. Go back to the home page and search for a crypto currency.')

    # get values from the form
    coin_id = request.POST.get('id')
    quantity = request.POST.get('quantity')
    print(coin_id)

    # get the crypto currency data from the coingecko api based on the coin id
    api_url = f'https://api.coingecko.com/api/v3/coins/{coin_id}'
    response = requests.get(api_url)
    data = response.json()
    print(data)
    # store the name, symbol, current price, and market cap rank of the crypto currency
    user = request.user
    name = data['name']
    id_from_api = data['id']
    symbol = data['symbol']
    current_price = data['market_data']['current_price']['usd']

    try:
        # save the crypto currency to the database
        crypto_currency = Cryptocurrency.objects.create(
            user = user,
            name= name,
            id_from_api= id_from_api,
            symbol= symbol,
            quantity= quantity,
            current_price=current_price,
        )
    except IntegrityError:
        crypto_currency = Cryptocurrency.objects.get(user=user, name=name)
        crypto_currency.quantity += int(quantity)

    crypto_currency.save()

    # calculate the total value of the crypto currency
    total_value = int(quantity) * int(current_price)

    # save the total value of the crypto currency to the database in the portfolio model
    # check if the user already has a portfolio
    if Portfolio.objects.filter(user=user).exists():
        portfolio = Portfolio.objects.get(user=user)
        portfolio.total_value += total_value
    else:
        portfolio = Portfolio(user=user, total_value=total_value)

    portfolio.save()
    messages.success(request, f'{name} has been added to your portfolio.')

    # if all the above steps are successful, redirect the user to the portfolio page
    return redirect('portfolio')
The code provided consists of two Django views: search_view and add_to_portfolio_view. Both views require users to be logged in before accessing them, which is enforced by the @login_required decorator.
The search_view allows users to search for a cryptocurrency by sending a POST request to the view with a search query. The view then queries the Coingecko API with the search query to retrieve data on the cryptocurrency. If the query returns a result, the view extracts relevant information from the response and renders a template with the retrieved data.
If the user has already added the searched cryptocurrency to their portfolio, the view passes that information to the template to inform the user.
The add_to_portfolio_view is responsible for adding a cryptocurrency to the user's portfolio. The view expects a POST request with the cryptocurrency ID and quantity. Once received, the view queries the Coingecko API to retrieve data on the cryptocurrency and saves it to the database. If the cryptocurrency already exists in the user's portfolio, the view updates the quantity. The view then calculates the total value of the cryptocurrency based on the current price and quantity and saves it to the user's portfolio. Finally, the view redirects the user to their portfolio page.
If the user tries to access the view with a GET request, the view returns an error message.
Both views make use of the requests library to query the Coingecko API and the HttpResponse and HttpResponseNotAllowed classes to send HTTP responses to the user. The views also make use of the Django messages framework to send success messages to the user.
Now, the template for the search page -> search.html:
{% extends 'base.html' %} {% block title %} Search Results {% endblock title %} {% block content %}

<div class="text-white border-0 col-md-8 mx-auto mt-5">
  <!-- NOTIFY USER IF THEY HAVE ALREADY ADDED THIS CURRENCY IN THEIR WALLET. ANY NEW ADDITIONS WILL BE INCREMENTED, NOT OVERWRITTEN. -->
  {% if is_already_in_portfolio %}
  <div class="card-body">
    <p class="card-text text-uppercase mb-0"><small>{{ coin_id }} is already in your portfolio.</small></p>
    <p class="card-text"><small>Any changes to the quantity will be reflected in your portfolio. Units will be added to the existing quantity.</small></p>
    <hr class="border-white">
  </div>
  {% endif %}

  <div class="card mb-3 text-center border-0">
    <div class="row justify-content-center align-items-center p-5">

      <div class="col-md-4">
        <img src="{{ image }}" height="150" width="150" class="img-fluid" alt="{{ symbol }}">
      </div>

      <div class="col-md-4">
        <div class="card-body text-dark">
          <h5 class="card-title text-uppercase mb-2"><b>{{ coin_id }}</b><p class="card-subtitle mb-2 text-muted"><b>[{{ symbol }}]</b></p></h5>

          <p class="card-text text-uppercase mb-2"><small><b>MARKET CAP:</b> {{ market_cap }}</small></p>
          <form action="{% url 'add_to_portfolio' %}" method="post" class="d-inline-block">
            {% csrf_token %}
            <input type="hidden" name="id" value="{{ coin_id }}">
            <label class="mr-2 font-weight-bold text-uppercase">Units Owned</label>
            <input type="number" name="quantity" min="1" max="500" value="1" class="form-control d-inline-block w-auto mr-2 mb-2"><br>
            <button type="submit" class="btn btn-primary text-uppercase">Add to Portfolio</button>
          </form>
      </div>
      </div>
    </div>

  </div>
</div>
{% endblock content %} {% block scripts %}  {% endblock scripts %}
This template is used for displaying search results for a cryptocurrency in a portfolio management application. It allows the user to add the selected cryptocurrency to their portfolio by specifying the quantity owned. If the cryptocurrency is already in the portfolio, the template notifies the user and provides an option to increment the quantity. The template uses Bootstrap classes for styling and Django tags to handle form submissions.
Wallet Page


Now, moving on to the final and the most important part of the project, the wallet page. The wallet page is the page where the user can see all the cryptocurrencies they have added to their portfolio. The wallet page also displays the total value of the user's portfolio. The wallet page is the most important page of the application as it is the page where the user can see the total value of their portfolio and the profit/loss they have made on their investments.
The view for the wallet page is as follows:
@login_required(login_url="login")
def portfolio_view(request):
    # get the current logged in user
    current_user = request.user

    # get the referal code of the current user
    referral_code = current_user.profile.referral_code

    # get a list of all users who have the current user as their referrer
    referrals = Referal.objects.filter(referrer=current_user)

    # get total bonus earned by the current user
    total_bonus = current_user.profile.bonus

    # get the list of cryptocurrencies owned by the current user
    user_cryptocurrencies = Cryptocurrency.objects.filter(user=current_user)

    if user_portfolio := Portfolio.objects.filter(user=current_user).first():
        portfolio = Portfolio.objects.get(user=current_user)

        # get all the crypto currencies in the portfolio and recalculate the total value of the portfolio
        new_portfolio_value = 0

        user_cryptocurrencies = Cryptocurrency.objects.filter(user=current_user)
        for cryptocurrency in user_cryptocurrencies:
            total_value = cryptocurrency.quantity * cryptocurrency.current_price
            new_portfolio_value += total_value

        portfolio.total_value = new_portfolio_value
        portfolio.save()

        context = {
            'current_user': current_user,
            'referral_code': referral_code,
            'user_cryptocurrencies': user_cryptocurrencies,
            'user_portfolio': user_portfolio,
            'referrals': referrals,
            'total_bonus': total_bonus,
            'new_portfolio_value': new_portfolio_value,
        }
    else:
        context = {
            'current_user': current_user,
            'referral_code': referral_code,
            'user_cryptocurrencies': user_cryptocurrencies,
            'user_portfolio': user_portfolio,
            'referrals': referrals,
            'total_bonus': total_bonus,
        }
    return render(request, 'portfolio.html', context)


@login_required(login_url="login")
def delete_from_portfolio_view(request, pk):
    # get the current logged in user
    user = request.user

    # get the crypto currency object from the database
    crypto_currency = Cryptocurrency.objects.get(pk=pk)

    # delete the crypto currency from the database
    crypto_currency.delete()

    # update the total value of the portfolio
    portfolio = Portfolio.objects.get(user=user)

    # get all the crypto currencies in the portfolio and recalculate the total value of the portfolio
    user_cryptocurrencies = Cryptocurrency.objects.filter(user=user)
    for cryptocurrency in user_cryptocurrencies:
        total_value = cryptocurrency.quantity * cryptocurrency.current_price
        portfolio.total_value += total_value

    portfolio.save()

    # send an alert to the user that the crypto currency has been deleted from the portfolio
    messages.warning(request, f'{crypto_currency.name} has been deleted from your portfolio.')

    return redirect('portfolio')
The first function, portfolio_view, is responsible for rendering the user's portfolio page. It retrieves the current user's information and their cryptocurrency holdings from the database, as well as their referral code, referrals, and total bonus. If the user has a portfolio, the function recalculates its total value based on the current prices of the cryptocurrencies they own, updates the portfolio in the database, and adds the new value to the context. Finally, it renders the portfolio.html template with the retrieved information.
The second function, delete_from_portfolio_view, handles deleting a specific cryptocurrency from the user's portfolio. It first retrieves the current user's information and the specific cryptocurrency object from the database based on its primary key. Then, it deletes the cryptocurrency from the database and recalculates the total value of the user's portfolio based on their remaining holdings. Finally, it sends a warning message to the user notifying them that the cryptocurrency has been deleted, and redirects them back to their portfolio page.
Now, all that remains is to make the HTML template for the portfolio page. The template is as follows:
{% extends 'base.html' %}
{% block title %}
Wallet
{% endblock title %}
{% block content %}

{% if messages %}
  {% for message in messages %}
    <div class="alert alert-success" role="alert">
      {{ message }}
    </div>
  {% endfor %}
{% endif %}

<h1 class="mb-4 custom-heading">REFERRALS</h1>
<div class="my-4 py-3 px-4 rounded-lg referral-code">
  <div class="d-flex align-items-center justify-content-between">
    <p class="mb-0">Your Referral Code is <strong>http://localhost:8000/signup/{{ referral_code }}</strong></p>
    <button class="btn btn-dark btn-md copy-btn" onclick="sendToClipboard()"><i class="fas fa-copy"></i></button>
  </div>

  <p class="ml-0 mt-3 mb-0"><a href="http://localhost:8000/signup/{{ referral_code }}">Share this link with your friends to earn 100 points for each friend who signs up!</a></p>
</div>

{% if referrals %}
<div class="mb-5">
<table class="table table-striped table-hover custom-table mt-5">
    <thead>
      <tr>
        <th scope="col">#</th>
        <th scope="col">Referral User</th>
        <th scope="col">Date Joined</th>
      </tr>
    </thead>
    <tbody>
      {% for referral in referrals %}
        <tr>
          <td>{{ forloop.counter }}</td>
          <td>{{ referral.user }}</td>
          <td>{{ referral.user.date_joined }}</td>
        </tr>
      {% endfor %}
    </tbody>
  </table>

  <div class="row mt-5">
    <div class="col-md-6">
      <div class="alert alert-success py-3 mb-3">
        <h4 class="mb-0">Total Referrals</h4>
        <p class="mb-0 display-4">{{ referrals|length }}</p>
      </div>
    </div>
    <div class="col-md-6">
      <div class="alert alert-info py-3 mb-3">
        <h4 class="mb-0 text-dark">Total Points Earned</h4>
        <p class="mb-0 display-4 text-dark">{{ total_bonus }}</p>
      </div>
    </div>
  </div>
</div>
{% else %}
<div class="alert alert-danger my-4 p-3 rounded text-center text-light">
  You have not referred any friends yet.
</div>

{% endif %}

<h1 class="mb-4 mt-5 custom-heading">Wallet for {{ current_user|upper }}</h1>

{% if user_cryptocurrencies %}
  <div class="table-responsive">
    <table class="table table-striped mb-4 mt-2 custom-table">
      <thead>
        <tr>
          <th scope="col">Cryptocurrency</th>
          <th scope="col">Current Price</th>
          <th scope="col">Amount Owned</th>
          <th scope="col">Action</th>
        </tr>
      </thead>
      <tbody>
        {% for crypto in user_cryptocurrencies %}
          <tr>
            <td>{{ crypto.name }}</td>
            <td>{{ crypto.current_price }}</td>
            <td>{{ crypto.quantity }}</td>
            <td><a href="{% url 'delete_from_portfolio' crypto.id %}"><i class="fa fa-trash red-arrow"></i></a></td>
          </tr>
        {% endfor %}
      </tbody>
    </table>
  </div>
    <div class="alert alert-info py-3 mb-3 fancy-color">
      <h4 class="mb-0 text-light">Total Portfolio Value</h4>
      <p class="mt-2 display-4 text-light">${{ new_portfolio_value }}</p>
    </div>


{% else %}
<div class="alert alert-danger my-3 p-3 rounded text-center text-light">
  You have not added any cryptocurrencies to your portfolio yet.
</div>
<p><a class="btn btn-primary" href="{% url 'home' %}">Add Cryptocurrencies</a></p>
{% endif %}

<br><br><br><br>
<script>
  function sendToClipboard() {
    var copyText = document.querySelector(".referral-code strong");
    copyText.textContent = "http://localhost:8000/signup/" + copyText.textContent;
    var textArea = document.createElement("textarea");
    textArea.value = copyText.textContent;
    document.body.appendChild(textArea);
    textArea.select();
    document.execCommand("Copy");
    textArea.remove();
    alert("Copied to clipboard");
  }
</script>
{% endblock %}
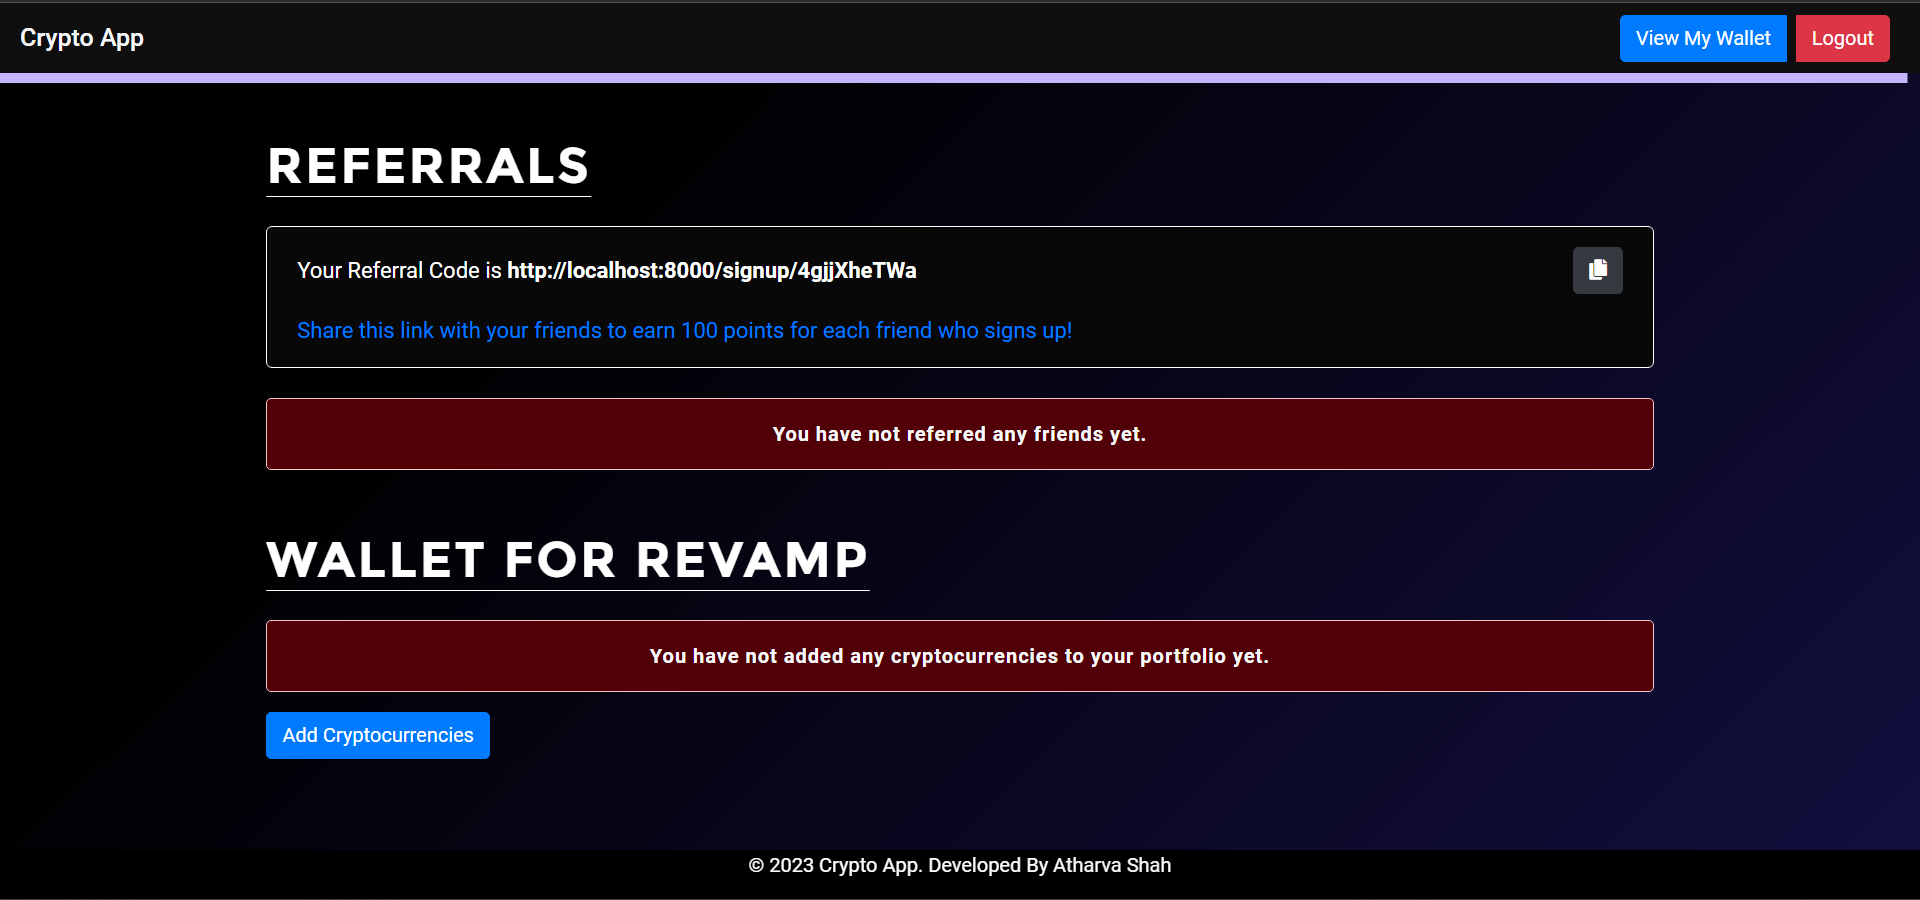
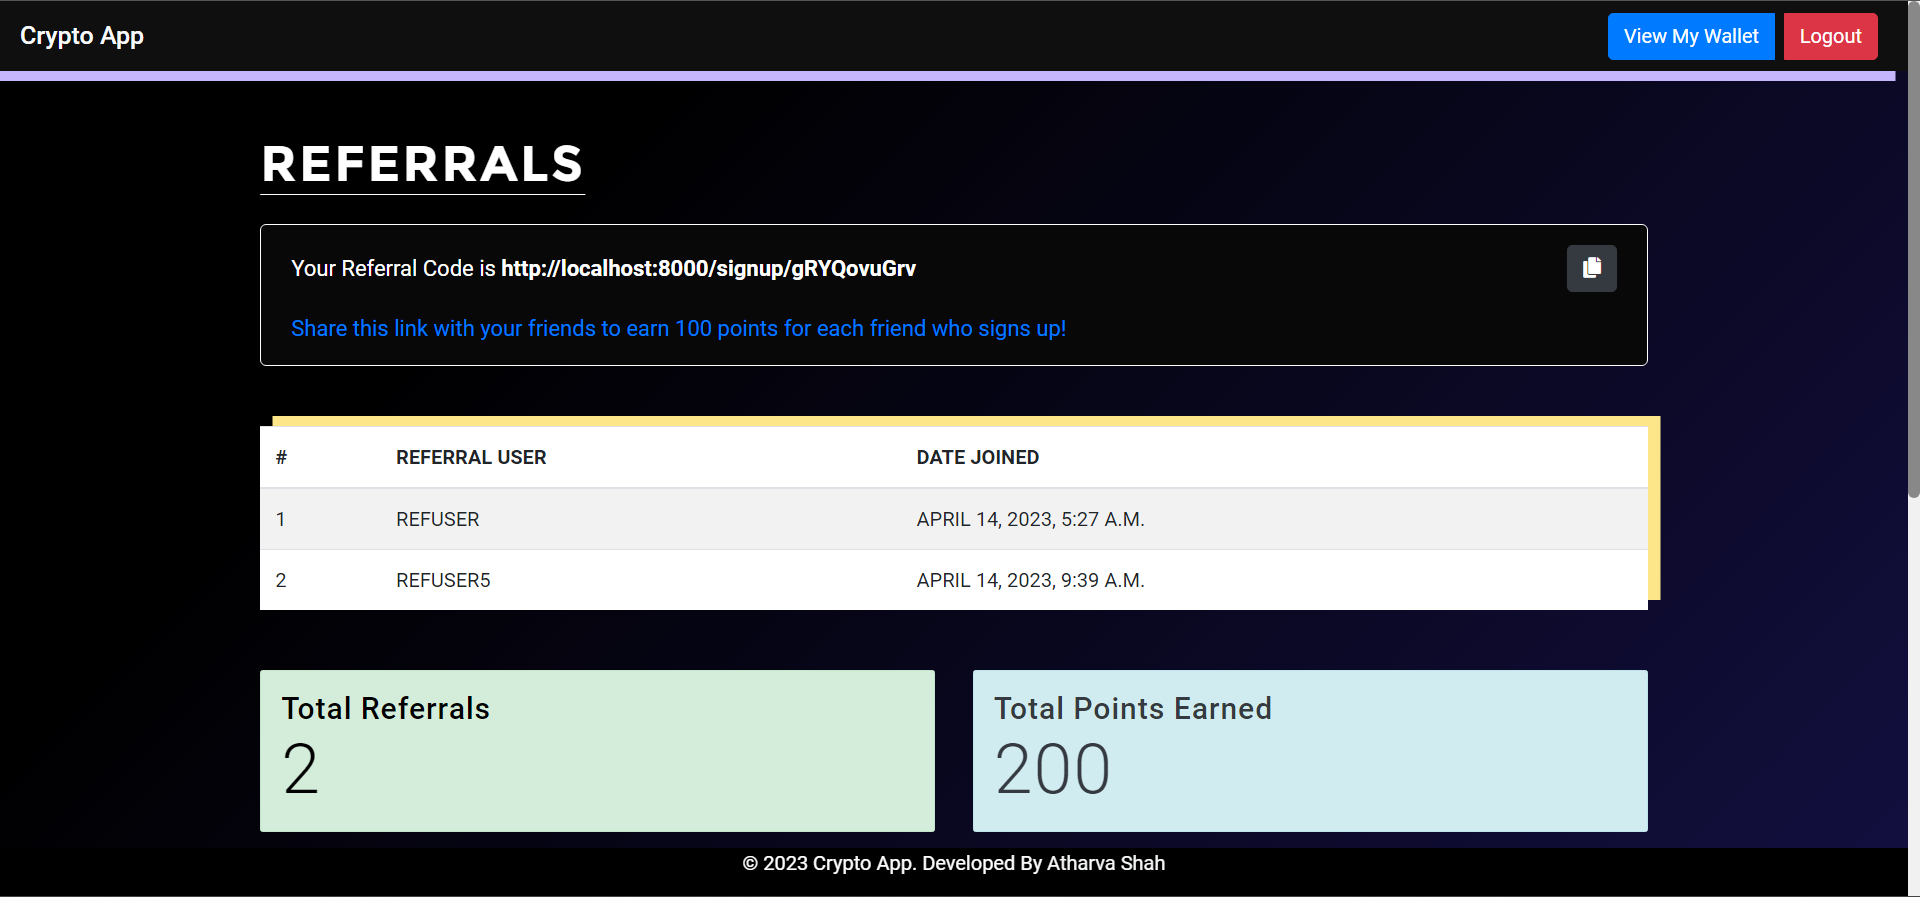
This Django template generates a web page that displays two main sections: referrals and cryptocurrency portfolio. The referral section shows the user's referral link and a table of all the referrals made by the user. The user can copy the referral link to share with friends and earn bonus points for each successful referral. The cryptocurrency portfolio section displays a table of all the cryptocurrencies owned by the user along with their current price and quantity. The total portfolio value is also shown. If the user has not added any cryptocurrencies to the portfolio, a message is displayed prompting them to add some. The template also includes a JavaScript function to copy the referral link to the clipboard when the user clicks on the copy button.
Run the crypto app
Now that about wraps up the crypto app. Let's run the app and see how it looks. Run the following command in the terminal:
python manage.py makemigrations
python manage.py migrate
python manage.py runserver
Now, open the following URL http://localhost:8000/signup in your browser. The app should show you the home page of the application. You can sign up for a new account and then log in to the application. Once you log in, you will be redirected to the home page. You can add cryptocurrencies to your portfolio and then view your portfolio and referrals on the portfolio page. You can also copy your referral link to the clipboard and share it with your friends to earn bonus points.
Conclusion
In the second part of this massive tutorial we learned how to build a cryptocurrency portfolio web application using Django.
In our Django development journey, we covered the following topics:
- Using the CoinGecko API to fetch the latest cryptocurrency prices and how to use the Django ORM to store the data in the database.
- Django's authentication system to create user accounts.
- Django messages framework to display messages to the user.
- Django's template system to generate dynamic web pages.
- Django ORM to query the database and perform various operations such as fetch data, update and delete data from the database, as well as write complex queries.
- perform aggregate queries and joins on the database using the Django ORM.
- perform transactions, date and time queries, and queries on specific data types such as JSON, arrays , UUID in the database.
- Writing highly specifc views, decorators and request methods to handle complex business backend logic such as adding cryptocurrencies to the portfolio, deleting cryptocurrencies from the portfolio, and so on.
Overall, we covered various aspects of Django development that will help us build robust and scalable web applications. In the final part of this tutorial, in the next post we will cover testing all endpoints, views and models so definitely do not miss that.

Top comments (0)