
In this Firebase CRUD JavaScript Web Tutorial, you will be learning how to do CREATE, UPDATE and DELETE operations with Firebase Real-time database using Firebase Functions such as push(), update() and remove().
I will be showing you a simple web app example to demonstrate Firebase JavaScript CRUD operations.
This is the second part of the Firebase CRUD JavaScript Tutorial series.
The first part covers how to get started with Firebase from setting up a project to how to READ data from the Firebase database.
🔥 Part #1: Firebase CRUD JavaScript Tutorial → Setup and Read Data
🔥 Part #2: Firebase CRUD JavaScript Tutorial → Insert/Update/Delete data (you’re here)
This is the final outcome of this Firebase CRUD JavaScript tutorial.
- Add/Insert Data
- Update/Edit an Existing User Data
- Delete a User
Add/Insert A New User Data using Firebase
There are three ways to save data to the Firebase Database:
- Push()
- Set() and
- Update()
Push (data, callback):
- Firebase push() method will insert new data to a given Database reference path. It takes two arguments; one is the actual data that you want to insert and the second is the callback function that will run once the operation is done.
- This method will create a unique id/key in a given path as a key and it will add the data that we passed as a value of that key.

The image below shows the unique keys added to the given Firebase Database reference path when you use the push() method.
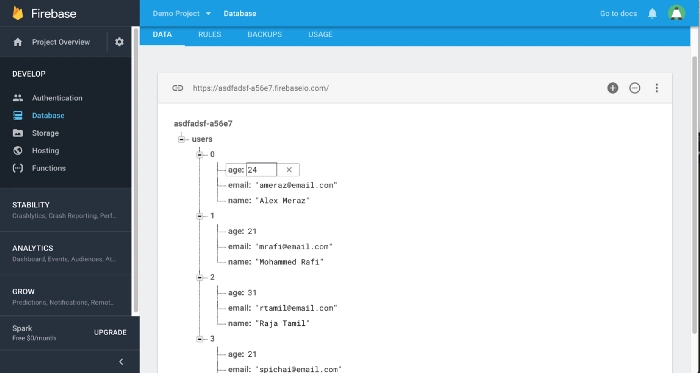
Note: As you know, in the first part, I imported JSON data to the Database on the firebase console which is index-based, like the image below.
I recommend using the push unique key because it has a timestamp in it to avoid overwrites when multiple users push() data at the same time.
Here is the starter project that you can download and follow along with me if you wish.
Recommended
Learn Firebase Storage Quickly
1) Add (+) button and User Form: Add the following HTML code to your index.html. This HTML code contains a section element in which there is an (+) add button and a New User Form.
<!-- add user module -->
<section id="add-user-module"> <button id="open-add-user-form-btn">+</button>
    <form>
        <h2>Add User</h2> name:<br> <input type='text' data-key='name' class='user-input'><br> age:<br> <input
            type='text' data-key='age' class='user-input'><br> email:<br> <input type='text' data-key='email'
            class='user-input'><br> <button type='button' id="add-user-btn">add user</button>
    </form>
</section>
Inside the Add User Form, I have three input fields for name, age, and email and each one contains a class called user-input and an attribute called data-key.
2) Show the Add User Form when a user hovers (+) button: I have used CSS style to achieve this using position absolute. Go ahead and copy the code below and paste it into your style.css file.
<!-- Add User Module -->
#add-user-module {
    width: 30px;
    margin-bottom: 1px;
    margin-left: 10px;
    margin-top: 10px;
}

#add-user-module #open-add-user-form-btn {
    background: #54bb7d;
    font-size: 1.5em;
    color: white;
    padding-bottom: 5px;
}

#add-user-module form {
    position: absolute;
    padding: 10px;
    width: 150px;
    background-color: #e1e1e1;
    border: 1px solid #999;
    display: none;
}

#add-user-module form input {
    width: 97%;
    margin: 2px 0;
}

#add-user-module form button {
    background: #54bb7d;
    font-size: 1em;
    padding: 0px 10px;
    color: white;
    margin-top: 10px;
}

#add-user-module:hover form {
    display: block;
}
At this stage, the form should show when you hover the (+) button.
Note: At the top of JavaScript, you need to replace the config object with your own credentials otherwise your app will NOT work.
3) Attach Click Event to the Add User Button: Cache #add-user-btn DOM element which is inside the Add User Form. Then, attach a click event to it with the callback function addUserBtnClicked().
const addUserBtnUI = document.getElementById("add-user-btn");
addUserBtnUI.addEventListener("click", addUserBtnClicked);
4) Create a new user Object: Inside the call back function, create a Firebase Database reference path where you want to insert the new user data.
const usersRef = dbRef.child('users');
Then, get all the input fields from the Add User Form and cache them into an array variable addUserInputsUI like so.
const addUserInputsUI = document.getElementsByClassName("user-input");
After that, create an empty JavaScript object in which I am going to store new user data as key-value pairs.
// this object will hold the new user information
let newUser = {};
Now, loop through the addUserInputsUI array that has three input fields. Then, inside each iteration, get the value of the input attribute data-key and store it into the variable key.
After that, create another variable called value and store it in the actual user typed value.
// loop through View to get the data for the model
for (let i = 0, len = addUserInputsUI.length; i < len; i++) {
    let key = addUserInputsUI[i].getAttribute('data-key');
    let value = addUserInputsUI[i].value;
    newUser[key] = value;
}
Assign the key and value variables to the newUser object on each iteration. You will have an object something like this:
{
    "age": "21",
    "email": "rtamil@email.com",
    "name": "Raja Tamil"
}

Top comments (0)