A deadman's switch to encrypt your vulnerability reports or other compromising data to be decryptable at a set time in the future. Uses tlock-js and is powered by drand. Messages encrypted with timevault are also compatible with the go tlock library.
Cloudrun
Cloud Run is a managed compute platform that lets you run containers directly on top of Google's scalable infrastructure. You can deploy code written in any programming language on Cloud Run if you can build a container image from it. In fact, building container images is optional.
Structure of Timevault
Step 1:
Create a repository as in GCP Cloud Source Repositories name timevault-cloudrun. And clone the repository to your local.
Step 2:
Clone the timevault repository
 git clone https://github.com/r4jeshwar/timevault.git
 cd  timevault
Step 3:
Mirror the Github (timevault) repository to GCP cloud source repository
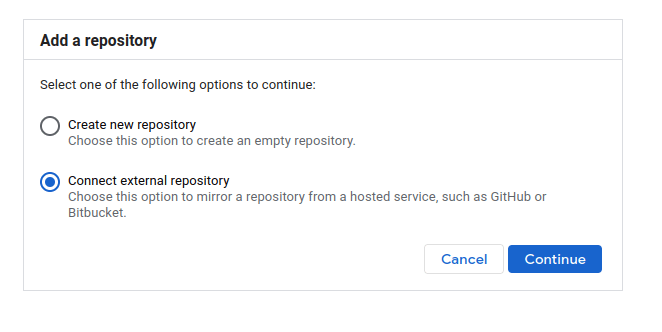
Go the GCP cloud source repository service and click Add repository and click connect external repository next click continue
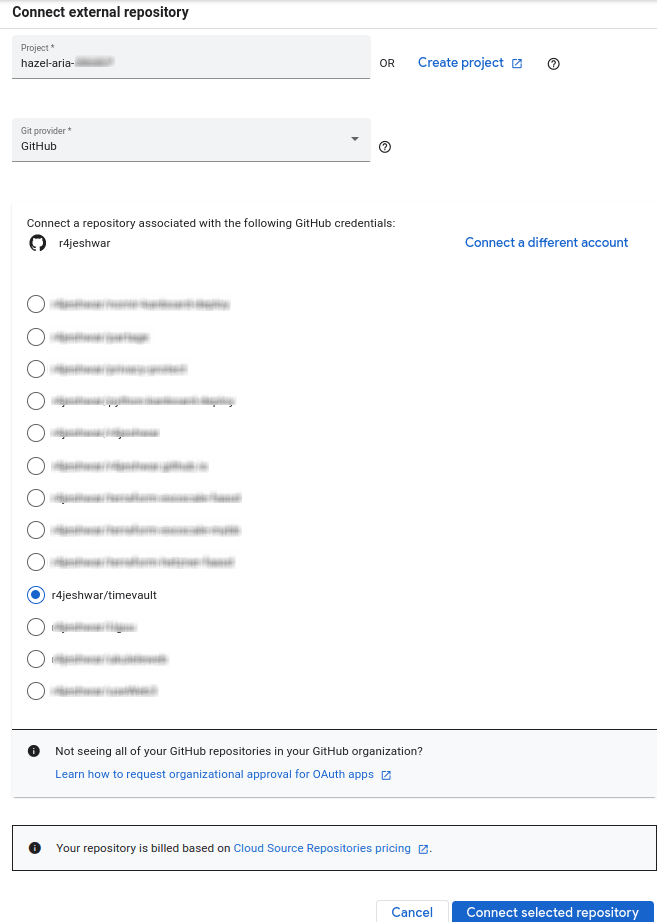
Select your project ID and Select Github in Git provider, next choose your needed repository and click connect selected repository
Finally, Your Github repository will connect to your GCP cloud source repository
Step 4:
Using this Multi-stage Dockerfile we can able to deploy it on Cloudrun
FROM node:18-alpine AS build

WORKDIR /app

COPY package*.json ./
COPY ./src ./src

RUN npm i
RUN npm run build

FROM nginx:stable-alpine

COPY --from=build /app/dist/ /usr/share/nginx/html/
Step 5:
Write the cloudbuild.yaml to deploy it on Cloudrun. Here the cloudbuild.yaml file
 steps:
 # Build the container image
 - name: 'gcr.io/cloud-builders/docker'
   args: ['build', '-t', 'gcr.io/$_PROJECT_ID/$_IMAGE_NAME:$COMMIT_SHA', '.']
 # Push the container image to Container Registry
 - name: 'gcr.io/cloud-builders/docker'
   args: ['push', 'gcr.io/$_PROJECT_ID/$_IMAGE_NAME:$COMMIT_SHA']
 # Deploy container image to Cloud Run
 - name: 'gcr.io/google.com/cloudsdktool/cloud-sdk'
   entrypoint: gcloud
   args:
   - 'run'
   - 'deploy'
   - '$_IMAGE_NAME'
   - '--platform=managed'
   - '--image'
   - 'gcr.io/$_PROJECT_ID/$_IMAGE_NAME:$COMMIT_SHA'
   - '--region'
   - '$_REGION'
   - '--allow-unauthenticated'
   - '--port'
   - '80'
 images:
 - 'gcr.io/$_PROJECT_ID/$_IMAGE_NAME:$COMMIT_SHA'

 substitutions:
   _IMAGE_NAME: timevault
   _REGION: <YOUR_REGION>
   _PROJECT_ID: <YOUR_PROJECT_ID>
-
YOUR_REGIONis the region of the Cloud Run service you are deploying. -
YOUR_PROJECT_IDis your Google Cloud project ID where your image is stored.
Step 6:
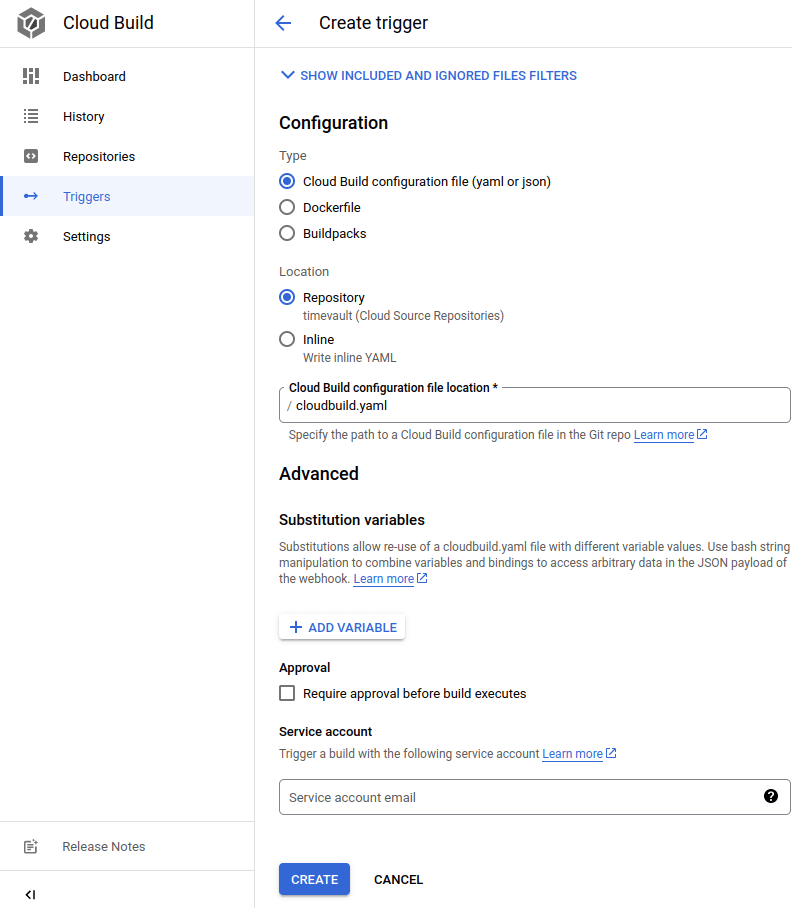
Go to Cloud Build and create a trigger.
Step 7:
Trigger the Cloud Build. By below steps:
Cloud Build --> Triggers --> click RUN --> click RUN TRIGGER
Deployed on Cloud Run. Copy the Cloud Run URL and expose it on web browser
Adding custom domain in Cloud run
When you deploy a service to Cloud run, you are provided with a default domain to access the service. However, you can use your own domain or subdomain instead of default one.
Step 1:
Go to Cloud run service, Click MANAGE CUSTOM DOMAINS
Step 2:
Go to the domain mapping, Click ADD MAPPING
Step 3:
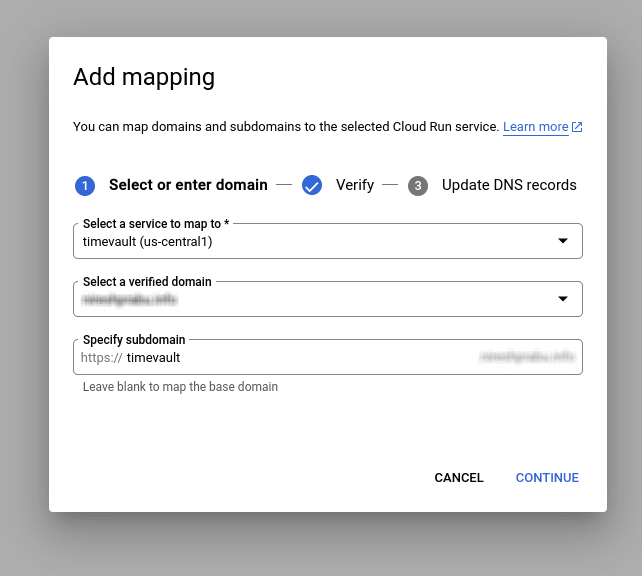
In the add mapping form, select the service which you map to and select the verify the new domain, next enter your domain. As shown in the below. Click the CONTINUE
It will take some time to verify your domain, Click REFRESH to check verification is done.
After the verification is done, enter the subdomain to map to the service you have selected, then click CONTINUE
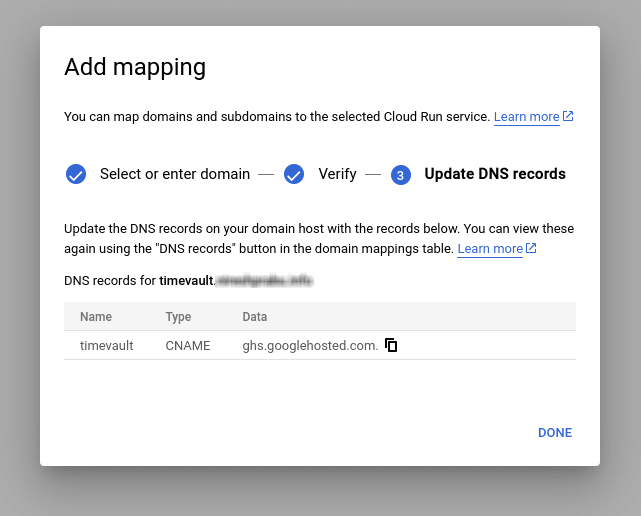
You will get the DNS record for your custom domain that maps to your Cloud run service. You need to add this DNS record to your domain provider
Finally, when you add the DNS record successfully, you can use your custom domain to access your deployed Cloud run service.







Top comments (0)