
Table Of Contents
- Intro
- Part 1: The Backend and the API
- Part 2: The Frontend Webpage
- Part 3: The Answering Machine Script
- Conclusion
Intro
Having been born near the very end of the '90s, I've always lived in a world of incredibly fast and innovative technological advancements. Within my first two decades of life, I've witnessed the rise of smartphones, the widespread adoption of home internet, the rise of social media, the digitalization of nearly every service, and much more.
While I am grateful for all the convenience and entertainment modern technology is able to provide us with today, I can't help but be fascinated by the machines of yesteryear that I never got to use or experience. One such machine is the famous answering machine, which hit peak popularity in the '80s and '90s. An endearing product of the era, this technology eventually became obsolete and was gradually fazed out of the mainstream when telephone companies started offering voice mail services.
Still, the image of sitting on the couch at home with a glass of wine while listening to messages your friends and acquaintances left you throughout the day has always appealed to me - an idea that, undoubtedly, has been instilled into my brain by countless Hollywood classics.
With the pandemic forcing all my university classes online this semester, I've decided to go back to sunny Portugal to finish my degree from home. While being back here definitely has its fair share of benefits, I'm sure I'll miss all the friends I've made in the U.S. and who I won't be able to see anymore until later this year when I go back to graduate.
So I thought: "what better time to get myself an answering machine than now? Having a novel, yet retro, communication system that my friends can use to leave messages from anywhere in the world seems like the most fun way to keep in touch."
And so that's what I did, I sat down in front of my computer for an afternoon and built a web app that allows my friends to reach me within seconds by sending a message that will be read out loud by my computer. In this blog post, I will share how I built this app to give you some inspiration on how you can build yours too, and as a means of explaining how web applications work in general. I will purposely omit details to avoid having my answering machine hijacked by internet strangers.
Note: throughout this post, code or text encapsulated inside <> symbols is meant to be replaced.
Part 1: The Backend and the API
If a full web application can be thought of as a restaurant, the backend of a web application can be thought of as the restaurant's kitchen. For most customers, a restaurant's kitchen is a black-box where orders come in and food comes out, but for the workers of the restaurant, the kitchen is where all the magic happens. This is the place where food is stored, prepared, and cooked according to the restaurant's recipes.
This is similar to how web applications work: for many interactive websites, there is a backend portion (a kitchen) that stores all of the relevant info (the food) about its users and content and that processes (prepares and cooks) this info as needed following the logic (the recipes) implemented by its developers (the cooks).
Just like you wouldn't shout out your order directly to the kitchen in a restaurant, the backend of an application isn't directly accessed by its users. Instead, there is an intermediary to relay information between the two.
An Application Programming Interface, or API for short, is an interface that allows someone to interact with an application's backend without having direct access to its code. These are accessible through the internet and can be used to get information from or send information to an application.
Following the restaurant analogy, an easy way to think about how an API works is to imagine it as a waiter. In a restaurant, the waiter (the API) comes to you, takes your order (your request), and passes it on to the kitchen (the backend). Upon receiving your order, the kitchen processes it and delivers your meal (a response) to you through the waiter again. This is essentially how an API is used so that anyone can use applications whose backend they don't have direct access to. Here's a good video of this analogy if this seems confusing.
In order to implement my answering machine app, I needed a backend application with a database to store messages. I also needed an API that would communicate with this backend application. The API needed to work two ways: it had to be able to receive messages from anyone anywhere in the world and it had to be able to retrieve those messages to an authorized user (me 🙂).
There are many ways to set up a backend application with an API, and many different frameworks to do so. Due to my previous experience with the Flatiron School, I decided to go with an API-only Ruby on Rails application. You can read more about how to set up one of those here. However, any method that produces a backend application with an API that includes routes to post, get, and delete messages (the last one being optional) will work just fine.
My main backend application is a simple Ruby on Rails application with an SQL database that stores message models with the following info: an author string, and a body text. There was no need to write custom methods for a message class or anything like that as the main logic of the answering machine was handled by the script that I wrote in the end (more on that later in this post).
Truly, the gist of this project's backend and API is just a set of routes and an SQL table with the following schema:
ActiveRecord::Schema.define(version: 2021_01_10_144146) do

  # These are extensions that must be enabled in order to support this database
  enable_extension "plpgsql"

  create_table "messages", force: :cascade do |t|
    t.string "author", limit: 50
    t.text "body", null: false
  end

end
*Note: the limit: 50 and null: false statements simply certify that the author's name is no longer than 50 characters and that a message's body is not empty.
And here's the messages controller with all the relevant RESTful routes:
class MessagesController < ApplicationController
    def index
        render json: Message.all
    end

    def create
        message = Message.new(body: params[:body], author: params[:author])
        if validate(message)
            message.save
            render json: {'status': 'Message sent successfully!'}
        else
            render json: {'status': "Failed to send: message body can't be empty!"}
        end
    end

    def show
        message = Message.find(params[:id])
        render json: message
    end

    def destroy
        #patch request deletes message by default
        message = Message.find(params[:id])
        message.destroy
    end


    def validate(message)
        #validates message by checking that it is not empty
        if message.body != ''
            return true
        else
            return false
        end
    end
end
With the backend and the API working together through a Ruby on Rails application, it was time to host it online. Heroku is a free hosting platform that anyone can use to deploy their applications on the internet, so that's what I used. The process of deploying a Ruby on Rails application with Heroku is detailed here.
Part 2: The Frontend Webpage
Great! With the backend and the API done, it was time to set up a user-friendly access point where friends could send me messages by posting them to the API.
Continuing our previous analogy, think of a frontend of a full application as the dining area in a restaurant. This is where customers (users) sit, send their orders (requests) to the waiter (API), receive their food (responses), and eat (use the application). For most customers, this is the only part of the restaurant they'll ever inhabit, and the same is true for web applications.
In even simpler terms, the frontend of a web application is what you're using right now to read this post - the part that is directly accessible and visible to you without needing to write any code.
If you want to read more on the different parts of a web application, read this article.
To set up the frontend portion of my application, I made a simple HTML webpage that displays a form to visitors as such:
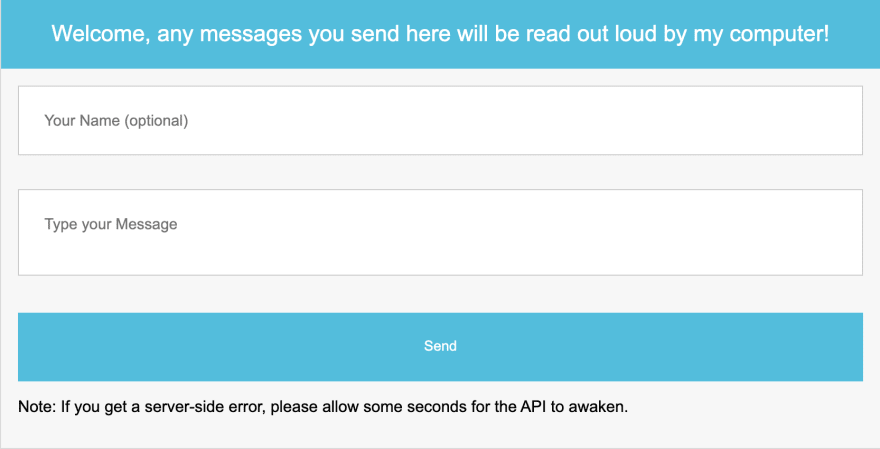
The entire HTML page is just 20 lines of code:
<!DOCTYPE html>
<html lang="en" dir="ltr">
  <head>
    <meta charset="utf-8" />
    <title><App Title></title>
    <script type="text/javascript" src="src/script.js"></script>
    <link rel="stylesheet" href="css/styles.css" />
  </head>
  <body>
    <div class="form-style-6">
      <h1>Welcome, any messages you send here will be read out loud by my computer!</h1>
      <form id='messageForm'>
      <input type="text" name="author" placeholder="Your Name (optional)" maxlength="50" />
      <textarea name="body" placeholder="Type your Message" maxlength = "280" style="resize: none"></textarea>
      <input type="submit" value="Send" />
      <p>Note: If you get a server-side error, please allow some seconds for the API to awaken.</p>
      </form>
    </div>
  </body>
</html>
There is of course some CSS working behind the scenes to make this webpage look a bit fancier than plain HTML - that part is completely optional and how to implement it is up to your imagination and creativity.
The final and most crucial part of the frontend is a javascript file. I wrote a simple JS script that takes the information submitted from the form and sends it to the API. The script then processes the API's response and appends it to the HTML page at the bottom, displaying a "Message sent successfully!" notice or an appropriate error message. The entire script itself is ~30 lines:
document.addEventListener('DOMContentLoaded', () => {

    let messageForm = document.getElementById('messageForm')
    let response = document.createElement('p')
    messageForm.append(response)

    //form submit
    messageForm.addEventListener('submit', () => {
      event.preventDefault()

      configObj = {
          method: "POST",
          headers: {
              "Content-Type": "application/json"
          },
          body: JSON.stringify({
              "body": event.target.author,
              "author": event.target.body
          })
        }
      fetch('<api_post_messages_url>', configObj)
      .then(res => res.json())
      .catch((err) => {
        response.innerText = 'Server-side error: ' + err.message
      })
      .then(json => {
        response.innerText = json['status']
        })
      messageForm.reset()
    })
  }
)
*Note: the entire script is encapsulated inside a 'DOMContentLoaded' event listener. This is because when a webpage is accessed, we need to wait for all the HTML elements to load first before trying to use them or modify them with JavaScript.
Part 3: The Answering Machine Script
With the backend, the API, and the frontend complete, this project was almost finished. Now I just needed to create a simple script that would access the API with all the messages, read them out to me, and then promptly delete them. I wrote this script in Ruby, although it can be coded in pretty much any language with HTTP functionality.
First, I imported the HTTParty gem to make requests to the API and the TTS gem to have easy to use text-to-speech functionality. With the help of these gems, writing the actual script to get the messages and read them out to me was simple.
After the imports, I wrote a function read_messages. This function sends a get request to the API in order to see all the messages that had been sent there. Then, it gets the content of each message and wraps it nicely in a formatted string. Finally, the function uses the TTS gem to read the formatted string and then promptly sends a request to delete the message off of the API, so that it's not read again:
require 'httparty'
require 'tts'

def read_messages
    response = HTTParty.get('<api_get_messages_url>')

    response.each do |message|
        #create message string
        to_read = ''
        if message['author'] == ''
            to_read = "You have a message: " + message['body']
        else
            to_read = "You have a message from #{message['author']}: " + message['body']
        end

        #read message string out loud
        to_read.play('en', 1)

        #delete message that was just read from API
        HTTParty.delete("<api_get_messages_url>#{message['id']}")
    end
end
Finally, I wrapped the function in an infinite while loop so it is always running while the script is executing:
while true do
    read_messages()
end
*Note: in case you don't want to delete the messages, an alternative is to have a read boolean that can be set to false once a message is read out loud by the script, using a patch request rather than a delete request.
And there you go! Now each time the script is running, I am able to instantly hear any messages that have been previously sent to the API or that are being sent in real-time.
The very final thing I did was to make the script an executable file so that I wouldn't have to type ruby <script_name.rb> into the terminal each time I wanted to run my answering machine.
The process to make any code file executable on MacOS by simply clicking on it is the following:
- Use the terminal to navigate into the directory where the script is located.
- Type
chmod a+x <script_name.file_extension>- this gives you permission to execute the file. - Add the line
#!/usr/bin/env <programming_language_name>to the top of your script file - this tells your computer what language the script is in. - Create a shell script like so:
#!/bin/sh
cd <script_directory>
echo Running script
./<script_name.file_extension>
- Finally, change the shell script's file extension to
.command.
I made a shortcut to the .command file on my desktop, and voilà! Now every time I open up my laptop, I can press that shortcut and instantly hear all the random messages my friends sent me since I last checked! Just like the good ol' days of answering machines...
Conclusion
I hope this post has provided you with some insight into how most web applications we use work behind the scenes. Whether it be a simple answering machine or a complex application like Facebook, the core ideas of how these systems work are all the same.

Top comments (0)