Creating a personal portfolio can be overwhelming, but with GitHub templates, you can set up your own site in minutes! In this guide, we'll use my GitHub portfolio template made for Software and Cloud developers to create a new repository, clone it, and customize it to fit your style.
By the end of this tutorial, you'll have:
- A GitHub repository based on my template
- A cloned version on your local machine
- A ready-to-customize portfolio site
Let's get started!
🛠️ What You Need
Before we begin, make sure you have the following:
- Git Command Line (CLI) You'll need Git installed to clone and manage your repository. If you don’t have Git yet, download and install it from: 🔗 Git Download Page
To check if Git is installed, run:
git --version
- A text editor (VS Code highly recommended) A code editor is essential for modifying your portfolio. I recommend VS Code, which you can download here: 🔗 VS Code Download
Once you have these set up, you're ready to create your portfolio repository!
Making a Repository From the Template
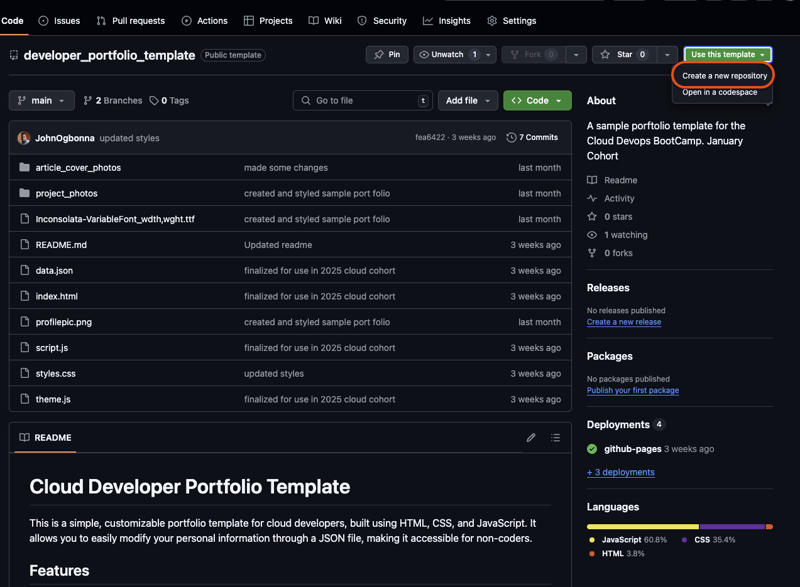
In your browser, go to my portfolio template repository
-
Click on
Use this templateand thenCreate a new repository
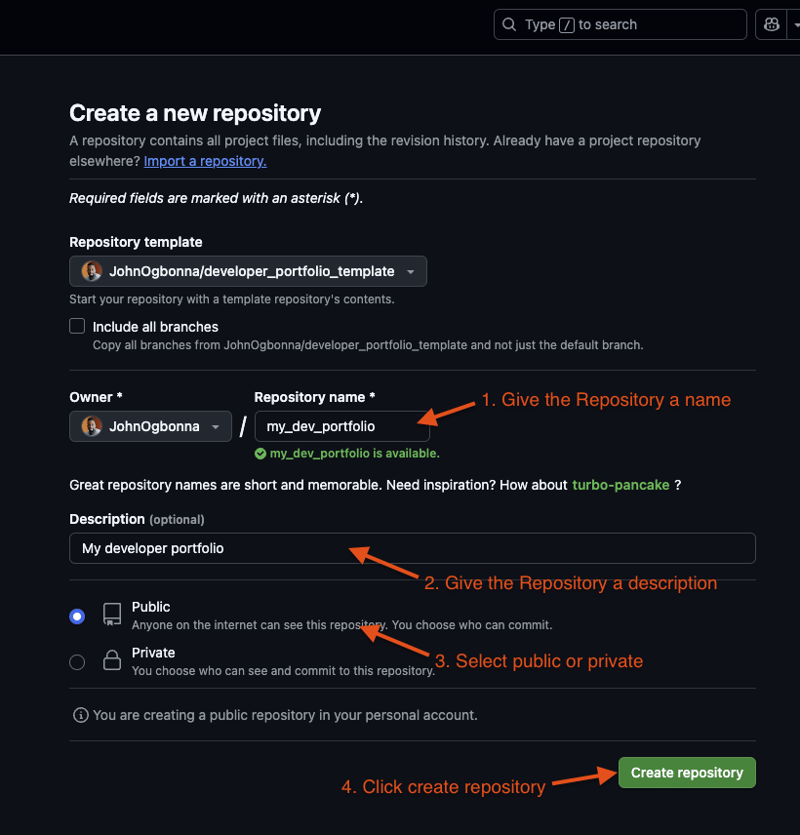
- Give the repo a name
- Give the repo a description
- Select public or private
- Click create repository
Open your terminal and navigate to a suitable environment to download the template. Then enter this command:
git clone https://github.com/JohnOgbonna/my_dev_portfolio.git
- Open the cloned folder in VS code

Editing Your site locally
Open the
README.mdto view the instructions on how to edit the site.

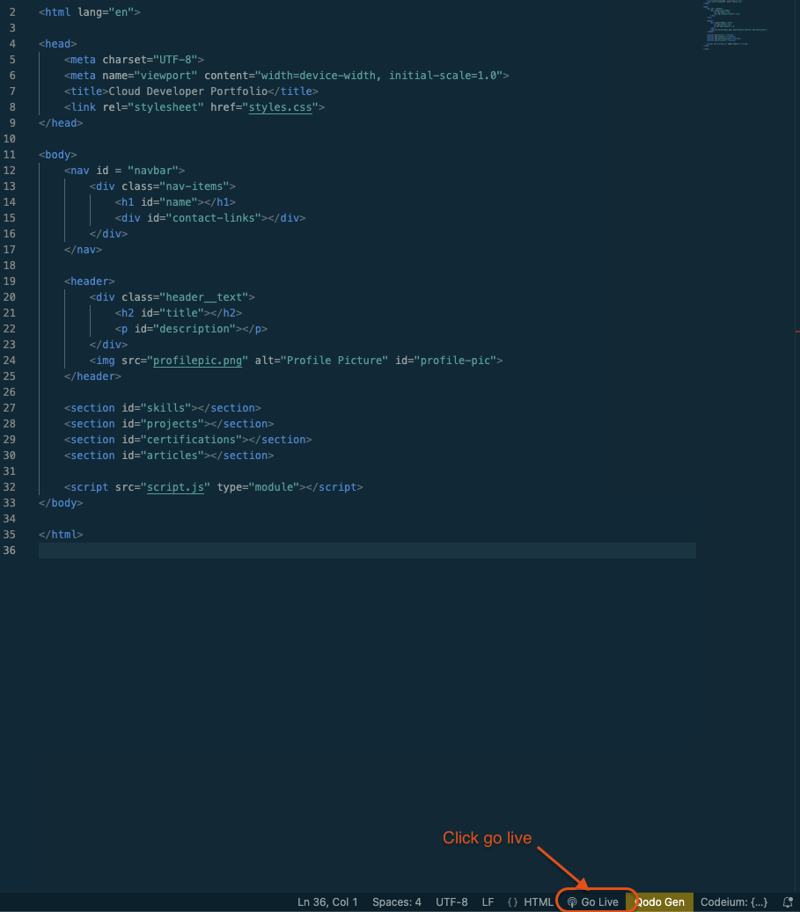
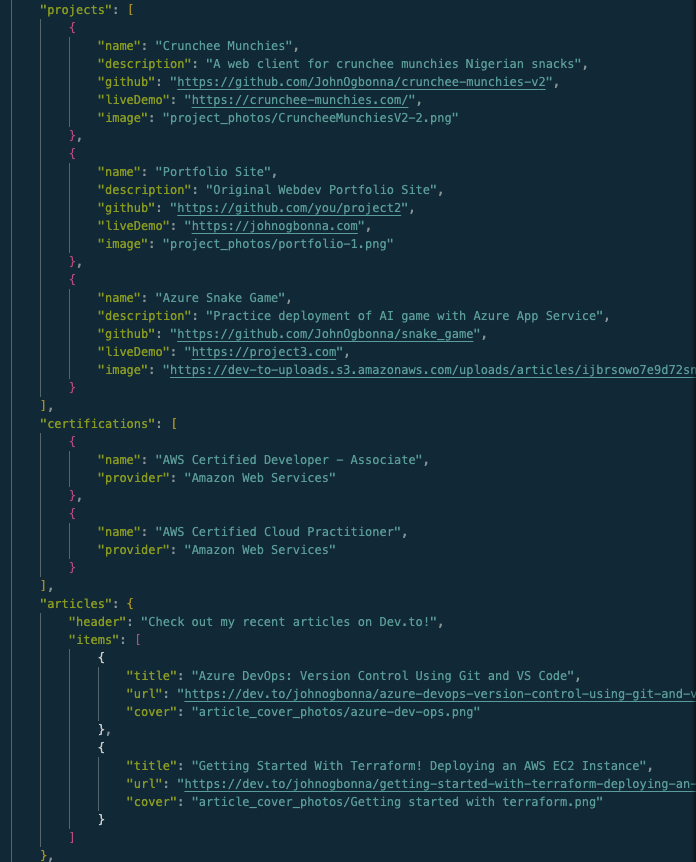
Edit the data.json file accordingly. Install VS Code live server. Open
index.htmlin the editor, On the bottom right, click go live to view the site locally]
The site will open in the browser. As you make changes in
data.json, you will see them in the browserA mentioned in the
README.md, To change the content displayed, simply edit thedata.json. Add a profile picture to the root directory and call itprofilepic.png. Remove the default one (unless you'd like an AI generated image of me as your portfolio profile picture). here is an example of the "skills" object I modified:
"skills": [
        {
            "platform": "AWS",
            "list": [
                "EC2",
                "S3",
                "Lambda",
                "DynamoDB",
                "Amplify",
                "Api Gateway",
                "SES"
            ]
        },
        {
            "platform": "Azure",
            "list": [
                "Azure Functions",
                "Blob Storage",
                "App Service",
                "Azure DevOps",
                "Azure Virtual Machines"
            ]
        },
        {
            "platform": "Google Cloud",
            "list": [
                "Cloud Functions",
                "Cloud Storage",
                "Firebase"
            ]
        }
    ]
- Adjust the information for yourself accordingly. Follow the instructions and make sure your information follows the same pattern in order to avoid compilation errors when building the site.
Store article photos and project photos in the correct folder and reference them accordingly in
data.json. Notice that these can also be web URLs
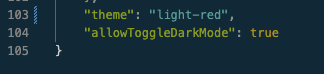
I changed my theme to
light-redwith the option to toggle dark mode. See a list of allowed theme setups in theREADME.md. Adjust these settings as you wish
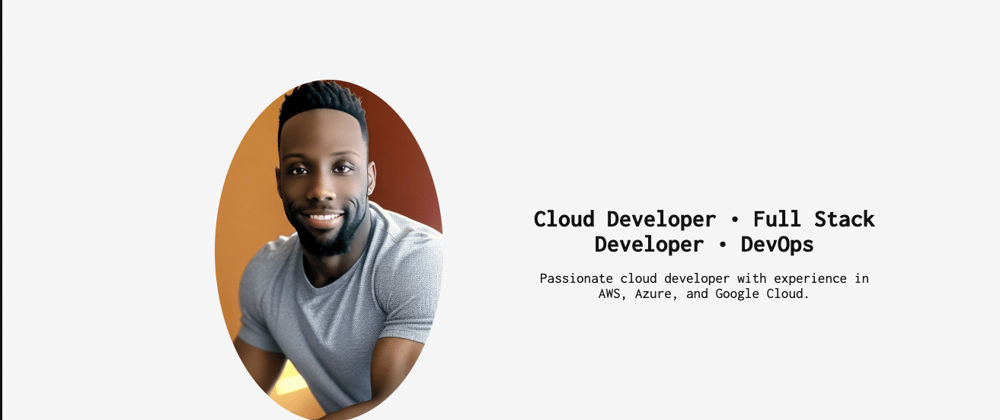
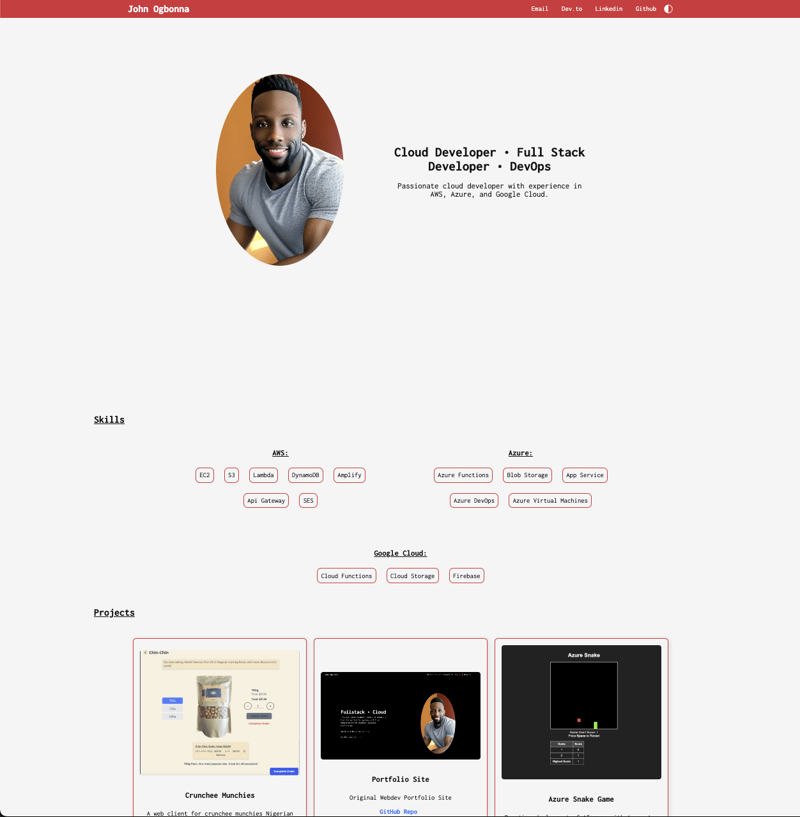
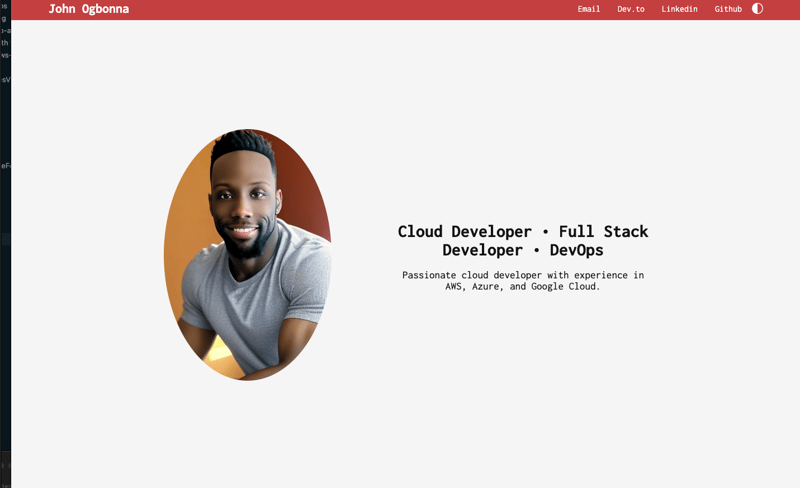
My modified site:
If you are experienced in web development, feel free to modify ay of the other files and customize fully to get your desired look and feel.
Committing and pushing to Github
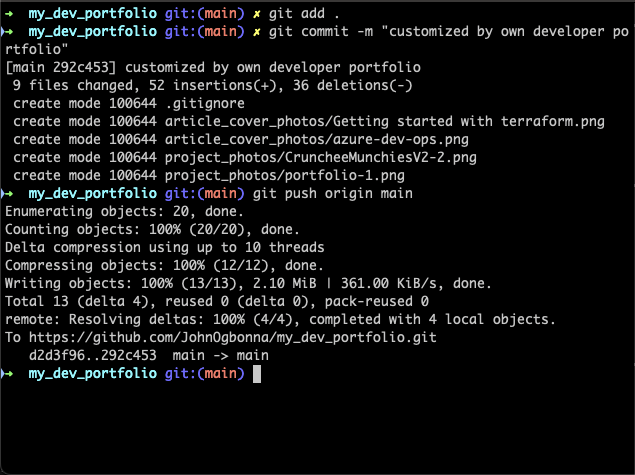
- Once you are satisfied with your modifications, it's time to commit and push the changes. In the terminal enter:
git status
This will list all the changes you made to the base template
Then enter
git add .
- This will add mark changes made to be committed
- Then enter the following command, replacing "Commit message" with a meaningful description of your update::
git commit -m "Commit message"
This will now stage the changes to be pushed to the repository on git hub, then:
git push origin main

- Your changes are now live in your GitHub repository in the main branch.
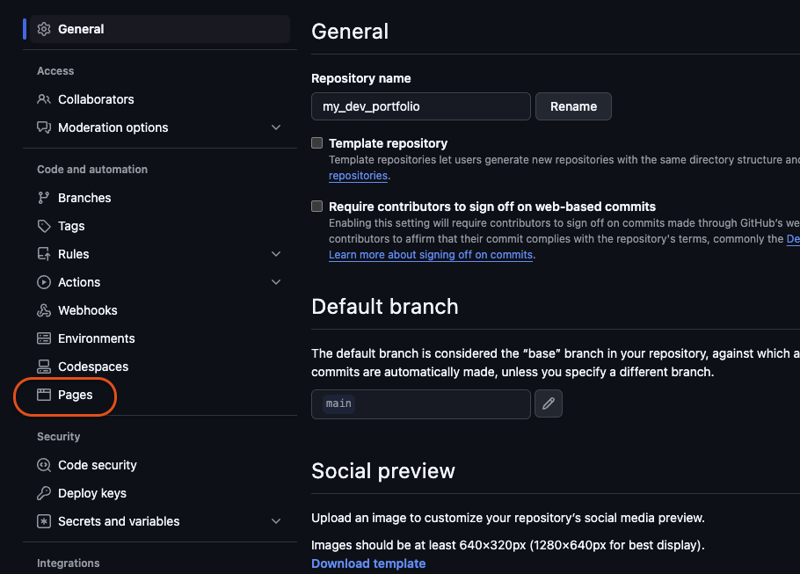
Deploying live site with github pages
- Navigate to the Github repository in the browser
Click settings
Click pages
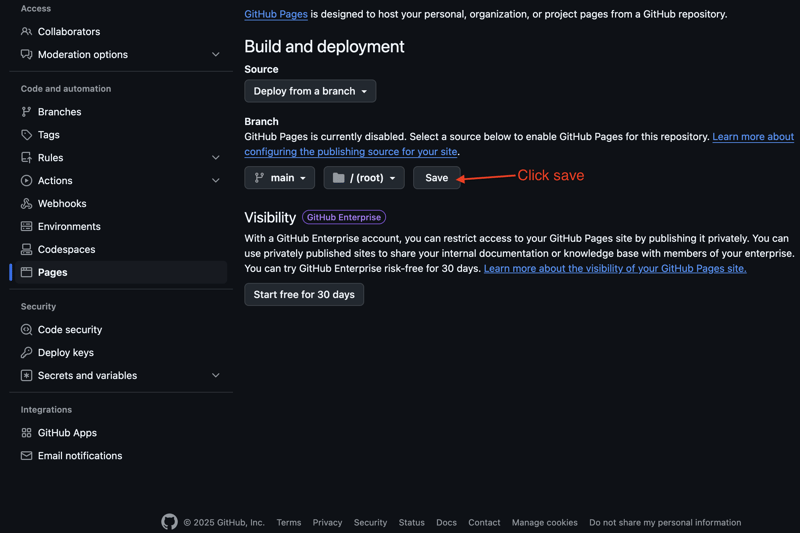
Select deploy from branch
Select main
Select save
Wait a few moments and the link will appear
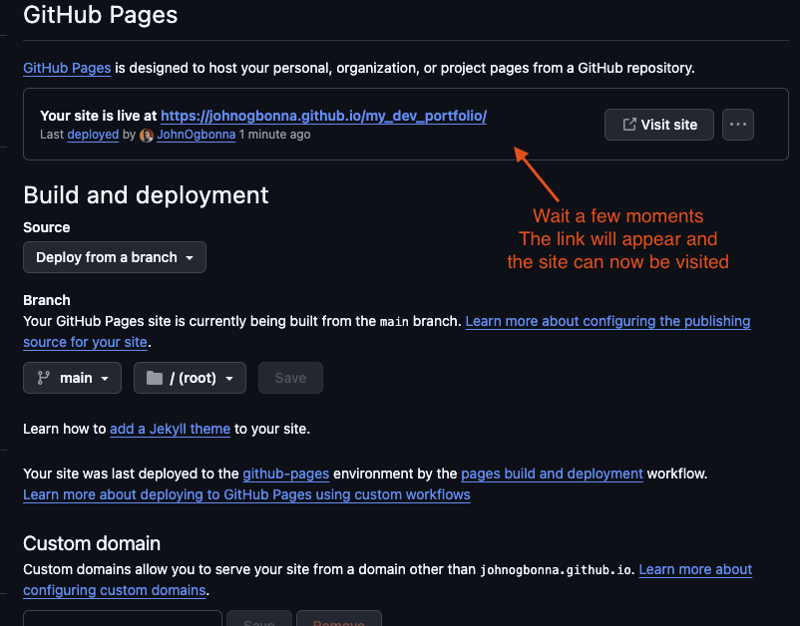
Your site is now live and accessible from a link

Top comments (0)