
Strapi is a headless CMS that helps you build content-based sites with the frontend of your choice by providing a reliable, customizable API backend. Strapi allows you to define your own content types, includes a feature-rich admin panel, and provides all of the building blocks you need to develop a comprehensive editing and publication workflow.
In this tutorial, we will show how to create a Strapi instance and deploy it to Koyeb. The application will use an external PostgreSQL database for performance and data integrity and will use Backblaze B2 to store uploads persistently across deployments.
You can consult the repository for this guide to follow along on your own. You can deploy the Strapi application by clicking the Deploy to Koyeb button below:

Be sure to modify all of the environment variable values to reflect your own data. You can consult this guide if you need additional information on appropriate values.
Requirements
To successfully follow and complete this guide, you need:
- A Koyeb account to provision the PostgreSQL database and to build and deploy the Strapi application.
- A Backblaze B2 account to store images and other uploads used within your content.
-
Node.js and the
npmpackage manager installed on your local computer.
Steps
To complete this guide and deploy a Strapi application, you'll need to follow these steps:
- Create a new Strapi repository on your local computer
- Create content types
- Configure the Strapi object storage behavior
- Push the project to GitHub
- Provision a Backblaze B2 object storage bucket
- Provision a PostgreSQL database on Koyeb
- Deploy Strapi to Koyeb
- Create a production administration account and test functionality
Create a new Strapi repository on your local computer
To get started, you'll need to create a new Strapi repository on your local machine.
The following command will create a new Strapi instance in a directory called example-strapi. It will use npm as the package manager:
npx create-strapi-app@latest --use-npm --no-run example-strapi
When prompted, select Quickstart to provision a JavaScript project initially configured to use a local SQLite database (we'll change this momentarily). This will create a new example-strapi project directory with the core application files and install all of the necessary dependencies.
Navigate into the new project directory and install the pg and @strapi/provider-upload-aws-s3 packages with npm. This will allow us to configure Strapi to store its data externally when we deploy to production later:
cd example-strapi
npm install pg @strapi/provider-upload-aws-s3
Create content types
Certain Strapi features are only available when running in development mode. Perhaps the most important of these is the ability to configure content types. You can add content to Strapi in development or production mode, but you can only adjust the content types in development mode.
To create our first content types, start up the development server locally:
npm run develop
Strapi will start up and create a local SQLite file as the database. Afterwards, it will open a browser page to the admin account creation form (you can visit http://localhost:1337 if this page does not automatically open):

Fill in your info to create a local administration account. Since our development instance and our future production deployment will use different databases, this version of the administration account will only be used locally.
Once you create an account, you will be taken to Strapi's admin dashboard:

From here, you can create your first content types. Click Create your first Content type or visit the Content-Type Builder plugin in the navigation sidebar.
On the page that follows, click Create new collection type under the Collection Types section:

A form will appear where you can configure the collection type. We will configure a "post" collection type as an example. Enter Post in the Display name field and click Continue:

Select Text to add a text field:

Enter title in the Name field:

Click Advanced Settings and select the Required field and Unique field boxes:

Click Add another field and follow the same process to define the following fields:
| Field type | Name | Other settings |
|---|---|---|
| Rich text (Blocks) | body | Required |
| Date | published | Type: date (ex: 01/01/2024) |
Click Finish when you're finished. In the Post content type, click Save in the upper-right corner to commit the changes:

Strapi will commit the changes and restart.
Next, click Create new collection type again to create a collection called Tag with the following fields:
| Field type | Name | Other settings |
|---|---|---|
| Text | name | Required, Unique |
| Relation | (none) | Select the icon with the "has and belongs to many" description |
Again, click Finish when you've configured the final field and then click Save to commit the changes and restart Strapi:

With the content type configuration complete, stop the development server by pressing CTRL-C.
Configure the Strapi object storage behavior
During development, Strapi places any images or other uploaded files on the local filesystem. This works great when operating locally, but doesn't fit the environment we will use for production where files stored on the local filesystem will be lost during redeployment.
To address this, we will configure Strapi to upload images and other files to an S3-compatible object storage provider when running in production. We will provision a Backblaze B2 instance to fill this role when preparing to deploy later on, but we can get started by configuring Strapi with this behavior.
In the config directory, create a set of nested directories called env/production to configure production-specific behavior:
mkdir -p config/env/production
Files inside this directory will take precedence over their counterparts in the bare config directory when running in the production environment. Strapi will use the files in the bare config file when not running in production or when it cannot find the appropriate file in the environment-specific directory.
Inside the new directory, create a plugins.js file with following contents:
// File: config/env/production/plugins.js

module.exports = ({ env }) => ({
  upload: {
    config: {
      provider: 'aws-s3',
      providerOptions: {
        s3Options: {
          credentials: {
            accessKeyId: env('S3_ACCESS_KEY_ID'),
            secretAccessKey: env('S3_ACCESS_SECRET'),
          },
          region: env('S3_REGION'),
          endpoint: 'https://' + env('S3_ENDPOINT'),
          params: {
            ACL: 'private',
            Bucket: env('S3_BUCKET'),
          },
        },
      },
    },
  },
})
This file configures the upload module to use an S3-compatible object storage provider instead of the local filesystem. It takes its configuration data from environment variables beginning with S3_. We will define these during deployment to reference our Backblaze B2 bucket.
Next, we need to alter Strapi's security middleware configuration so that it will allow content hosted in our object storage bucket. Without this extra step, the middleware will block the content from loading as a security precaution.
Create a middlewares.js file in the config directory and add the following code:
// File: config/env/production/middlewares.js

module.exports = ({ env }) => [
  'strapi::logger',
  'strapi::errors',
  {
    name: 'strapi::security',
    config: {
      contentSecurityPolicy: {
        useDefaults: true,
        directives: {
          'connect-src': ["'self'", 'https:'],
          'img-src': [
            "'self'",
            'data:',
            'blob:',
            'market-assets.strapi.io',
            env('S3_BUCKET') + '.' + env('S3_ENDPOINT'),
          ],
          'media-src': [
            "'self'",
            'data:',
            'blob:',
            'market-assets.strapi.io',
            env('S3_BUCKET') + '.' + env('S3_ENDPOINT'),
          ],
          upgradeInsecureRequests: null,
        },
      },
    },
  },
  'strapi::cors',
  'strapi::poweredBy',
  'strapi::query',
  'strapi::body',
  'strapi::session',
  'strapi::favicon',
  'strapi::public',
]
Again, we are configuring Strapi to configure its policies based on S3_ environment variables. In this case, the expected format for the bucket URL differs from the format used in the plugins.js file, so we concatenate the necessary values to build the expected strings.
Push the project to GitHub
You are now ready to commit your Strapi configuration to git and upload it to a GitHub repository. Strapi automatically created a git repository complete with a relevant .gitignore file when it initialized the project.
Create a new GitHub repository and then run the following commands to commit and push changes to your GitHub repository:
```bash // //
git add :/
git commit -m "Initial commit"
git remote add origin git@github.com:/.git
git branch -M main
git push -u origin main
**Note:** Make sure to replace `<YOUR_GITHUB_USERNAME>` and `<YOUR_REPOSITORY_NAME>` with your GitHub username and repository name.

## Provision a Backblaze B2 object storage bucket

In a serverless environment, content stored on the local filesystem is ephemeral and will be lost when redeploying or reconfiguring the application. We need to create an S3-compatible object storage bucket where Strapi can store images and files uploaded to our production instance. We will use Backblaze B2 for this.

To create an object storage bucket for Strapi, log into your [Backblaze account](https://secure.backblaze.com/user_signin.htm) and follow these steps:

1. In the **B2 Cloud Storage** section on the left side of the dashboard, click **Buckets**.
2. Click **Create a Bucket** to begin configuring a new bucket.
3. Choose a name for the bucket. This must be globally unique, so choose a name not likely to be used by another user.
4. Set the bucket privacy to **Private**.
5. Use the provided defaults for the rest of the settings.
6. Click **Create a Bucket** to create the new bucket.

Copy and save the following information about your new bucket. You'll need it later to configure Strapi:

| Backblaze B2 item | Example value                       |
| ----------------- | ----------------------------------- |
| Bucket name       | `some-bucket-name`                  |
| Endpoint          | `s3.eu-central-003.backblazeb2.com` |

Now that you have a bucket, you need to create API credentials so that Strapi can authenticate to Backblaze as well as upload and manage objects:

1. In the **Account** section on the left side of the dashboard, click **Application Keys**.
2. Under **Your Application Keys**, click **Add a New Application Key** to begin configuring a new key.
3. Select a name for your key to help you identify it more easily.
4. Select the bucket you just created in the **Allow access to Bucket(s)** drop-down menu.
5. Select **Read and Write** as the access type.
6. Leave the remaining fields blank to accept the default policies.
7. Click **Create New Key** to generate the new key to manage your bucket.

Copy and save the following information related to your new API key. You'll need it to properly authenticate to your Backblaze account and perform object operations:

| Backblaze B2 item | Example value                     |
| ----------------- | --------------------------------- |
| `keyID`           | `008c587cb98cb3d0000000003`       |
| `applicationKey`  | `K002cbYLV/CkW/x+28zsqmpbIAtdzMM` |

## Provision a PostgreSQL database on Koyeb

As mentioned before, we need an external PostgreSQL database during production to store our application data. This will persist our data across deployments and allow for better performance and scalability. We will use [Koyeb's PostgreSQL service](https://www.koyeb.com/docs/databases) which includes a free tier.

To deploy a new PostgreSQL database, on the **Overview** tab of the [Koyeb control panel](https://app.koyeb.com/), click **Create Database Service**. Choose a name for the service and choose the region closest to you or your users.

Once the database is provisioned, click the **copy icon** associated with `psql` to save the connection details for later.

## Deploy Strapi to Koyeb

Now that the project code is on GitHub and the external storage providers are provisioned, we can deploy our project to Koyeb. On the **Overview** tab of the [Koyeb control panel](https://app.koyeb.com/), click **Create Web Service** to begin:

1. Select **GitHub** as the deployment method.
2. Select your Strapi project repository repository. Alternatively, you can enter our public [Strapi example repository](https://github.com/koyeb/example-strapi) into the **Public GitHub repository** field at the bottom of the page: `https://github.com/koyeb/example-strapi`.
3. In the **Environment variables** section, click **Bulk edit** to enter multiple environment variables at once. In the text box that appears, paste the following:
HOST=0.0.0.0
NODE_ENV=production
DATABASE_CLIENT=postgres
DATABASE_URL=
S3_ENDPOINT=
S3_REGION=
S3_BUCKET=
S3_ACCESS_KEY_ID=
S3_ACCESS_SECRET=
APP_KEYS=
API_TOKEN_SALT=
JWT_SECRET=
ADMIN_JWT_SECRET=
TRANSFER_TOKEN_SALT=
   Set the variable values to reference your own information as follows:

   - `HOST`: Set to `0.0.0.0`. This tells Strapi to listen for connections on all interfaces.
   - `NODE_ENV`: Set to `production`. This disables development-only features and enables our production-specific configuration.
   - `DATABASE_CLIENT`: Set to `postgres` to use a PostgreSQL database instead of a local SQLite database.
   - `DATABASE_URL`: The connection string to connect to and authenticate with the PostgreSQL database. Set this to the `psql` connection string you copied from your Koyeb database detail page and append `?ssl_mode=require` to the end to force the connection to use TLS/SSL.
   - `S3_ENDPOINT`: The object storage bucket endpoint URL. Enter the "Endpoint" value you copied from Backblaze B2 (this should not include a protocol specification).
   - `S3_REGION`: The region where the object storage bucket is hosted. Enter the region embedded in the endpoint URL. For instance if the `S3_ENDPOINT` is `s3.eu-central-003.backblazeb2.com`, the `S3_REGION` should be set to `eu-central-003`.
   - `S3_BUCKET`: The name of your object storage bucket. Enter the bucket name copied from Backblaze B2.
   - `S3_ACCESS_KEY_ID`: The key ID to use when authenticating to Backblaze B2. Enter the `keyID` for the API key that you created in Backblaze.
   - `S3_ACCESS_SECRET`: The secret key to use when authenticating to Backblaze B2. Enter the `applicationKey` for the API key that you created in Backblaze.
   - `APP_KEYS`: A comma-separated list of application keys to be used by middleware. Generate these with `openssl rand -base64 32`. For example, to set two keys, it might look like: `APP_KEYS=<first_key>,<second_key>`.
   - `API_TOKEN_SALT`: The salt used to generate new API keys. Generate with `openssl rand -base64 32`.
   - `JWT_SECRET`: A random string used to create new JSON Web Tokens (JWT). Generate with `openssl rand -base64 32`.
   - `ADMIN_JWT_SECRET`: A separate random string used to create new JSON Web Tokens (JWT) for the admin panel. Generate with `openssl rand -base64 32`.
   - `TRANSFER_TOKEN_SALT`: A salt used to generate [transfer tokens](https://docs.strapi.io/dev-docs/data-management/transfer#generate-a-transfer-token). Generate with `openssl rand -base64 32`.

4. In the **Instance** section, select the **Eco** category and choose **eMedium** or larger. Strapi [recommends a single core and 2GB of memory](https://docs.strapi.io/dev-docs/deployment#hardware-and-software-requirements) at a minimum.
5. Click **Deploy**.

Koyeb will pull your application repository and then build and run it according to the `build` and `start` scripts found in the `package.json` file. During deployment, Strapi will create the appropriate data structures in the database according to the schema files generated by our content type definitions.

## Create a production administration account and test functionality

Once the deployment is complete, access your Strapi instance by visiting your Koyeb deployment URL. The application URL should have the following format:
https://--.koyeb.app
Here, you can confirm that Strapi is running in production mode:
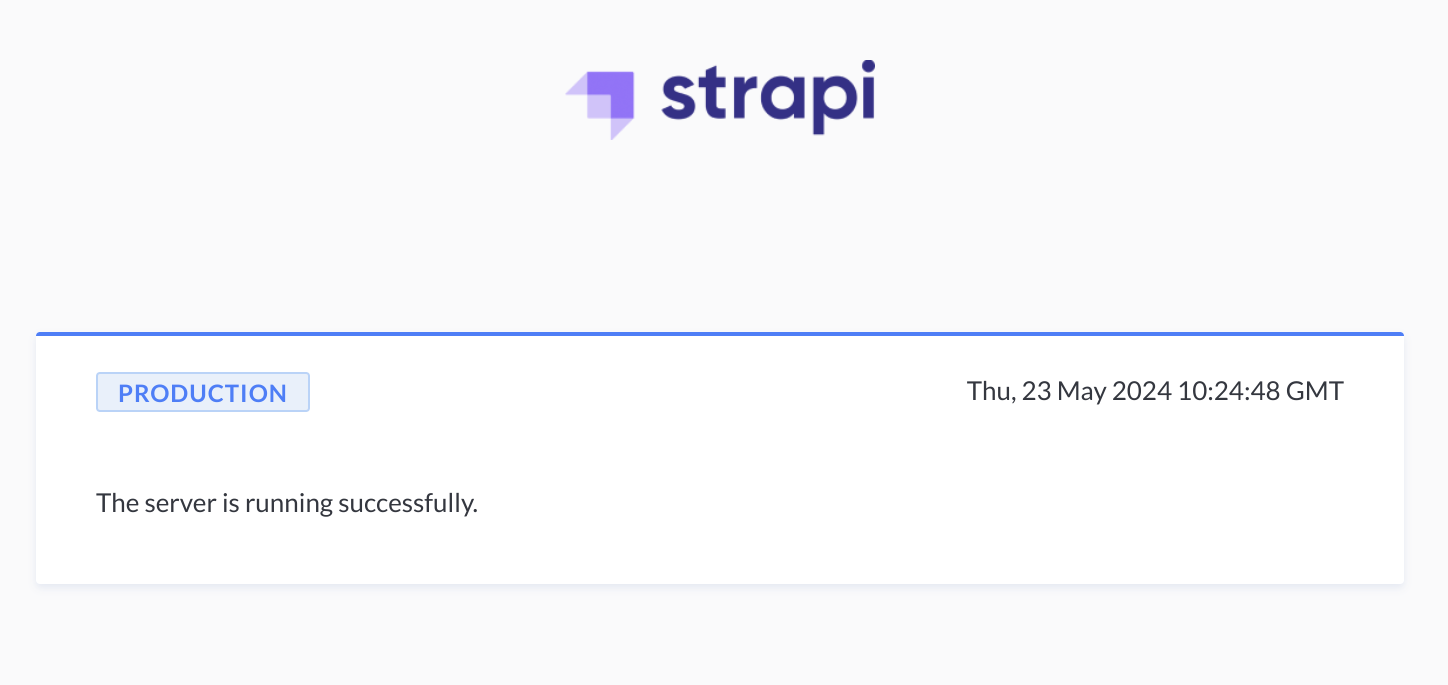
Since Strapi is only focused on providing a content backend, this sparse page is expected.
Next, append `/admin` on the end of the URL to access the admin panel. On your first visit, you will be prompted to create a new admin account, mirroring the process we performed earlier. This time, the admin account is for the production instance:
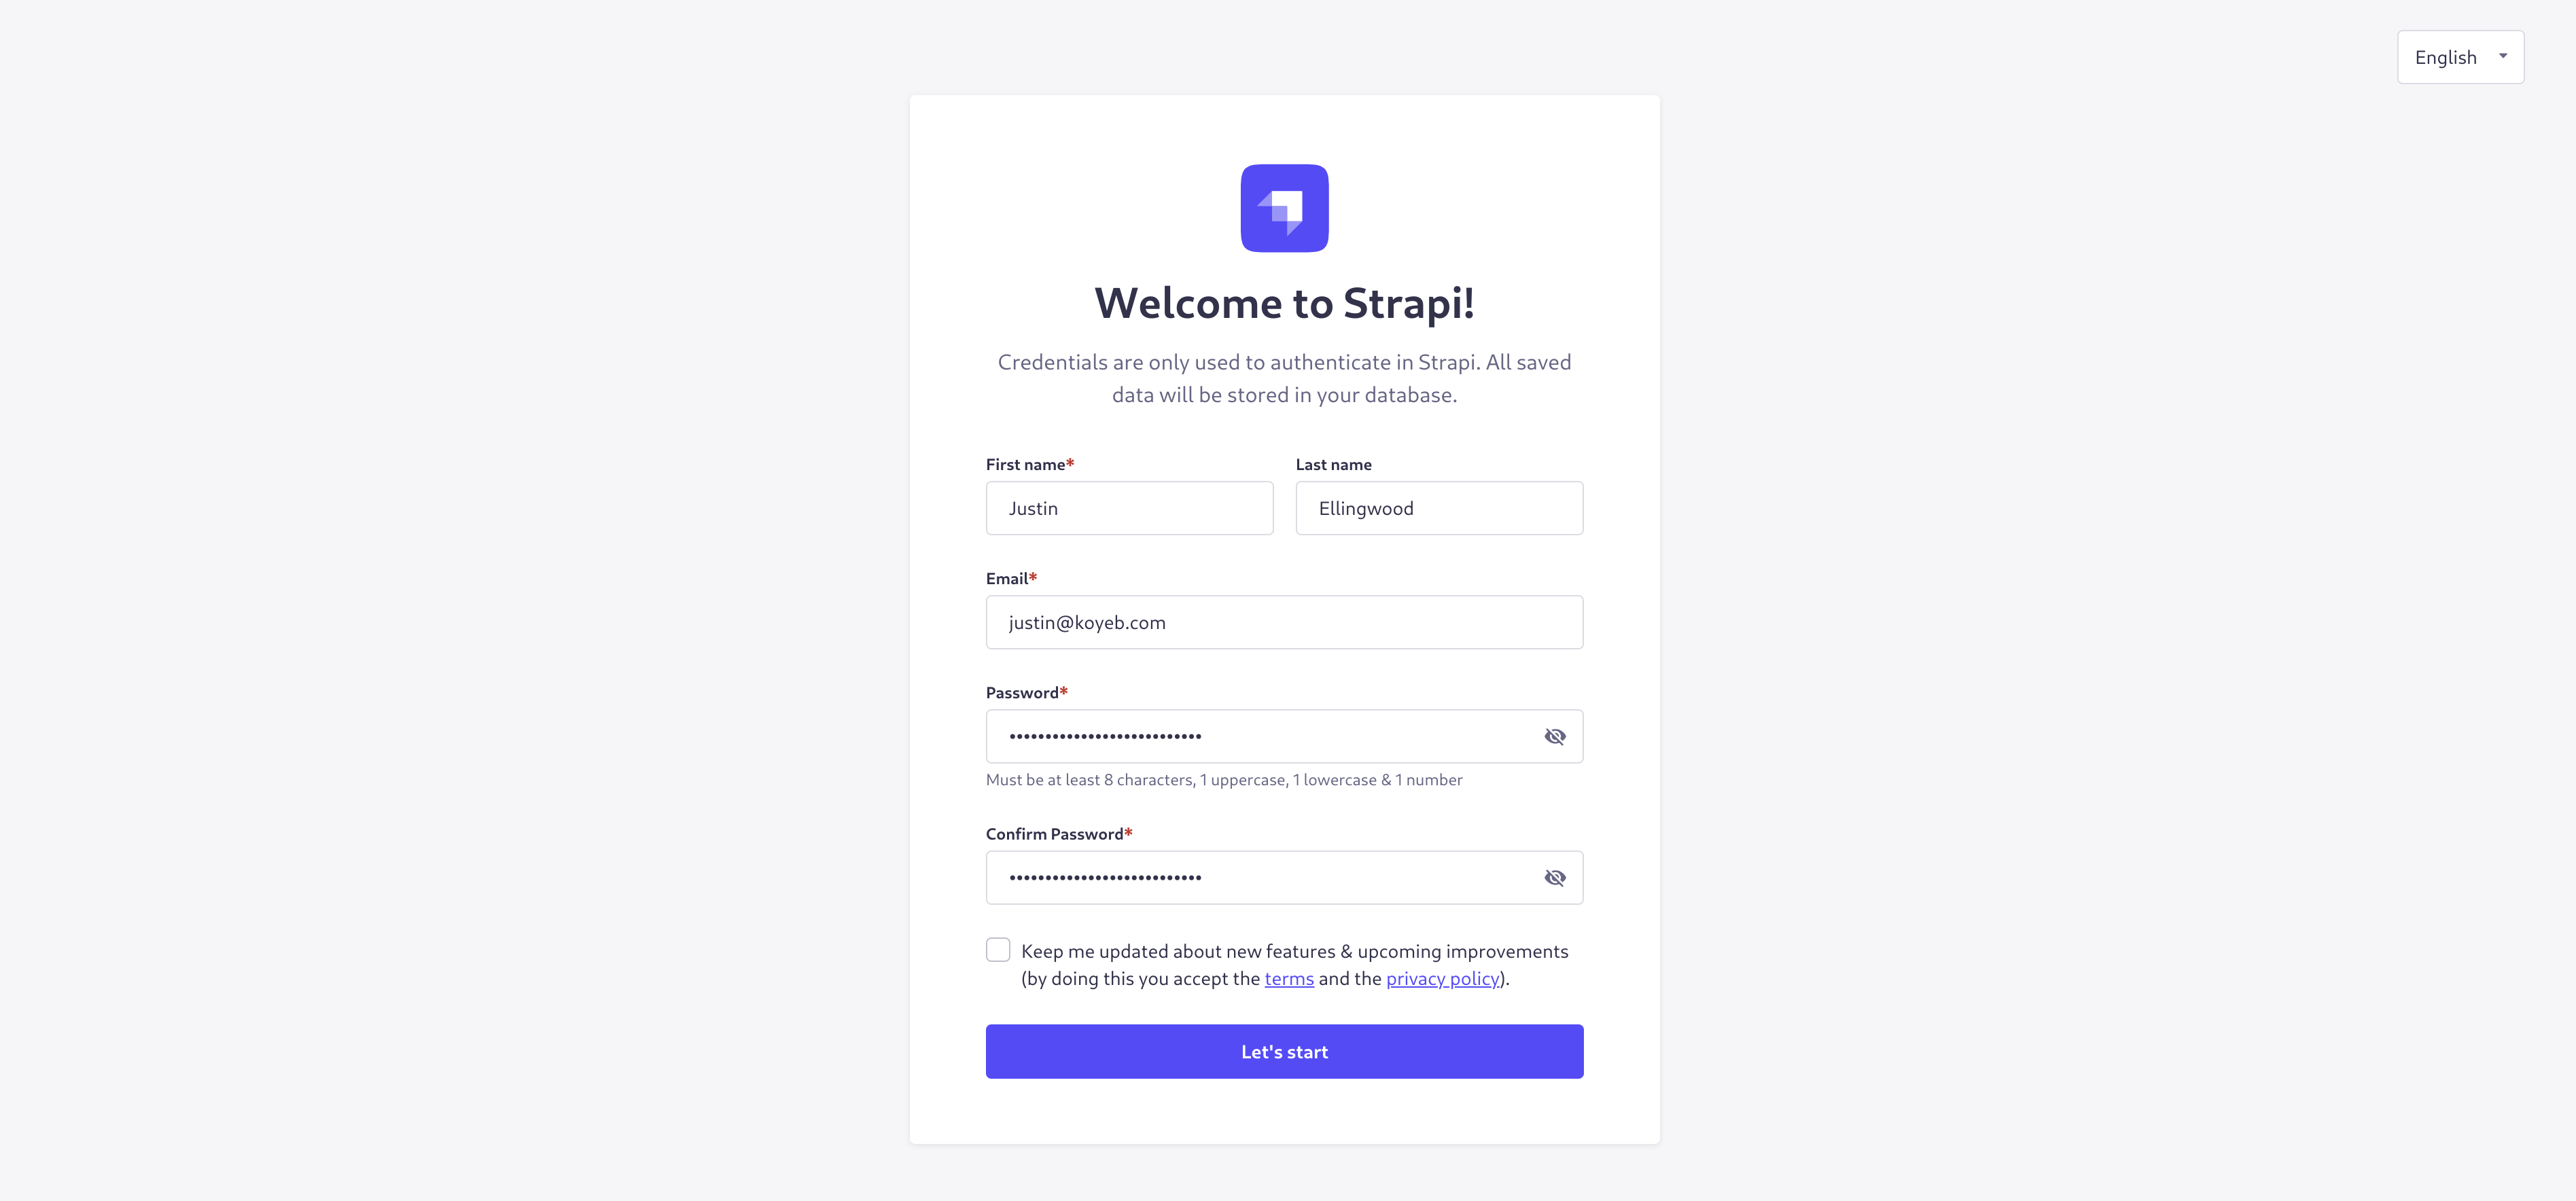
After creating an account, you will be taken to the administration dashboard.
### Test media uploads
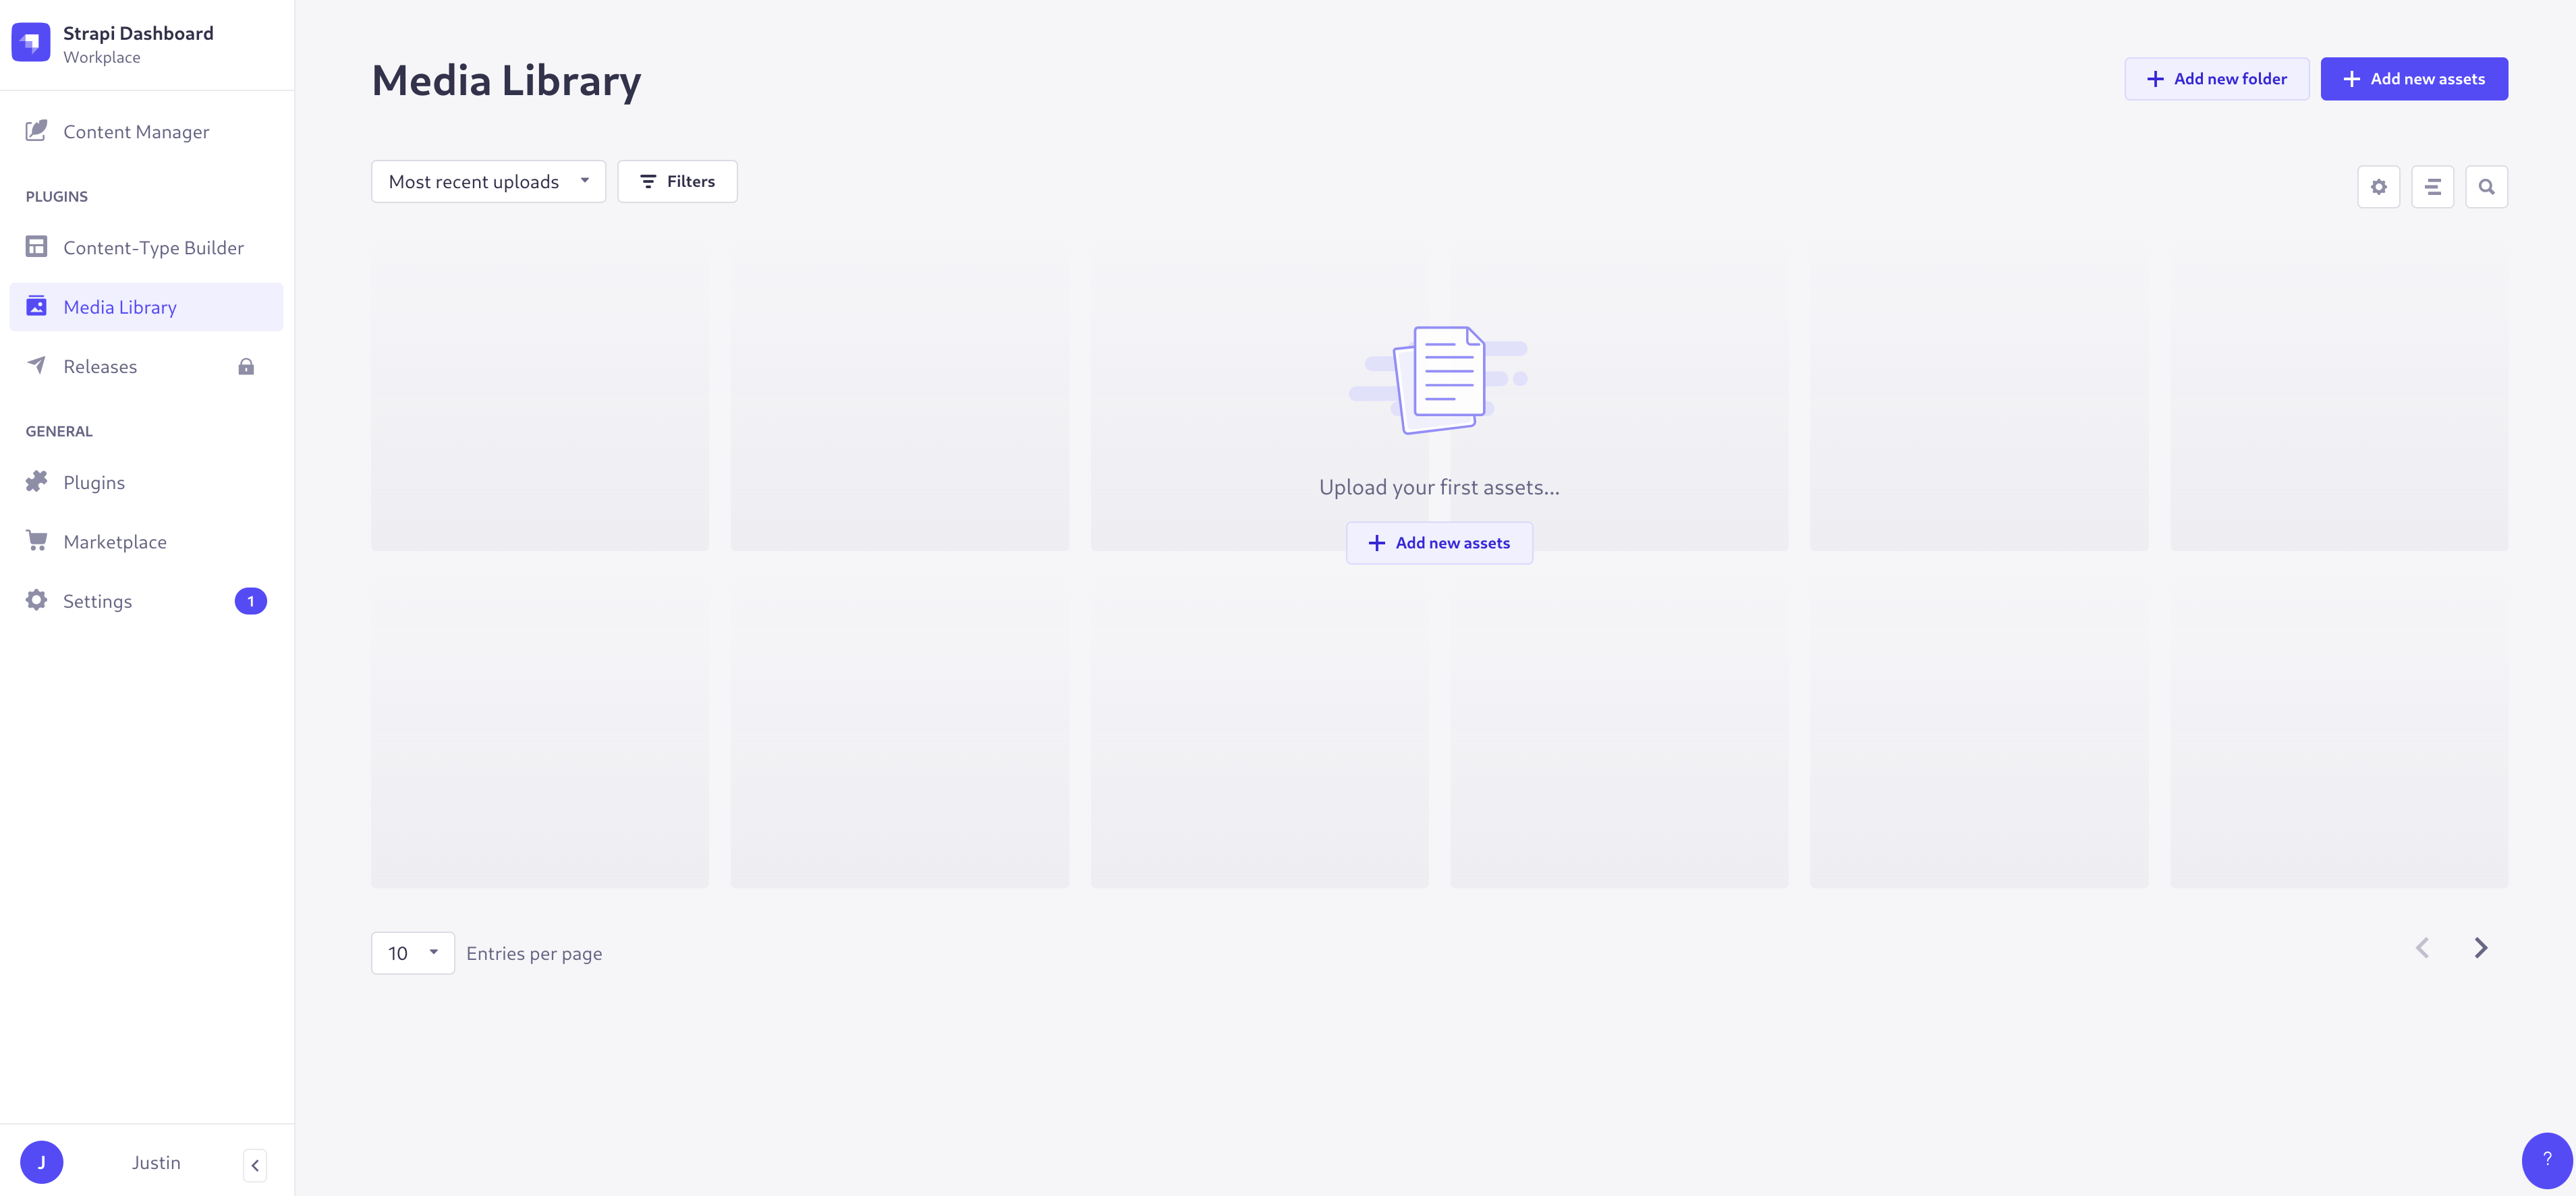
First, test that we are able to upload new media files to our object storage bucket.
Click **Media Library** in the left-hand navigation menu and then click **Add new assets**:
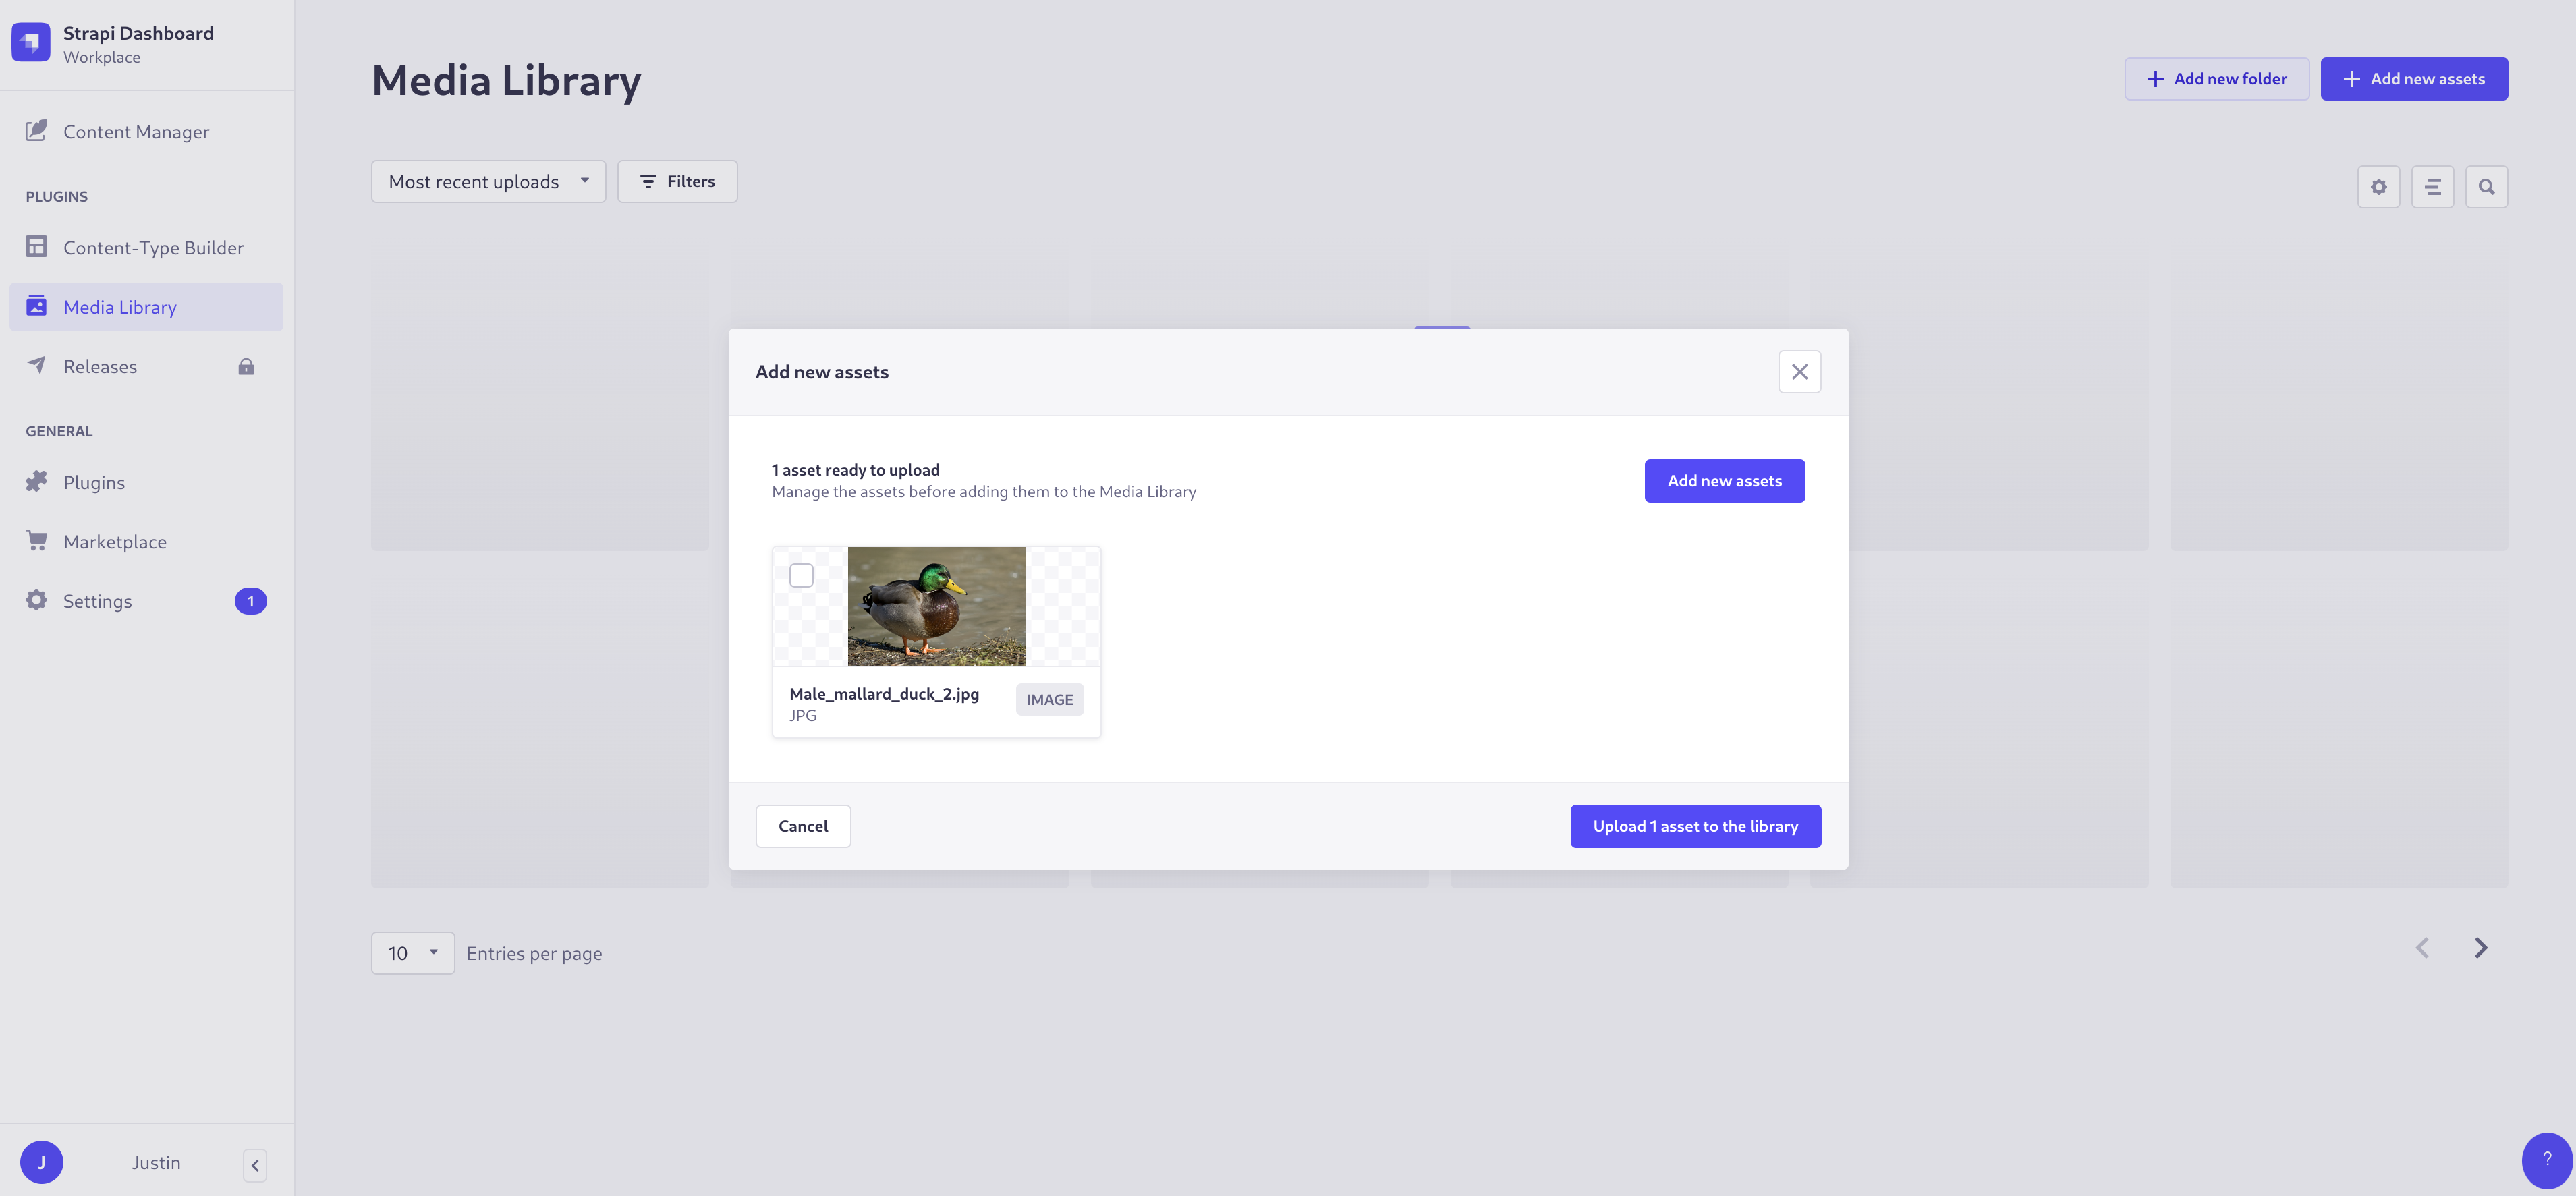
Click **Browse files** and select an image from your computer. Click **Upload 1 asset to the library** to upload the new image:
Select the image and click the **link icon** to copy the image to your clipboard. Paste it to confirm that the image is being served from your object storage bucket.
### Create new content
Next, click **Content Manager** in the left-hand navigation menu. The content types you defined during development will be displayed under the **Content Types** section:
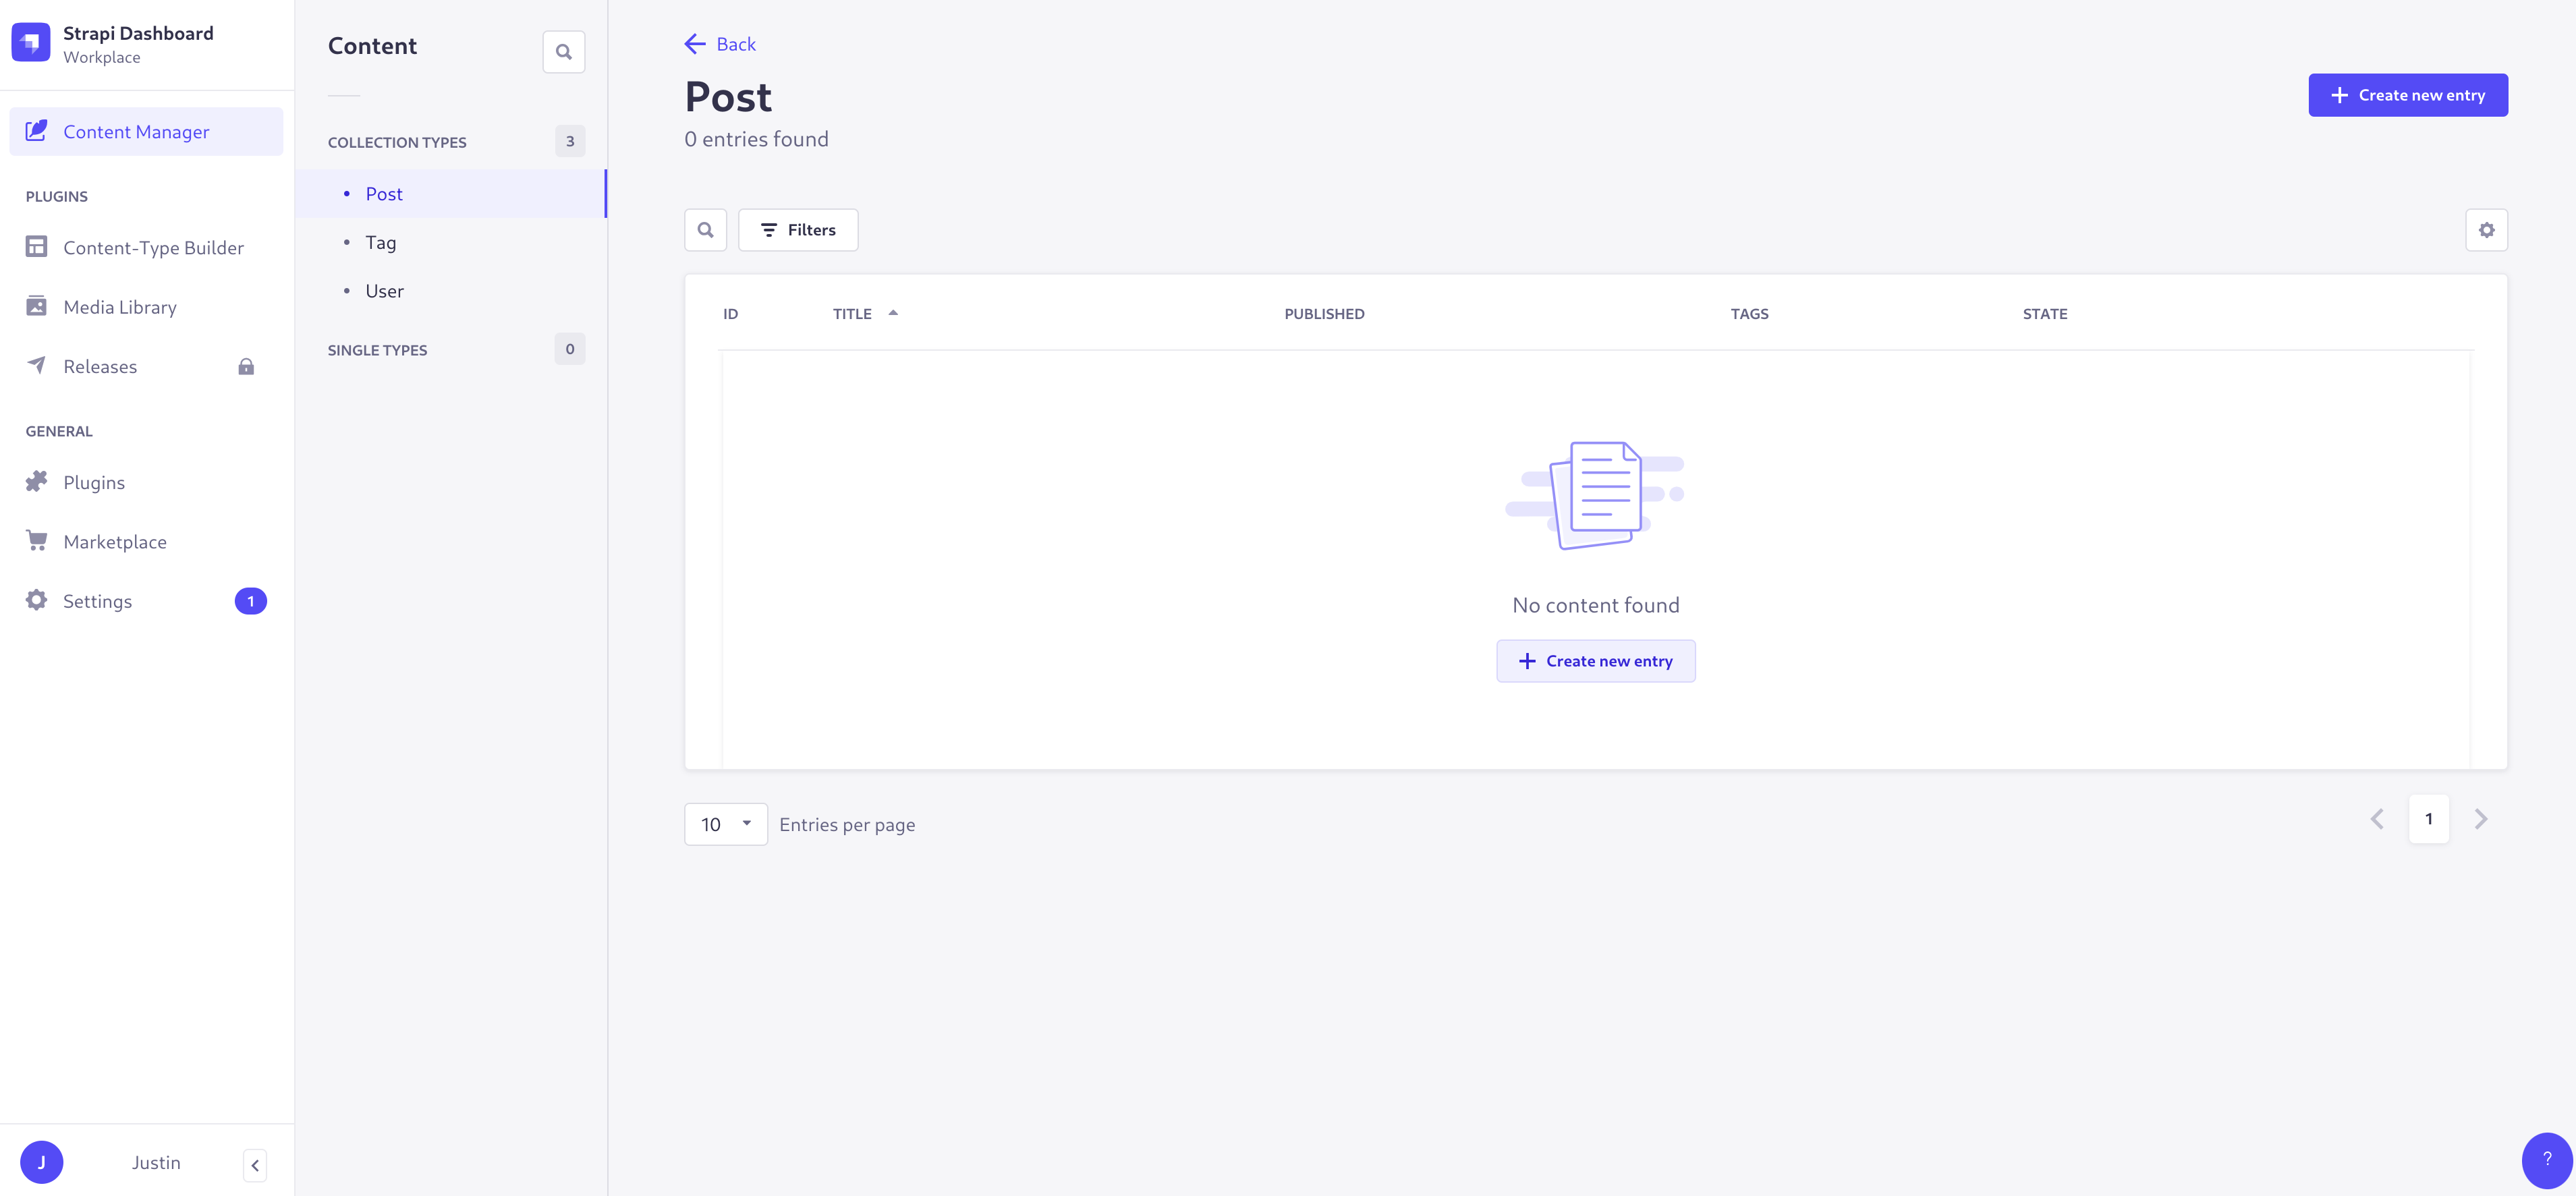
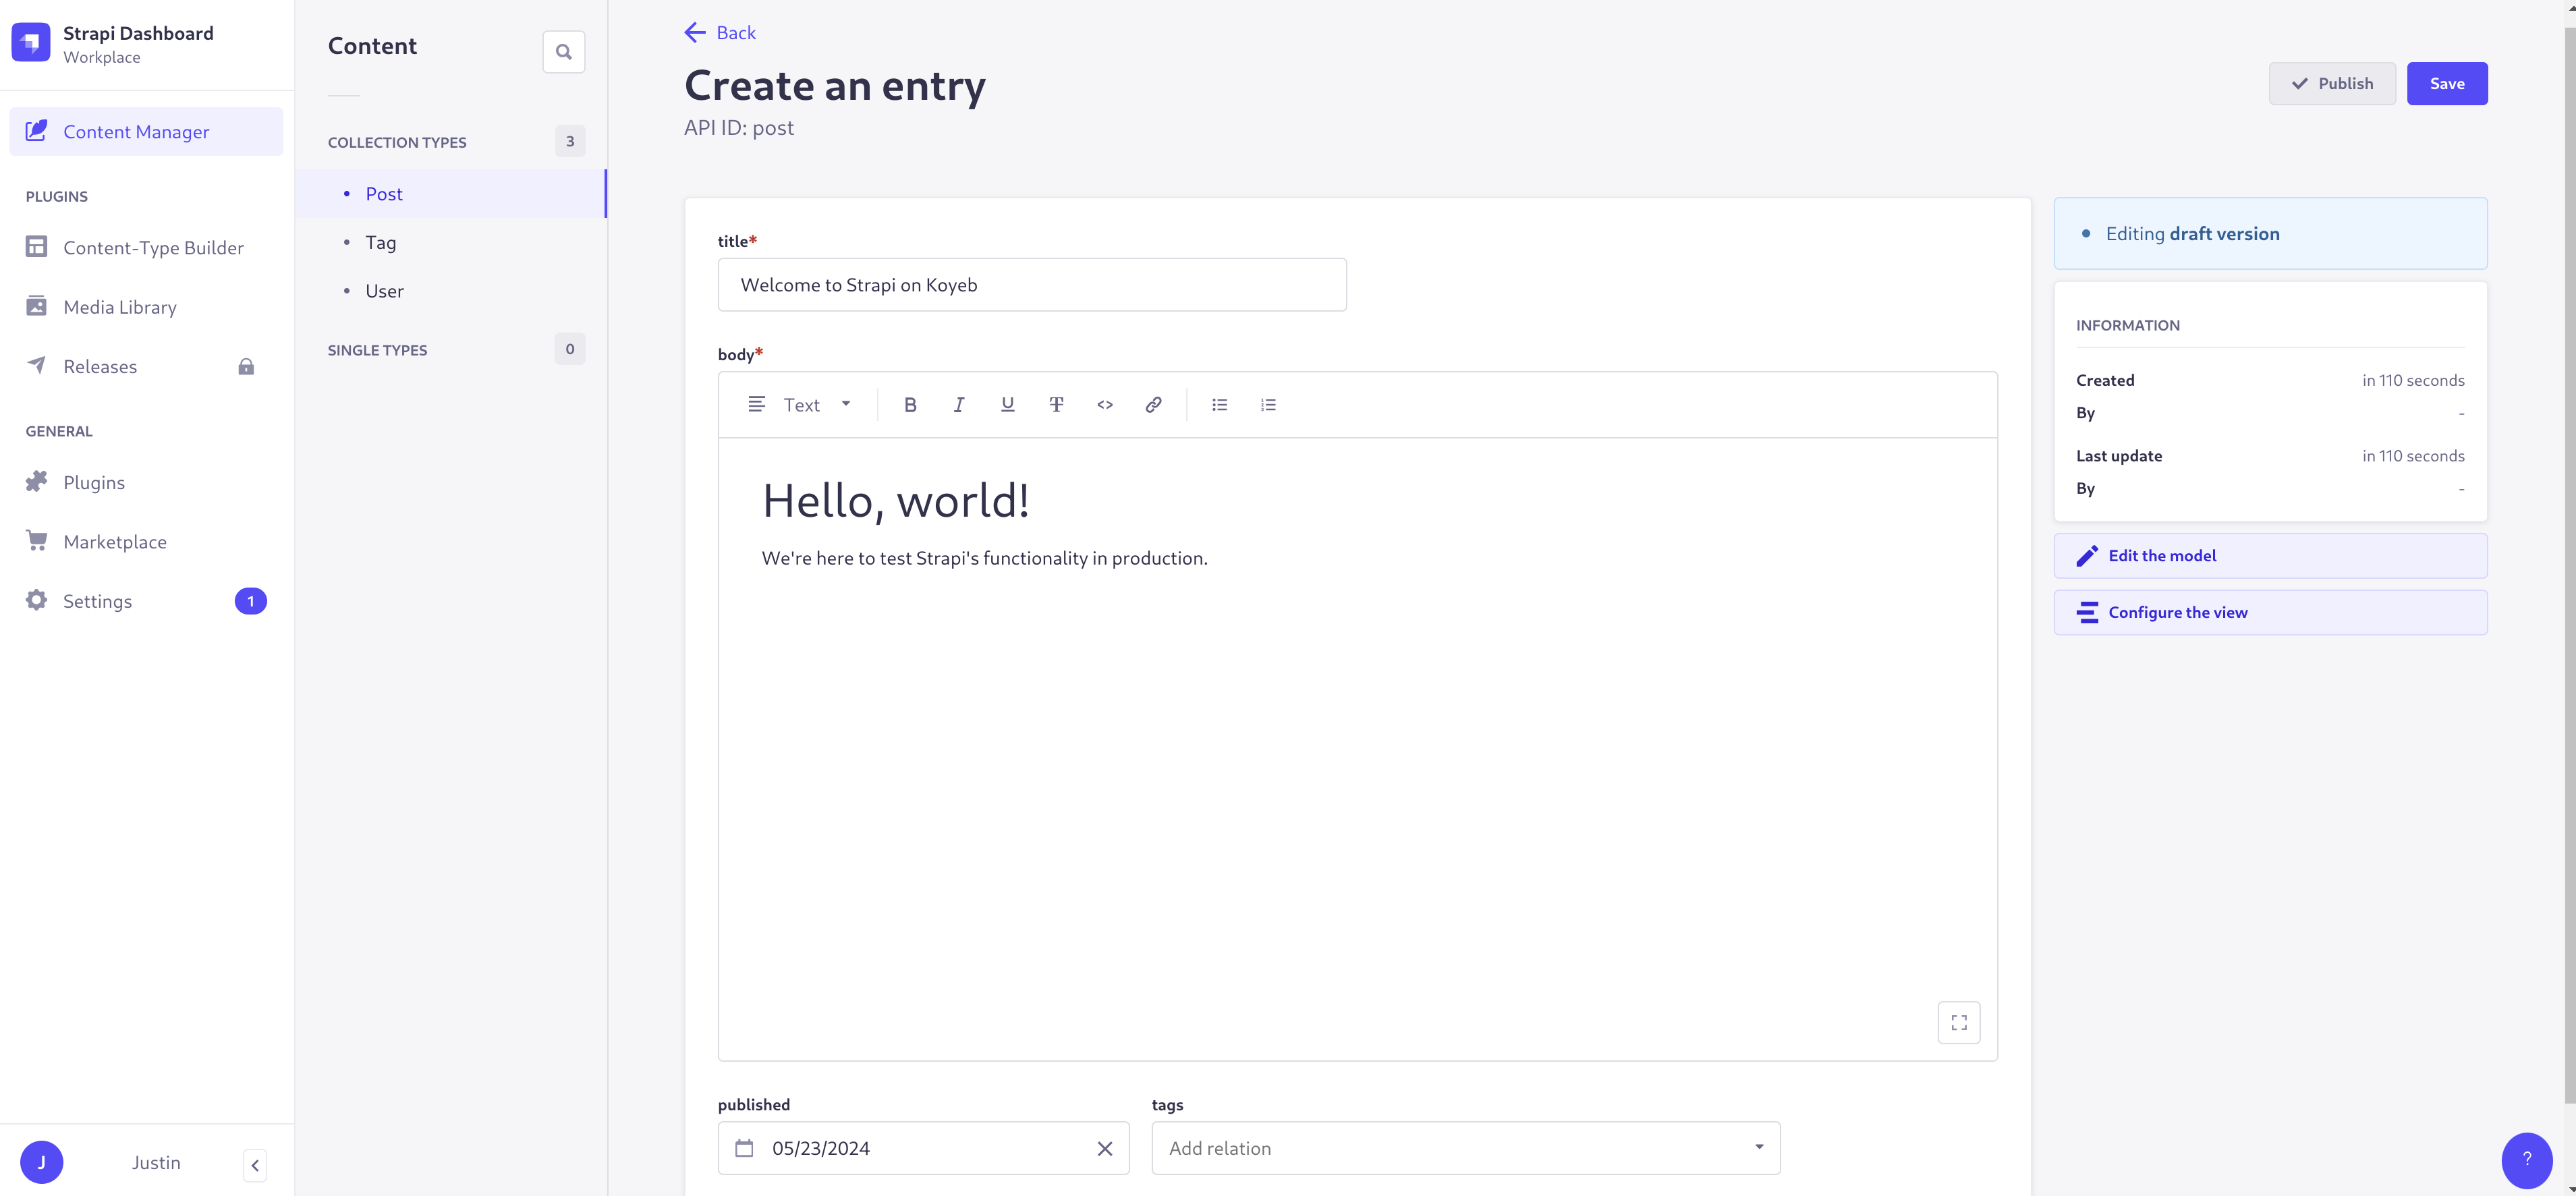
Click **Create new entry** on the **Posts** type to create your first post. Fill out the **title** and **body** fields and choose a **published** date:
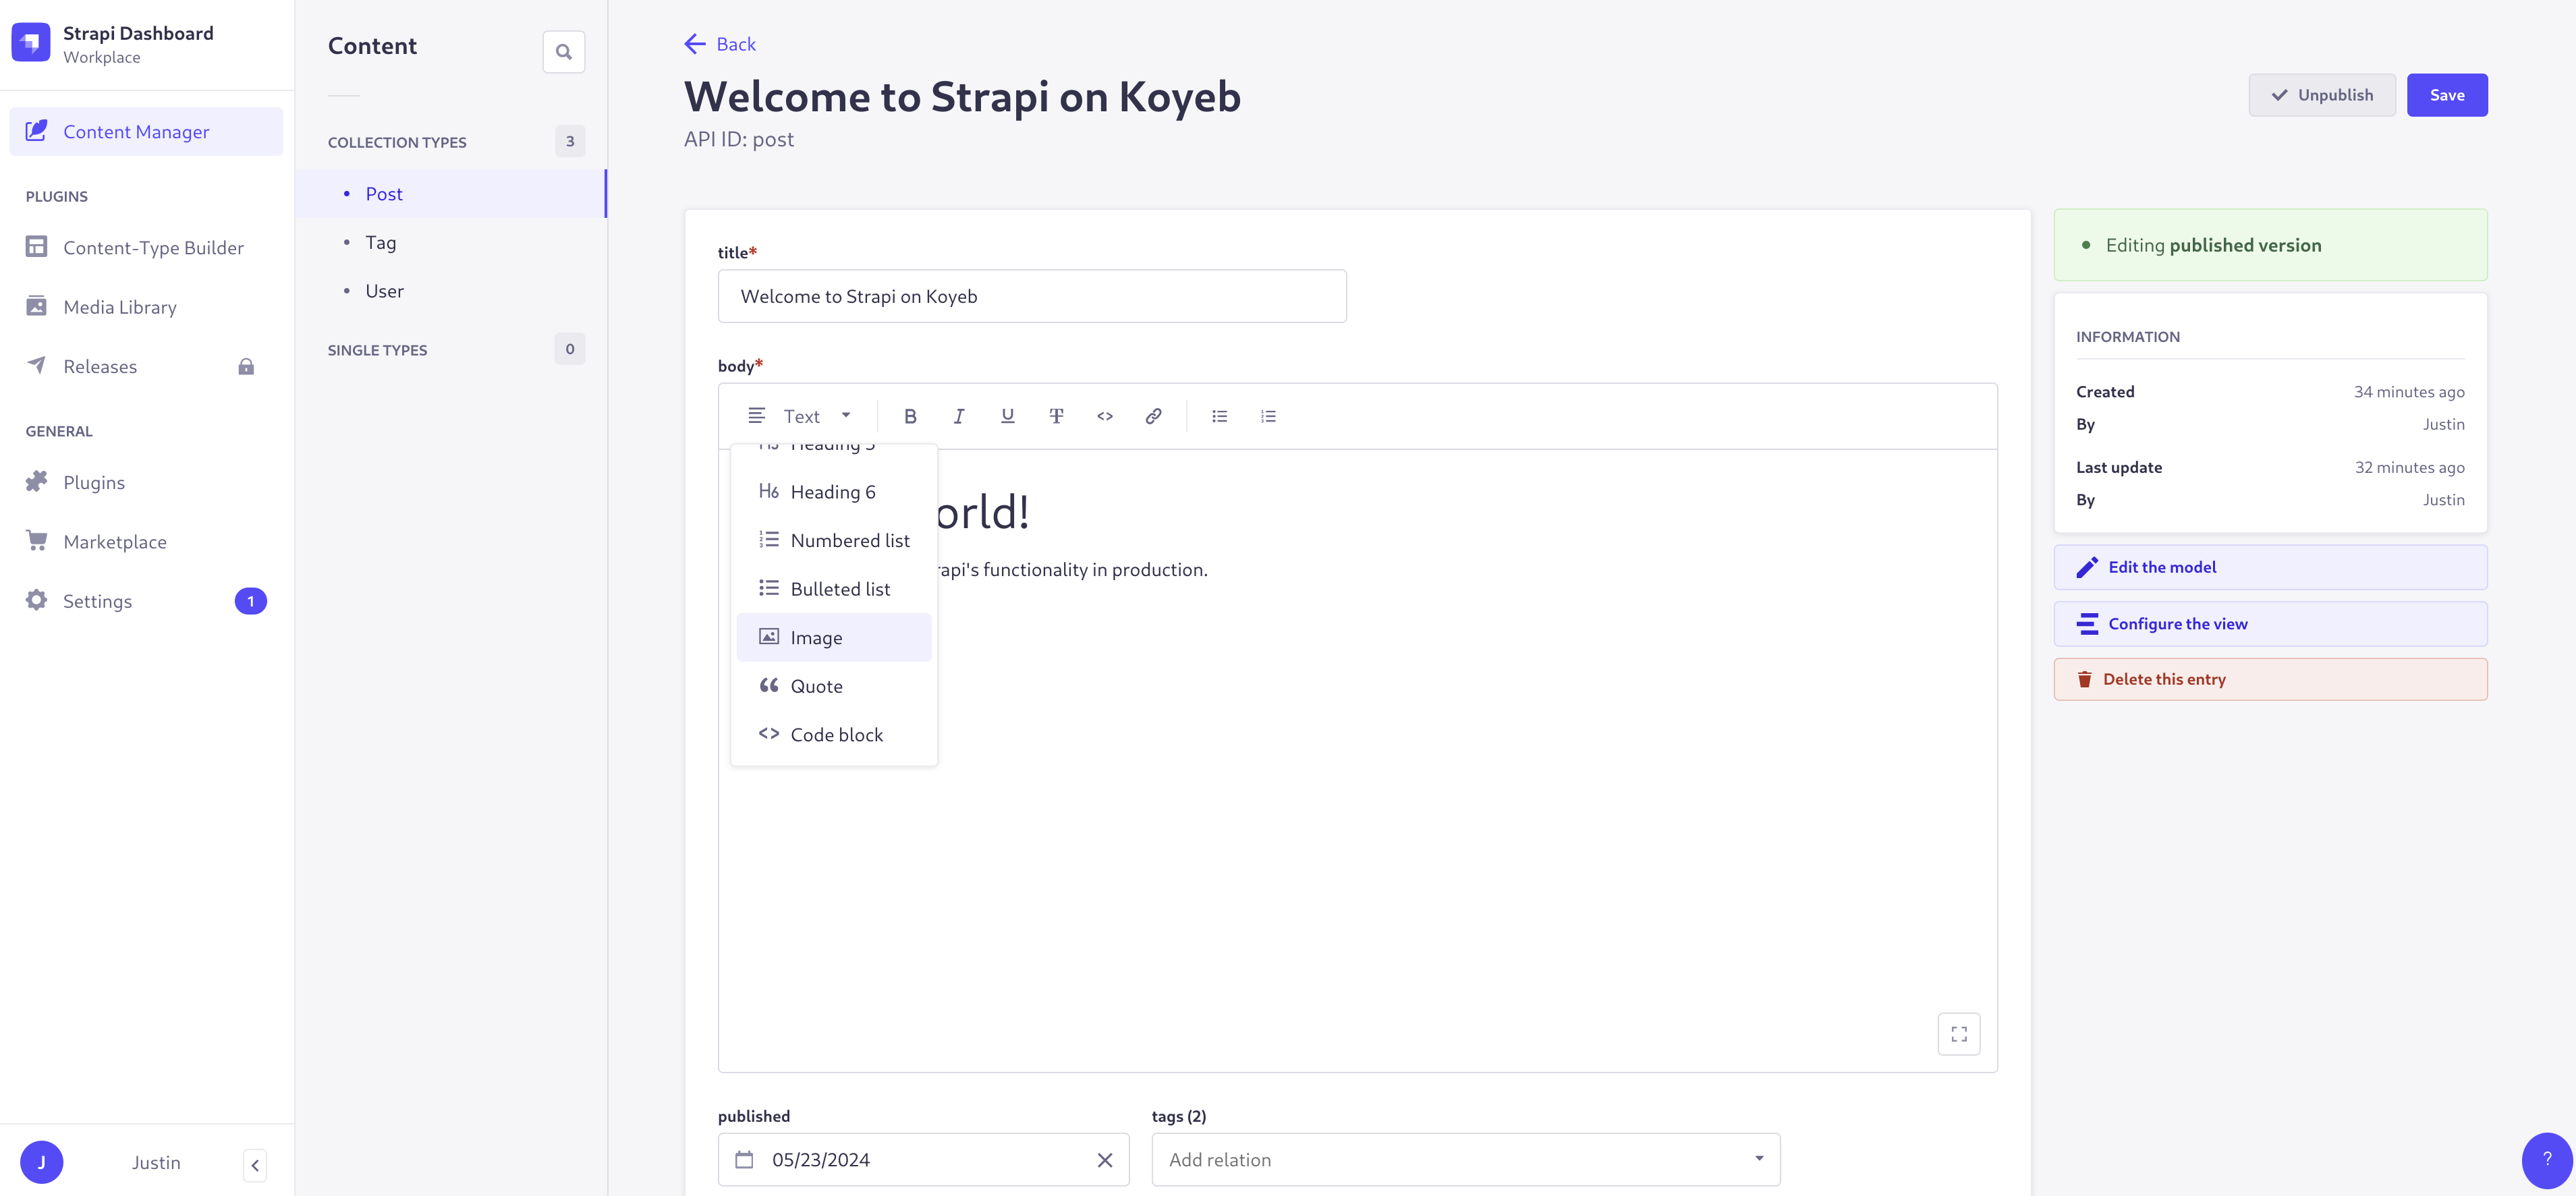
In the body, change the input type to **Image** to insert an image:
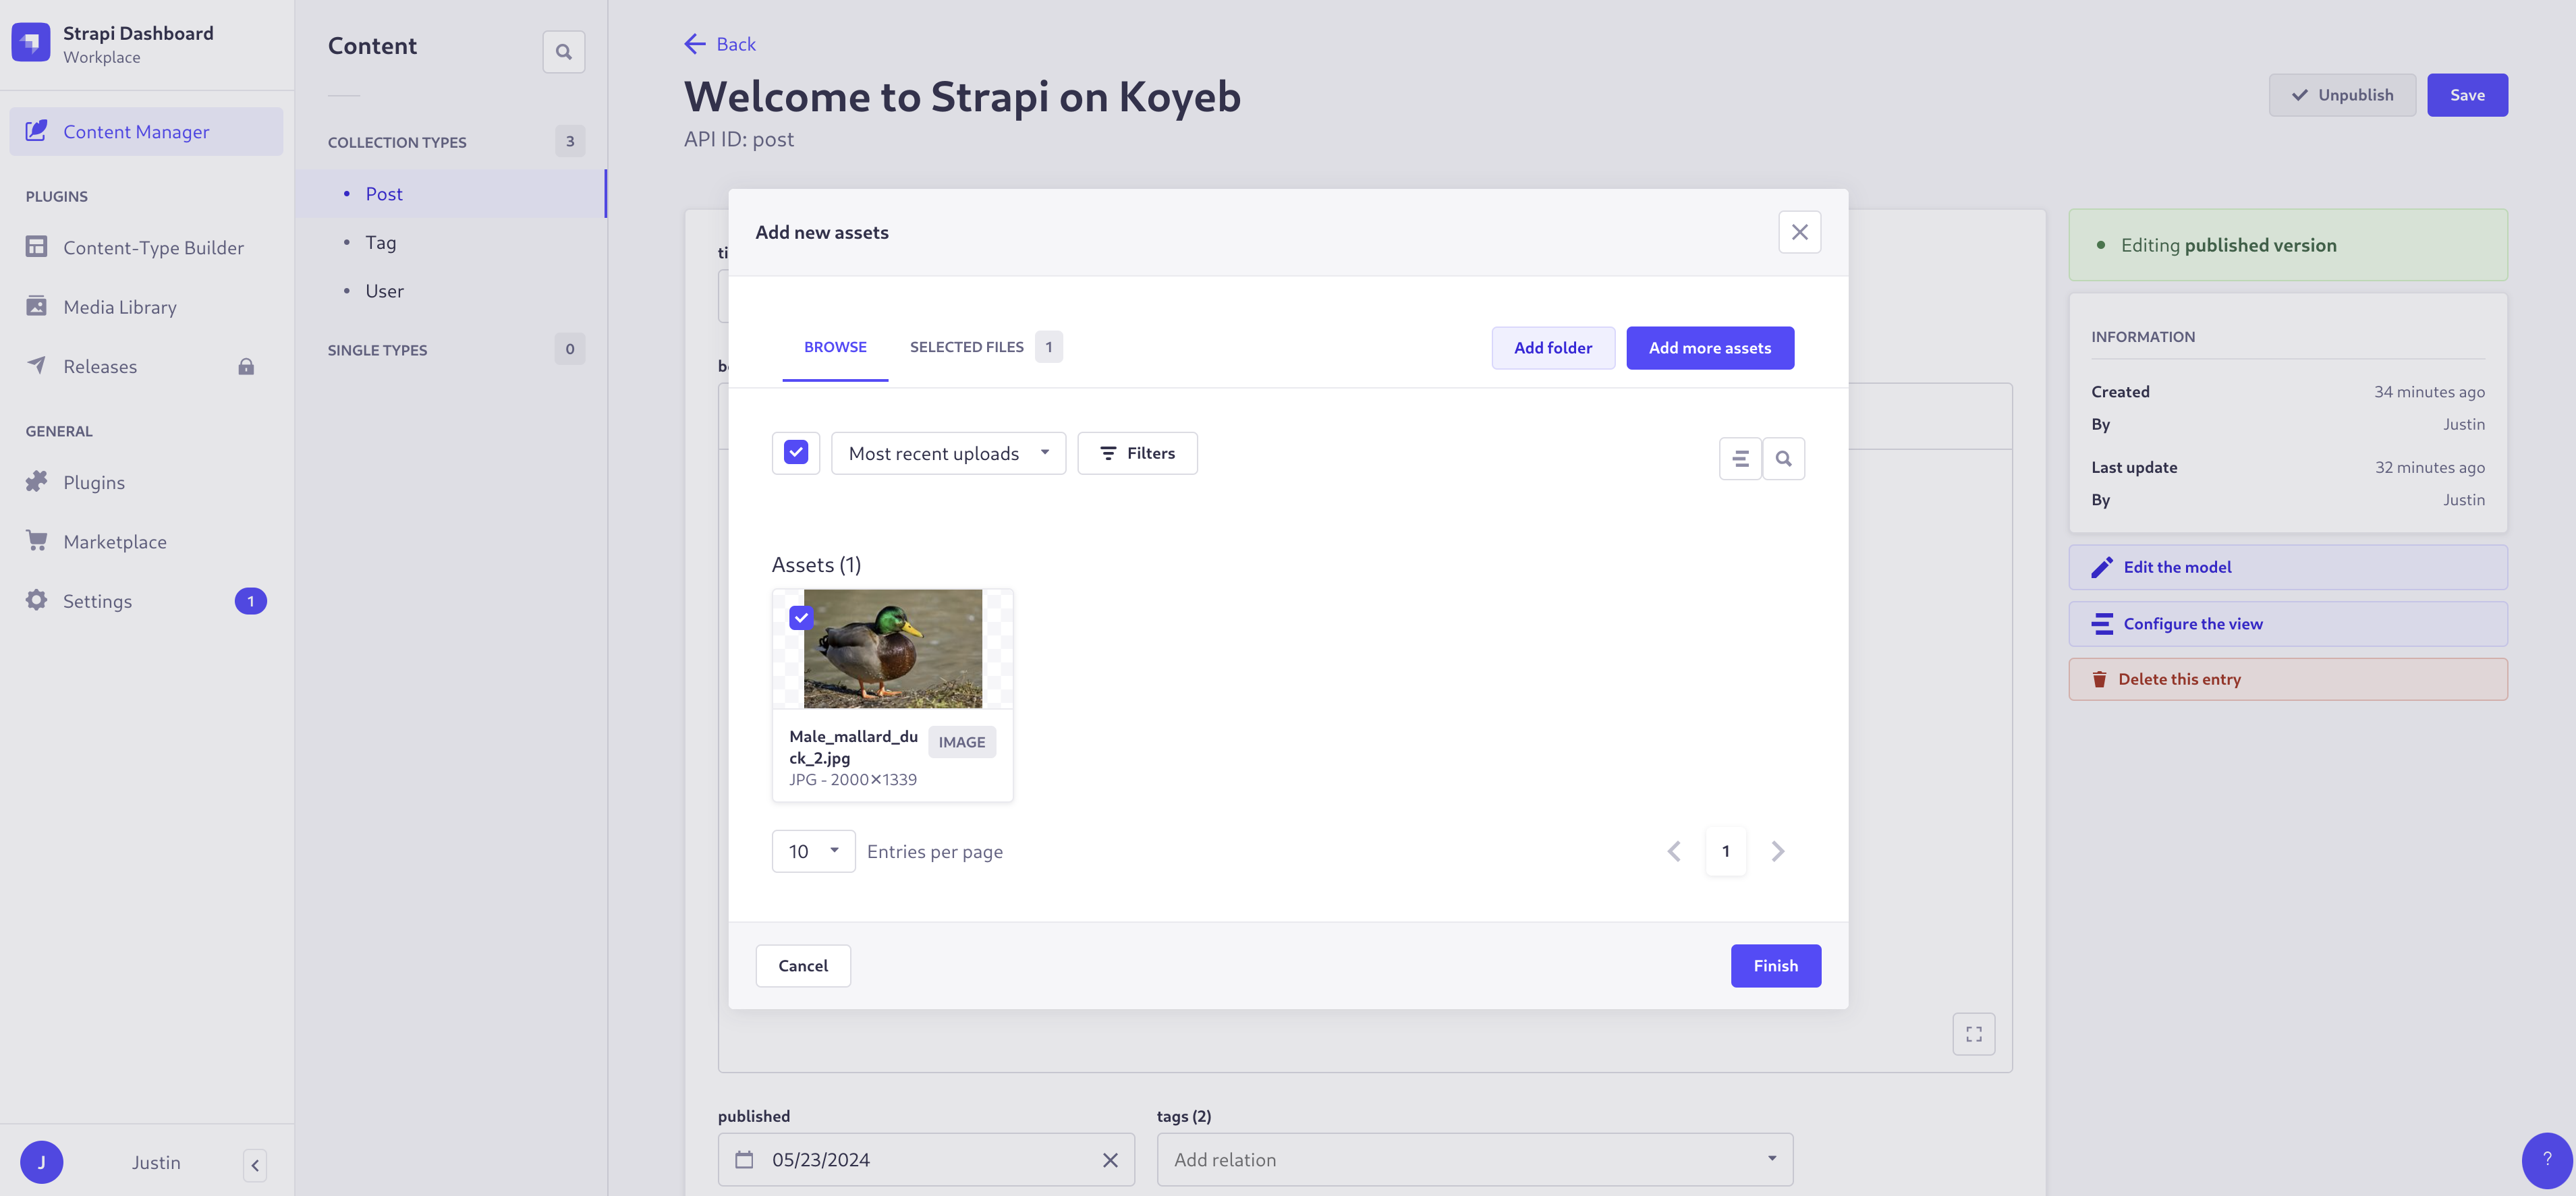
Select the image you uploaded and click **Finish** to insert it into the post:
Click **Save** when finished. Click **Publish** to set the post as public.
Next, click the **Tag** collection type and click **Create new entry**. Create a few tags and link them to the post you just created in the **posts** field:
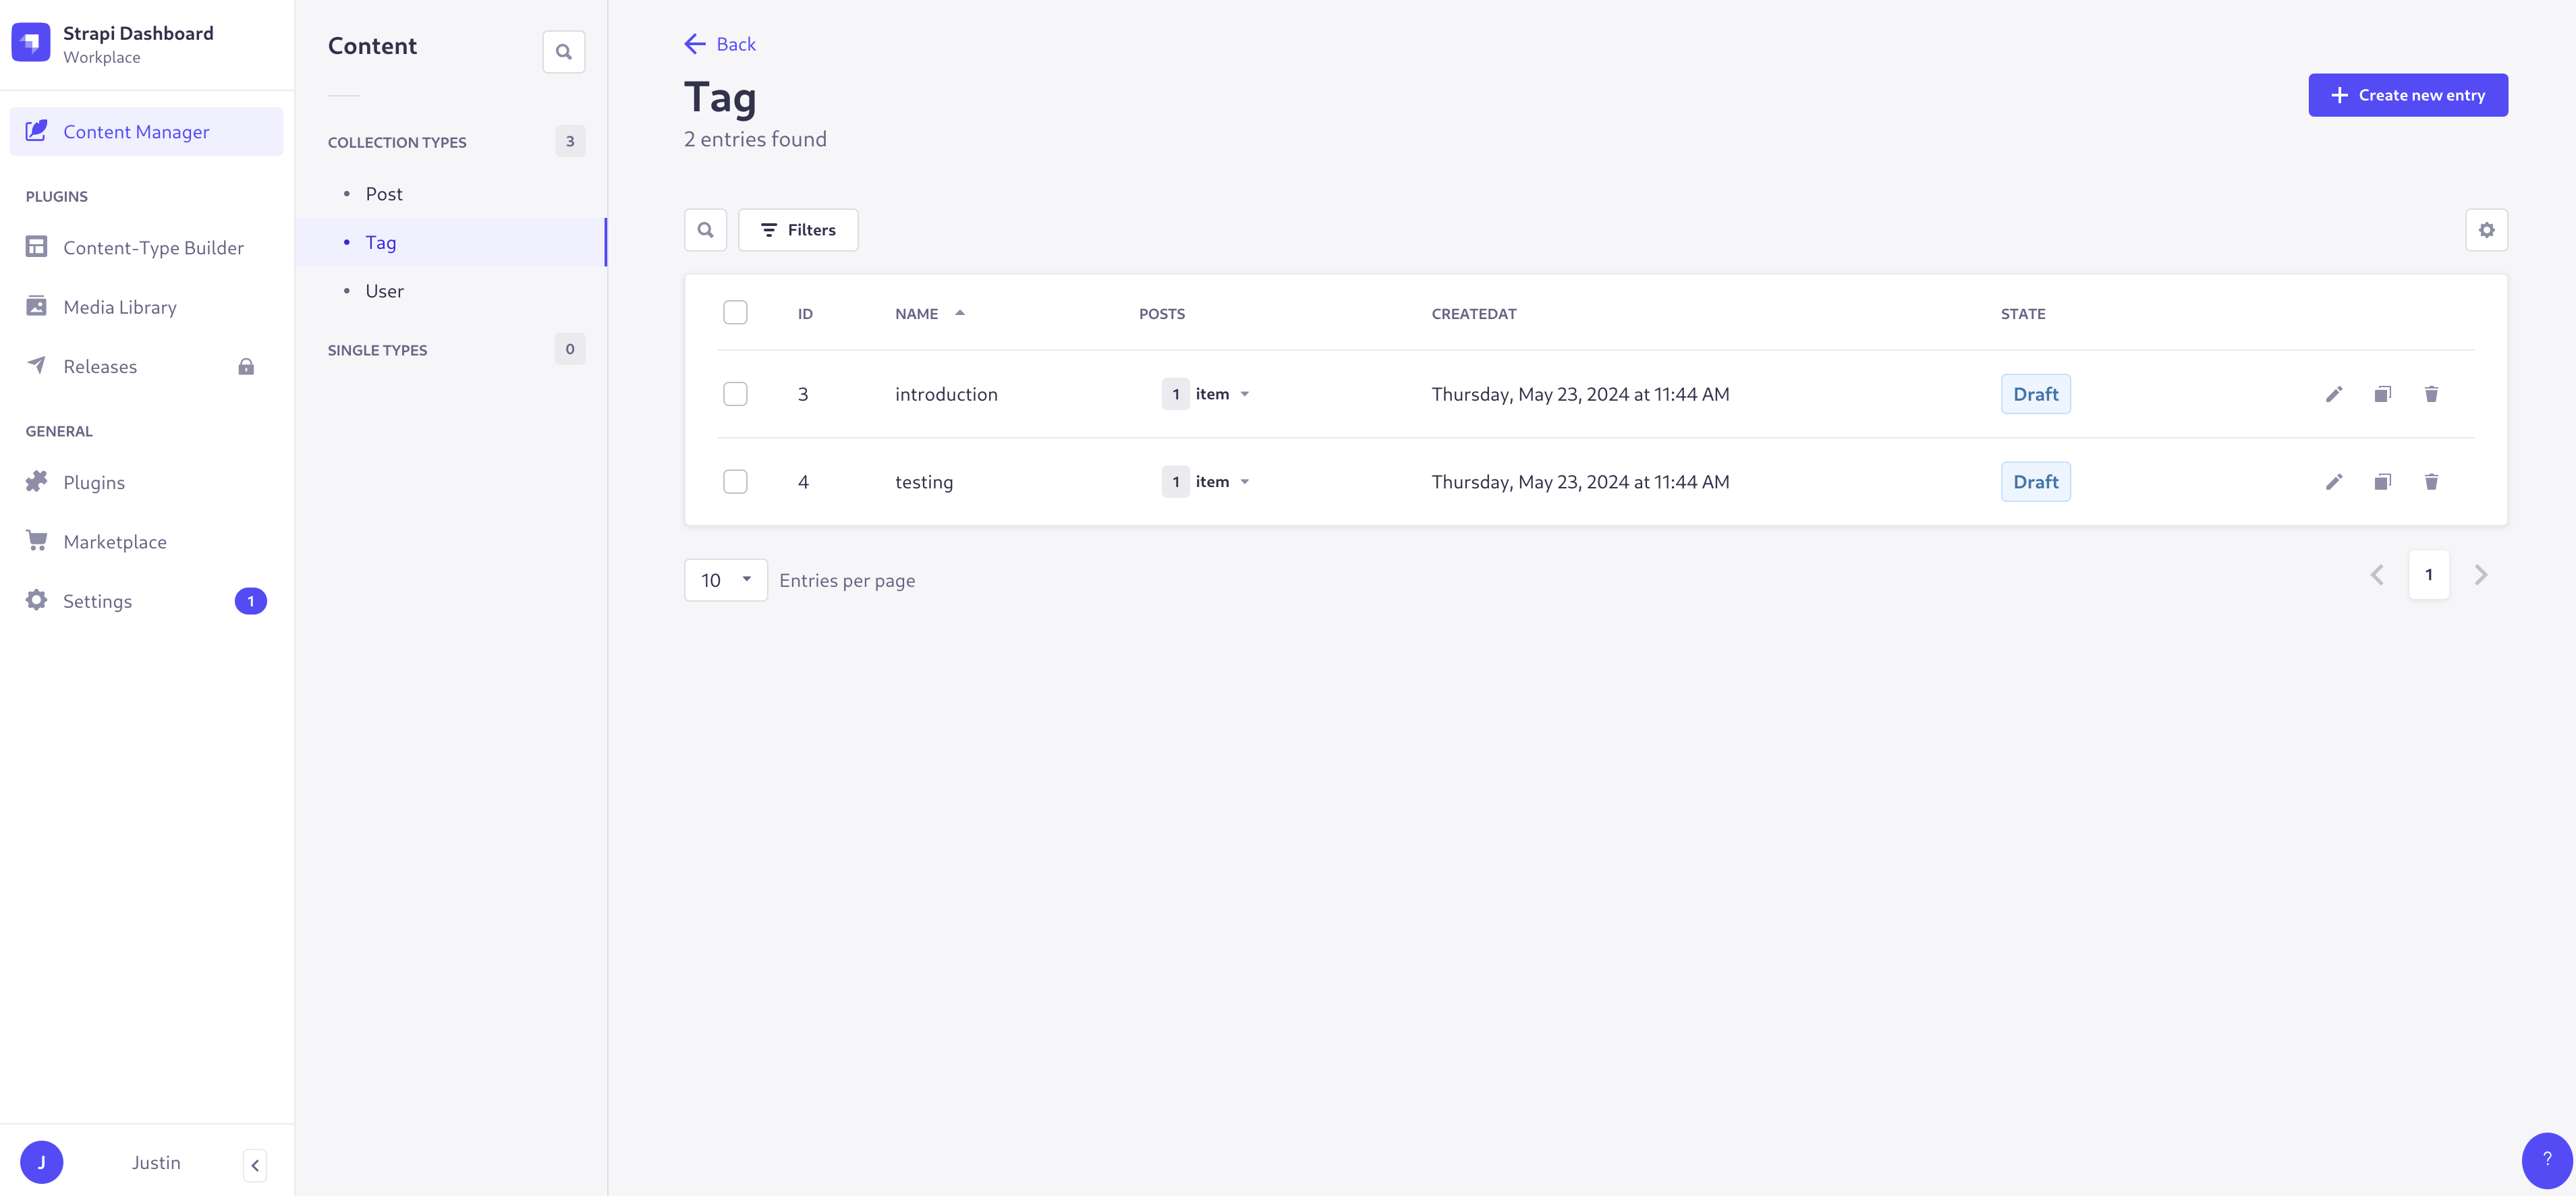
Select the tags you created and click **Publish** to make them live.
### Make content available to unauthenticated users
The post and tags we created are now marked as published. However, they are still not accessible to unauthenticated users. To fix this, click **Settings** in the left-hand navigation menu and then select **Roles** under the **Users & Permissions Plugin** heading (not the one under "Administration Panel"):
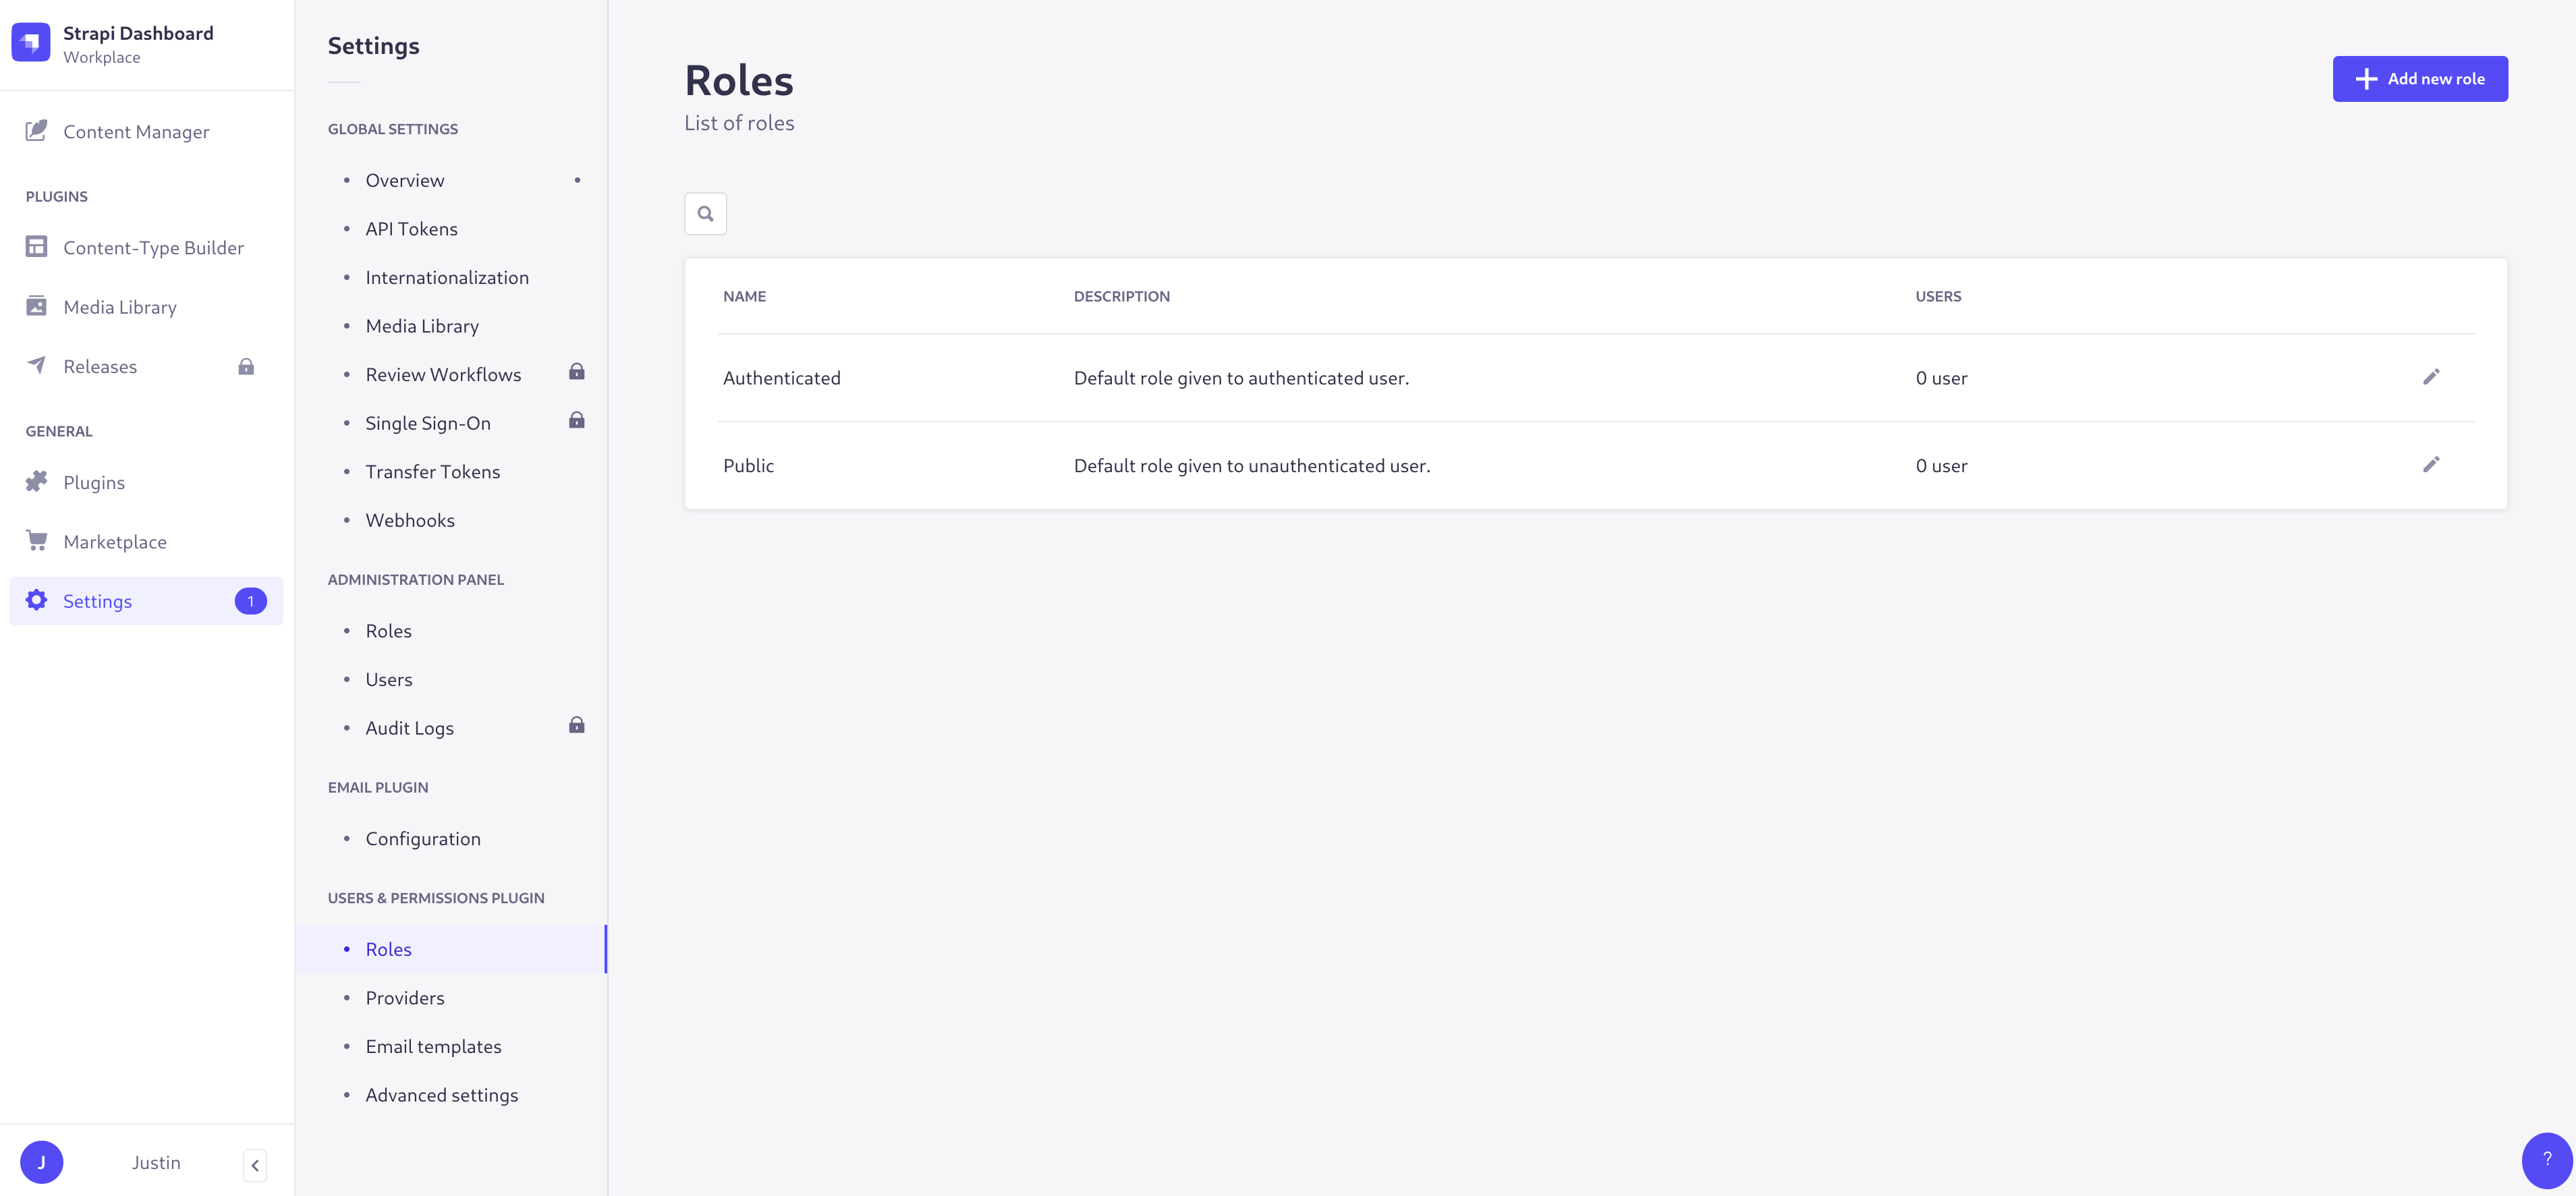
Click **Public** to modify the permissions of unauthenticated users.
On the next page, check the `find` and `findOne` boxes in both the **Post** and **Tag** sections:
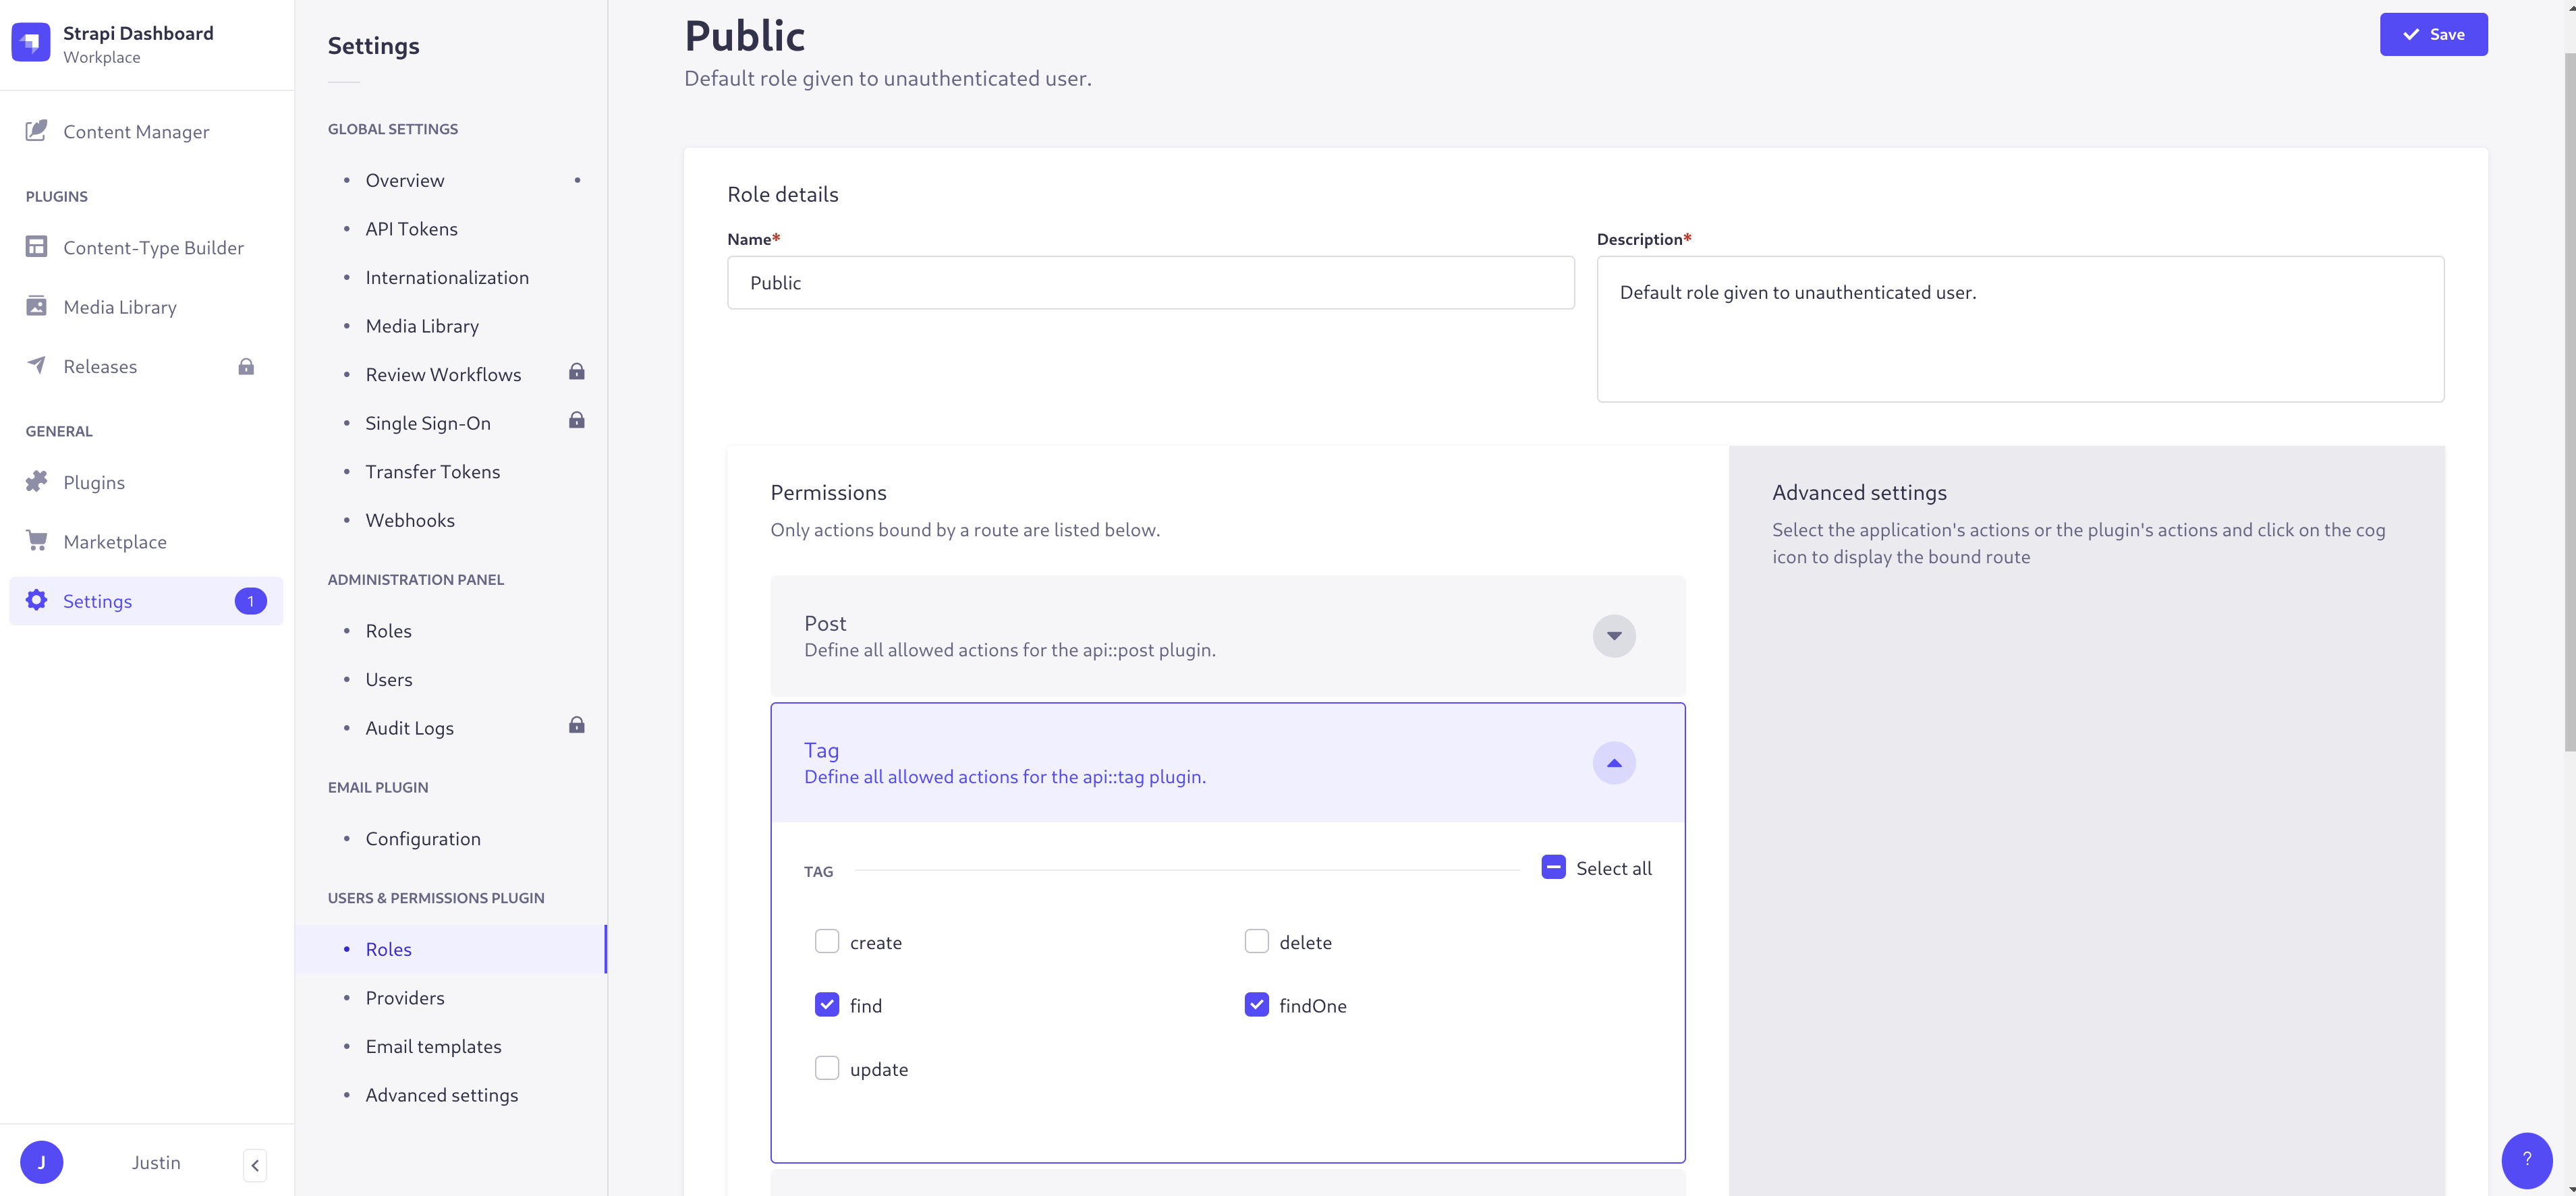
Click **Save** when you are finished.
### Access the content
Now, we can test that we're able to access the published content.
In your browser, visit your Strapi instance's URL with the `/api/posts` path. If you click the "Pretty-print" box, you should see something like this:
```json
{
"data": [
{
"id": 3,
"attributes": {
"title": "Welcome to Strapi on Koyeb",
"body": [
{
"type": "heading",
"level": 2,
"children": [
{
"text": "Hello, world!",
"type": "text"
}
]
},
{
"type": "paragraph",
"children": [
{
"text": "We're here to test Strapi's functionality in production.",
"type": "text"
}
]
},
{
"type": "image",
"image": {
. . .
"provider": "aws-s3",
"createdAt": "2024-05-23T11:12:26.709Z",
"updatedAt": "2024-05-23T11:12:26.709Z",
"previewUrl": null,
"alternativeText": "Male_mallard_duck_2.jpg",
"provider_metadata": null
},
"children": [
{
"text": "",
"type": "text"
}
]
}
],
"published": "2024-05-23",
"createdAt": "2024-05-23T10:40:17.098Z",
"updatedAt": "2024-05-23T11:19:15.033Z",
"publishedAt": "2024-05-23T10:42:32.172Z"
}
}
],
"meta": {
"pagination": {
"page": 1,
"pageSize": 25,
"pageCount": 1,
"total": 1
}
}
}
Check other URLs paths like /api/posts/1, /api/tags, /api/tags/1. They should similarly display the content we created in the admin interface.
To display content along with their relations, append ?populate=* to the end of the URL. For instance, for /api/posts/1?populate=* you might see something like this:
{
  "data": {
    "id": 3,
    "attributes": {

      . . .

      "tags": {
        "data": [
          {
            "id": 3,
            "attributes": {
              "name": "introduction",
              "createdAt": "2024-05-23T10:44:09.682Z",
              "updatedAt": "2024-05-23T10:44:09.682Z",
              "publishedAt": "2024-05-23T10:45:39.201Z"
            }
          },
          {
            "id": 4,
            "attributes": {
              "name": "testing",
              "createdAt": "2024-05-23T10:44:24.658Z",
              "updatedAt": "2024-05-23T10:44:24.658Z",
              "publishedAt": "2024-05-23T10:45:39.201Z"
            }
          }
        ]
      }
    }
  },
  "meta": {

  }
}
This confirms that the content is available through the API as expected. Your Strapi instance is fully up and running in production.
Conclusion
In this guide, we showed how to set up a Strapi instance in production to serve as the backend for contnet-focused sites and applications. We created a new Strapi instance locally to establish content types and add object storage configuration. We set up an external PostgreSQL database and a Backblaze B2 object storage bucket to hold our data and assets. Afterwards, we deployed a production instance of Strapi and tested content creation, publication, permissions, and access.
Next, you may wish to connect your Strapi instance with a frontend app that can consume the content through its APIs. The Strapi documentation includes information on integrating with many frontends and configuring advanced functionality. Use this basic configuration as a starting point to build the content-driven site perfect for your needs.

Top comments (0)