
Make a fully functional real estate app in minutes
Become the next Trulia, Zillow or Airbnb by releasing a real estate app for both iOS and Android in minutes. Download our functional React Native Real Estate app template, integrated with Firebase Backend, to literally launch your own app today. Crafted with extreme attention to details, this beautiful app template written in React Native represents the best way to jumpstart the development of your new mobile app.
This tutorial is the third chapter of our implementation of an Airbnb clone in React Native. In previous chapters, we’ve successfully implemented a Home Screen UI and Login Screen UI:
- AirBnB Clone with React Native Part 1: Home Screen UI
- AirBnB Clone with React Native Part 2: Login Screen UI
In part 3, we’re going to continue from where we left off in part two. Here, we’ll implement email authentication in our Login Screen UI. Basically, we’re going to integrate a user authentication mechanism with Firebase. For simplicity, we’re going to use basic Email and Password authentication first.
If you’re interested in working with other authentication mechanisms, check out my tutorial on implementing Facebook login on Android with React Native.
Let’s get started!
Setting up the Firebase package
First, we need to set up our Firebase package. For this, we’re going to install the react-native-firebase package into our project, which simply integrates Firebase into our project. It facilitates a light-weight layer on-top of the native Firebase SDKs while mirroring the Firebase Web SDK’s API as closely as possible. To install this package, we can use yarn or npm:
Using yarn:
Using npm:
After using the above commands in our project console, we should have successfully integrated the react-native-firebase package. But we can’t forget to link the package with the react-native package itself. To do this, we can use the following commands:
Install Pod Requirement
After linking the required package, we need to install the required Pod. For this, we need to open ios/Podfile and add a line after target 'airbnbclone' do, as shown in the example below:
After adding the line, we need to run the command:
pod install
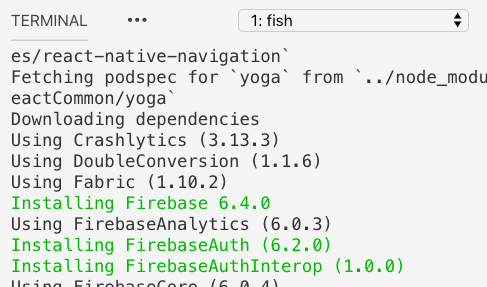
As we can see, we have successfully installed the required Pod.
Initializing Firebase
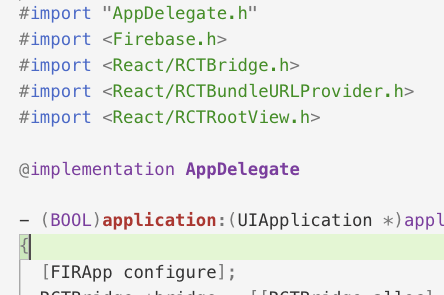
Now its time to initialize Firebase into our project. To initialize the native SDK in our app, we’ll need to add the following piece of codes to our ios/airbnbclone/AppDelegate.m file.
At the top of the file, we need to add:
At the beginning of the didFinishLaunchingWithOptions:(NSDictionary *)launchOptions method, we need to add the following line:
The pieces of codes mentioned above are shown in the IDE screenshot below:
The next revolution in mobile development? Machine learning. Don’t miss out on the latest from this emerging intersection. Sign up for weekly updates from our crew of mobile devs and machine learners.
Adding GoogleService-Info
Lastly, we need to head over to the Firebase console and create a new app named ‘ airbnbclone’. The Firebase app is shown in the screenshot provided below:
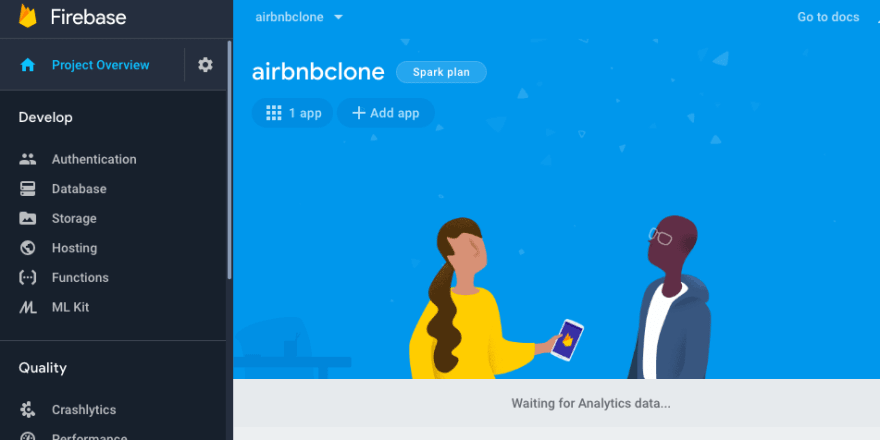
In the screenshot, we can see the ‘Add app’ button. Click on this and choose iOS and add your iOS bundle ID, as shown in the screenshot below:
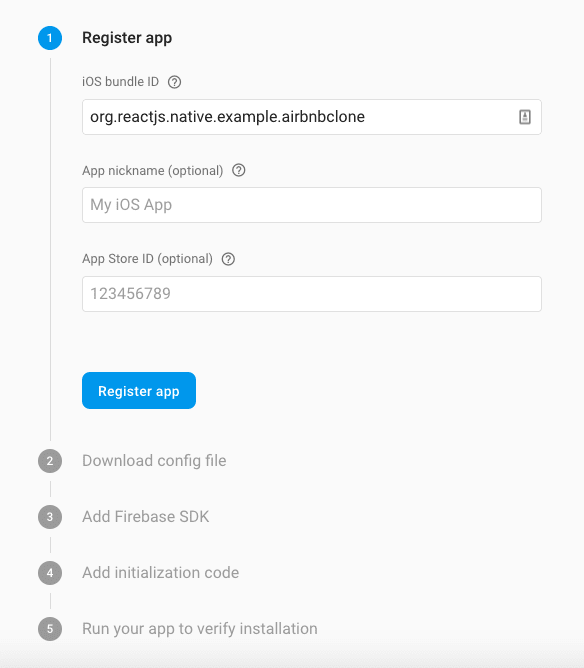
If we want to know our bundle ID, we need to open the ios folder in Xcode where we’ll see bundle identifiers, from which we need to grab the value. The Xcode project with bundle identifiers is shown in the screenshot below:

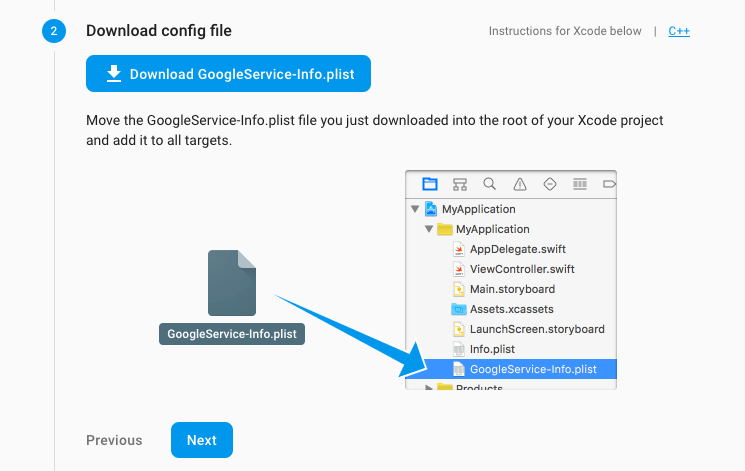
Then, we need to click on ‘Register app’ in Firebase and follow the instructions given below:
Finally, after everything is done, we need to run the command:
This will run the iOS emulator in our project.
Getting data in the form and setting it up to state
Now, let's move on to the coding part of the tutorial. Here, we need to create two functions— handleEmailChange and handlePasswordChange to handle email and password inputs as shown in the code snippet below:
And then, we need to add these functions to an onChangeText event.
Next, we need to add an onChangeText event to the child component. For this, we need to open src/components/form/InputField.js and add a few new props: inputType, customStyle, and onChangeText:
Then, we need to add an onChangeText event to the child component, also passing new props, as shown in the code snippet below:
After this, we successfully pass the form data to our parent component.
Handling the Firebase login
Now it’s time to handle the Firebase login with authentication. In order to activate Firebase in our project, we simply need to call a function named Login() and paste the code given below:
Then we add a trigger to our Login() function. We do this by using a button and passing the event to the child component, which is the same process we did before:
Next we need to add the event to the child component, as well:
Trying it out
We’ve successfully integrated Firebase login authentication to our login screen UI. Now we can test it out by changing the functions to signInWithEmailAndPassword for the login and createUserWithEmailAndPassword to create a new user. First, let's try creating a user:


Now that we have a new user, we switch the function to signInWithEmailAndPassword and try the login function. We can see the result of our login attempts in the console simulations below:

Our test works! We’ve now successfully completed and tested the implementation of Firebase authentication in our AirBnB clone login screen.
Conclusion
In part 3, we’ve learned how to set up the react-native-firebase package and link it to the react-native package in our project. Also, we learned how to activate Firebase in React Native and how to get the form value as a child component.
Lastly, we followed an in-depth, step-by-step guide to using Firebase as an email authentication mechanism. The overall code for this tutorial is available on GitHub. In the next chapter, we’re going to continue working with basic form validation.
Resource
Authenticate with Firebase using Password-Based Accounts using Javascript | Firebase
The next revolution in mobile development? Machine learning. Learn more about how Fritz can help you build a new kind of mobile experience.
Editor’s Note:Join Heartbeat on Slack and follow us onTwitter andLinkedIn for all the latest content, news, and more in machine learning, mobile development, and where the two intersect.

Top comments (0)