
Welcome to Part-2 of the series. In this part , we will create Authentication to login to our App.
We will use google OAuth authentication. So, head over to https://console.developers.google.com/
Once, you logging with your google account you will find a Dashboard already open. This happens when you already have some project using Google APIs. I already have some projects. So, i need to click near the top left corner on the Project name(Mine is vue-calendar). It will open a pop-up in which i will click on NEW PROJECT button.
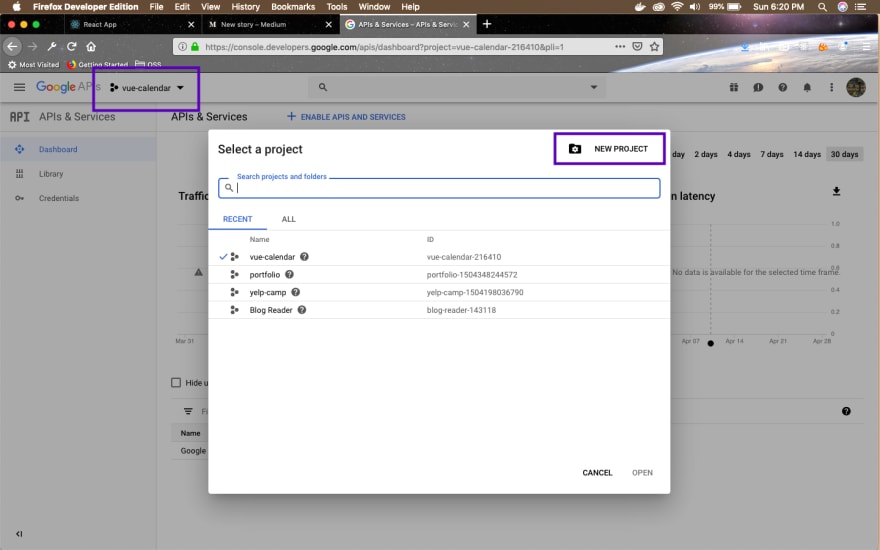 Already have projects
If you are new you will directly get the NEW PROJECT button. In the next page as in screenshot below, enter an appropriate name for the project and click the CREATE button.
 Create Streamer Project
It will take 30–40 seconds to create your project. You will be taken to the first screen and an notification will come, near the top-right corner.
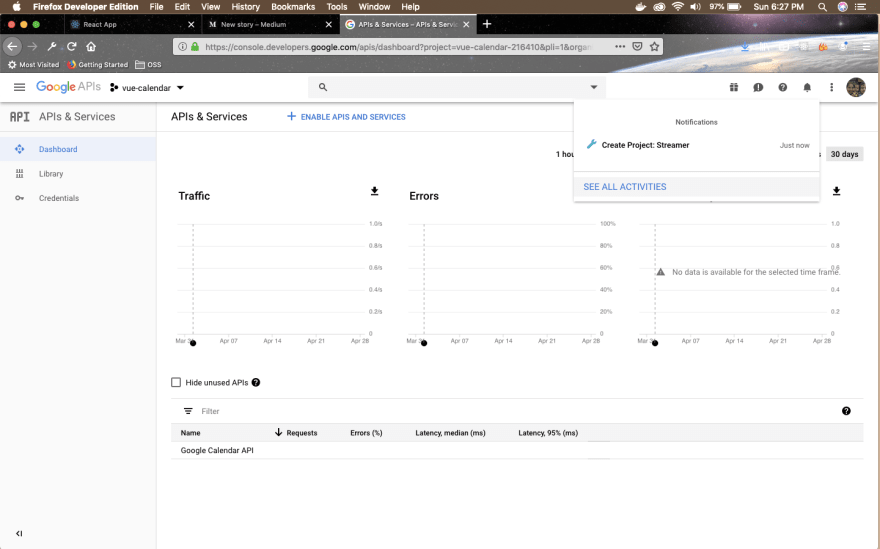 Streamer Successfully created
Again click onear the top left corner on the Project name(Mine is vue-calendar). It will open a pop-up in which click the newly created project. Mine is Streamer.
 Streamer
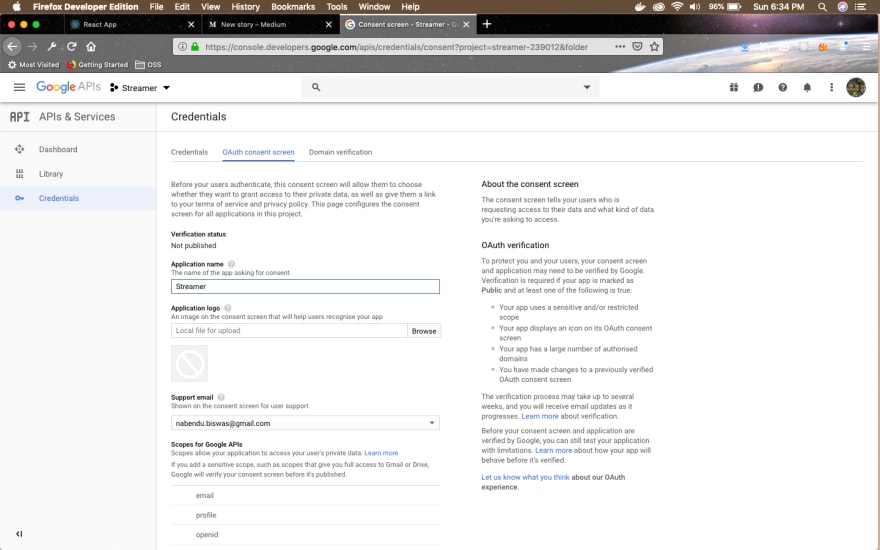
In the App Screen now Click on the tab Credentials and the OAuth consent screen
 Consent Screen
Here give the Application name and scroll down and click on SAVE button.
 Application Name Again
On Saving, you will be taken to Credentials page within Credentials tab, as in screenshot below. Click on Create Credentials select bar. In it click on OAuth Client ID.
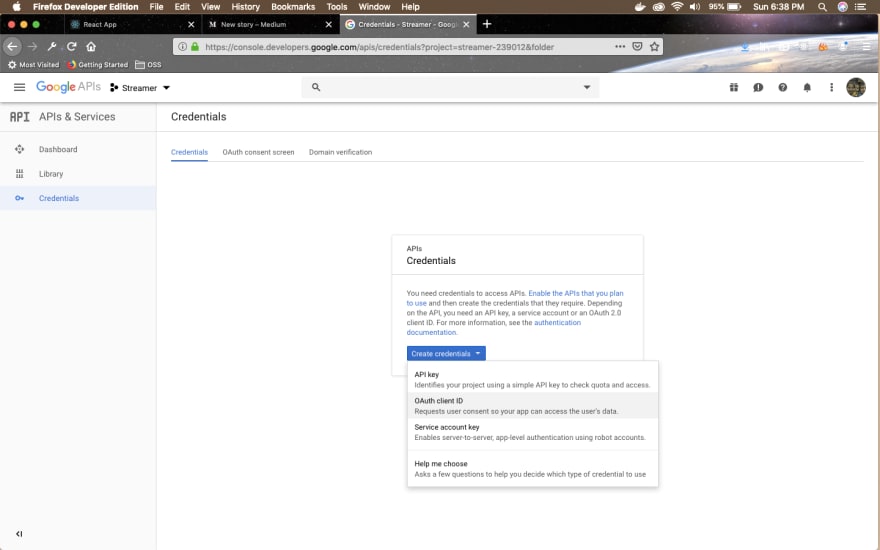 Credentials
In the next page, select Web application radio button and then, in Authorised JavaScript origins give http://localhost:3000. Then click on Create button.
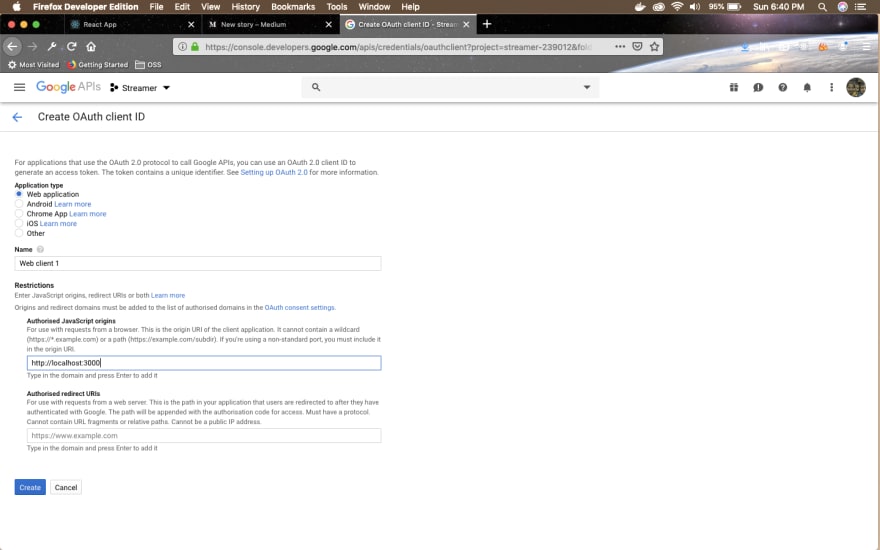 localhost
A pop-up OAuth client will show your client ID and client secret. We are going to use the client ID, so copy it somewhere.
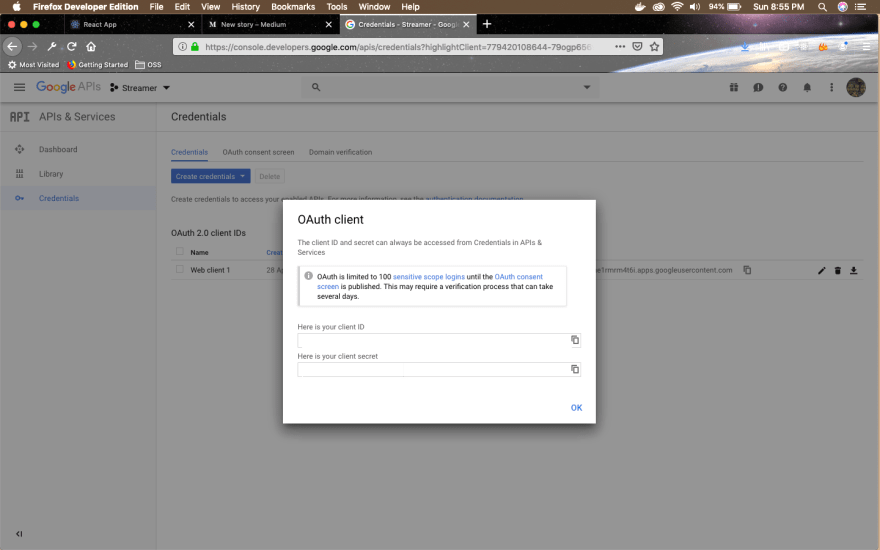 OAuth Client
We will now include the Google Auth in our project. The first step is to go to our index.html file and inside the
tag add the following line.<script src="https://apis.google.com/js/api.js"></script>
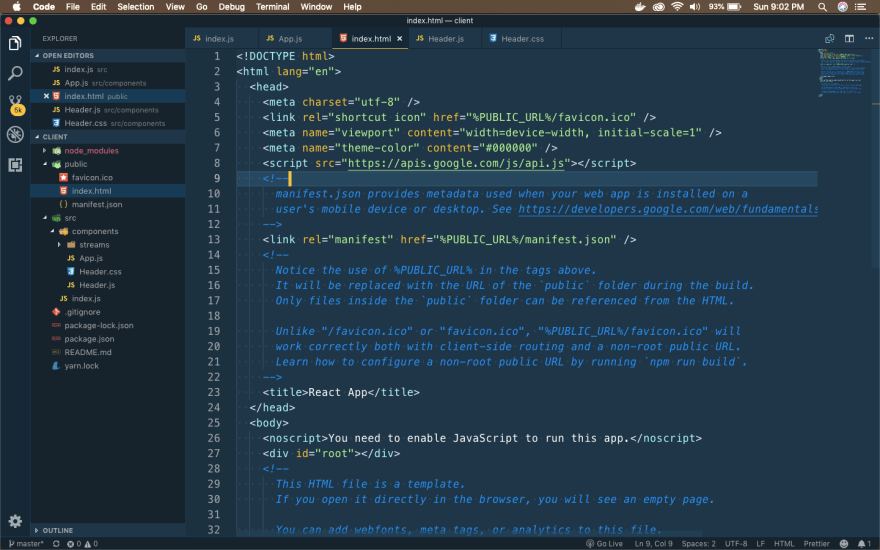 index.html
Next create a GoogleAuth.js file inside our components directory. Add the below code in it. Most of it is standard code, require to add Google Authentication to our web-app. In place of YOUR_CLIENT_ID, put the client id you got while creating the app.
import React, { Component } from 'react'

class GoogleAuth extends Component {
  componentDidMount() {
    window.gapi.load('client:auth2', () => {
        window.gapi.client.init({
            clientId: '**YOUR_CLIENT_ID**',
            scope: 'email'
        });
    });
  }

  render() {
    return (
      <div>
        Google Auth
      </div>
    )
  }
}

export default GoogleAuth;
Next, we add this to our Header.js file.
import React from 'react';
import { Link } from 'react-router-dom';
import './Header.css';
import GoogleAuth from './GoogleAuth';

const Header = () => {
    return (
        <div className="headerWrapper">
            <div className="headerTitle">
                <Link to="/">Stremer</Link>
            </div>
            <div className="otherLinks">
                <Link to="/">All Streams</Link>
                <GoogleAuth />
            </div>
        </div>
    )
}

export default Header;
We also, need more styles in our Header.css file to show it correctly.
...
...
.otherLinks {
    font-size: 16px;
    font-weight: bold;
    line-height: 1.25;
    color: #333333;
    display: flex;
    align-items:center;
}

.otherLinks > * {
    margin-left:4px;
}
Now, we will move back to GoogleAuth.js file to complete our Authentication logic. Here, we have attached .then() to our API call google. Then we are getting the authentication instance.
We have a local state variable isSignedIn, which we are setting to the get(). It returns true if the user is signed in or false if not.
We are also adding a event listener to isSignedIn and if it fires, then changing state again.
import React, { Component } from 'react';
import './GoogleAuth.css';

class GoogleAuth extends Component {
  state = { isSignedIn: null };

  componentDidMount() {
    window.gapi.load('client:auth2', () => {
        window.gapi.client.init({
            clientId: 'YOUR_CLIENT_ID',
            scope: 'email'
        }).then(() => {
            this.auth = window.gapi.auth2.getAuthInstance();
            this.setState({ isSignedIn: this.auth.isSignedIn.get()    });
            this.auth.isSignedIn.listen(this.onAuthChange);
        });
    });
  }

  onAuthChange = () => {
    this.setState({ isSignedIn: this.auth.isSignedIn.get() });
  }

  onSignInClick = () => {
      this.auth.signIn();
  }

  onSignOutClick = () => {
    this.auth.signOut();
  }

  renderAuthButton() {
      if(this.state.isSignedIn === null){
          return null;
      } else if(this.state.isSignedIn) {
        return (
            <button
                className="loginBtn loginBtn--google"
                onClick={this.onSignOutClick}>Log Out</button>
        )
      } else {
        return (
            <button
                className="loginBtn loginBtn--google"
                onClick={this.onSignInClick}>Login With Google</button>
        )
      }
  }

  render() {
    return (
      <div>
        {this.renderAuthButton()}
      </div>
    )
  }
}

export default GoogleAuth;
Finally, there is a function renderAuthButton() which checks the status of the user and shows a Signout or a Signin button.
Finally, added a GoogleAuth.css file in components directory, which contains the button styles. These i have found from this codepen.
.loginBtn {
    box-sizing: border-box;
    position: relative;
    /* width: 13em;  - apply for fixed size */
    margin: 0.2em;
    padding: 0 15px 0 46px;
    border: none;
    text-align: left;
    line-height: 34px;
    white-space: nowrap;
    border-radius: 0.2em;
    font-size: 16px;
    color: #FFF;
  }
  .loginBtn:before {
    content: "";
    box-sizing: border-box;
    position: absolute;
    top: 0;
    left: 0;
    width: 34px;
    height: 100%;
  }
  .loginBtn:focus {
    outline: none;
  }
  .loginBtn:active {
    box-shadow: inset 0 0 0 32px rgba(0,0,0,0.1);
  }

  .loginBtn--google {
    /*font-family: "Roboto", Roboto, arial, sans-serif;*/
    background: #DD4B39;
  }
  .loginBtn--google:before {
    border-right: #BB3F30 1px solid;
    background: url('https://s3-us-west-2.amazonaws.com/s.cdpn.io/14082/icon_google.png') 6px 6px no-repeat;
  }
  .loginBtn--google:hover,
  .loginBtn--google:focus {
    background: #E74B37;
  }
The result is a beautiful and fully working Login with Google button.
 Login with Google
Click on it and it will ask for your approval to authenticate.
 Approval to authenticate
Approve it and you will be logged in and will get the Logout button.
 Logout button
Next, we will move some of our authentication logic to Redux. So, open your terminal and stop the running instance of server. Then install redux and react-redux to your project.
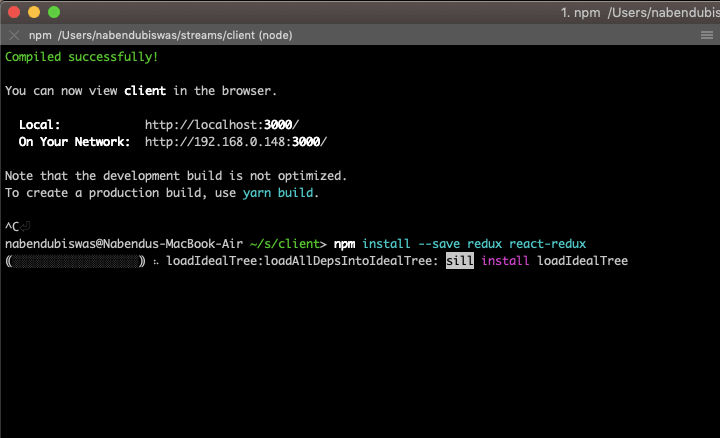 redux and react-redux
Once, it installs sucessfully do an npm start again to start your local server.
Let’s start with our redux setup. Inside our src directory add actions and reducers folders. Inside each of them add an index.js file. In the index.js file for reducer, add the boilerplate code. We will soon replace it with real reducers.
 Additions for Redux
Next, open out root index.js and change it to include redux. The changes are highlighted in bold.
import React from 'react';
import ReactDOM from 'react-dom';
import App from './components/App';
import { Provider } from 'react-redux';
import { createStore } from 'redux';
import reducers from './reducers';

const store = createStore(reducers);

ReactDOM.render(
<Provider store={store}><App /></Provider>, document.querySelector('#root'));
Now, let’s create our action creator. Goto the index.js file in actions folder and create two simple functions.
export const signIn = () => {
    return {
        type: 'SIGN_IN'
    };
};

export const signOut = () => {
    return {
        type: 'SIGN_OUT'
    };
};
Now, we will use these functions in our GoogleAuth.js by using react-redux connect. Do, these changes in GoogleAuth.js.We are changing the function onAuthChange() and adding stuff to connect to Redux actions.
import React, { Component } from 'react';
import './GoogleAuth.css';
import { connect } from 'react-redux';
import { signIn, signOut } from '../actions';

class GoogleAuth extends Component {
  state = { isSignedIn: null };

…
…
  onAuthChange = (isSignedIn) => {
    if(isSignedIn) {
      this.props.signIn();
    } else {
      this.props.signOut();
    }
  }

  onSignInClick = () => {
      this.auth.signIn();
  }

…

  render() {
    return (
      <div>
        {this.renderAuthButton()}
      </div>
    )
  }
}

export default connect(null, { signIn, signOut })(GoogleAuth);
Now, time to create the reducer. Create a file authReducer.js inside folder reducers. Type the below code inside it. Here, we are taking the SIGN_IN and SIGN_OUT ,which we got from action creator and updating our state.
const INITIAL_STATE = {
    isSignedIn: null
};

export default (state = INITIAL_STATE, action) => {
    switch(action.type) {
        case 'SIGN_IN' :
            return {...state, isSignedIn: true};
        case 'SIGN_OUT':
            return {...state, isSignedIn: false};
        default:
            return state;
    }
}
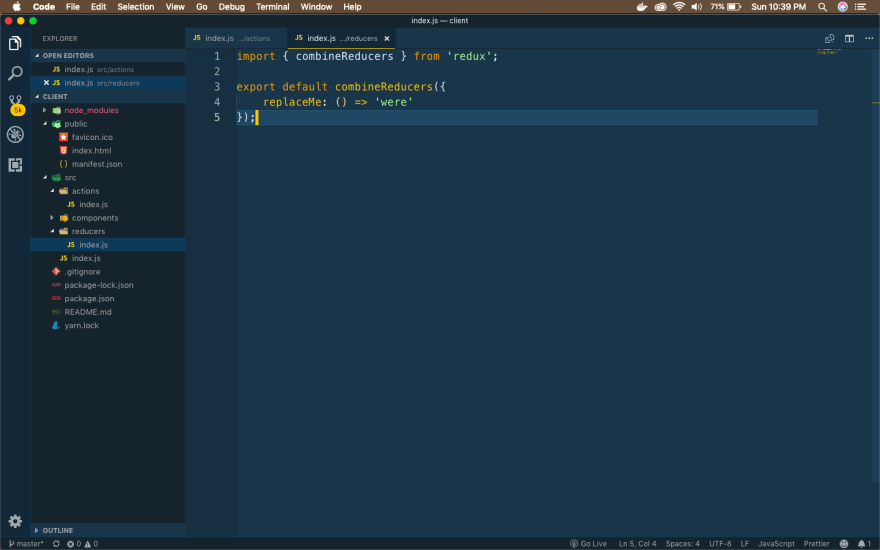
Next, hook this reducer to our combine reducer at index.js in reducers folder.
import { combineReducers } from 'redux';
import authReducer from './authReducer';

export default combineReducers({
    auth: authReducer
});
Now, time to hook these changes in GoogleAuth.js file and get rid of local state logic completely. The changes are marked in bold. We basically introduced mapStateToProps to get the auth from our reducer.
import React, { Component } from 'react';
import './GoogleAuth.css';
import { connect } from 'react-redux';
import { signIn, signOut } from '../actions';

class GoogleAuth extends Component {

  componentDidMount() {
    window.gapi.load('client:auth2', () => {
        window.gapi.client.init({
            clientId: ‘YOUR_CLIENT_ID’,
            scope: 'email'
        }).then(() => {
            this.auth = window.gapi.auth2.getAuthInstance();
            this.onAuthChange(this.auth.isSignedIn.get());
            this.auth.isSignedIn.listen(this.onAuthChange);
        });
    });
  }

  onAuthChange = (isSignedIn) => {
    if(isSignedIn) {
      this.props.signIn();
    } else {
      this.props.signOut();
    }
  }

  onSignInClick = () => {
      this.auth.signIn();
  }

  onSignOutClick = () => {
    this.auth.signOut();
  }

  renderAuthButton() {
      if(this.props.isSignedIn === null){
          return null;
      } else if(this.props.isSignedIn) {
        return (
            <button
                className="loginBtn loginBtn--google"
                onClick={this.onSignOutClick}>Log Out</button>
        )
      } else {
        return (
            <button
                className="loginBtn loginBtn--google"
                onClick={this.onSignInClick}>Login With Google</button>
        )
      }
  }

  render() {
    return (
      <div>
        {this.renderAuthButton()}
      </div>
    )
  }
}

const mapStateToProps = (state) => {
  return { isSignedIn: state.auth.isSignedIn };
}

export default connect(mapStateToProps, { signIn, signOut })(GoogleAuth);
We are done with our authentication. You can head over to localhost and check. But we will do a small refactor in our code base. This refactor is generally consider good practice in Redux.
Create a file types.js inside actions folder. Type the following code in it.
export const SIGN_IN = 'SIGN_IN';
export const SIGN_OUT = 'SIGN_OUT';
Now, use these variables instead of strings in authReducer.js
import { SIGN_IN, SIGN_OUT } from '../actions/types';

const INITIAL_STATE = {
    isSignedIn: null
};

export default (state = INITIAL_STATE, action) => {
    switch(action.type) {
        case SIGN_IN :
            return {...state, isSignedIn: true};
        case SIGN_OUT:
            return {...state, isSignedIn: false};
        default:
            return state;
    }
}
Also, do similar change in index.js of actions
import { SIGN_IN, SIGN_OUT } from './types';

export const signIn = () => {
    return {
        type: SIGN_IN
    };
};

export const signOut = () => {
    return {
        type: SIGN_OUT
    };
};
We will be doing one another refactor. This is for later uses. Head over to GoogleAuth.js and change the below in onAuthChange()
onAuthChange = (isSignedIn) => {
    if(isSignedIn) {
      this.props.signIn(this.auth.currentUser.get().getId());
    } else {
      this.props.signOut();
    }
  }
Now, in index.js of actions folder use this userId.
import { SIGN_IN, SIGN_OUT } from './types';

export const signIn = (userId) => {
    return {
        type: SIGN_IN,
        payload: userId
    };
};

export const signOut = () => {
    return {
        type: SIGN_OUT
    };
};
Now, we will do the changes in authReducer.js
import { SIGN_IN, SIGN_OUT } from '../actions/types';

const INITIAL_STATE = {
    isSignedIn: null,
    userId: null
};

export default (state = INITIAL_STATE, action) => {
    switch(action.type) {
        case SIGN_IN :
            return {...state, isSignedIn: true, userId: action.payload};
        case SIGN_OUT:
            return {...state, isSignedIn: false, userId: null};
        default:
            return state;
    }
}
Finally head over to localhost to check if everything is working fine.
 All is well
This concludes our rather long part-2 in which we are done with authentication. You can find the code till here in my github link.

Top comments (0)