
အားလုံးပဲ မင်္ဂလာပါ။
ကျွန်တော် ဒီ tutorial လေးကနေ React Redux App တစ်ခု ဘယ်လိုတည်ဆောက်လဲဆိုတာကို sharing လုပ်ပေးသွားမှာပါ။
သင့်အနေနဲ့ ကိုယ့်ရဲ့စက်ထဲမှာ Nodejs ရယ် npm ရယ် install ထားဖို့လိုပါတယ်။ ကျွန်တော်ကတော့ ဒီ tutorial မှာ yarn ကိုအသုံးပြုသွားမှာ ဖြစ်ပါတယ်။
yarn အတွက် package install ပုံ၊ npm အတွက် package install ပုံပါ ထည့်သွင်းရေးပြသွားမှာပါ။
So, lets get started 👍
create-react-app package ကိုသုံးပြီး React project တစ်ခုကို install လုပ်ရအောင်။
create-react-app package က ကိုယ့်ရဲ့ စက်ထဲမှာ global အနေနဲ့ install လုပ်ထားဖို့လိုပါတယ်။
// terminal
ny-dev@react:~$ npx create-react-app github-client
github-client ဆိုတဲ့ dir လေးတစ်ခုထွက်လာပါလိမ့်မယ်။ ကြိုက်နှစ်သက်ရာ code editor သုံးပြီး ဖွင့်လိုက်ပါ
-/node_modules
-/public
-/src
-.gitignore
-package.json
-README.md
-yarn.lock (or) package-lock.json
JavaScript project တွေရဲ့ အဓိက အသက်က package.json file လေးပါ။ သူက project တစ်ခုလုံးမှာသုံးထားတဲ့ package တွေအပြင် သူရဲ့ version တွေပါ တစ်ခါတည်း ပါပါတယ်၊ ပြီးတော့ App တစ်ခုလုံးရဲ့ အချက်အလက်တွေလည်း အဲ့ထဲမှာ အကုန်ပါပါတယ်။
အပေါ်မှာ မြင်ရတဲ့ အတိုင်း node_modules ဆိုတာက JavaScript packages တွေ ပါတဲ့ dir တစ်ခုပါ။
သူ့အောက်မှာ public folder,
နောက် src။ ကျွန်တော်တို့ တစ်ကယ် အလုပ်လုပ်မှာက src directory ထဲမှာပါ။
terminal ပြန်ဖွင့်ပြီး လိုအပ်တဲ့ package တွေ install လုပ်ရအောင်
yarn add react-router-dom axios redux react-redux redux-thunk bootstrap antd

(or)

npm install react-router-dom axios redux react-redux redux-thunk bootstrap antd
bootstrap ရယ် ant design ရယ် install လုပ်လိုက်တာကြောင့် index.js မှာ အဲ့ css file တွေကို import သွားခေါ်ရမယ်။
// src/index.js
import React from "react";
import ReactDOM from "react-dom";
import "./index.css";
+ import "antd/dist/antd.css";
+ import "bootstrap/dist/css/bootstrap.min.css";
import App from "./App";
import * as serviceWorker from "./serviceWorker";

ReactDOM.render(
   <React.StrictMode>
    <App />
  </React.StrictMode>,
  document.getElementById("root")
);

// If you want your app to work offline and load faster, you can change
// unregister() to register() below. Note this comes with some pitfalls.
// Learn more about service workers: https://bit.ly/CRA-PWA
serviceWorker.unregister();
react-router-dom
component တွေကို route တစ်ခုအနေနဲ့ navigation လုပ်လို့ရအောင်
axios
https request တွေ စီမံဖို့အတွက်
redux
JavaScript app တွေအတွက် state management package တစ်ခု
react-redux
က react components တွေကို redux store နဲ့ချိတ်ဆက်ပေးမယ့် layer တစ်ခု
redux-thunk
က middleware တစ်ခု၊ သူက redux actions တွေအတွက် object return ပြန်မယ့်အစား store ရဲ့ dispatch method ပါတဲ့ function တစ်ခုကို return ပြန်ပေးတယ်
အားလုံးပြီးသွားရင် npm start or yarn start ရေးပြီး run လိုက်ပါ။
localhost:3000 မှာ React logo လေးတက်လာပါလိမ့်မယ်။
Congratulations

App.js ကိုဖွင့်ပြီး ပါလာတဲ့ codes တွေကို ရှင်းပြစ်ပြီး ကျွန်တော်တို့ codes တွေ ရေးထည့်ရအောင်
ပထမဆုံး react-router-dom ကိုသုံးပြီး components တွေဆောက်ပြီး link ချိတ်ရအောင်
-/src/
  -/pages
    -/users
      -UserList.jsx
// in UserList.jsx
import React from 'react';

class UserList extends React.Component {
  render() {
    return (
      <div>UserList</div>
    );
  }
}

export default UserList;
extension က jsx or js ကြိုက်ရာသုံးလို့ရပါတယ်၊ React component တွေအတွက် ကျွန်တော်တို့က JSX ကိုသုံးပြီးရေးထားတဲ့အတွက် ကြောင့် extension ကလည်း jsx ဖြစ်သင့်ပါတယ်လို့ recommand ပေးပါတယ်
// in App.js
import React from 'react';
import { Router, Route } from 'react-router-dom';
import { createBrowserHistory } from 'history';
// pages
import UserList from './pages/user/UserList';

class App extends React.Component {
  render() {
    return (
      <Router history={createBrowserHistory()}>
        <Route path='/users' component={UserList} />
      </Router>
    );
  }
}

export default App;
Router အတွက် ကျွန်တော်တို့ browser location history ဆိုတာလေး ထည့်ပြီးရေးပေးရပါမယ်။
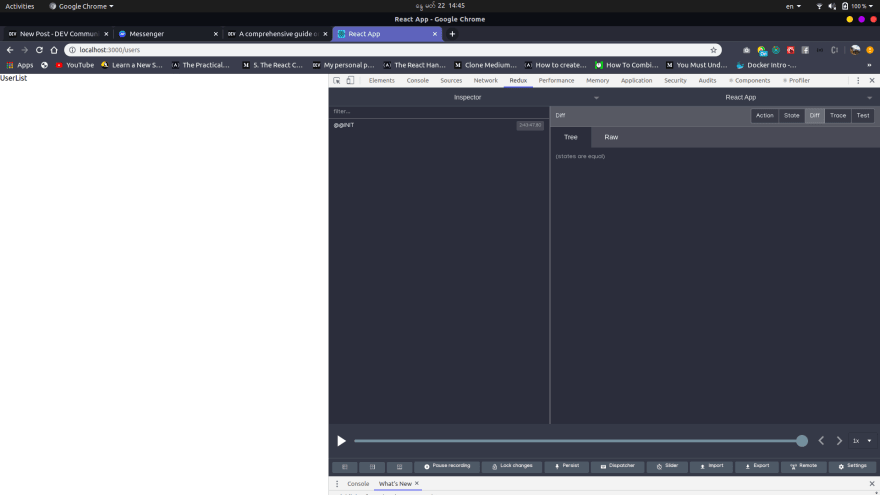
localhost:3000/users ဆိုပြီး browser မှာ ခေါ်ကြည့်လိုက်ပါ။
UserList ဆိုတဲ့ text လေးပေါ်နေပါမယ်
On we go Redux
UserList page ကနေကျွန်တော်တို့က github api ကိုသုံးပြီး users တွေကို fetch လုပ်မှာဖြစ်ပါတယ်။ ဒါကို redux action နဲ့ခေါ်မှာဆိုတော့ ပထမဆုံး ကျွန်တော့်တို့ App မှာ redux setup လုပ်ရပါမယ်
actions
action ဆိုတာက JavaScript pure object တစ်ခုပါ။ view ကနေ actions dispatch လုပ်မယ်။ reducers ဆီရောက်မယ်။ reducers ကနေ store ကိုစီမံမယ်။ actions မှာ type နဲ့ payload ဆိုပြီး ၂ခု ရှိတယ်
action creators
ဆိုတာ အမှန်တော့ functions တစ်ခုပါ။ ခုနက action ကို ခေါ်ယူသုံးလို့ရအောင် လုပ်ပေးတာပါ။
reducer ဆိုတာက application ရဲ့ state data တွေကို manage လုပ်ပေးတဲ့ကောင်ပါ။
store ဆိုတာကတော့ application တစ်ခုလုံးရဲ့ state data တွေ သိမ်းထားတဲ့နေရာပါ။
-/src
   -/pages
   -/reducers
     -index.js
   -/store
     -index.js
reducers dir ထဲမှာ index.js file ဆောက်ပါ။
App တစ်ခုလုံးရဲ့ state တွေကို ဒီ file ထဲမှာ ခေါ်ထားမှာ။
လောလောဆယ် ဘာ state မှ မရှိသေးတဲ့အတွက် fake state data တစ်ခုကို တည်ဆောက်ထားပါတယ်။
// reducers/index.js
import { combineReducers } from 'redux';

export default combineReducers({
  example: () => 'Hi There',
});
store dir ထဲမှာလည်း index.js file တစ်ခုဆောက်ပါ။
// store/index.js
import { createStore, applyMiddleware, compose } from "redux";
import thunkMiddleware from "redux-thunk";
import rootReducer from "../reducers";

const middleWareList = applyMiddleware(thunkMiddleware);

export const store = createStore(
  rootReducer,
  compose(
    middleWareList,
    window.__REDUX_DEVTOOLS_EXTENSION__ && window.__REDUX_DEVTOOLS_EXTENSION__()
  )
);
createStore
reducers ထဲက state တွေကို store ထဲသိမ်းဖို့
applymiddleware
က redux actions တွေကို async function အနေနဲ့ ခေါ်ယူလို့ရအောင်လို့
compose က ကျွန်တော်တို့ store ကို dev tool သုံးပြီး ကြည့်လို့ရအောင်လို့
ဒီအဆင့်ထိရောက်ပြီဆို ကျွန်တော်တို့ redux devtools လေး install လုပ်ရပါတော့မယ်။ browser extension လေးပါ။ ကိုယ် သုံးတဲ့ browser ပေါ်မူတည်ပြီး install လုပ်ရပါ့မယ်
Chrome Redux Devtool
Firefox Redux Devtool
store ကော reducer ကော setup လုပ်ပြီးသွားရင် src dir အောက်က index.js file ကိုသွားပါ။
အခုက ကျွန်တော်တို့ရဲ့ Redux Store ကို App တစ်ခုလုံး access လုပ်လို့ရအောင် implement ထက်လုပ်ရပါ့မယ်
// src/index.js
import React from 'react';
import ReactDOM from 'react-dom';
import { Provider } from 'react-redux';
import { store } from './store/index';
import './index.css';
import "antd/dist/antd.css";
import "bootstrap/dist/css/bootstrap.min.css";
import App from './App';
import * as serviceWorker from './serviceWorker';

ReactDOM.render(
  <Provider store={store}>
    <React.StrictMode>
      <App />
    </React.StrictMode>
  </Provider>,
  document.getElementById('root')
);
localhost:3000/users ကိုသွား ပြီးရင် Ctrl + Shift + I ကို နှိပ်ပြီး developer tool ကိုဖွင့်ပါ။ အဲ့ဒီမှာ redux ဆိုတဲ့ tab လေးပေါ်လာပါလိမ့်မယ်။ နှိပ်လိုက်ပါ။
ဒါဆိုရင် ကျွန်တော်တို့ ဒီကိုသွပြီးတော့ https://developer.github.com/v3/users/#get-all-users သူတို့ရဲ့ api ကို ဘယ်လိုသုံးရမလဲ သွားကြည့်ရမယ်
အခုဆိုရင် ကျွန်တော်တို့ App မှာ api ကလာမယ့် data တွေကို သိမ်းဖို့ store လည်းစီမံပြီးပြီ။ လိုအပ်တဲ့ package တွေလည်းသွင်းပြီးပြီ။ Redux devtool နဲ့လည်း store ကို ကြည့်လို့ရပြီ။ တစ်ခုကျန်သေးတာက API လွှတ်မယ့် actions ရယ်၊ React component တွေကို redux နဲ့ ချိတ်ပေးမယ့် layer ရယ် ကို ဒီအောင်ပိုင်းမှာ ဆက်ပြသွားမယ်။
src dir အောက်မှာ actions ရယ် constants ရယ် ဆိုတဲ့ dir ၂ခုထက်ဆောက်ပါ။
-/src
  -/actions
    -/userAction.js
  -/constants
    -/actionTypes.js
userAction.js & actionTypes.js ဆိုတဲ့ file လေးဆောက်ပါ။
// in constants/actionTypes.js
export const FETCH_USER_LIST_SUCCESS = 'FETCH_USER_LIST_SUCCESS';
export const FETCH_USER_LIST_REQUEST = 'FETCH_USER_LIST_REQUEST';
export const FETCH_USER_LIST_FAILURE = 'FETCH_USER_LIST_FAILURE';
ပုံမှန် အားဖြင့်ဆိုရင် redux actions က action type ရယ် payload ရယ် လက်ခံပြီး reducers ဆီပို့တယ်။ reducers ကနတစ်ဆင့်ပို့လိုက်တဲ့ action type ပေါ်မူတည်ပြီး payload ကပါလာတဲ့ data နဲ့အတူ store ကို manage လုပ်တယ်
ဒီနေရာမှာ ကျွန်တော်က code structure ကောင်းသွားအောင် သပ်သပ်ရပ်ရပ်ဖြစ်သွားအောင် actions type တွေကို ခွဲထုတ်ပြီးရေးလိုက်တာပါ
Request, Success, Failure ဆိုပြီး အခြေအနေ ၃ခုနဲ့ ကျွန်တော်တို့ action ပို့မှာပေါ့။
data fetch နိုင်ခဲ့ရင် SUCCESS
data request ပို့နေရင် REQUEST
data fetch တဲ့အချိန် error တက်သွားရင် FAILURE
အဲ့ ၃ခုနဲ့အတူ သူတို့ရဲ့ payload ကပါလာမှာပါ။ အဲ့ ၃ခုပေါ်မူတည်ပြီး store ရဲ့ state data တွေကို manage လုပ်မှာပါ။
// in actions/userAction.js
import { FETCH_USER_LIST_FAILURE, FETCH_USER_LIST_SUCCESS, FETCH_USER_LIST_REQUEST } from '../constants/actionTypes';
import axios from 'axios';

function fetchUserList() {
  function success(payload) {
    return { type: FETCH_USER_LIST_SUCCESS, payload }
  }
  return dispatch => {
    return axios.get('https://api.github.com/users?since=10')
    .then(response => dispatch(success(response.data)));
  }
}

export const userActions = {
  fetchUserList,
};
အခုလောလောဆယ် အစမ်းပြမာဖြစ်တဲ့အတွက် success တစ်ခုပဲသုံးထားပါတယ်
ပြီးရင် ကျွန်တော်တို့ရဲ့ UserList component ဆီကိုသွားပြီး redux store နဲ့ချိတ်ဆက်ရပါမယ်
import React from 'react';
import { connect } from 'react-redux';
import { userActions } from '../../actions/userAction';

class UserList extends React.Component {
  componentDidMount() {
    this.props.fetchAllUsers();
  }
  render() {
    return (
      <div>UserList</div>
    );
  }
}

const mapDispatchToProps = dispatch => {
  return {
    fetchAllUsers: () => dispatch(userActions.fetchUserList())
  }
}
export default connect(null, mapDispatchToProps)(UserList);
connect ဆိုတာသည် React component နဲ့ redux ကိုချိတ်ဆက်ပေးတဲ့ layer တစ်ခုပါ။
စောစောတုန်းက ကျွန်တော်တို့ ရေးထားတဲ့ actions ကို import လှမ်းခေါ်တယ်။ ပြီးရင် life cycle method ဖြစ်တဲ့ componentDidMount method ထဲမှာ props အနေနဲ့ ခေါ်ယူထားတယ်။
export default နေရာမှာ connect function သုံးပြီး ကျွန်တော်တို့ရဲ့ component ကို wrap လုပ်ထားတယ်။
connect function က arguments ၂ခု လက်ခံတယ်။
ပထမကောင်က store ထဲမှာရှိတဲ့ data တွေကိုယူပေးတယ်။ အခုချိန်မှာတော့ null ပေါ့။
ဒုတိယ ကောင်က actions dispatch လုပ်ပေးတဲ့ကောင်တွေ ရေးထားတယ်။
အခုချိန် localhost:3000/users ဆီသွားကြည့်ရင် action dispatch လုပ်သွားတာ တွေ့ရမယ့်အပြင် Redux devtool ကနေလည်း API ကနေ ပါလာမယ့် responses ကိုကြည့်လို့ရမှာပါ။
အခု user reducer တစ်ခု setup လုပ်မယ်။ API ကပါလာမယ့် data တွေကိုသိမ်းဖို့အတွက်
in reducers/userReducer.js

import { FETCH_USER_LIST_FAILURE, FETCH_USER_LIST_SUCCESS, FETCH_USER_LIST_REQUEST } from '../constants/actionTypes';

const initialState = {
  users: [],
};

export function users(state = initialState, action) {
  switch(action.type) {
    case FETCH_USER_LIST_SUCCESS:
      return {
        users: action.payload,
      };
    default:
      return state;
  }
}
in reducers/index.js
import { combineReducers } from 'redux';
import { users } from './userReducer';

export default combineReducers({
  users,
});
reducer မှာလည်း ထက်ပြီး actionTypes ကို import ခေါ်ထားတာတွေ့ရမှာပါ။ ကျွန်တော်ပြောခဲ့သလို
Request, Success, Failure ဆိုပြီး အခြေအနေ ၃ခုနဲ့ ကျွန်တော်တို့ action ပို့မှာပေါ့။ data fetch နိုင်ခဲ့ရင် SUCCESS
data request ပို့နေရင် REQUEST
data fetch တဲ့အချိန် error တက်သွားရင် FAILURE
အဲ့ ၃ခုနဲ့အတူ သူတို့ရဲ့ payload ကပါလာမှာပါ။ အဲ့ ၃ခုပေါ်မူတည်ပြီး store ရဲ့ state data တွေကို manage လုပ်မှာပါ။
action တစ်ခု dispatch ပို့နိုင်သွားပြီးရင် ရလာတဲ့ response တွေကို UI မှာ render ချရပါတော့မယ်
// in Userlist.jsx
import React from 'react';
import { connect } from 'react-redux';
import { userActions } from '../../actions/userAction';

class UserList extends React.Component {
    componentDidMount() {
        this.props.fetchAllUsers();
    }
    render() {
        const { users } = this.props;
        return (
            <div className="container">
                <div className="row">
                    {users &&
                        users.map((item, index) => {
                            return (
                                <div className="col-md-3" key={index}>
                                    <h5>{item.login}</h5>
                                </div>
                            );
                        })}
                </div>
            </div>
        );
    }
}

const mapStateToProps = ({ users }) => {
    return {
        users : users.users
    };
};
const mapDispatchToProps = (dispatch) => {
    return {
        fetchAllUsers : () => dispatch(userActions.fetchUserList())
    };
};
export default connect(mapStateToProps, mapDispatchToProps)(UserList);
http://localhost:3000/users ဆိုပြီး ခေါ်ကြည့်လိုက်ပါ။ ဒါဆိုရင်တော့ Redux နဲ့ API ခေါ်ယူနည်းကို အခြေခံသိရှိသွားပြီ ထင်ပါတယ်

ခုနက action ကို ကျွန်တော်တို့ အခြေအနေ ၃ခုနဲ့ ပြန်ခေါ်ကြမယ်
data fetch နေတဲ့အချိန်မှာ ကျွန်တော်တို့က loading ထည့်ချင်တယ်။
မှားသွားရင် error Msg ပြန်ထုတ်ပြမယ်
ဆိုတော့ reducer ထဲမှာ အခြေအနေ ၃ခုအတွက် state manage လို့ရအောင် ရေးရမယ်။
// in reducers/userReducer.js
import { FETCH_USER_LIST_FAILURE, FETCH_USER_LIST_SUCCESS, FETCH_USER_LIST_REQUEST } from '../constants/actionTypes';

const initialState = {
  users: [],
  loading: false,
  errorMsg: '',
};

export function users(state = initialState, action) {
  switch(action.type) {
    case FETCH_USER_LIST_REQUEST:
      return {
        ...state,
        loading: action.payload
      }
    case FETCH_USER_LIST_SUCCESS:
      return {
        ...state,
        users: action.payload,
      };
    case FETCH_USER_LIST_FAILURE:
      return {
        ...state,
        loading: false,
        errorMsg: action.payload
      }
    default:
      return state;
  }
}
// in actions/userAction.js
import { FETCH_USER_LIST_FAILURE, FETCH_USER_LIST_SUCCESS, FETCH_USER_LIST_REQUEST } from '../constants/actionTypes';
import axios from 'axios';

function fetchUserList() {
  function request(payload) {
    return { type: FETCH_USER_LIST_REQUEST, payload }
  }
  function success(payload) {
    return { type: FETCH_USER_LIST_SUCCESS, payload }
  }
  function failure(payload) {
    return { type: FETCH_USER_LIST_FAILURE, payload }
  }
  return dispatch => {
    dispatch(request(true));
    axios.get('https://api.github.com/users?since=10')
    .then(response => {
      dispatch(success(response.data))
      dispatch(request(false));
    }).catch(err => dispatch(failure(err.message)));
  }
}

export const userActions = {
  fetchUserList,
};
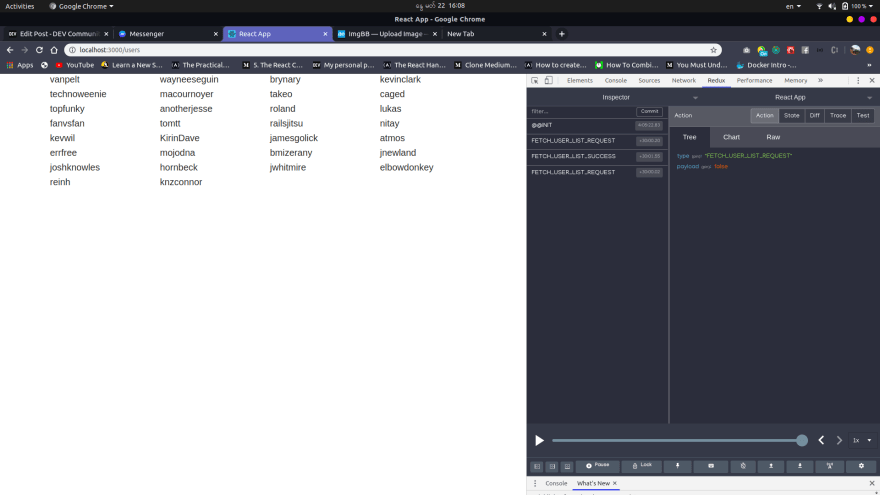
Redux devtool ထဲမှာ လည်း Request, Success, Request ထွက်သွားတာကိုတွေ့ရမှာပါ။
loading ထည့်ဖို့အတွက် ကျွန်တော်တို့ UI ကိုပြန်သွားရအောင်
import React from 'react';
import { connect } from 'react-redux';
import { Spin } from 'antd';
import { userActions } from '../../actions/userAction';

class UserList extends React.Component {
    componentDidMount() {
        this.props.fetchAllUsers();
    }
    render() {
        const { users, loading } = this.props;
        return (
            <div className="container mt-4">
                <Spin spinning={loading} tip="Loading...">
                    <div className="row">
                        {users &&
                            users.map((item, index) => {
                                return (
                                    <div className="col-md-3" key={index}>
                                        <h5>{item.login}</h5>
                                    </div>
                                );
                            })}
                    </div>
                </Spin>
            </div>
        );
    }
}

const mapStateToProps = ({ users }) => {
    return {
        users   : users.users,
        loading : users.loading
    };
};
const mapDispatchToProps = (dispatch) => {
    return {
        fetchAllUsers : () => dispatch(userActions.fetchUserList())
    };
};
export default connect(mapStateToProps, mapDispatchToProps)(UserList);
Clone Repo
ကျွန်တော့် tutorial လေးကို ကြည့်ပြီး နားလည်လိမ့်မယ်လို့ထင်ပါတယ်။ အဆုံးထိ ဖတ်ပေးလို့လည်း ကျေးဇူးတင်ပါတယ်။ ပြီးတော့ ကျွန်တော့် tutorial လေးကိုလည်း Like and share လေးလုပ်ပေးပါ။
အဆင်မပြေတာ နားမလည်တာရှိရင် ကျွန်တော့်ကို အချိန်မရွေးလာရောက်မေးမြန်းနိုင်ပါတယ်။
အားလုံးကျေးဇူးတင်ပါတယ်။

Top comments (0)