
Image editing has always required a delicate balance between precision and creativity, and that’s exactly what Qwen-Image-Edit delivers. Built on the robust 20B Qwen-Image model, this cutting-edge tool takes image editing to the next level by combining semantic control (powered by Qwen2.5-VL) with appearance control (via its VAE Encoder). This dual-system approach allows users to seamlessly perform both low-level edits, like adding or removing objects while keeping the rest of the image untouched, and high-level transformations, such as rotating objects, transferring artistic styles, or even creating new concepts entirely. What truly sets Qwen-Image-Edit apart, however, is its precise text editing capability, enabling direct modification of text in English and Chinese while preserving the original font, size, and style.
If you’re looking for an image editing model that’s powerful, versatile, and incredibly easy to use, Qwen-Image-Edit is a must-try. Let's see how to get it up and running on your machine.
Prerequisites
The minimum system requirements for running this model are:
GPU: 1x H100
Storage: 50 GB (preferable)
VRAM: at least 64 GB
Step-by-step process to install and run Qwen Image Edit
For the purpose of this tutorial, we’ll use a GPU-powered Virtual Machine by NodeShift since it provides high compute Virtual Machines at a very affordable cost on a scale that meets GDPR, SOC2, and ISO27001 requirements. Also, it offers an intuitive and user-friendly interface, making it easier for beginners to get started with Cloud deployments. However, feel free to use any cloud provider of your choice and follow the same steps for the rest of the tutorial.
Step 1: Setting up a NodeShift Account
Visit app.nodeshift.com and create an account by filling in basic details, or continue signing up with your Google/GitHub account.
If you already have an account, login straight to your dashboard.

Step 2: Create a GPU Node
After accessing your account, you should see a dashboard (see image), now:
1) Navigate to the menu on the left side.
2) Click on the GPU Nodes option.
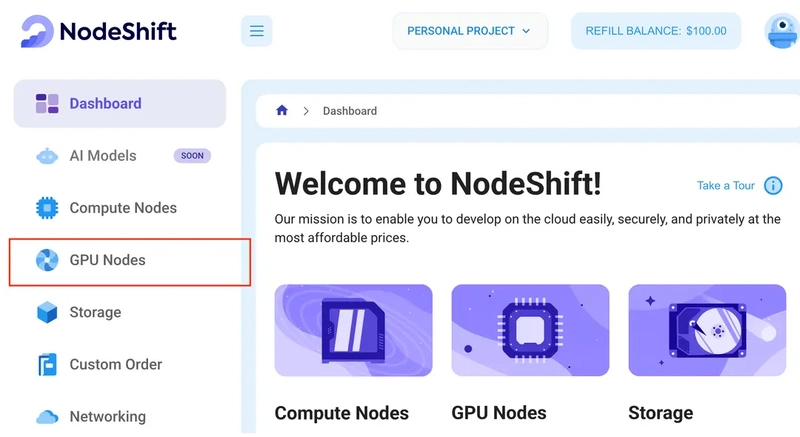
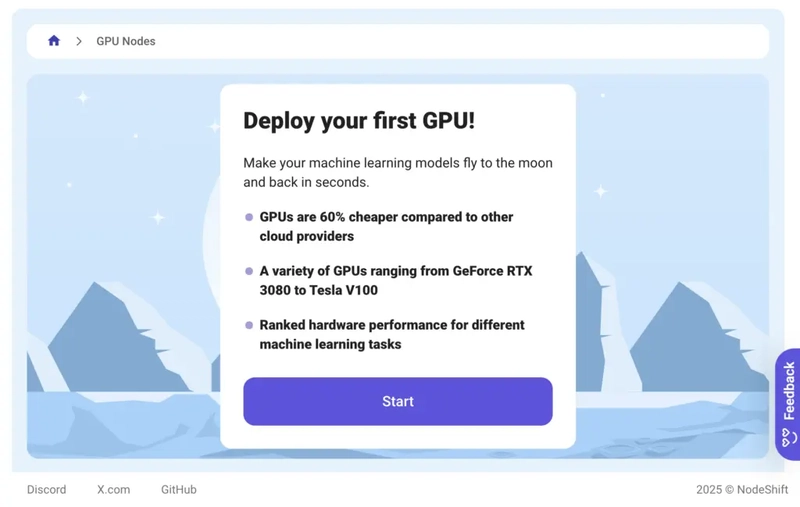
3) Click on Start to start creating your very first GPU node.
These GPU nodes are GPU-powered virtual machines by NodeShift. These nodes are highly customizable and let you control different environmental configurations for GPUs ranging from H100s to A100s, CPUs, RAM, and storage, according to your needs.
Step 3: Selecting configuration for GPU (model, region, storage)
1) For this tutorial, we’ll be using 1x H100 GPU, however, you can choose any GPU as per the prerequisites.
2) Similarly, we’ll opt for 200 GB storage by sliding the bar. You can also select the region where you want your GPU to reside from the available ones.

Step 4: Choose GPU Configuration and Authentication method
1) After selecting your required configuration options, you’ll see the available GPU nodes in your region and according to (or very close to) your configuration. In our case, we’ll choose a 1x H100 SXM 80GB GPU node with 192vCPUs/80GB RAM/200GB SSD.

2) Next, you'll need to select an authentication method. Two methods are available: Password and SSH Key. We recommend using SSH keys, as they are a more secure option. To create one, head over to our official documentation.

Step 5: Choose an Image
The final step is to choose an image for the VM, which in our case is Nvidia Cuda.

That's it! You are now ready to deploy the node. Finalize the configuration summary, and if it looks good, click Create to deploy the node.


Step 6: Connect to active Compute Node using SSH
1) As soon as you create the node, it will be deployed in a few seconds or a minute. Once deployed, you will see a status Running in green, meaning that our Compute node is ready to use!
2) Once your GPU shows this status, navigate to the three dots on the right, click on Connect with SSH, and copy the SSH details that appear.

As you copy the details, follow the below steps to connect to the running GPU VM via SSH:
1) Open your terminal, paste the SSH command, and run it.
2) In some cases, your terminal may take your consent before connecting. Enter ‘yes’.
3) A prompt will request a password. Type the SSH password, and you should be connected.
Output:

Next, If you want to check the GPU details, run the following command in the terminal:
!nvidia-smi
Step 7: Set up the project environment with dependencies
1) Create a virtual environment using Anaconda.
conda create -n qwen python=3.11 -y && conda activate qwen
Output:

2) Install required dependencies.
pip install torch torchvision torchaudio --index-url https://download.pytorch.org/whl/cu121
pip install git+https://github.com/huggingface/diffusers
pip install transformers accelerate gradio pillow
Output:

3) Install and run jupyter notebook.
conda install -c conda-forge --override-channels notebook -y
conda install -c conda-forge --override-channels ipywidgets -y
jupyter notebook --allow-root
4) If you’re on a remote machine (e.g., NodeShift GPU), you’ll need to do SSH port forwarding in order to access the jupyter notebook session on your local browser.
Run the following command in your local terminal after replacing:
` with the PORT allotted to your remote server (For the NodeShift server – you can find it in the deployed GPU details on the dashboard).
<PATH_TO_SSH_KEY> with the path to the location where your SSH key is stored.
<YOUR_SERVER_IP> with the IP address of your remote server.
ssh -L 8888:localhost:8888 -p <YOUR_SERVER_PORT> -i <PATH_TO_SSH_KEY> root@<YOUR_SERVER_IP>
Output:

After this copy the URL you received in your remote server:

And paste this on your local browser to access the Jupyter Notebook session.
Step 8: Download and Run the model
1) Open a Python notebook inside Jupyter.

2) Download the model checkpoints.
`
import os
from PIL import Image
import torch
from diffusers import QwenImageEditPipeline
pipeline = QwenImageEditPipeline.from_pretrained("Qwen/Qwen-Image-Edit")
print("pipeline loaded")
pipeline.to(torch.bfloat16)
pipeline.to("cuda")
pipeline.set_progress_bar_config(disable=None)
image = Image.open("./cat.jpg").convert("RGB")
prompt = "Add a pillow under cat's head and cover it with a blanket."
inputs = {
"image": image,
"prompt": prompt,
"generator": torch.manual_seed(0),
"true_cfg_scale": 4.0,
"negative_prompt": " ",
"num_inference_steps": 50,
}
with torch.inference_mode():
output = pipeline(**inputs)
output_image = output.images[0]
output_image.save("output_image_edit.png")
print("image saved at", os.path.abspath("output_image_edit.png"))
`
Output:

Original Image:

Edited Image:

Conclusion
Qwen-Image-Edit stands out as a next-generation image editing model, seamlessly blending semantic intelligence with appearance precision to enable everything from subtle object adjustments to bold creative transformations, all while offering unmatched text editing capabilities. By running it on Nodeshift Cloud, you gain a frictionless way to harness this power, eliminating complex setup hurdles and ensuring a smooth, scalable environment for experimentation. Together, Qwen-Image-Edit and Nodeshift Cloud make advanced image editing not just possible, but practical and accessible for creators, developers, and enterprises alike.
For more information about NodeShift:

Top comments (0)