
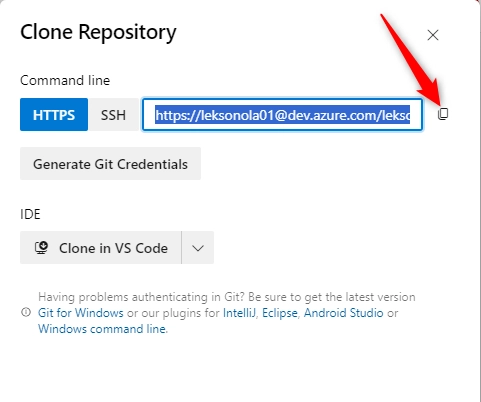
How to clone already existed Repository.
- Go to Azure DevOps from your browser and navigate to the project.
- Click on Repo

- Click clone

- Copy the clone url under command line by clicking copy to clipboard.
- Open Visual Studio Code. Note that Visual Studio Code must be installed on your computer. Click View tab and select command palette. An straightforward and practical way to access many different tasks, including those offered by third-party extensions, is through the Command Palette.
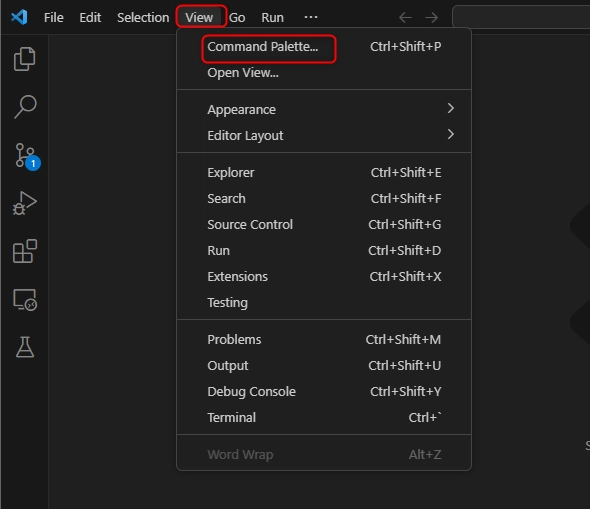
- Type Git in the search box and select Git: clone

- A box displaying provide a repository url will pop up, paste the copied url and press Enter.

- Choose a local path where your cloned repo will be and click select a repository destination

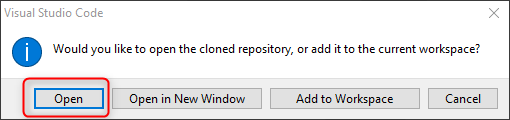
- You will be prompted to log into your DevOps account. Click open to open the cloned repository
How to commit changes
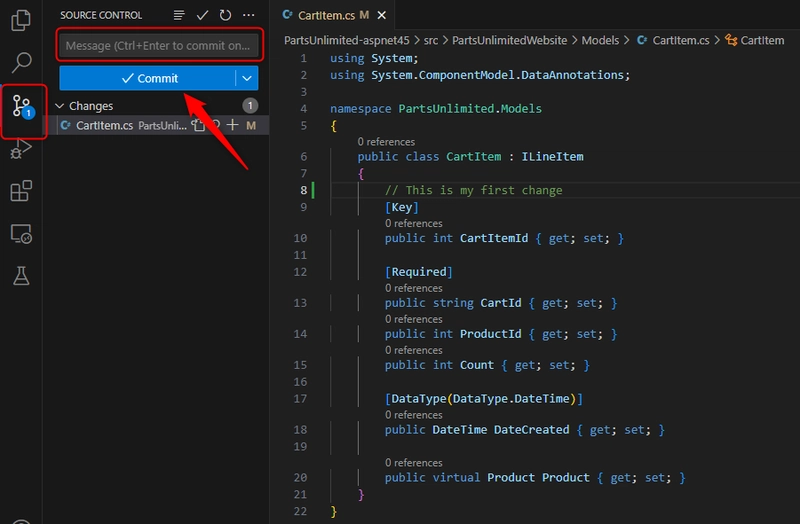
- After clicking open, the cloned repo will be under Explorer tab.

- Follow this path from the Explorer tab /PartsUnlimited-aspnet45/src/PartsUnlimitedWebsite/Models/CartItem.cs and click CartItem.cs to open it

- Add a comment to the file on line 8 and click Ctrl + S to save the comment.

- Click Source control, enter a commit message and click Commit.
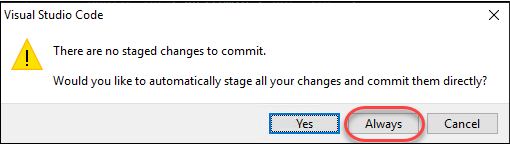
- Click Always whenever asked to automatically stage your changes and commit them directly.
- In order to synchronize your changes with the server, click the Synchronize Changes button.
 .
.
How to review commit
- To review the new commits on Azure DevOps, Click Repo and select commit

How to stage changes.
You can add specific files to a commit while preserving the changes made to other files by staging modifications.
- Go back to Visual Studio Code, open the CartItem.cs file and edit the comment on line 8. Save the new changes with Ctrl + s.
- Use this path to open another file /PartsUnlimited-aspnet45/src/PartsUnlimitedWebsite/Models/Category.cs and add comment to line 8. Press Ctrl + S to save the new changes. We now have two files with pending changes.

- Click source control and click the + sign in front of CartItem.cs to stage changes.

- CartItem.cs will be prepared for committing without Category.cs.

- Add a comment to the commit, click the ellipsis button, select commit and click commit staged.
- Synchronize the committed changes with the server by clicking the synchronize changes button.

How to compare files
- From the source control, click Category.cs. Two files are placed side by side for easy comparison and to locate where changes was made.

- An easy way to visualize how changes were made and when it is made is done by clicking commit in Azure DevOps.
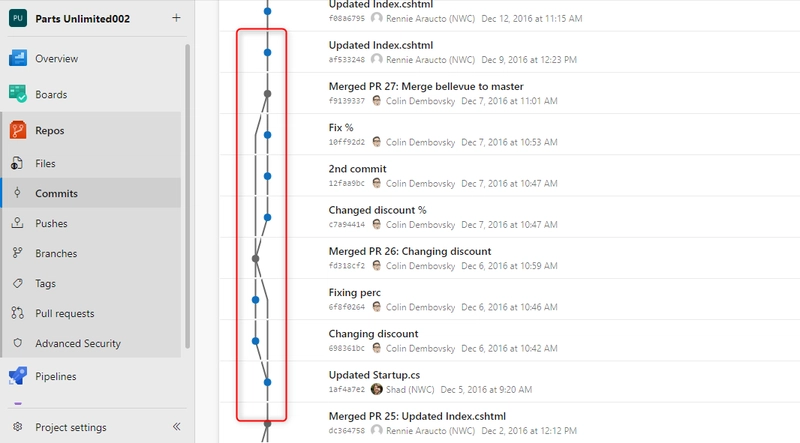
- Clicking the ellipsis button on each commit and and selecting Browse files will offer the ability to move around the state of the commit source. One can review and download the files


How to create a new branch in local repository
- Go back to Visual Studio Code.
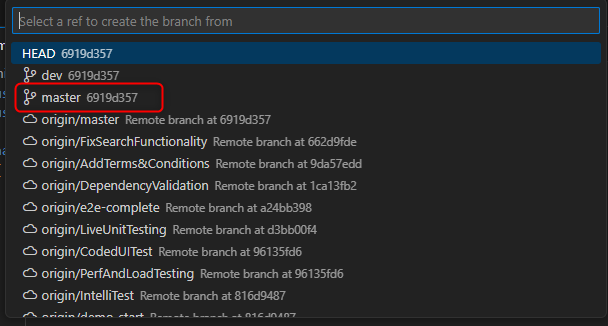
- From the bottom left, click master branch.

- Click Create new branch from…

- provide a name for the new branch and press Enter.

- Click on master for reference branch.
- The name of the branch at the bottom left will be the new branch.
How to work with branches
- Publish the branch by clicking on the button beside the branch.

- We need to go back to Azure DevOps and click Branches to check the new branch.

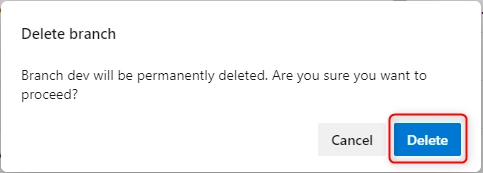
- Click on the ellipsis button on the branch and select Delete branch
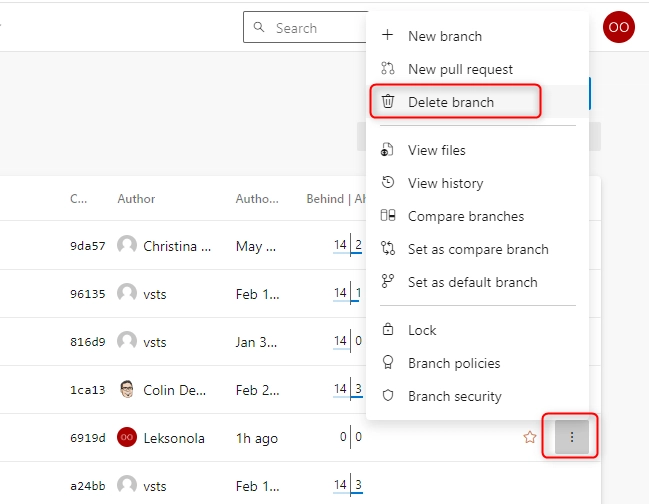
- Confirm delete
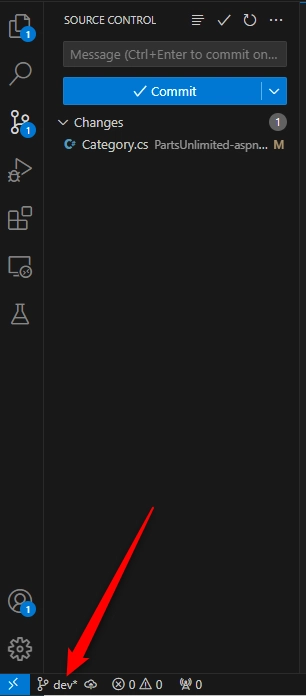
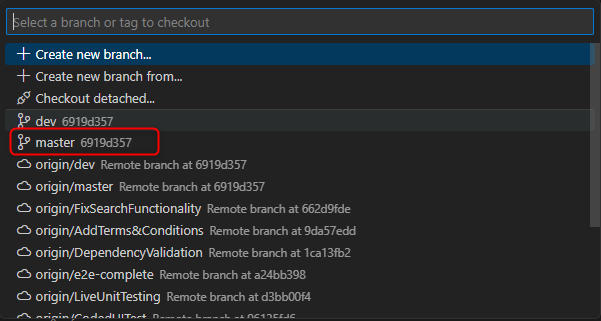
- Go back to Visual Studio Code and click dev branch

- Note that the branch deleted in the Azure DevOps is the server branch (the one we published) not the local branch. The origin/dev has not been pruned
- Change the branch to master by selecting master after clicking dev branch
- Open the Command Palette by pressing Ctrl+Shift+P and type Git: Delete in the search box, select Git: Delete Branch

- Select the local branch to delete it.

- To check if the local branch has been deleted, click master branch on the bottom left and you will notice that the local dev branch is no longer listed. Notice that the remote origin/dev is still showing.

- Open the Command Palette by pressing Ctrl+Shift+P and type Git: Fetch, select Git: Fetch (Prune)

- Now if we click master branch on the bottom left, origin /dev is no longer in the list, which means that it has been pruned.

How to set up branch policies
To add policies to the main branch and only approve changes through Pull Requests that adhere to the established policies, use the Azure DevOps portal. Before changes on a branch are merged, you want to make sure they are reviewed.
- Click on branches under Repos tab, click on the ellipsis button in front of main branch and select Branch Policies

- In the Branch policies pane, let Require minimum number of reviewers be enabled, type 1 in the Minimum number of reviewers box and tick Allow requestors to approve their own changes

- Scroll down to enable Check for linked work items and tick Required

How to test the branch policy
- Click Repos and select files.
- To test the the policy, we need to make changes and commit it on the main branch. Follow this path /eShopOnWeb/src/Web/Program.cs and open Program.cs

- Click Edit button
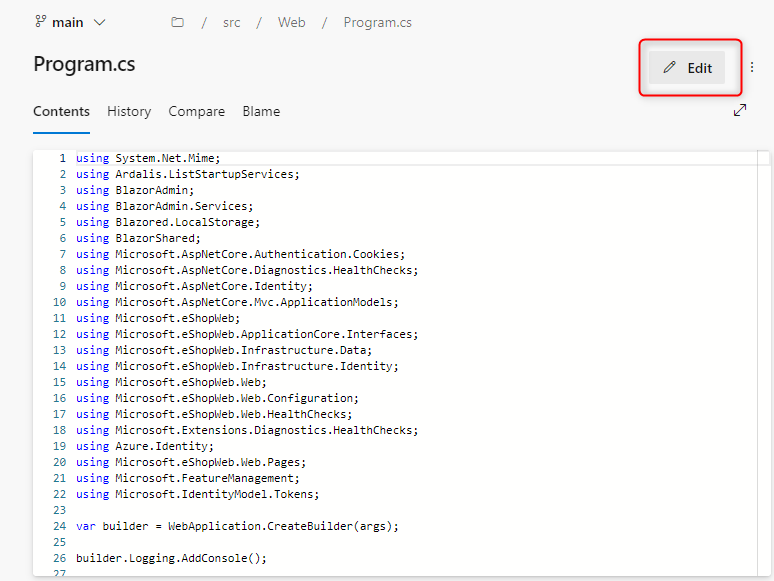
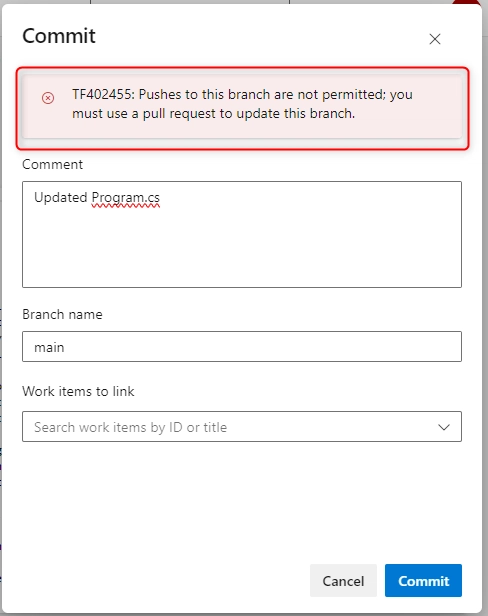
- Insert // Testing main branch policy on the first line of the contents and click Commit
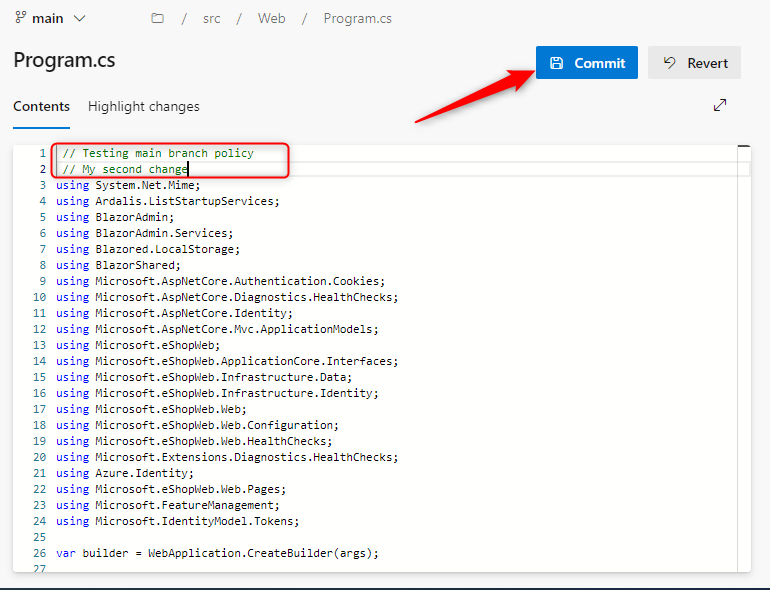
- You will see a warning: Pushes to this branch are not permitted...
How to work with Pull request
To integrate a change into the protected main branch, you will use the dev branch and the Azure DevOps site to make a pull request. To track outstanding work with code activity, an Azure DevOps work item will be associated with the modifications.
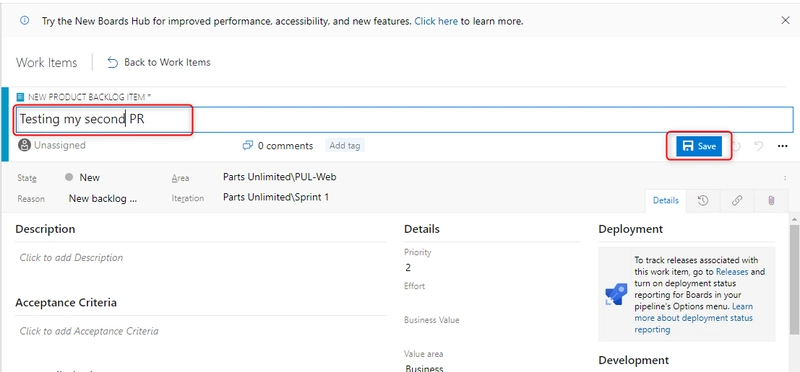
- Select work items under Boards section, click + New work item and select Product Backlog Item from the dropdown.

- Provide a title for the work item and click save.
- Next is to go back to Repo and select files.
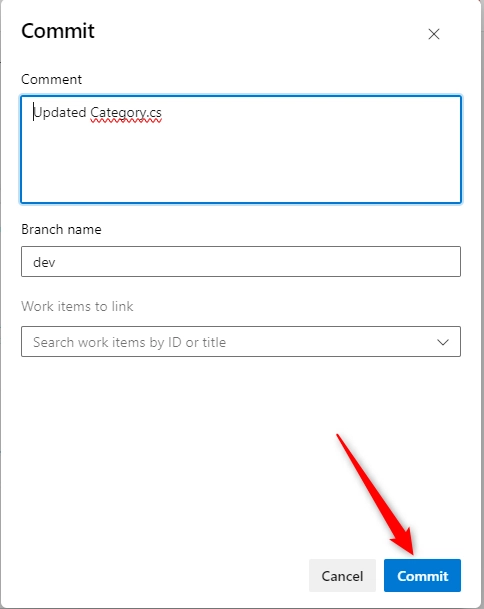
- Follow this path /PartsUnlimited-aspnet45/src/PartsUnlimitedWebsite/Models/Category.cs to open

- Ensure to change the branch to dev branch

- Edit the content of the file by clicking the Edit button

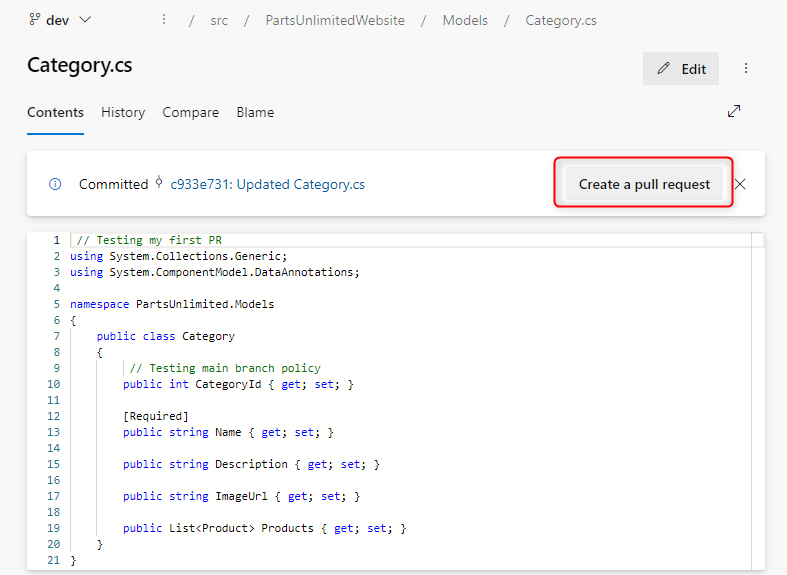
- Insert // Testing my first PR on the first line and click commit.

- Click commit
- You will see a pop up message showing create a pull request. Select create a pull request
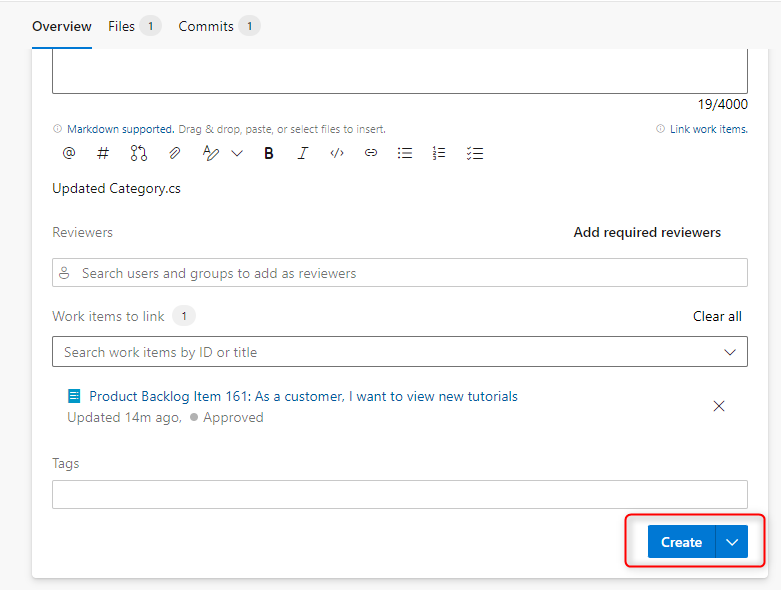
- Leave the settings as default and click Create

- Click Approve

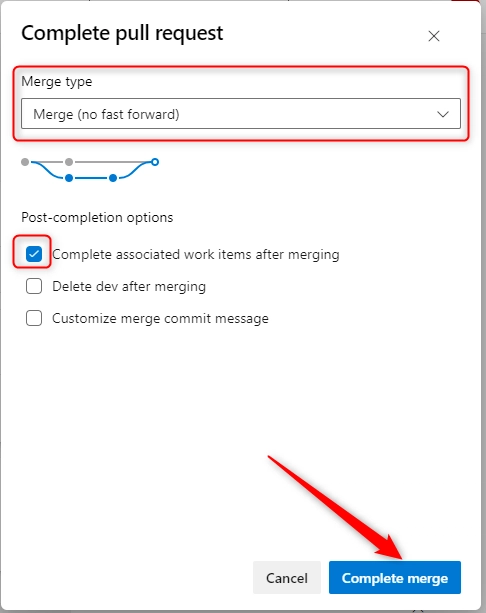
- Notice that all the requirements changed to green and click Complete

- In the Complete Pull Request pane, select Merge (no fast forward) under Merge type from the dropdown, tick Complete associated work item... under Post-completion options and click complete merge.
How to manage branches from Azure DevOps
- Go back to Azure DevOps, click Repo and select branches of your project. click New branch

- Provide a name for the branch and select the the work items to link from the dropdown

- The new branch will be listed in the list.

- Go back to Visual Studio Code, press Ctrl+Shift+P to open the Command Palette and type and select Git: Fetch

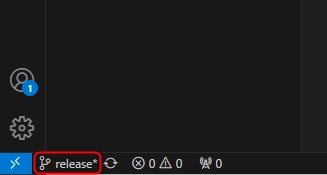
- Click on the master branch and select origin/release

- Local branch called release will be created
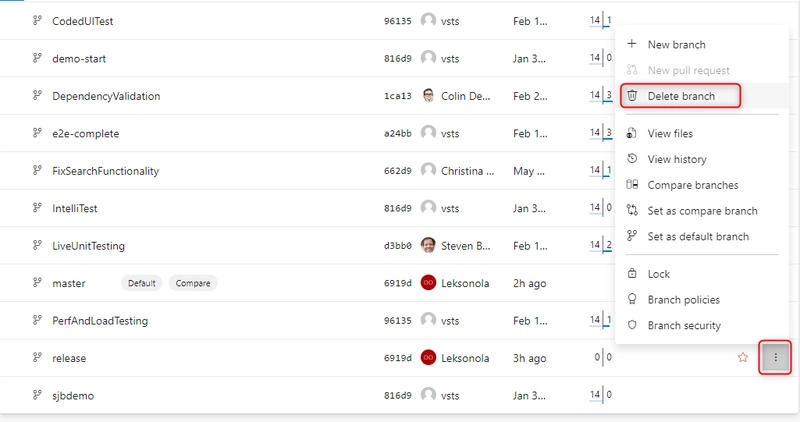
How to delete a branch from Azure DevOps
- Go back to the branch in Azure DevOps, click on the ellipsis button in front of it and select Delete branch
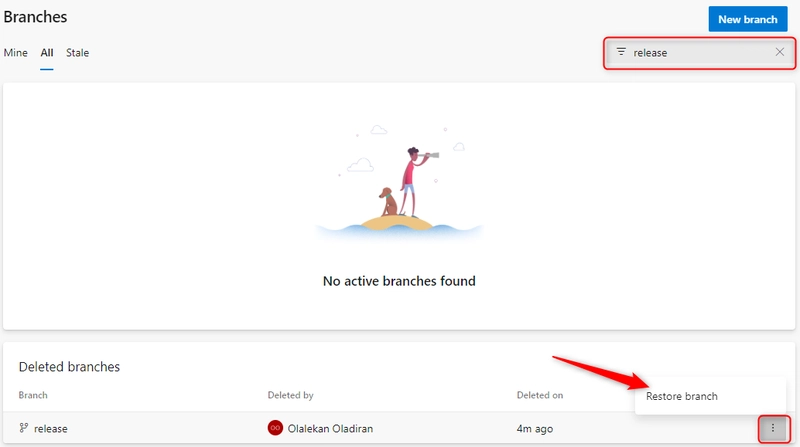
- To restore a deleted branch, for the exact name in the search box, click the ellipsis button and select restore branch
How to Lock a branch
Locking is the best way to stop new modifications that could interfere with a crucial merge or to make a branch read-only. If all you want to do is make sure that changes in a branch are reviewed before they are merged, you can also accomplish this by using pull requests and branch policies in place of locking.
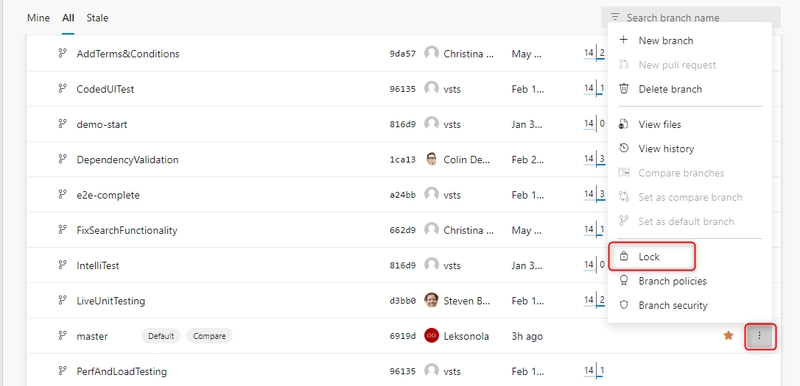
- Click the ellipsis button in front of master branch and select Lock
- A lock sign indicates that the branch is locked.

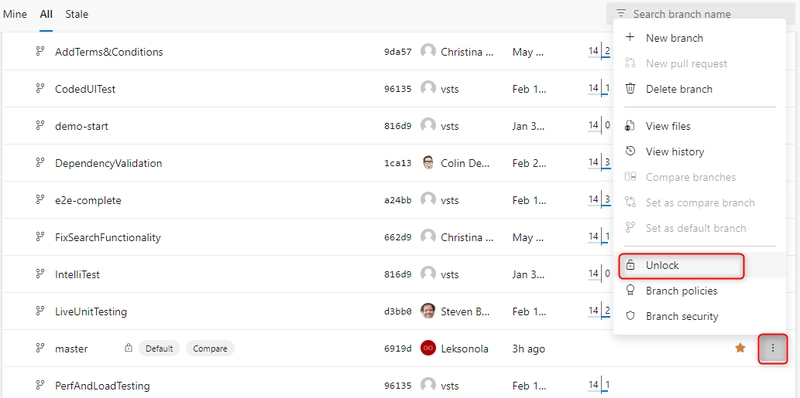
- To unlock a branch, click on ellipsis button again and select unlock.
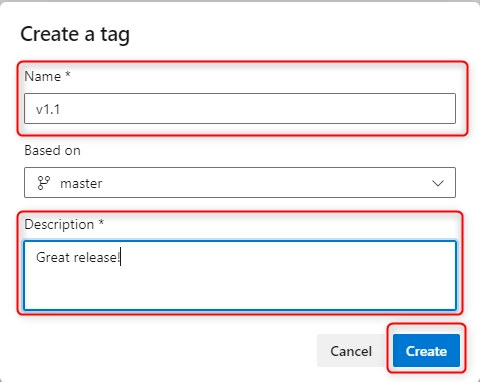
How to Tag a release
- Click on Tag tab under Repo

- Click New tag

- provide a name and description for the tag. Click create after
- You can delete a tag by clicking on the ellipsis button in front of it and selecting delete tag

How to create a new repo from Azure DevOps
- Click the + sign in front of your project and select New repository from the dropdown

- Provide a name for the repository and click create.

- The repository is now ready to be cloned.
How to delete and rename a Git repos
- Click project settings to open it

- Click repositories under Repos tab, click the ellipsis button in front of the repo to delete/rename and select delete/rename.

- Enter the correct name of the repo and click Delete


Top comments (0)