
Introduction
This tutorial demonstrates how to build a simple C++ Casino Number Guessing Game using Jenkins. The game generates a random number depending on the chosen difficulty level, and players win a prize if they guess the correct number.
Requirements
- Docker
- Docker compose
- Git
- VS Code
Fork and clone the sample repository
First, fork the sample repository containing the Casino Number Guessing Game’s C++ code to your GitHub account. Then, clone your fork to your local machine.
- Sign into your GitHub account
- Fork the casino-number-guessing-game from GitHub into your GitHub account

- Click Create fork

- clone the forked repository using VS Code by running the following command
git clone [repo-URL]
To get repo-URL, click code and copy HTTPS url.

NOTE:Make sure to create a folder before running the command.

Start your Jenkins controller
- Clone the quickstart-tutorials repository to get the latest preconfigured Jenkins deployment by running the command
git clone https://github.com/jenkins-docs/quickstart-tutorials.git

- Run the following command after cloning. Make sure to cd into quickstart-tutorials directory before running it.
docker compose --profile cpp up -d

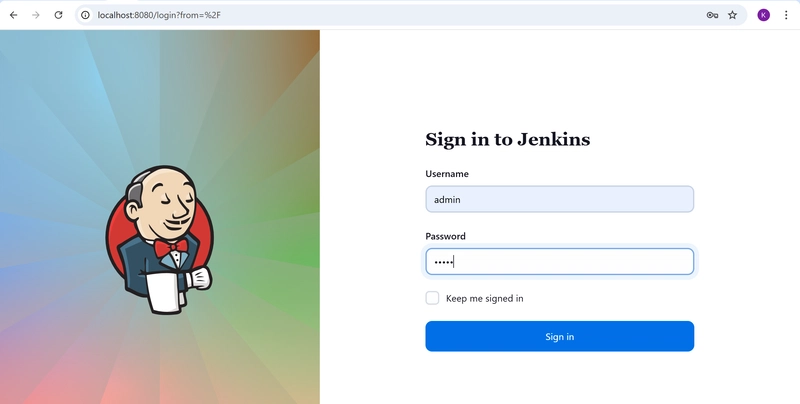
- After confirming the containers are running with docker compose ps, access the controller at http://localhost:8080.
- Log in with admin as username and password.
Create your Pipeline project in Jenkins
- In Jenkins UI, select New Item under Dashboard.

- Give a name to your Pipeline, select Pipeline under Select an item type section and click OK.

- Enter a Pipeline Description.


Create your initial Pipeline as a Jenkinsfile
You are now ready to automate your C++ application build by creating a Jenkins Pipeline. This pipeline will be defined in a Jenkinsfile that you will commit to your local Git repository (casino-number-guessing-game).
- When you forked our sample repository, you already have an empty Jenkinsfile.
- Copy the Declarative Pipeline code below and paste it into your Jenkinsfile:
pipeline {
    agent any
    stages {
        stage('Build') {
            steps {
                sh 'rm -rf build'
                sh 'cmake -B build -S .'
                sh 'cmake --build build'
            }
        }
    }
}

- Save and commit the edited Jenkinsfile into your local casino-number-guessing-game Git repository. cd into casino-number-guessing-game directory if you have not done so and run the following command:
git  add .

git commit -m "Add initial Jenkinsfile"

git push

- Back at Jenkins UI, select Build Now

- If your Pipeline run successfully, you will see a green check mark and #1 on the left side and the Build stage completed in the main view.

- You can now click on #1 to view the build details, where you'll see both the queue wait time and actual execution time for your build - this helps monitor performance and identify potential delays for future runs.

- On the left, you can click on Pipeline Overview to see the stages of the Pipeline.

- Click the Build stage to view detailed logs, including the cmake command output (click the green cmake section to expand it). This helps verify your build executed correctly.

- To return to your pipeline's main page, simply select 'casino-number-guessing-game' (or the name you’ve chosen for your pipeline) from the top left.
Add a test stage to your Pipeline
- Head back to Jenkins UI and open Jenkinsfile.
- Copy and paste the following Declarative Pipeline syntax under Build stage of your Jenkinsfile.
stage('Test') {
            steps {
                sh './build/casino_game'
                sh './build/test_game'
            }
        }
Your Jenkinsfile should look like this:
pipeline {
    agent any
    stages {
        stage('Build') {
            steps {
                sh 'rm -rf build'
                sh 'cmake -B build -S .'
                sh 'cmake --build build'
            }
        }
        stage('Test') {
            steps {
                sh './build/casino_game'
                sh './build/test_game'
            }
        }
    }
}

- Save your Jenkinsfile and push the new changes to your remote Jenkinsfile for Jenkins to access by running the following command:
git add .

git commit -m "Add 'Test' stage"

git push

- Click Build Now to launch another build

- After some time, a new column called 'Test' should appear in the Stage View.
- Click on #2 or the number corresponding to your most recent build on the left, under Build History, to view the build details.

- Select Pipeline overview to see the stages of the Pipeline.


- Take note of the new 'Test' stage. You can select the checkmark next to 'Test' to view the output from that stage.


Add a final delivery stage to your Pipeline
- Back at your VS Code with Jenkinsfile opened.
- Copy and paste the following Declarative Pipeline syntax under Test stage of your Jenkinsfile.
stage('Deliver') {
            steps {
                sh 'tar -czf casino_game.tar.gz build/casino_game'
                archiveArtifacts artifacts: 'casino_game.tar.gz', fingerprint: true
            }
        }
Your Jenkinsfile will look like this:
pipeline {
    agent any
    stages {
        stage('Build') {
            steps {
                sh 'rm -rf build'
                sh 'cmake -B build -S .'
                sh 'cmake --build build'
            }
        }
        stage('Test') {
            steps {
                sh './build/casino_game'
                sh './build/test_game'
            }
        }
        stage('Deliver') {
            steps {
                sh 'tar -czf casino_game.tar.gz build/casino_game'
                archiveArtifacts artifacts: 'casino_game.tar.gz', fingerprint: true
            }
        }
    }
}

- Save your Jenkinsfile and push the new changes to your remote Jenkinsfile for Jenkins to access by running the following command:
git add .

git commit -m "Add 'Test' stage"

git push

- Click on 'Build Now' on the left. After a short wait, a new column labeled 'Deliver' should appear in the Stage View.

- Click on #3 or the number for your most recent build in the left pane under Build History to view the build details.

- Select Pipeline Overview to see the stages of the Pipeline.

- Select the Deliver stage. You will then see a green part displaying tar -czf casino_game.tar.gz build/casino_game, which represents the successful execution of the tar command.

- You can see the full stage view by clicking on the "Full Stage View" in the left menu.


Thanks for staying till the end

Top comments (2)
Some comments may only be visible to logged-in visitors. Sign in to view all comments.