

In this article, we will be able to provision our cluster using terraform and make it ready for application deployments.
Prerequisite
Already have an account in AWS
Understand Terraform basics have a different blog that talks about what terraform is and how it is used you can find it here.
Basic Knowledge of kubectl
AWS’s Elastic Kubernetes Service (EKS) is a comprehensive and sophisticated managed service that enables you to effortlessly deploy, oversee, and grow containerized applications on Kubernetes with ease.
This tutorial will walk you through the process of deploying an EKS cluster using Terraform, a robust infrastructure automation tool. Afterwards, you will configure kubectl with Terraform output and confirm that your cluster is ready for use.
Why Deploy With Terraform
Why choose to use Terraform for deploying EKS clusters? While it’s possible to use AWS’s built-in provisioning methods (such as the UI, CLI, or CloudFormation), Terraform provides several benefits:
*Unified Workflow *— If you already utilize Terraform for deploying AWS infrastructure, you can use the same process for deploying both EKS clusters and the applications that run on them.
Lifecycle Management — Terraform handles the creation, updates, and removal of tracked resources, without requiring manual API inspection to identify those resources.
Graph of Relationships — Terraform identifies and observes the dependencies between resources. For instance, if an AWS Kubernetes cluster requires specific VPC and subnet configurations, Terraform won’t attempt to create the cluster unless the VPC and subnet have been provisioned first.
First clone this repo
https://github.com/onai254/terraform-eks-provision/tree/main
Then view the files in your preferred editor and move to the directory where the files are located in the terminal.

The configuration for this deployment specifies a fresh VPC where the cluster will be provisioned. The public EKS module is used to build the necessary resources such as Auto Scaling Groups, security groups, and IAM Roles and Policies.

You can inspect the module configuration by opening the main.tf file. The eks_managed_node_groups parameter is set to deploy three nodes distributed over two node groups for the cluster.
Lets look at each component in the repository
Main.tf
provider "aws" {
  region = var.region
}

data "aws_availability_zones" "available" {}

locals {
  cluster_name = var.Cluster_name
}

resource "random_string" "suffix" {
  length  = 8
  special = false
}

module "vpc" {
  source  = "terraform-aws-modules/vpc/aws"
  version = "3.19.0"

  name = var.VPC_name

  cidr = "10.0.0.0/16"
  azs  = slice(data.aws_availability_zones.available.names, 0, 3)

  private_subnets = ["10.0.1.0/24", "10.0.2.0/24", "10.0.3.0/24"]
  public_subnets  = ["10.0.4.0/24", "10.0.5.0/24", "10.0.6.0/24"]

  enable_nat_gateway   = true
  single_nat_gateway   = true
  enable_dns_hostnames = true

  public_subnet_tags = {
    "kubernetes.io/cluster/${var.Cluster_name}" = "shared"
    "kubernetes.io/role/elb"                      = 1
  }

  private_subnet_tags = {
    "kubernetes.io/cluster/${var.Cluster_name}" = "shared"
    "kubernetes.io/role/internal-elb"             = 1
  }
}

module "eks" {
  source  = "terraform-aws-modules/eks/aws"
  version = "19.5.1"

  cluster_name    = var.Cluster_name
  cluster_version = "1.24"

  vpc_id                         = module.vpc.vpc_id
  subnet_ids                     = module.vpc.private_subnets
  cluster_endpoint_public_access = true

  eks_managed_node_group_defaults = {
    ami_type = "AL2_x86_64"

  }

  eks_managed_node_groups = {
    one = {
      name = "node-group-1"

      instance_types = ["t3.small"]

      min_size     = 2
      max_size     = 4
      desired_size = 3
    }

    two = {
      name = "node-group-2"

      instance_types = ["t3.small"]

      min_size     = 2
      max_size     = 4
      desired_size = 3
    }
  }
}

# https://aws.amazon.com/blogs/containers/amazon-ebs-csi-driver-is-now-generally-available-in-amazon-eks-add-ons/
data "aws_iam_policy" "ebs_csi_policy" {
  arn = "arn:aws:iam::aws:policy/service-role/AmazonEBSCSIDriverPolicy"
}

module "irsa-ebs-csi" {
  source  = "terraform-aws-modules/iam/aws//modules/iam-assumable-role-with-oidc"
  version = "4.7.0"

  create_role                   = true
  role_name                     = "AmazonEKSTFEBSCSIRole-${var.Cluster_name}"
  provider_url                  = module.eks.oidc_provider
  role_policy_arns              = [data.aws_iam_policy.ebs_csi_policy.arn]
  oidc_fully_qualified_subjects = ["system:serviceaccount:kube-system:ebs-csi-controller-sa"]
}

resource "aws_eks_addon" "ebs-csi" {
  cluster_name             = var.Cluster_name
  addon_name               = "aws-ebs-csi-driver"
  addon_version            = "v1.5.2-eksbuild.1"
  service_account_role_arn = module.irsa-ebs-csi.iam_role_arn
  tags = {
    "eks_addon" = "ebs-csi"
    "terraform" = "true"
  }
}
This Terraform code provisions an Amazon Elastic Kubernetes Service (EKS) cluster with an EBS CSI driver. The code defines a new VPC, with private and public subnets, and uses a public EKS module to create the required resources, including auto-scaling groups, security groups, and IAM roles and policies.
The eks_managed_node_groups parameter configures the EKS cluster with three nodes across two node groups. The code also creates an IAM role with the necessary permissions to use the EBS CSI driver, and attaches this role to a Kubernetes service account. Finally, the code provisions the EBS CSI driver as an EKS add-on using the previously created IAM role.
Overall, this code enables the creation of a fully-managed EKS cluster with EBS CSI driver support using Terraform, providing a unified workflow and full lifecycle management capabilities.
Output.tf
output "cluster_endpoint" {
  description = "Endpoint for EKS control plane"
  value       = module.eks.cluster_endpoint
}

output "cluster_security_group_id" {
  description = "Security group ids attached to the cluster control plane"
  value       = module.eks.cluster_security_group_id
}

output "region" {
  description = "AWS region"
  value       = var.region
}

output "cluster_name" {
  description = "Kubernetes Cluster Name"
  value       = module.eks.cluster_name
}
These are the output values that Terraform will show after successfully running the code.
“cluster_endpoint”: This is the endpoint for EKS control plane.
“cluster_security_group_id”: This is the security group ids attached to the cluster control plane.
“region”: This is the AWS region used in the deployment.
“cluster_name”: This is the Kubernetes Cluster Name used in the deployment.
These outputs are useful for accessing the deployed resources and verifying the deployment.
Terraform.tf
terraform {
  required_providers {
    aws = {
      source  = "hashicorp/aws"
      version = "~> 4.47.0"
    }

    random = {
      source  = "hashicorp/random"
      version = "~> 3.4.3"
    }

    tls = {
      source  = "hashicorp/tls"
      version = "~> 4.0.4"
    }

    cloudinit = {
      source  = "hashicorp/cloudinit"
      version = "~> 2.2.0"
    }
  }

  required_version = "~> 1.3"
}
This is the Terraform configuration block that declares the required providers and the minimum required version of Terraform. In this specific example, it requires the AWS, Random, TLS, and Cloudinit providers at specific version constraints to be installed in order to run the Terraform code. Additionally, it sets the required version of Terraform to be at least version 1.3.
Variable.tf
variable "region" {
  description = "AWS region"
  type        = string
  default     = "us-east-2"
}

variable "Cluster_name" {
  description = "Cluster Name"
  type = string
  default = "Giovanni"
}

variable "VPC_name" {
  description = "VPC Name"
  type = string
  default = "VPC_giovanni"

}
These are the variable definitions in the Terraform code:
region: A string variable that specifies the AWS region to use. It has a default value of "us-east-2" and a description explaining what it is used for.
Cluster_name: A string variable that specifies the name of the Kubernetes cluster. It has a default value of "Giovanni" and a description explaining what it is used for.
VPC_name: A string variable that specifies the name of the VPC. It has a default value of "VPC_giovanni" and a description explaining what it is used for.
These variables can be overridden when the Terraform module is used, allowing users to customize the infrastructure to their needs. The descriptions provided can help users understand what each variable is used for and make informed decisions when setting their values.
Lets now initialize our environment
In order for us to configure the infrastructure we need first to initialize the environment before
terraform init
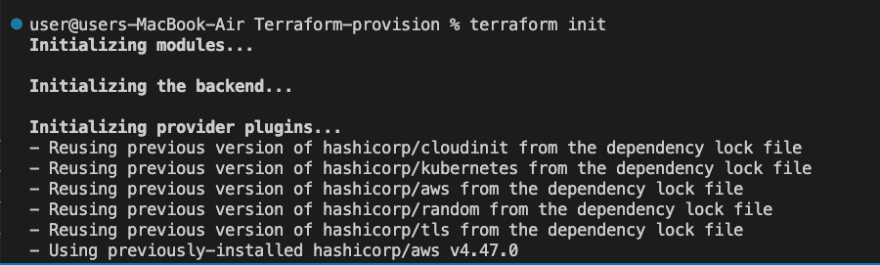
terraform init is a command used to initialize a new or existing Terraform working directory. It is typically the first command to run after writing or cloning a Terraform configuration, or when starting to work on a new module or environment.
When you run terraform init, it will perform the following steps:
Download and install the required provider plugins and modules declared in the configuration.
Initialize a backend if one is not already configured, which is used to store the state of the infrastructure that Terraform manages.
Check for updates to the installed provider plugins and modules, and display a message if updates are available.
Running terraform init is a necessary step before using any other Terraform command, and it should be run again whenever new providers or modules are added or updated in the configuration.
Terraform plan
terraform plan

terraform plan will show you the execution plan for the infrastructure changes that will be applied when you run terraform apply. It will check your configuration files and compare them with the current state of your infrastructure, and then display a summary of the changes that Terraform will make to bring your infrastructure to the desired state.
Before running terraform plan, you should make sure that you have initialized your Terraform working directory by running terraform init and that your AWS credentials are properly configured.
Assuming your configuration files are in the current directory, you can run terraform plan by opening a terminal or command prompt, navigating to the directory where your configuration files are located, and running the following command:
Terraform apply
terraform apply

When you run the terraform apply command, Terraform will compare the current state of your infrastructure, as defined by your Terraform configuration files (in this case, your main.tf file), with the desired state described in the configuration.
Terraform will then determine what changes need to be made to the current infrastructure to bring it into the desired state, and prompt you to approve these changes before applying them.
If you approve the changes, Terraform will make the necessary API calls to create, update, or delete resources as needed.
Once the apply is complete, Terraform will output any relevant information, such as the IDs of the resources it created, and update the state file with the new state of the infrastructure.
Configuring your Kubectl
Once your cluster has been created using Terraform, you’ll need to configure kubectl to interact with it. To do this, you'll need to open the outputs.tf file to review the output values. In particular, you'll use the region and cluster_name outputs from this file to configure kubectl
Run the following command to retrieve the access credentials for your cluster and configure kubectl.
aws eks --region $(terraform output -raw region) update-kubeconfig \
    --name $(terraform output -raw cluster_name)

You can now use your kubectl to manage your cluster and deploy Kubernetes configurations to it.
You can then verify the cluster if it is configured correctly
kubectl cluster-info

Notice that the Kubernetes control plane location matches the cluster_endpoint value from the terraform apply output above.
You can then verify the worker nodes as part of the cluster
kubectl get nodes

Terraform Destroy
terraform destroy
Destroy the resources you created in this tutorial to avoid incurring extra charges. Respond yes to the prompt to confirm the operation.

That was easy with a few steps you are able to have a cluster up and running. Check out my other blogs and follow me on Twitter and LinkedIn for more content. You can also check the UI in AWS cluster to check your cluster if it is running.

Top comments (0)